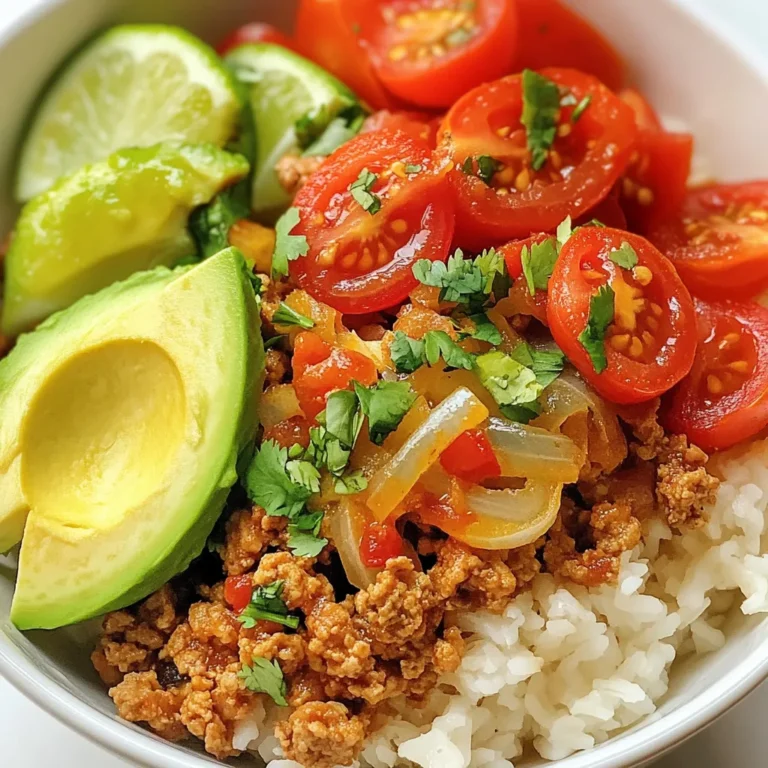
Burger Bowls Packed with Flavorful Ingredients
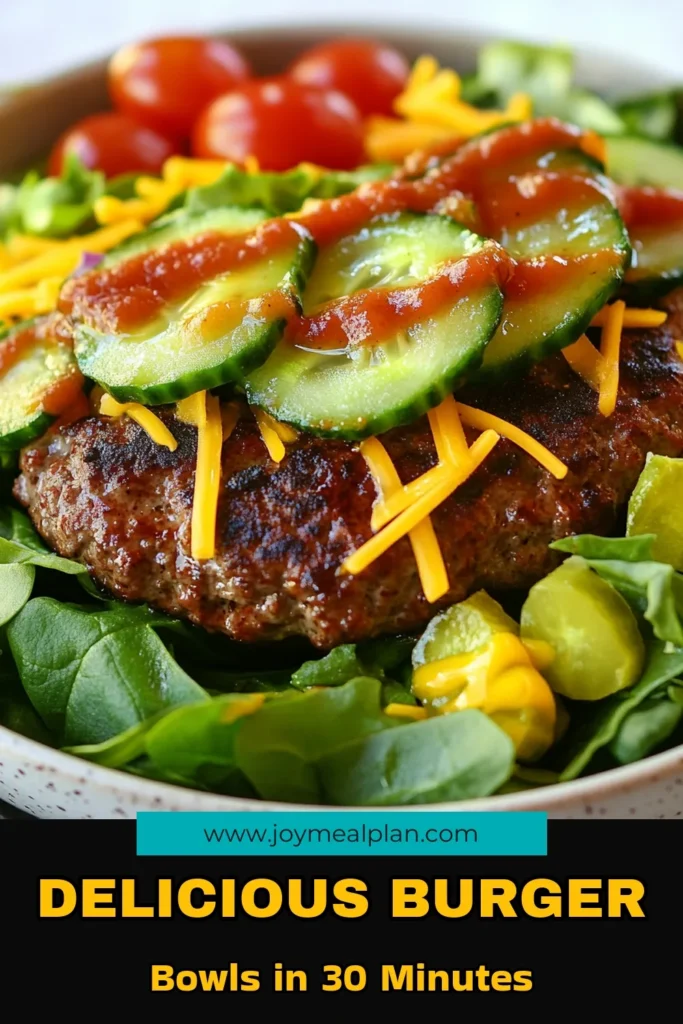
Are you ready to turn your burger craving into a healthy and fun meal? Burger bowls packed with flavorful ingredients are the answer! These bowls combine all the classic tastes of a burger with fresh greens and tasty toppings. I’ll guide you through easy steps to make your own. Let’s dive into this delicious world of burger bowls! You won’t want to miss the secrets to flavor and fun!
Why I Love This Recipe
- Flavorful and Satisfying: This burger bowl combines the rich flavors of seasoned beef or turkey with fresh vegetables, creating a satisfying meal that doesn’t skimp on taste.
- Healthy Twist: By serving the burger components over a bed of mixed greens, this recipe transforms a classic indulgence into a nutritious option, perfect for health-conscious eaters.
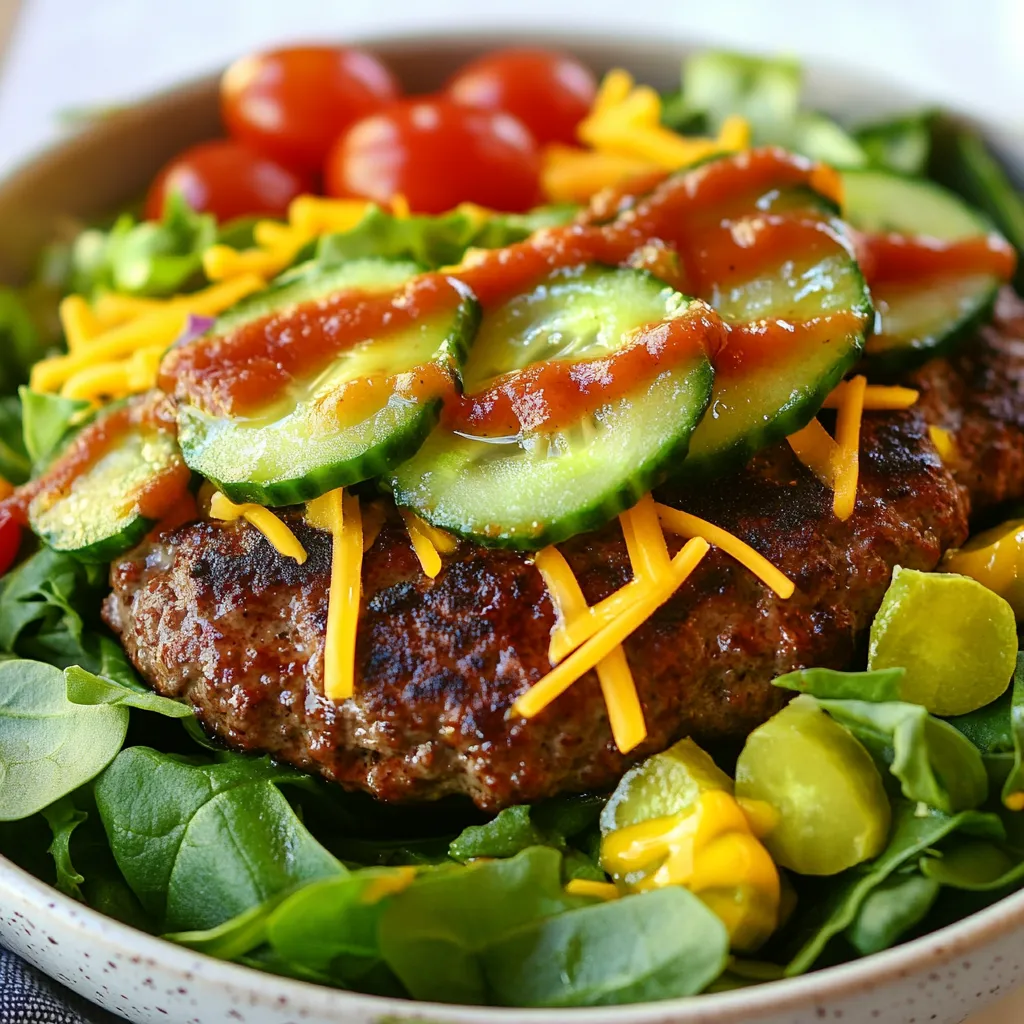
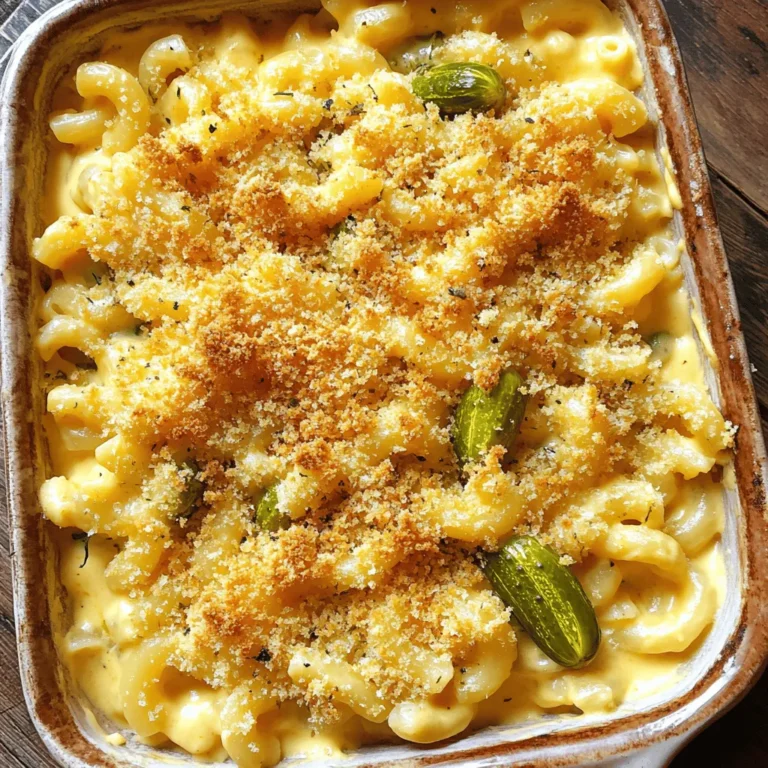
- Customizable: With various toppings like avocado, pickles, and jalapeños, everyone can customize their bowl to suit their taste, making it a versatile dish for gatherings.
- Quick and Easy: This recipe is quick to prepare, taking only 30 minutes from start to finish, making it an ideal choice for busy weeknight dinners.
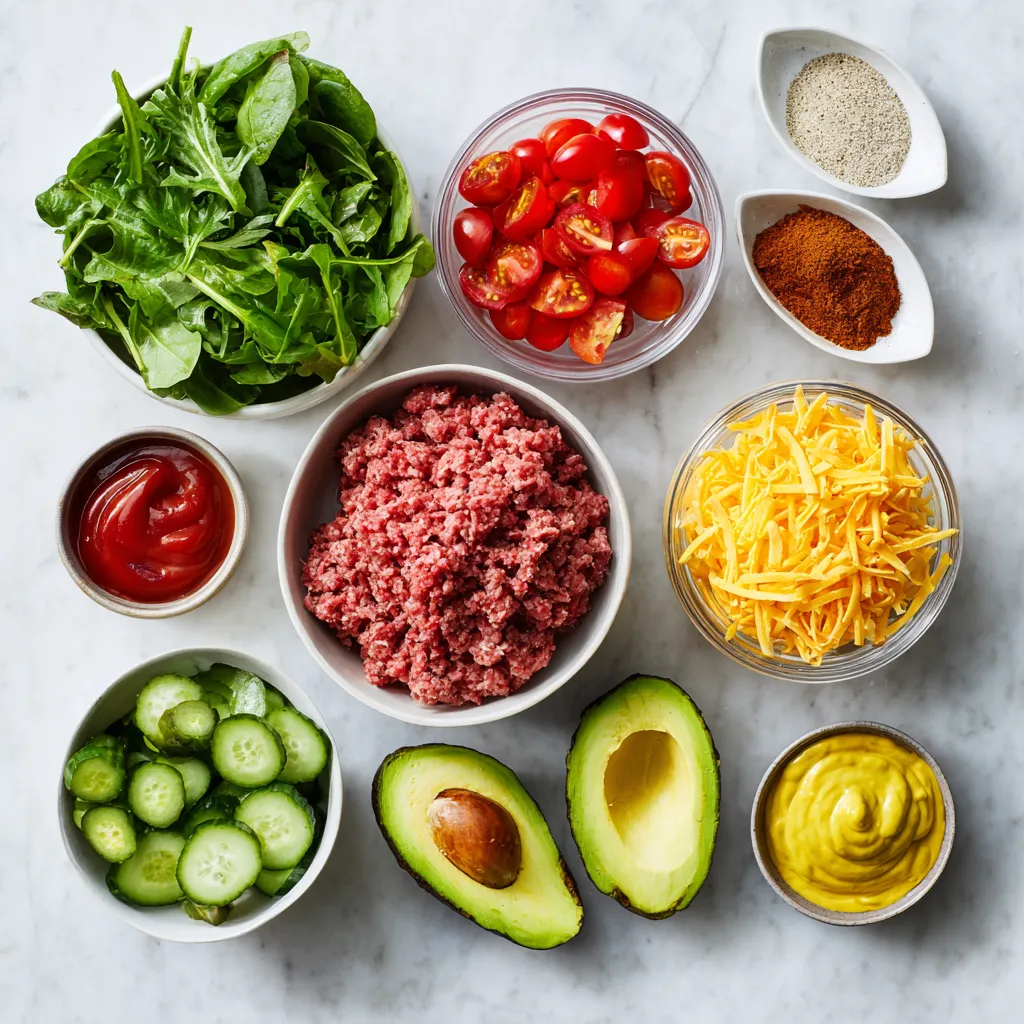
Ingredients
Main Ingredients for Burger Bowls
– 1 pound ground beef (or turkey for a leaner option)
– 4 cups mixed greens: spinach, arugula, and romaine
For the main part of your burger bowl, choose either ground beef or turkey. Beef gives a rich flavor, while turkey keeps it light. I love using a mix of greens like spinach, arugula, and romaine. This mix adds crunch and nutrition. The base of greens is key for a fresh taste.
Toppings and Condiments
– 1 cup cherry tomatoes, halved
– 1 cucumber, diced into bite-sized pieces
– 1/2 cup pickles, sliced into rounds
– 1 ripe avocado, sliced
– 1/2 cup shredded sharp cheddar cheese
– 1/4 cup ketchup (or your favorite condiment)
– 1/4 cup mustard (yellow or Dijon, to taste)
Now, let’s talk toppings. Cherry tomatoes add sweetness and color. Diced cucumber gives a nice crunch. Pickles add tang, while avocado brings creaminess. I always use sharp cheddar cheese; it melts beautifully. Don’t forget ketchup and mustard! They add that classic burger taste everyone loves.
Optional Spicy Add-ons
– Sliced jalapeños
– Tortilla chips for crunch
If you like spice, add sliced jalapeños. They give a nice kick! For extra crunch, try crushing some tortilla chips on top. This adds texture and flavor. Feel free to mix and match your toppings for a fun twist.
Step-by-Step Instructions
Preparing the Patties
To make great patties, start by mixing the meat with seasonings. In a large bowl, combine 1 pound of ground beef or turkey with 1 teaspoon garlic powder, 1 teaspoon onion powder, and 1 teaspoon smoked paprika. Add salt and pepper to taste. Use your hands to mix gently. Be careful not to overwork the meat, or the patties may become tough.
Next, shape the meat into patties. Divide the mixture into four equal parts. Make each patty a bit larger than a burger bun. This way, they will shrink as they cook.
Cooking the Patties
Now it’s time to cook the patties. Heat a non-stick skillet or grill pan over medium-high heat. Place the patties in the pan and cook them for about 4-5 minutes on each side. You want them to reach medium doneness, which is about 165°F (74°C) for turkey. Adjust the cooking time to match your preference.
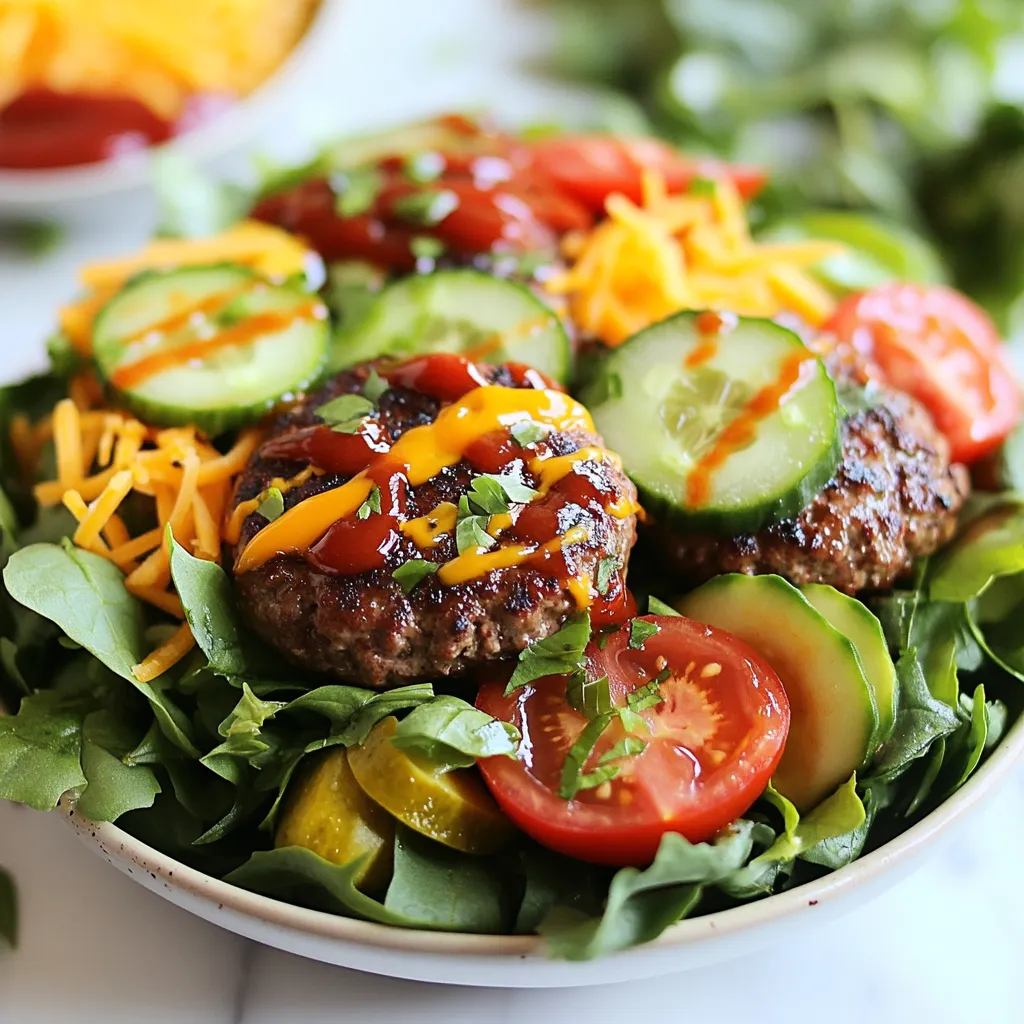
Assembling the Burger Bowls
Once the patties are done, it’s time to build your burger bowls. Start by layering the salad base. In a large serving bowl, add 4 cups of mixed greens. This can be spinach, arugula, and romaine.
Next, add the cooked patties on top of the greens. The heat from the patties will help wilt the greens a little.
Now, it’s time for the toppings. Scatter 1 cup of halved cherry tomatoes, 1 diced cucumber, 1/2 cup of sliced pickles, and 1 ripe avocado that you sliced. This creates a colorful display.
To finish, sprinkle 1/2 cup of shredded sharp cheddar cheese over each patty. The heat will slightly melt the cheese. Drizzle 1/4 cup of ketchup and 1/4 cup of mustard on top for a tangy flavor.
If you like spice, add sliced jalapeños. You can place them in the salad or on the patties. Serve the bowls right away. Encourage everyone to mix the ingredients for a tasty bite. Enjoy your flavorful burger bowls!
Tips & Tricks
Cooking Tips for Perfect Patties
To make the best burger patties, keep a few key tips in mind.
– Avoiding overworking the meat: Gently mix the ground meat with seasonings. Use your hands to blend, but don’t mash it. Overworking makes patties tough. You want them juicy and tender.
– Checking internal temperature: Cook patties until they reach 165°F (74°C) for turkey. Use a meat thermometer to check. This ensures food safety and perfect doneness.
Presentation Techniques
How you serve your burger bowl matters.
– Creating a visually appealing bowl: Start with a bed of mixed greens. Add colorful toppings around the patty. Cherry tomatoes, cucumbers, and avocados bring brightness.
– Suggestions for serving: Drizzle ketchup and mustard over the top. For extra crunch, sprinkle crushed tortilla chips. This adds texture and flavor.
Customizing Your Burger Bowls
Making burger bowls your way is easy.
– Adapting ingredients for dietary preferences: Use ground turkey for leaner options or plant-based patties for a vegan twist. You can swap mixed greens with kale or lettuce based on taste.
– Combining flavors creatively: Try adding different cheeses or spicy condiments. Mix in new veggies like bell peppers or red onions. Each change creates a unique flavor profile.
Pro Tips
- Use a Meat Thermometer: To ensure your patties are cooked to perfection, invest in a meat thermometer. The internal temperature should reach 160°F (71°C) for ground beef and 165°F (74°C) for turkey.
- Customize Your Greens: Feel free to mix up your salad greens! Adding kale or baby kale can elevate the nutritional value and texture of your burger bowl.
- Rest Your Patties: After cooking, let the patties rest for a few minutes before serving. This helps retain their juices and enhances the overall flavor.
- Experiment with Toppings: Don’t hesitate to get creative with your toppings! Try adding caramelized onions, sautéed mushrooms, or even a fried egg for extra richness.
Variations
Alternative Proteins
You can switch up the protein in your burger bowls. Try using ground turkey for a leaner dish. If you want a meat-free option, consider black beans or lentils. These options are healthy and tasty. You can also try chicken patties or plant-based patties. They add great flavor and texture. Both options fit well in your burger bowls.
Unique Flavor Profiles
Make your burger bowls exciting by adding unique flavors. Think about different cuisines. For a Southwest twist, add corn, black beans, and salsa. For an Asian flair, use teriyaki sauce and top with sesame seeds. Gourmet toppings make a big difference too. Try crispy onions, fresh herbs, or spicy aioli. These small changes can transform your meal.
Seasonal Ingredients
Using fresh, seasonal ingredients can elevate your burger bowls. During spring and summer, add ripe tomatoes, cucumbers, and fresh herbs. In fall and winter, roasted squash and kale work well. These seasonal vegetables are often at their best. They taste better and provide great nutrition. Adapting your burger bowls with the seasons keeps every meal fresh and fun.
Storage Info
Storing Leftovers
To keep your burger bowls fresh, store them in the fridge. Place leftovers in airtight containers. This helps keep the flavors intact and prevents spoilage. Use glass or plastic containers that seal well. Label the containers with the date. This way, you can track freshness easily.
Reheating Guidelines
When reheating, you want to keep the quality high. The best method is using the oven or microwave. Set your microwave to medium heat. Heat for about 1-2 minutes. If using an oven, preheat it to 350°F (175°C). Warm the burger bowls for about 10 minutes. Check if the patties are heated through before serving.
Freezing Burger Bowls
Freezing your burger bowls can extend their life. First, separate the patties and toppings before freezing. Wrap each patty in plastic wrap and place in a freezer bag. For toppings, use a container or bag with air removed. When ready to eat, thaw the patties in the fridge overnight. Reheat them as instructed above. Add fresh toppings after reheating for the best taste.
FAQs
What can I substitute for ground beef?
You can use lean meats like ground turkey or chicken. These options are tasty and lower in fat. If you want a plant-based choice, try black beans, lentils, or chickpeas. These will give you a good texture and flavor.
Using lean meat or plant-based options can make your burger bowl healthier. Just remember to season them well. Seasonings like garlic powder, onion powder, and smoked paprika work great.
Can I make burger bowls ahead of time?
Yes, you can prep components in advance. Cook the patties and store them in the fridge for up to three days. You can also wash and chop your veggies ahead of time. Keep the mixed greens, tomatoes, and pickles in separate containers. This helps them stay fresh.
When it’s time to eat, just assemble your bowl. Heat the patties in the microwave or a skillet. This keeps everything tasty and fresh.
How do I ensure my avocado stays fresh?
To keep your avocado fresh, leave the pit in the unused half. This helps slow browning. You can also sprinkle lemon or lime juice on the cut surface. The acid helps preserve its color.
Store the avocado half in an airtight container in the fridge. Use it within a day or two for the best taste. If it does brown, you can scrape off the top layer before serving.
Burger bowls are fun, tasty, and easy to make. You can mix ground beef or turkey with fresh greens, add vibrant toppings, and explore spicy add-ons. Remember, the way you shape and cook the patties matters. Aim for a perfect finish each time. Get creative by customizing your burger bowl to fit your taste. Store leftovers well or even freeze them for later. Enjoy making these bowls that fit any diet and season. With these tips, you’re set to impress at your next mea

Burger Bowls Delight
Ingredients
- 1 pound ground beef (or turkey for a leaner option)
- 1 teaspoon garlic powder
- 1 teaspoon onion powder
- 1 teaspoon smoked paprika
- to taste Salt and freshly ground black pepper
- 4 cups mixed greens (a blend of spinach, arugula, and romaine)
- 1 cup cherry tomatoes, halved
- 1 cucumber diced into bite-sized pieces
- 1/2 cup pickles, sliced into rounds
- 1 ripe avocado sliced
- 1/2 cup shredded sharp cheddar cheese
- 1/4 cup ketchup (or your favorite condiment)
- 1/4 cup mustard (yellow or Dijon, to taste)
- to taste Sliced jalapeños (optional)
Instructions
- In a sizable mixing bowl, combine the ground beef or turkey with garlic powder, onion powder, smoked paprika, salt, and freshly ground black pepper. Use your hands to mix gently, ensuring that the seasonings are evenly distributed without overworking the meat.
- Divide the mixture into 4 equal portions and shape each portion into a thick patty, ensuring they're slightly larger than a burger bun as they may shrink during cooking.
- Heat a non-stick skillet or grill pan over medium-high heat and place the patties in the pan. Cook for about 4-5 minutes on each side for medium doneness, adjusting the time according to your preference or until the internal temperature reaches 165°F (74°C) for turkey.
- While the meat is cooking, prepare your salad base. In a large serving bowl, create a generous layer of mixed greens as the foundation for your bowl.
- Once the patties have cooked to your liking, carefully place them on top of the bed of greens, allowing the residual heat to slightly wilt the greens.
- Scatter the halved cherry tomatoes, diced cucumber, sliced pickles, and avocado around each patty, creating a vibrant and colorful display.
- Generously sprinkle shredded cheddar cheese over each burger, allowing it to melt slightly from the heat of the patties.
- Drizzle your desired amounts of ketchup and mustard over the entire bowl, creating a deliciously tangy coating.
- For those who enjoy a bit of spice, add sliced jalapeños to taste, either nestled in the salad or on top of the patties.
- Serve the burger bowls immediately while fresh, encouraging everyone to mix the ingredients together as they dig in for a delightful bite of every flavor.
![To create a delicious Lemon Herb Grilled Salmon, you need fresh and simple ingredients. Here’s what you will gather: - 4 salmon fillets (approximately 6 ounces each) - 1/4 cup extra virgin olive oil - Zest from 1 large lemon - Juice of 2 fresh lemons - 3 cloves garlic, finely minced - 2 tablespoons fresh parsley, finely chopped - 2 tablespoons fresh dill, finely chopped - 1 tablespoon fresh thyme, finely chopped - Salt and freshly ground black pepper to taste - Lemon wedges, for garnishing These ingredients work together to bring out the bright and zesty flavor of the salmon. The fresh herbs add depth, while the lemon provides a refreshing kick. When you combine these elements, you create a dish that looks and tastes amazing. If you want to explore the complete process, check out the Full Recipe. To start, grab a medium bowl. Mix together: - 1/4 cup extra virgin olive oil - Zest from 1 large lemon - Juice from 2 fresh lemons - 3 cloves garlic, finely minced - 2 tablespoons fresh parsley, chopped - 2 tablespoons fresh dill, chopped - 1 tablespoon fresh thyme, chopped - Salt and pepper to taste Whisk all these ingredients together until they blend well. This mix will be your flavorful marinade. Now, take your salmon fillets. Place them in a resealable bag or shallow dish. Pour the marinade over the salmon. Make sure each piece is well coated. Seal the bag or cover the dish. Let it chill in the fridge for 30 minutes up to 2 hours. The longer it sits, the stronger the flavor will be. Preheat your grill to medium-high heat. If using a grill pan, set it to medium heat. Lightly coat the surface with olive oil to stop the fish from sticking. After marinating, remove the salmon from the bag. Let any extra marinade drip off. Discard the leftover marinade. Place the salmon skin-side down on the hot grill. Cook for about 5-6 minutes without touching it. Then, flip the salmon gently with a spatula. Grill for another 4-5 minutes. The fish should be opaque and flake easily with a fork. Once it’s done, let the salmon rest for a few minutes. This helps improve the flavor and texture. Serve the grilled salmon with fresh lemon wedges. Add a pop of citrus to enhance your dish. Enjoy your meal! For the complete recipe, check the [Full Recipe]. To grill salmon just right, aim for medium-high heat. This usually means around 375°F to 400°F. The salmon needs about 5-6 minutes on the first side. Flip it gently and grill for another 4-5 minutes. To check for doneness, use a fork. The fish should easily flake apart and look opaque. If it’s still shiny, it needs more time. For more flavors, try adding a pinch of smoked paprika or a dash of cayenne pepper. These spices can add a nice kick. Pair the salmon with sides like roasted veggies, quinoa, or a fresh salad. These dishes complement the salmon well and balance its rich taste. When plating the salmon, add a bright touch with fresh herbs. A sprinkle of parsley or dill makes it pop. Serve with lemon wedges for an extra zing. For drinks, a crisp white wine, like Sauvignon Blanc, pairs well. It enhances the meal and makes it feel special. For a non-alcoholic option, try sparkling water with lemon. It refreshes the palate and adds a lovely touch to your dinner. For the full recipe, check out the detailed steps above. {{image_4}} You can switch up the marinade to keep things fresh. Try using lime or orange juice instead of lemon. These fruits add a different twist to your salmon. You can also add spices like cayenne pepper for some heat. A touch of heat makes the dish more exciting. Grilling is great, but you have other choices too. Baking or broiling the salmon works well and keeps it moist. If it’s raining or too cold outside, use a stovetop grill pan. Just make sure it’s hot before adding the salmon for even cooking. You can make this dish fit your diet needs. For a gluten-free version, check that your spices are gluten-free. You can also skip dairy by using olive oil instead of butter. If you want to lower calories, use less oil in the marinade. These small changes keep the meal healthy while still tasting great. Try these variations to make lemon herb grilled salmon fit your taste and lifestyle. For the full recipe, check out the earlier sections! To keep your grilled salmon fresh, store it in the fridge. Place the salmon in an airtight container. This helps keep it from drying out. It should last for up to three days in the fridge. If you want to save it longer, freezing is a good option. Wrap the salmon tightly in plastic wrap, then put it in a freezer bag. You can freeze it for up to three months. Label the bag with the date so you know when to use it. When you reheat grilled salmon, you want to keep it moist. The best way is to use the oven. Preheat the oven to 275°F (135°C). Place the salmon on a baking sheet, cover it with foil, and heat for about 15 minutes. This method helps avoid drying out the fish. You can also use a microwave, but be careful. Heat it in short bursts of 30 seconds on low power. Check often to keep the flavor and texture. A splash of lemon juice can help refresh the taste. Grilling time depends on the thickness of the salmon. For fillets about 1 inch thick, grill for 5-6 minutes on one side. Flip and grill for another 4-5 minutes. Thicker fillets may need more time, so check for doneness. When the salmon is opaque and flakes easily, it's ready to eat. Yes, you can use frozen salmon. To cook it, thaw the salmon first. Place it in the fridge overnight or submerge it in cold water for about an hour. Once thawed, pat it dry and marinate as in the Full Recipe. This will help keep it moist while grilling. Lemon herb grilled salmon pairs well with fresh salads and veggies. Try serving it with: - Mixed green salad with a light vinaigrette - Steamed asparagus or green beans - Roasted potatoes seasoned with herbs - Quinoa or rice pilaf for a hearty side These dishes complement the fresh flavors of the salmon and make a complete meal. Grilling lemon herb salmon is simple and rewarding. You start with fresh salmon and a tasty marinade of olive oil, lemon, garlic, and herbs. Marinate for a short time to boost flavor. Grill it right and serve with sides for a complete meal. Experiment with different flavors and cooking methods to find your favorite. Always store leftovers properly to enjoy them later. With these tips, you’ll impress everyone at the table. Now, get ready to grill and enjoy this delicious dish!](https://joymealplan.com/wp-content/uploads/2025/06/94675a3f-7fd4-4f6d-bbd0-da6b916d26a4-768x768.webp)