
High Protein Mediterranean Chicken Flavorful Dish

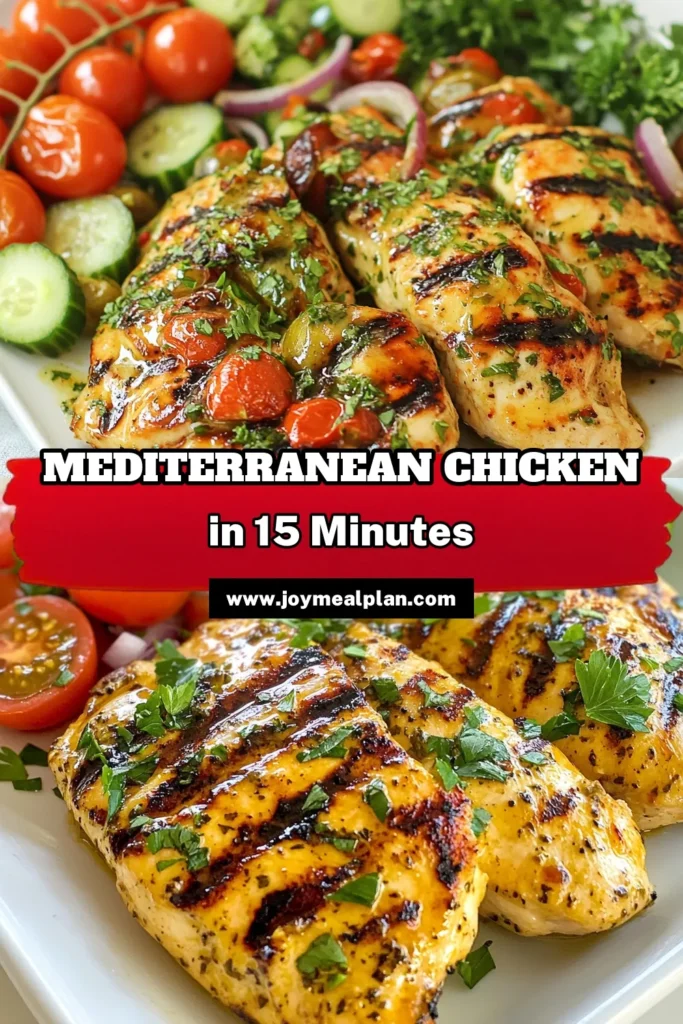
Looking for a tasty and healthy meal? This High Protein Mediterranean Chicken will become your new favorite dish! Packed with flavor and nutrients, it’s easy to make and perfect for meal prep. In this post, I’ll guide you through the simple steps—from marinating to cooking and even serving ideas. Get ready to impress your family with this vibrant and delicious recipe! Let’s dive in!
Why I Love This Recipe
- High Protein Content: This dish is packed with protein from the chicken and Greek yogurt, making it a fantastic choice for muscle recovery and overall health.
- Fresh Mediterranean Flavors: The combination of herbs, lemon, and olives brings a vibrant taste of the Mediterranean that is both refreshing and satisfying.
- Easy Preparation: With simple ingredients and straightforward steps, this recipe is perfect for both novice cooks and experienced chefs looking for a quick meal.
- Versatile Serving Options: This dish can be served as a main course or as part of a larger spread, making it suitable for casual dinners or festive gatherings.
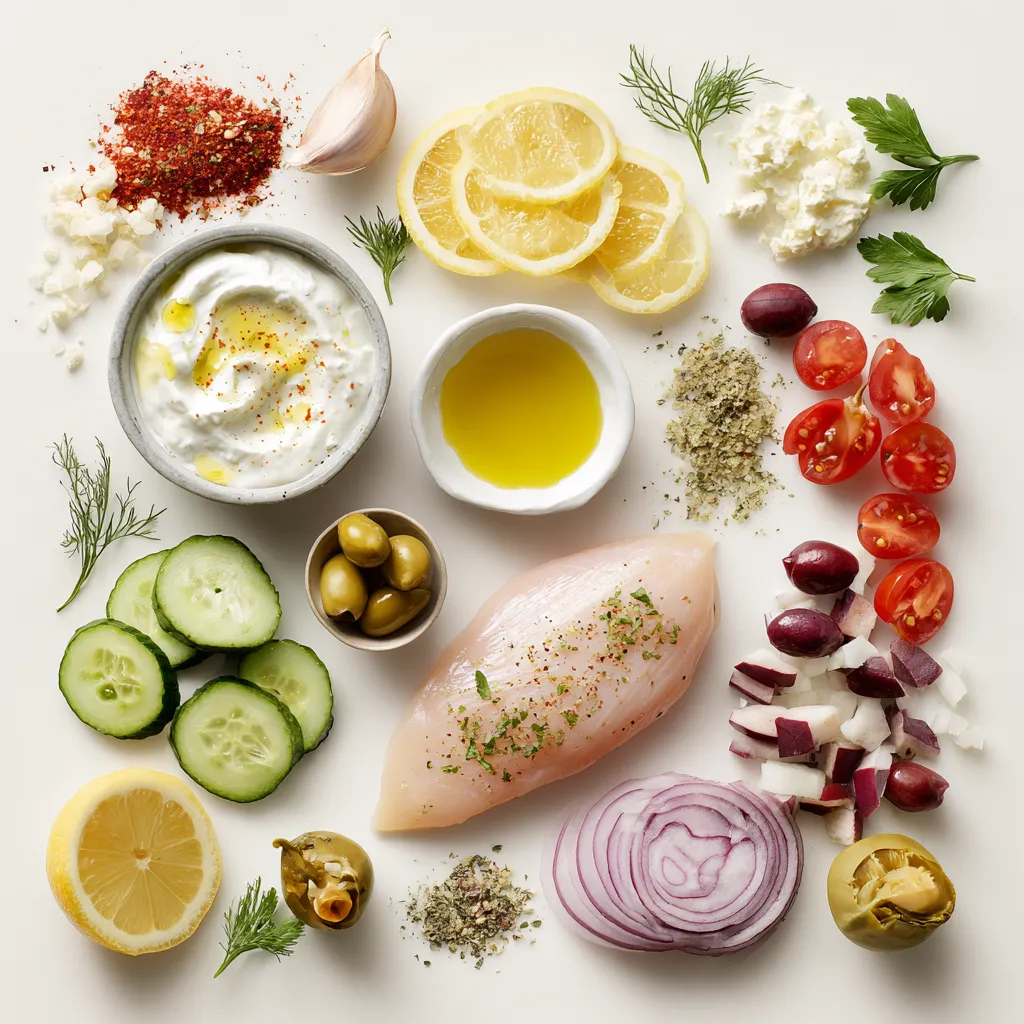
Ingredients
Main Ingredients for High Protein Mediterranean Chicken
This dish needs a few key items to shine. You will need:
– 4 boneless, skinless chicken breasts
– 1 cup creamy Greek yogurt
– 2 tablespoons extra virgin olive oil
– 2 cloves garlic, finely minced
– 1 tablespoon freshly grated lemon zest
– 1 teaspoon dried oregano
– 1 teaspoon dried thyme
– 1 teaspoon smoked paprika
– Sea salt and freshly cracked pepper, to taste
These ingredients form the base of our tasty chicken.
Marinade Ingredients
The marinade brings life to the chicken. It includes:
– 1 cup creamy Greek yogurt
– 2 tablespoons extra virgin olive oil
– 2 cloves garlic, finely minced
– 1 tablespoon freshly grated lemon zest
– 2 tablespoons freshly squeezed lemon juice
– 1 teaspoon dried oregano
– 1 teaspoon dried thyme
– 1 teaspoon smoked paprika
– Sea salt and freshly cracked pepper, to taste
Mix these well. The yogurt makes the chicken tender and adds flavor.
Salad Ingredients
The salad adds color and crunch. You will need:
– 1 cup cherry tomatoes, halved
– 1 cucumber, diced into bite-sized pieces
– 1/2 red onion, finely chopped
– 1/2 cup pitted Kalamata olives, sliced
– 1/4 cup fresh parsley, finely chopped
This fresh salad pairs perfectly with the chicken. It brightens the meal.
Step-by-Step Instructions
Marinating the Chicken
First, gather your ingredients. In a medium bowl, mix these items:
– 1 cup creamy Greek yogurt
– 2 tablespoons extra virgin olive oil
– 2 cloves garlic, finely minced
– 1 tablespoon freshly grated lemon zest
– 2 tablespoons freshly squeezed lemon juice
– 1 teaspoon dried oregano
– 1 teaspoon dried thyme
– 1 teaspoon smoked paprika
– Sea salt and freshly cracked pepper, to taste
Stir everything together until smooth. This marinade adds flavor and moisture.
Next, add the chicken breasts. Make sure they are coated well. Cover the bowl with plastic wrap. Chill the chicken in the fridge for at least 1 hour. For the best taste, marinate overnight.
Cooking Methods: Grilling or Skillet
Now, it’s time to cook the chicken! Preheat your grill or a non-stick skillet to medium-high heat. Lightly brush it with olive oil. This helps prevent sticking.
Remove the chicken from the marinade, letting excess drip off. Grill the chicken for about 6-7 minutes on each side. You want the inside to reach 165°F (75°C). The chicken should look golden brown.
If you use a skillet, cook the chicken the same way. Just make sure to check it often.
Preparing the Mediterranean Salad
While the chicken cooks, let’s make the salad. In a large bowl, combine:
– 1 cup cherry tomatoes, halved
– 1 cucumber, diced into bite-sized pieces
– 1/2 red onion, finely chopped
– 1/2 cup pitted Kalamata olives, sliced
– 1/4 cup fresh parsley, finely chopped
Drizzle a little olive oil over the salad. Add salt and pepper to taste. Toss it gently to mix everything.
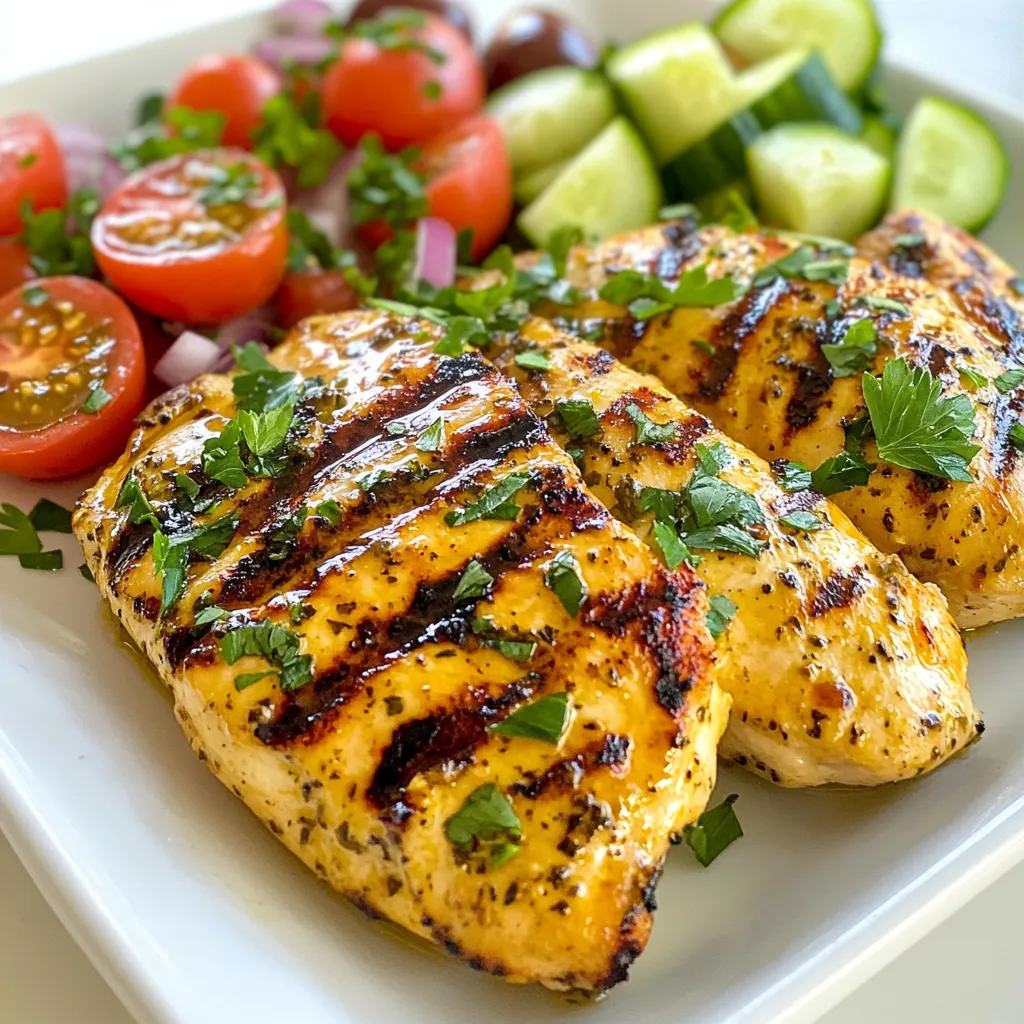
Once the chicken is cooked, let it rest for a few minutes. This keeps it juicy. Slice the chicken into strips. Serve the chicken with the salad on the side, and enjoy!
Tips & Tricks
Best Practices for Marinating Chicken
Marinating chicken is key to great flavor. Start with a creamy base like Greek yogurt. This keeps the meat moist and adds a tangy taste. Mix your marinade well. I use garlic, lemon zest, and spices for depth. Coat each piece of chicken fully. This ensures every bite bursts with flavor. Let it marinate for at least an hour. For more flavor, let it sit overnight. Cover the bowl tightly and refrigerate. Always remember, the longer it marinates, the better the taste.
Cooking Tips for Juicy Chicken
Cooking chicken can be tricky. To get juicy chicken, preheat your grill or skillet to medium-high. This helps sear the outside, locking in the juices. Avoid flipping the chicken too often. Cook it for about 6-7 minutes on each side. Use a meat thermometer to check doneness. The chicken should reach 165°F (75°C). Let it rest after cooking. This lets the juices settle inside, making it tender. Remember, a well-rested chicken will taste better.
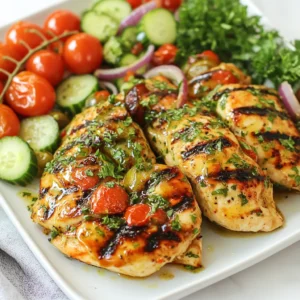
Presentation Ideas for Serving
Presentation matters when serving. After slicing your grilled chicken, arrange it on a large platter. This makes the dish look inviting. Sprinkle fresh parsley on top for color. Serve the vibrant Mediterranean salad in a separate bowl. This keeps the colors bright and fresh. Add lemon wedges to the side. They add a lovely touch and let guests add extra flavor. A beautiful presentation can make your meal even more enjoyable.
Pro Tips
- Marinate Longer for Flavor: For maximum flavor, marinate the chicken overnight. This allows the spices and yogurt to penetrate the meat, resulting in a juicy and flavorful dish.
- Using a Meat Thermometer: To ensure the chicken is perfectly cooked, use a meat thermometer. The internal temperature should reach 165°F (75°C) for safe consumption.
- Resting the Chicken: Allow the grilled chicken to rest for a few minutes before slicing. This helps retain the juices, keeping the chicken tender and moist.
- Enhance Your Salad: Add additional toppings to your Mediterranean salad, such as feta cheese or avocado, for extra flavor and creaminess.
Variations
Substitutions for Greek Yogurt
If you need a swap for Greek yogurt, try using plain yogurt. You can also use sour cream for a creamy texture. For a dairy-free option, choose coconut yogurt or a cashew-based yogurt. Each option gives a different taste, so experiment to find your favorite!
Adding More Vegetables
You can easily boost the nutrition by adding more vegetables. Consider tossing in bell peppers, zucchini, or spinach to the Mediterranean salad. You can grill or roast these veggies with the chicken too. They add color and flavor while keeping your meal healthy.
Altering the Marinade Flavors
Feel free to mix up the marinade flavors. For a spicy kick, add red pepper flakes or cayenne pepper. You could also try using fresh herbs like basil or cilantro for a different taste. If you want a smoky flavor, switch smoked paprika for regular paprika. Enjoy the creative process!
Storage Info
How to Store Leftover Chicken
To store leftover chicken, first let it cool down. Place it in an airtight container. This keeps moisture in and air out. You can store it in the fridge for up to three days. Make sure to label it with the date. This helps you keep track of freshness.
Freezing Options for the Meal
If you want to freeze the chicken, wrap it tightly in plastic wrap. Then place it in a freezer-safe bag. This helps prevent freezer burn. You can freeze it for up to three months. When you are ready to eat, just thaw it in the fridge overnight.
Reheating Tips to Maintain Flavor
To reheat the chicken, use the oven or stovetop. Preheat the oven to 350°F (175°C). Place the chicken in a dish and cover it with foil. Heat it for about 15-20 minutes. If you use the stovetop, add a splash of water or broth to keep it moist. Cook over low heat until warmed through. This keeps the chicken juicy and tasty.
FAQs
What can I serve with High Protein Mediterranean Chicken?
You can serve High Protein Mediterranean Chicken with many tasty sides. Here are some great options:
– Mediterranean salad: This dish pairs well with the fresh salad made of tomatoes, cucumbers, and olives.
– Quinoa or couscous: Both grains soak up flavors and add protein.
– Roasted vegetables: Try roasted peppers, zucchini, or eggplant for a yummy side.
– Pita bread: Warm pita bread is great for scooping up the chicken and salad.
– Tzatziki sauce: This yogurt-based sauce adds creaminess and tang.
How do I know when the chicken is cooked through?
You can tell if the chicken is cooked by checking its temperature. Use a meat thermometer to check the thickest part of the chicken. It should reach 165°F (75°C). If you cut into the chicken, the juices should run clear, not pink.
Can I use chicken thighs instead of breasts?
Yes, you can use chicken thighs instead of breasts. Thighs are juicier and more flavorful. Just make sure they are boneless and skinless for the best results. Adjust the cooking time as thighs may need a few extra minutes to cook through.
This blog post outlined how to make a tasty high-protein Mediterranean chicken. It covered main ingredients, marinade, and a fresh salad. I provided step-by-step instructions for marinating, cooking, and serving. Tips and tricks helped ensure juicy chicken and stunning presentation. We also discussed variations to keep meals exciting and storage options for leftovers.
In summary, this recipe is simple and flexible. You can enjoy delicious meals while staying healthy. Try it and savor these flavors in your kitche
High Protein Mediterranean Chicken
Ingredients
- 4 pieces boneless, skinless chicken breasts
- 1 cup creamy Greek yogurt
- 2 tablespoons extra virgin olive oil
- 2 cloves garlic, finely minced
- 1 tablespoon freshly grated lemon zest
- 2 tablespoons freshly squeezed lemon juice
- 1 teaspoon dried oregano
- 1 teaspoon dried thyme
- 1 teaspoon smoked paprika
- to taste sea salt and freshly cracked pepper
- 1 cup cherry tomatoes, halved
- 1 piece cucumber, diced into bite-sized pieces
- 1 half red onion, finely chopped
- 1 cup pitted Kalamata olives, sliced
- 1 quarter cup fresh parsley, finely chopped
Instructions
- In a medium-sized mixing bowl, combine the Greek yogurt, extra virgin olive oil, minced garlic, lemon zest, lemon juice, oregano, thyme, smoked paprika, along with a generous pinch of sea salt and freshly cracked pepper. Stir everything together until you achieve a smooth and velvety marinade.
- Add the chicken breasts to the marinade, making sure they are thoroughly coated on all sides. Cover the bowl with plastic wrap and refrigerate for a minimum of 1 hour, allowing the flavors to meld. For the best taste, marinate overnight.
- Preheat your grill or a non-stick skillet to medium-high heat. Lightly brush the grill grates or skillet with olive oil to prevent sticking.
- Remove the marinated chicken breasts from the bowl, letting any excess marinade drip off. Grill the chicken for approximately 6-7 minutes on each side, cooking until the internal temperature reaches 165°F (75°C) and the chicken is golden brown.
- While the chicken is grilling, prepare the Mediterranean salad. In a large mixing bowl, combine the halved cherry tomatoes, diced cucumber, chopped red onion, Kalamata olives, and fresh parsley. Drizzle a little olive oil over the salad and season with salt and pepper. Toss gently to mix all the ingredients together.
- Once the chicken is cooked, transfer it to a cutting board and let it rest for a few minutes. This will help retain the juices and keep the chicken tender.
- Slice the grilled chicken into strips and arrange it beautifully on a serving platter. Serve the vibrant Mediterranean salad alongside the chicken. Drizzle any remaining marinade over the dish for an extra burst of flavor.


![To make a tasty sweet potato hash, gather these simple ingredients: - 2 medium sweet potatoes, peeled and diced into 1/2-inch cubes - 1 red bell pepper, finely diced - 1 green bell pepper, finely diced - 1 small red onion, finely diced - 2 cloves garlic, minced - 1 teaspoon smoked paprika - 1/2 teaspoon ground cumin - Salt and freshly ground black pepper to taste - 3 tablespoons extra-virgin olive oil - 4 large eggs (optional, for serving) - Fresh parsley, chopped (for garnish) Fresh herbs can brighten your hash. Try adding: - Chopped cilantro for a fresh kick - Thyme for an earthy flavor - Chives for a mild onion taste - Oregano for a hint of sweetness Experiment with spices too. You can add chili powder for heat or turmeric for color. Choosing the right cooking oil is key. I recommend: - Extra-virgin olive oil: Rich in healthy fats and flavor. - Avocado oil: Great for high heat and packed with vitamins. - Coconut oil: Adds a unique taste and is good for cooking. Each oil brings its own benefits, making your sweet potato hash even better. For the best result, use extra-virgin olive oil in this recipe. You will love the flavor! For the full recipe, check out the details above. 1. Start by heating 2 tablespoons of olive oil in a large skillet over medium heat. Wait until the oil shimmers. 2. Carefully add the diced sweet potatoes to the skillet. Season them with salt, pepper, smoked paprika, and cumin. Stir to coat the sweet potatoes evenly. 3. Let the sweet potatoes cook for 10-12 minutes. Stir them occasionally. They should soften and turn golden-brown on the edges. 4. Next, add the diced red onion and bell peppers to the skillet. Cook while stirring for another 5-7 minutes. All the veggies should become tender and slightly caramelized. 5. In the last minute, add the minced garlic to the skillet. Stir well and cook until the garlic smells great, about 30 seconds. Taste and adjust seasoning if needed. 6. If you want to add eggs, heat the last tablespoon of olive oil in another pan over medium heat. Cook the eggs to your liking, either fried sunny-side-up or poached. 7. Serve by spooning the sweet potato hash onto plates or bowls. Top with a cooked egg and sprinkle fresh parsley for color. This recipe uses several key cooking techniques: - Sautéing: This method cooks the sweet potatoes and veggies quickly, creating a nice browning effect. - Seasoning: Adding spices like smoked paprika and cumin enhances the flavor. - Layering: Cooking veggies in stages helps build depth in taste and texture. - Garnishing: Adding fresh parsley brightens up the dish visually and adds freshness. - Use medium heat to ensure even cooking. High heat can burn the sweet potatoes. - Stir often, especially after adding the onions and bell peppers. This keeps them from sticking and burning. - Keep an eye on the garlic. It can burn quickly, so add it last. - If you see the veggies getting too dark, lower the heat and add a splash of water to steam them. For more details, check the Full Recipe. To achieve the best texture for your sweet potato hash, follow these tips: - Cut sweet potatoes into even 1/2-inch cubes. This helps them cook evenly. - Pre-cook sweet potatoes in the microwave for 3-4 minutes. This speeds up cooking. - Cook on medium heat. This prevents burning while allowing them to crisp up. - Stir occasionally, so they don’t stick to the pan. This keeps a nice texture. You can elevate the flavors of your sweet potato hash with these ideas: - Add fresh herbs like thyme or rosemary for a burst of freshness. - Include a splash of lime juice or vinegar for extra zing. - Experiment with different spices, like chili powder or turmeric, for warmth. - Top with avocado or feta cheese for creaminess and richness. Avoid these common mistakes for a perfect sweet potato hash: - Don’t overcrowd the skillet. This can lead to steaming instead of browning. - Avoid using old or dry sweet potatoes. Fresh ones yield better flavor and texture. - Don’t skip the seasoning early on. It helps build flavor from the start. - Be careful not to overcook the garlic. It can turn bitter if burned. For the full recipe, check out Savory Sweet Potato Hash . {{image_4}} You can change up your sweet potato hash with many vegetables. Adding spinach gives it a nice green touch. Kale is another great choice; it adds a hearty bite. Try zucchini for a mild taste. You can even toss in some corn for sweetness. Each vegetable adds its own flavor and texture. To make your hash more filling, add protein. Cooked bacon or sausage provides a savory kick. If you want a leaner option, try diced chicken. For a meatless choice, black beans work well. They add protein and a creamy texture. You can even sprinkle feta cheese on top for a salty finish. Making your hash vegan is easy. Simply skip the eggs and use olive oil for cooking. You can also add nutritional yeast for a cheesy flavor. For gluten-free, all the ingredients in the recipe are safe. Just ensure any added condiments are gluten-free. This way, everyone can enjoy your delicious sweet potato hash! For the complete recipe, check out the [Full Recipe]. To keep your sweet potato hash fresh, let it cool first. Place it in an airtight container. Store it in the fridge for up to four days. This keeps the flavors intact. Be sure to label the container with the date. This helps you track how long it has been stored. If you want to save some for later, freezing is a great option. Use a freezer-safe container or bag. Portion it out to make reheating easier. Make sure to squeeze out as much air as possible. This helps prevent freezer burn. Sweet potato hash can freeze well for up to three months. When it’s time to eat your leftovers, reheating is easy. You can use a skillet or microwave. If using a skillet, add a splash of olive oil. Heat it on medium until warmed through. Stir occasionally to avoid sticking. If using a microwave, cover your dish to keep moisture in. Heat in short bursts, stirring in between. This helps keep the flavors fresh and vibrant. For more detailed instructions, check out the Full Recipe. Yes, you can make sweet potato hash in advance. Cook it fully and let it cool. Store it in an airtight container in the fridge. It stays fresh for up to three days. When ready to eat, just reheat it in a skillet. This keeps the flavors intact and makes serving easy. Sweet potato hash is super versatile. You can serve it for breakfast, lunch, or dinner. Top it with fried or poached eggs for a hearty breakfast. Add avocado slices for creaminess. For lunch, pair it with a green salad. You can also serve it as a side dish with grilled chicken or fish. The options are endless! You can customize your sweet potato hash in many fun ways. Try adding different vegetables like zucchini or mushrooms. For a spicy kick, toss in jalapeños. You can mix in cooked sausage or bacon for added flavor. If you prefer a vegan option, skip the eggs and add chickpeas. Use herbs like thyme or cilantro to enhance the taste. Get creative and make it your own! For the full recipe, check out the savory sweet potato hash section. This article covered how to make sweet potato hash. We discussed ingredients, cooking steps, and tips for perfect texture. You learned about variations, storage, and common questions. Each section helps you craft a tasty dish. As you make your hash, remember to experiment with flavors and textures. This dish is versatile and can fit many diets. Enjoy your cooking, and don't hesitate to make it your own!](https://joymealplan.com/wp-content/uploads/2025/06/a9a4856f-e5e6-4dd7-b1d4-7d775511eecc-768x768.webp)
![- 12 oz pasta (penne, fusilli, or preferred variety) - 2 large red bell peppers - 1 cup raw cashews (soaked in water) - 1 tablespoon olive oil - 3 cloves garlic, minced - 1 cup vegetable broth - 1 tablespoon nutritional yeast - 1 tablespoon freshly squeezed lemon juice - Salt and pepper to taste - Fresh basil leaves for garnish For this vegan creamy roasted red pepper pasta, I love using red bell peppers. They bring sweetness and a lovely color. Start with 12 ounces of your favorite pasta. I prefer penne or fusilli, but any shape you like works. Next, grab two large red bell peppers. These will be roasted to bring out their flavor. Don’t forget the cashews! Use one cup of raw cashews. Soak them in water for at least two hours. This step makes them creamy when blended. Now, let’s talk about the extra ingredients. You’ll need one tablespoon of olive oil for cooking. Garlic adds great taste, so use three cloves, minced. For a nice base, use one cup of vegetable broth. We also need one tablespoon of nutritional yeast for a cheesy flavor. Add one tablespoon of freshly squeezed lemon juice to brighten the sauce. Season with salt and pepper to taste. Finally, fresh basil leaves will make a beautiful garnish. This recipe is easy to follow and packed with flavor. Check out the Full Recipe for more details and instructions! - Preheat your oven to 425°F (220°C). - Slice the red bell peppers in half and remove seeds and stems. - Place them cut side down on a baking sheet. - Roast for 20-25 minutes until the skins blister and char. - Let the peppers cool for a few minutes. - Peel off the skins and chop the peppers into small pieces. - In a large pot, bring salted water to a boil. - Add your pasta and cook until al dente, following package instructions. - Before draining, reserve about 1 cup of the pasta water. - Drain the pasta and set it aside for later. - In a blender, add the roasted peppers, soaked cashews, and garlic. - Pour in the vegetable broth, nutritional yeast, and lemon juice. - Season with a pinch of salt and pepper. - Blend until smooth and creamy, scraping the sides if needed. - Adjust the sauce consistency with reserved pasta water as desired. - Add the cooked pasta back into the pot. - Pour the creamy sauce over the pasta and mix well. - Gently heat the mixture on low for 2-3 minutes. - Taste and adjust seasoning with more salt and pepper if needed. This simple guide helps you create a delightful vegan creamy roasted red pepper pasta that bursts with flavor. For the complete recipe, check the [Full Recipe]. Enjoy cooking! To achieve perfect pasta texture, follow these simple steps. Always cook your pasta in salted water. This enhances flavor and ensures the pasta cooks evenly. Aim for al dente, which means firm to the bite. It should not be mushy. Reserve a cup of pasta water before draining. This water helps to adjust your sauce later. For roasting peppers effectively, preheat your oven to 425°F. Slice the red bell peppers in half and remove the seeds. Place them cut side down on a baking sheet. Roast them for about 20 to 25 minutes. You want the skins to blister and char lightly. This caramelizes their sugars and boosts sweetness. Adjusting seasoning is key for a balanced dish. Start with a pinch of salt and pepper, then taste your sauce. If it needs more flavor, add more salt or lemon juice. For creaminess, you can also add a splash of vegetable broth. Using fresh or dried herbs can elevate your dish. Fresh basil adds brightness. Dried oregano or thyme brings depth. Add these herbs during the blending process for a more integrated flavor. Garnishing can transform your dish. Fresh basil leaves add a pop of color and freshness. Sprinkle some nutritional yeast on top for a cheesy flavor. Crushed red pepper flakes can add a nice kick. For visual appeal, plate your pasta with care. Swirl the noodles for a nice shape. You can also arrange extra basil leaves artfully around the dish. Serve your Vegan Creamy Roasted Red Pepper Pasta hot for the best experience. Enjoy your meal! For the full recipe, check out the details above. {{image_4}} For the sauce base, you can swap the cashews with other nuts. Almonds or macadamia nuts work well. If you want a nut-free option, try using sunflower seeds. They blend into a creamy texture too. If you need gluten-free pasta, use brown rice pasta or chickpea pasta. Both these options taste great and keep the dish healthy. They also add a unique flavor to your pasta. You can make this dish even heartier by adding proteins. Chickpeas or lentils are great choices. They cook quickly and blend well with the sauce. Just stir them in after mixing the pasta with the sauce. If you prefer something meatier, try vegan sausage or tofu. Cook them separately, then mix in with the pasta. This adds a nice texture and extra flavor. This pasta pairs well with side salads or crusty bread. A simple green salad adds freshness and crunch. Garlic bread is a great choice to soak up the creamy sauce. For meal prep, store the pasta in airtight containers. You can make it ahead and reheat it for quick lunches. Just warm it gently on the stove or in the microwave. This dish stays delicious for days! For the full recipe, check out the complete guide. To store leftovers, let the pasta cool down first. Place it in an airtight container. This keeps it fresh for up to four days. When you want to eat it again, take out the amount you need. For reheating, I recommend using the stove. Add a splash of water or vegetable broth. Heat it gently over low heat. Stir often to avoid burning. You can also use the microwave. Just cover it and heat in short bursts. Stir in between to heat evenly. For freezing, I suggest separating the sauce from the pasta. Store the sauce in a freezer-safe container. It will last up to three months in the freezer. You can freeze the pasta too, but it may change texture. If you freeze it, store it in a separate bag. When you're ready to use, thaw the sauce in the fridge overnight. Reheat on the stove, adding a splash of broth if needed. For frozen pasta, boil it for a few minutes until warm. This keeps your vegan creamy roasted red pepper pasta delightful and fresh! For the full recipe, check out the previous sections. Yes, you can use different types of pasta. Here are some suggestions: - Penne: This shape holds sauce well. - Fusilli: The spirals trap sauce nicely. - Spaghetti: Classic choice that works with creamy sauces. - Gluten-free options: Look for rice or chickpea pasta. Feel free to choose your favorite! To add heat, try these tips: - Red pepper flakes: Sprinkle them in the sauce for a kick. - Cayenne pepper: Add a pinch to the blended sauce. - Hot sauce: Mix in your favorite brand to taste. These options let you control the spice level. No, this recipe contains cashews. However, you can make it nut-free. Here are some alternatives: - Sunflower seeds: They blend smoothly and add creaminess. - Pumpkin seeds: A great nut-free option with a slightly different flavor. - Silken tofu: This gives a creamy texture without nuts. These substitutes work well and keep the dish tasty. To make it nut-free, simply substitute the cashews. Here’s how: 1. Choose a nut-free base: Use sunflower seeds or silken tofu. 2. Blend the new ingredient: Just like the cashews, blend them smooth. 3. Adjust seasoning: You may need to tweak the flavors to balance the change. This way, you can enjoy the dish without nuts. For the full recipe, check out the details above. This blog covers a tasty, creamy pasta dish using roasted peppers and cashews. You learned about the ingredients, step-by-step cooking, and tips for best results. Variations give you flexibility with proteins and flavors. Plus, I shared easy storage methods for leftovers. Remember, cooking can be fun and creative! Try different ingredients to make it your own. Enjoy making this flavorful recipe and make it a family favorite. Your kitchen adventures await!](https://joymealplan.com/wp-content/uploads/2025/07/982ba21e-a058-40ff-b3d3-28c410105247-768x768.webp)