Teriyaki Ground Beef Stir-Fry Flavorful Dinner Delight
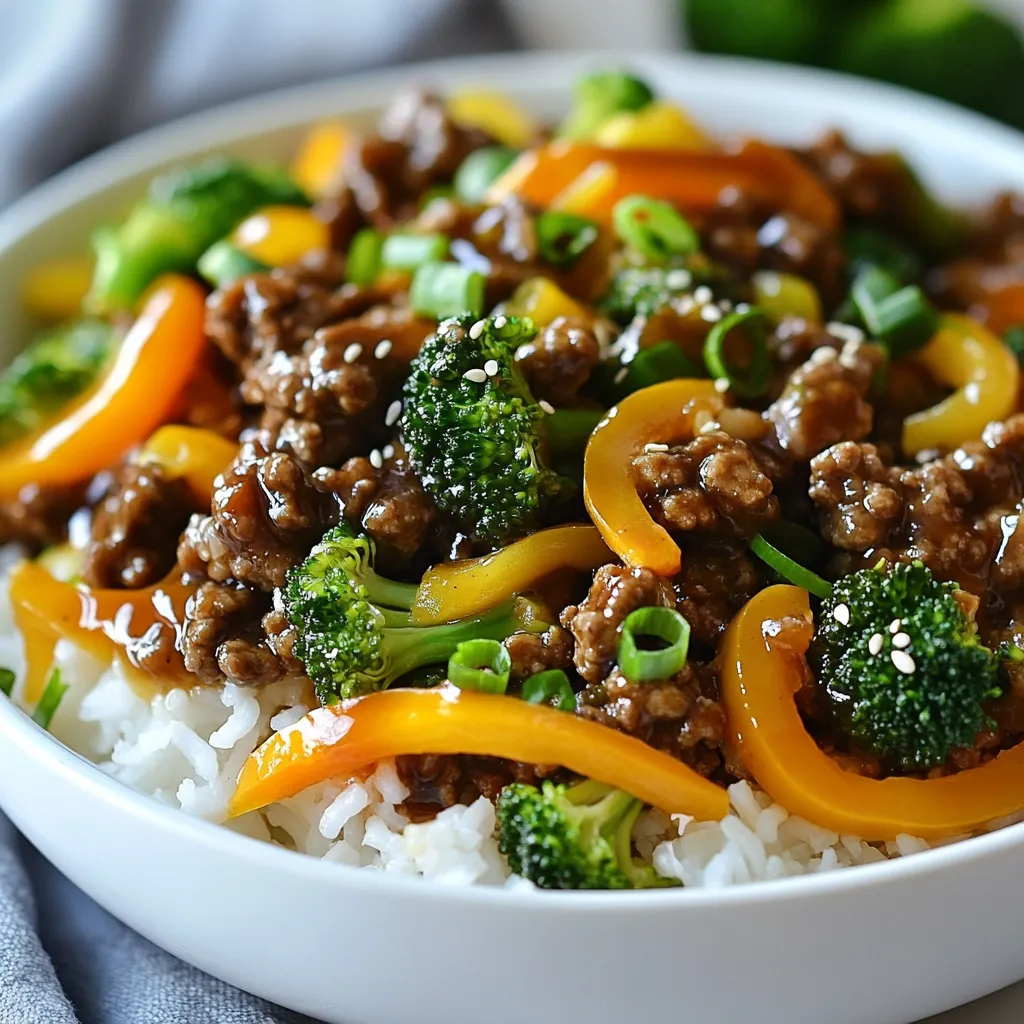

Are you ready to spice up dinner with a quick and tasty meal? My Teriyaki Ground Beef Stir-Fry is the answer! Packed with savory flavors and crisp veggies, this dish satisfies everyone at the table. With just a few simple ingredients, you can whip up a dinner delight that’s both healthy and easy to make. Let’s dive into this fun recipe and get cooking!
Why I Love This Recipe
- Quick and Easy: This recipe comes together in just 25 minutes, making it perfect for busy weeknights.
- Flavorful Sauce: The combination of teriyaki and soy sauce creates a deliciously rich and savory glaze.
- Healthy Ingredients: Packed with colorful vegetables like broccoli, bell peppers, and carrots, this stir-fry is as nutritious as it is tasty.
- Versatile Serving Options: Whether served over rice or noodles, this dish can be customized to fit your preference.
Ingredients
Main Ingredients
– 1 pound ground beef
– 2 tablespoons teriyaki sauce
– 1 tablespoon soy sauce
Ground beef forms the base of this dish. It cooks quickly and absorbs flavors well. Teriyaki sauce adds a sweet and savory punch, while soy sauce gives depth to the taste. Together, these sauces make the beef juicy and vibrant.
Vegetables
– 1 cup broccoli florets
– 1 medium bell pepper, sliced
– 1 small carrot, julienned
Broccoli provides a nice crunch and bright color. Bell peppers add sweetness and a pop of color. Carrots bring both flavor and nutrition. Using fresh veggies ensures your stir-fry is tasty and healthy.
Seasonings and Oils
– 1 tablespoon sesame oil
– 2 cloves garlic, minced
– 1 teaspoon fresh ginger, grated
– Salt and pepper, to taste
Sesame oil gives a nutty flavor that enhances the dish. Garlic and ginger add freshness and warmth. A pinch of salt and pepper helps round out the flavors. These simple ingredients elevate your stir-fry to gourmet status.

Step-by-Step Instructions
Preparation Steps
1. Heating the skillet: Start by heating the sesame oil in a large skillet or wok over medium-high heat. Wait until the oil shimmers; this means it’s ready.
2. Browning the ground beef: Next, add 1 pound of ground beef to the skillet. Use a spatula to break the beef apart. Cook it for about 5-7 minutes until it’s fully browned. If there’s extra fat, drain it off. This keeps your stir-fry light and tasty.
Combining Ingredients
1. Adding garlic and ginger: Now, introduce 2 cloves of minced garlic and 1 teaspoon of grated ginger to the skillet. Stir them in for about 30 seconds. This quick step makes the dish smell amazing.
2. Incorporating vegetables: It’s time to add the veggies. Toss in 1 cup of broccoli florets, a sliced medium bell pepper, and a julienned small carrot. Stir-fry these for 3-4 minutes. You want them to stay bright and crisp.
Finishing Touches
1. Mixing in sauces: Drizzle 2 tablespoons of teriyaki sauce and 1 tablespoon of soy sauce over the mix. Stir well to coat the beef and veggies. Cook for another 2 minutes. This step makes everything delicious.
2. Seasoning to taste: Finally, add salt and pepper to taste. Adjust it as you like. Remove the skillet from the heat. Fold in the green parts of 2 chopped green onions for a fresh finish. Enjoy your Teriyaki Ground Beef Stir-Fry!
Tips & Tricks
Cooking Techniques
To make your stir-fry tender, use high heat. This cooks the beef fast, keeping it juicy. Cut the beef into small pieces. This helps it cook evenly.
To stop your stir-fry from sticking, use a non-stick skillet. Heat the pan before adding oil. This creates a barrier and keeps food from sticking. Stir often while cooking. This allows even cooking and helps avoid sticking.
Ingredient Substitutions
If you want to switch proteins, try ground turkey or chicken. They work well in this dish and keep it light. You can also use tofu for a vegetarian option. It soaks up the flavors nicely.
For vegetables, feel free to mix it up! Use snap peas, bell peppers, or mushrooms. Each adds a new taste and texture. Just make sure to cut them into small pieces for even cooking.
Flavor Enhancements
Want more flavor? Add chili flakes for heat. A splash of rice vinegar brightens the dish. You can mix in hoisin sauce for a sweet touch.
Garnishing makes your meal pop! Top with sesame seeds for a nice crunch. Fresh cilantro or basil adds a burst of color and flavor. Use the green parts of green onions for a fresh look.
Pro Tips
- Use Fresh Ingredients: Fresh vegetables and quality ground beef will enhance the flavor and texture of your stir-fry.
- Customize Your Vegetables: Feel free to substitute or add other vegetables like snap peas or mushrooms for variety.
- Control the Heat: Adjust the cooking temperature as needed to prevent burning the garlic and ginger, which can become bitter.
- Serve Immediately: For the best taste and texture, serve the stir-fry right after cooking while the vegetables are still crisp.
Variations
Global Inspirations
You can change this dish with some global twists. For an Asian-inspired flavor, use different sauces. Try adding hoisin or oyster sauce for depth. You can also use fresh herbs like cilantro or basil for a bright finish. If you enjoy heat, add red pepper flakes or sliced jalapeños. These ingredients bring warmth and excitement to your meal.
Dietary Adjustments
If you’re looking for low-carb options, swap out the rice or noodles. Zucchini noodles are a great choice. They add texture and flavor without the carbs. For gluten-free needs, use tamari instead of soy sauce. This keeps the flavor while making it safe for gluten-free diets. Always check labels to ensure all ingredients meet your dietary needs.
Serving Suggestions
When serving, you can choose rice or noodles. Rice gives a classic touch, while noodles add a fun twist. You can also get creative with side dishes. Serve the stir-fry with a fresh salad or steamed vegetables. For a crunchy option, try serving with sesame crackers. These choices make your meal more enjoyable and balanced.
Storage Info
Refrigeration Guidelines
To store leftovers, place the stir-fry in an airtight container. Make sure it cools first. This helps keep the flavors fresh. You can store it in the fridge for up to three days. When reheating, use a skillet over medium heat. Stir often to warm it evenly. You can also use a microwave if you’re in a hurry. Just cover it to avoid drying out.
Freezing Instructions
For freezing portions, let the stir-fry cool completely. Then, pack it in freezer-safe bags or containers. Make sure to squeeze out extra air to prevent freezer burn. You can freeze it for up to three months. When it’s time to eat, thaw it overnight in the fridge. For quick results, use the microwave’s defrost setting. After thawing, reheat it on the stove for the best taste.
Shelf Life
The optimal timeframes for freshness are key. In the fridge, enjoy your leftovers within three days. If frozen, use them within three months for the best quality. Signs of spoilage include an off smell or discoloration. If you see any strange spots, it’s best to toss it out for safety.
FAQs
How can I make Teriyaki Ground Beef Stir-Fry spicy?
To add heat to your stir-fry, you can try a few things. First, add crushed red pepper flakes while cooking. This will give a nice kick. You can also use fresh sliced jalapeños for a fresh heat. Another option is to stir in a bit of sriracha sauce at the end. This adds flavor along with the spice. Just be careful not to add too much; you want to balance the flavors.
Can I use frozen vegetables in this recipe?
Yes, using frozen vegetables is a great choice. They save time and still provide good flavor. You can toss them straight into the pan without thawing. Just add them a minute or two before the beef is fully cooked. This allows them to heat through without becoming mushy. They work well in this dish, adding color and nutrients.
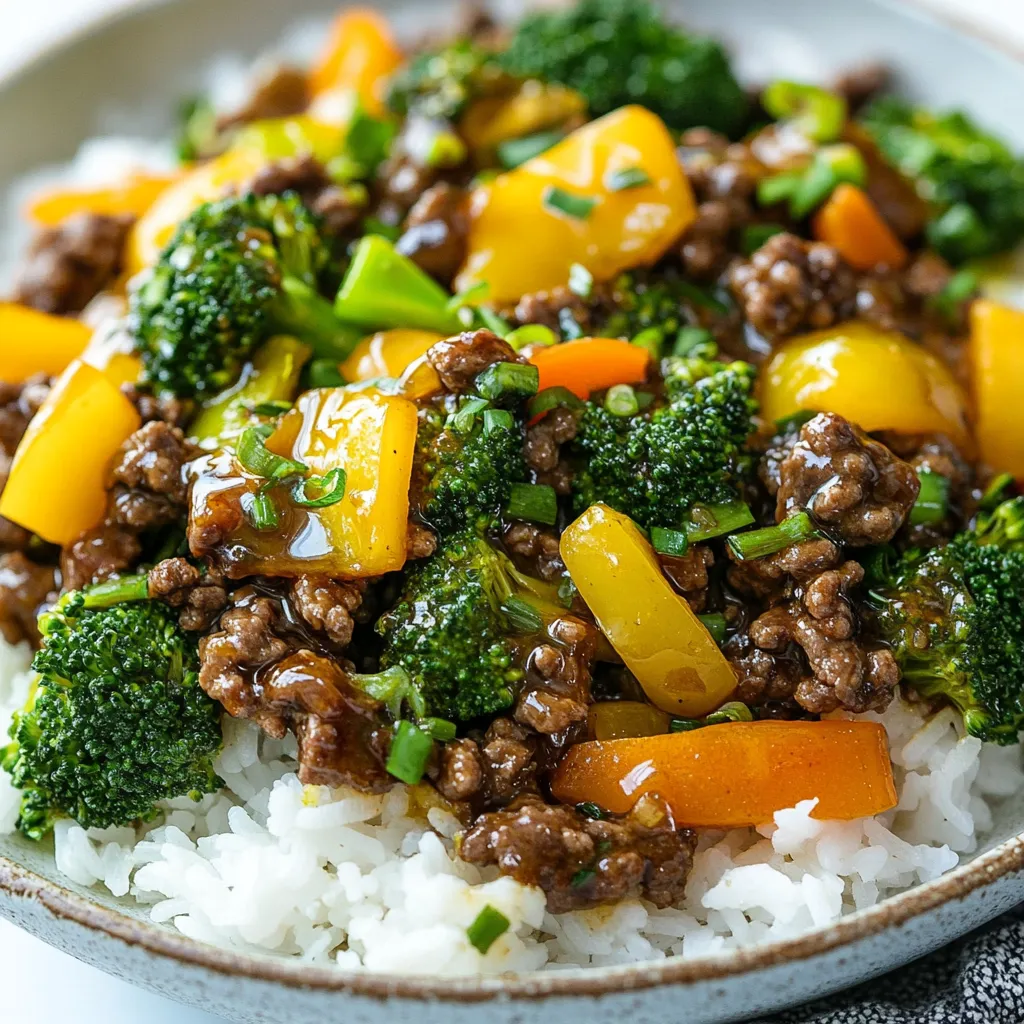
What is the best way to serve this stir-fry?
Serve your stir-fry over a bed of fluffy rice or noodles. This creates a nice base for the flavors. For a pop of color, garnish with extra green onions and a sprinkle of sesame seeds. A drizzle of teriyaki sauce on top can also add extra shine. Arrange the stir-fry in a bowl for a beautiful presentation. Enjoying it family-style can make it more fun!
This blog post covered making a tasty Teriyaki Ground Beef Stir-Fry. We discussed the main ingredients like ground beef and vegetables. I shared easy steps for cooking and tips to enhance flavors. I also explored variations to fit your diet and how to store leftovers.
In summary, you can create a great meal quickly. Use fresh ingredients and your favorite spices to make it yours. Enjoy experimenting and making this dish your ow

Teriyaki Ground Beef Stir-Fry
Ingredients
- 1 pound ground beef
- 2 tablespoons teriyaki sauce
- 1 tablespoon soy sauce
- 1 tablespoon sesame oil
- 1 cup broccoli florets
- 1 medium bell pepper, sliced
- 1 small carrot, julienned
- 2 cloves garlic, minced
- 1 teaspoon fresh ginger, grated
- 2 green onions chopped (green and white parts separated)
- to taste salt and pepper
- for serving cooked rice or noodles
Instructions
- Begin by heating the sesame oil in a large skillet or wok over medium-high heat until it's shimmering.
- Carefully add the ground beef to the skillet, using a spatula to break it apart. Cook for approximately 5-7 minutes, until the beef is fully browned and cooked through. If there's excess fat, drain it off to ensure a lighter stir-fry.
- Introduce the minced garlic and freshly grated ginger to the skillet. Stir continuously for about 30 seconds until the mixture becomes aromatic, enhancing the flavor profile.
- Add in the broccoli florets, sliced bell pepper, and julienned carrot. Stir-fry these vegetables for 3-4 minutes, ensuring they remain vibrant and tender-crisp.
- Drizzle in the teriyaki sauce and soy sauce, stirring thoroughly to coat the beef and vegetables evenly with the flavorful sauce. Continue cooking for an additional 2 minutes, stirring often to prevent sticking.
- Season the stir-fry with salt and pepper to taste, adjusting according to your preference.
- Remove the skillet from heat and fold in the green parts of the chopped green onions for a fresh finish.