Amish Christmas Jam Festive and Flavorful Delight

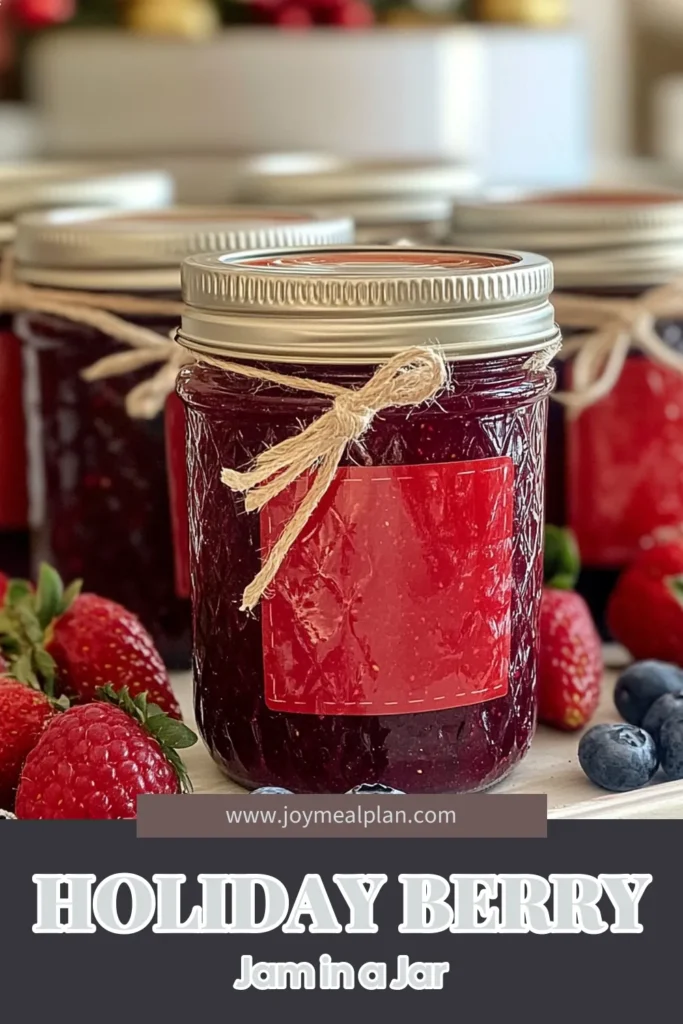
Nothing says holiday cheer like homemade Amish Christmas Jam. This delightful spread bursts with fresh fruits, sweet sugar, and a touch of lemon. Whether you’re looking to impress guests or enjoy a cozy treat, this jam is a festive staple. Join me as we explore easy steps, tips, and creative variations to make your own delicious batch. Get ready to take your holiday flavors to the next level!
Why I Love This Recipe
- Festive Flavor Combination: This jam beautifully blends the sweetness of strawberries, tartness of raspberries, and the rich depth of blueberries, creating a delightful taste experience that captures the essence of the holiday season.
- Easy to Make: With simple ingredients and straightforward steps, this recipe is perfect for both novice and experienced canners, allowing anyone to create homemade goodness without fuss.
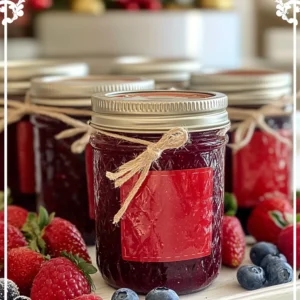
- Perfect for Gifting: Packaged in charming jars, this jam makes a thoughtful and delicious gift for friends and family, spreading joy and sweetness during the holidays.
- Long-Lasting Delight: By processing the jars in a boiling water bath, you ensure that this jam can be enjoyed long after the holiday season, making it a fantastic addition to your pantry.
Ingredients
Fresh Fruits for Amish Christmas Jam
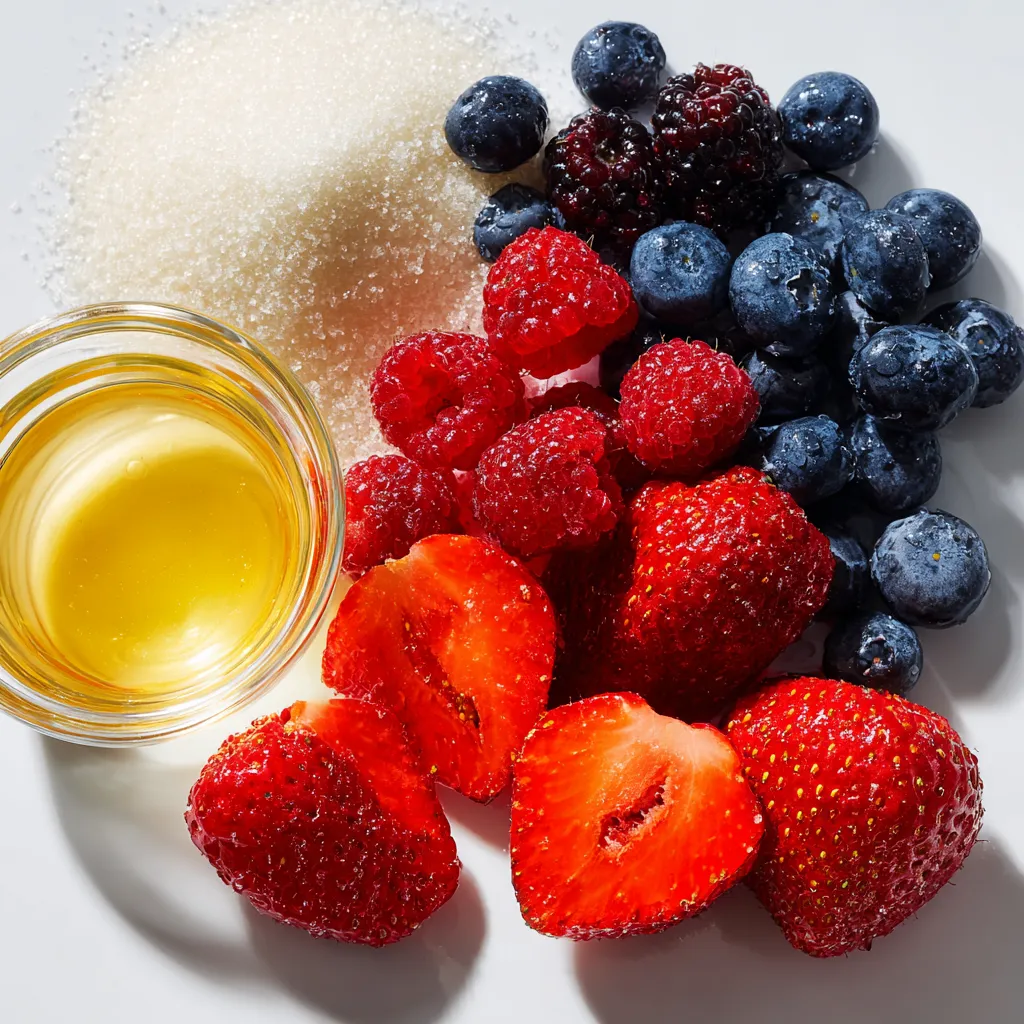
Amish Christmas Jam shines with its fresh fruit base. You will need:
– 4 cups fresh strawberries, hulled and halved
– 2 cups fresh raspberries
– 2 cups fresh blueberries
These fruits blend together to make a sweet and tangy mix. Strawberries add a nice sweetness, while raspberries bring a zesty touch. Blueberries offer a rich flavor that balances the jam.
Sugar and Lemon Juice
Next, we add sweetness and brightness. The key ingredients are:
– 5 cups granulated sugar
– 1/4 cup freshly squeezed lemon juice
Granulated sugar helps the jam set and preserves it. Fresh lemon juice adds a bright flavor. The citrus also helps the fruit colors pop, making your jam vibrant.
Essential Pectin
Pectin is crucial for the jam-making process. You need:
– 1 packet (1.75 oz) fruit pectin
Pectin helps the jam thicken. It binds the fruit and sugar, creating that perfect spreadable texture. Without it, your jam might be runny, and we want it to be just right.

Step-by-Step Instructions
Preparing the Fruit Mixture
First, gather your fresh strawberries, raspberries, and blueberries. Place the halved strawberries, raspberries, and blueberries in a spacious pot. Using a potato masher, gently mash the fruits. This helps release their juices. Once mashed, let the fruit mixture rest for 15 minutes. This resting time allows the flavors to blend well.
Incorporating Sugar
After the fruit has rested, sprinkle the granulated sugar evenly over the mixture. Stir continuously until the sugar fully dissolves. This can take a few minutes. Let it sit for another 10 minutes. During this time, the fruits absorb the sweetness, adding depth to your jam.
Cooking the Mixture
Now, set the pot over medium heat. Stir constantly as the mixture heats up. Bring it to a gentle boil. Once you see a rolling boil, add the packet of fruit pectin. Keep stirring and boil for an additional 1-2 minutes. This ensures everything combines nicely. After this, remove the pot from the heat. Skim off any foam that has formed on the surface. This step helps ensure a clear jam.
While still hot, pour the jam into sterilized jars, leaving about 1/4 inch of space at the top. Wipe the rims with a clean cloth for a good seal. Securely place the lids and bands on each jar. For longer shelf life, process the jars in a boiling water bath for 5-10 minutes. Let the jars cool completely before storing them.
Tips & Tricks
Perfecting Your Jam Texture
To know when your jam is thick enough, use a spoon. Dip the spoon into the jam. If it coats the back and forms a line when you run your finger through it, it’s ready. This method helps you see the right texture. You want it to be spreadable, not too runny.
Avoiding Common Mistakes
Always skim off the foam after cooking. Foam can make your jam look cloudy. Use a spoon to gently remove it. Also, jars must be clean and sterilized. You can boil them in water or run them through the dishwasher. This step helps keep your jam fresh longer.
Enhancing Flavor
You can add spices to make your jam special. A dash of cinnamon or nutmeg adds warmth. Vanilla extract can give a sweet touch. You can also mix in a bit of orange zest for a fresh twist. Experiment with flavors to find your favorite blend!
Pro Tips
- Use Fresh Fruit: For the best flavor and texture, always use fresh, ripe fruit. Frozen fruit can change the consistency of the jam.
- Adjust Sweetness: Taste the fruit mixture before adding all the sugar. Depending on the ripeness of the fruit, you may want to adjust the sugar to your preference.
- Check Jam Consistency: To test if the jam is set, place a spoonful on a cold plate and run your finger through it. If it holds its shape, it’s ready!
- Label and Date Jars: When storing your jam, label each jar with the date and contents. This will help you keep track of freshness and enjoy it at its best!

Variations
Fruit Combinations
You can mix other fruits to make unique jams. Try using blackberries or peaches. These fruits add their own sweet taste. You can even combine different berries, like strawberries and blackberries. Each choice brings a new flavor twist. Experimenting with fruit combinations keeps the jam fresh and fun.
Sugar Alternatives
If you want a healthier jam, consider using honey or agave. These add sweetness without white sugar. You can also try low-sugar options designed for jams. These can be great for those watching their sugar intake. Adjust the amount based on the fruit’s natural sweetness. This way, you can create a jam that fits your needs.
Seasonal Flavors
Adding spices can make your jam special. Think about using cinnamon or nutmeg during the holidays. These spices bring warmth and comfort to every bite. You can mix in a teaspoon of spice when cooking the jam. This small change can make your jam feel festive and cozy.
Storage Info
Proper Jar Sealing Techniques
To store Amish Christmas Jam well, you need to seal the jars correctly. First, use sterilized jars. After pouring in the hot jam, leave about 1/4 inch of space at the top. Wipe the rims with a clean cloth to remove any jam. This step helps the lid seal tightly. Place the lid on and screw on the band until it’s snug but not too tight. If you want extra safety, process the jars in a boiling water bath for 5-10 minutes. This step helps prevent spoilage and keeps the jam fresh longer.
Shelf Life and Best Practices
Amish Christmas Jam can last a year if sealed well and stored in a cool, dark place. Keep the jars in your pantry or a cool cupboard. After opening a jar, store it in the fridge. It will stay good for about three weeks once opened. Always check for signs of spoilage, like off smells or mold. If you see any, throw it out to stay safe.
Freezing Tips
Freezing Amish Christmas Jam is a great way to keep it fresh even longer. Use freezer-safe jars or containers. Leave space at the top for expansion. You can also use freezer bags, but remove as much air as possible. When you want to use it, thaw the jam in the fridge overnight. Never refreeze jam once it has thawed, as this can change the texture and taste. Enjoy your jam all year round!
FAQs
What is Amish Christmas Jam?
Amish Christmas Jam is a sweet spread made from fresh berries. It often includes strawberries, raspberries, and blueberries. This jam holds special meaning for the Amish. They make it to celebrate the joy of the season. The vibrant colors and flavors make it perfect for holiday gifts. The jam symbolizes sharing and community during festive times.
Can I use frozen fruits instead of fresh?
Yes, you can use frozen fruits. Frozen fruits change the texture of the jam slightly. They may make it slightly more watery. To fix this, you can cook it a bit longer. Just be sure to thaw the fruits first. This ensures the jam still has great flavor.
How do I know when my jam has set properly?
You can tell if your jam has set by doing a simple test. Place a spoonful of the hot jam on a cold plate. Let it sit for a minute, then run your finger through it. If it holds its shape, it’s ready! Another sign is when it looks thick and shiny. Both methods help you achieve the perfect jam consistency.
Making Amish Christmas Jam is simple and fun. We explored fresh fruit, sugar, and essential pectin to create a tasty treat. Preparing the fruit is key, along with boiling and getting the right texture. Keep in mind tips like avoiding common mistakes and trying unique flavor variations. Proper storage is vital for lasting enjoyment. Remember, you can use different fruits and sweeteners to make this jam your own. Enjoy your jam-making journey and share this deliciousness with family and friend

Amish Christmas Jam
Ingredients
- 4 cups fresh strawberries, hulled and halved
- 2 cups fresh raspberries
- 2 cups fresh blueberries
- 5 cups granulated sugar
- 0.25 cups freshly squeezed lemon juice
- 1 packet (1.75 oz) fruit pectin
Instructions
- In a spacious pot, combine the halved strawberries, raspberries, and blueberries. Using a potato masher, gently mash the fruits to release their natural juices, creating a thick and vibrant mixture.
- Add the lemon juice to the fruit mixture and stir well. Allow it to sit for 15 minutes at room temperature, letting the flavors meld beautifully.
- After the resting period, sprinkle the sugar evenly over the fruit and stir continuously until the sugar is fully dissolved. Let it sit again for another 10 minutes, allowing the fruits to absorb the sweetness.
- Set the pot over medium heat, stirring constantly and bringing the mixture to a gentle boil. Once it reaches a rolling boil, add the packet of fruit pectin. Keep stirring and boil for an additional 1-2 minutes, ensuring everything is well combined.
- Remove the pot from the heat and carefully skim off any foam that may have formed on the surface to ensure a clear jam.
- While the jam is still hot, pour it into sterilized jars, making sure to leave about 1/4 inch of space from the top for expansion.
- Wipe the rims of each jar with a clean cloth to ensure a proper seal, then securely place a lid and band on each jar.
- For longer shelf life, process the jars in a boiling water bath for 5-10 minutes. This step is optional but recommended if you plan to store the jam for an extended period.
- Allow the jars to cool completely on a clean kitchen towel or cooling rack at room temperature before storing them in the fridge or pantry.


. To get that perfect chewy texture in your cookies, use more brown sugar than white sugar. Brown sugar has moisture, which helps keep cookies soft. Also, don’t overmix the dough. Mix until just combined. This helps keep the cookies tender. One common mistake is using cold ingredients. Always use room temperature butter and eggs. Cold ingredients can make the batter too firm. Another mistake is baking too long. Take the cookies out when the edges are golden but the centers look soft. They firm up as they cool. Use parchment paper on your baking sheet. This prevents sticking and makes cleanup easy. Always space the cookies at least 2 inches apart. This gives them room to spread while baking. Lastly, let the cookies cool on the baking sheet for a few minutes before moving them. This helps them set nicely. For a full recipe, check the section above. {{image_4}} You can make Chewy Oatmeal Raisin Cookies healthier. Try using whole wheat flour instead of all-purpose flour. You can also replace half the sugar with applesauce. This swap keeps the cookies moist and reduces the sugar content. Another option is to use honey or maple syrup for a natural sweetener. These changes keep the cookies tasty while cutting down on empty calories. To spice up your cookies, add different flavors. A pinch of nutmeg or ginger can add a nice kick. You can also mix in some chocolate chips for sweetness. If you want a fun twist, try adding a tablespoon of peanut butter. It will give the cookies a rich, nutty flavor. A splash of almond extract instead of vanilla can also elevate the taste. If you need vegan cookies, swap the egg for a flax egg. Mix one tablespoon of ground flaxseed with three tablespoons of water, then let it sit until it thickens. For a gluten-free version, use a gluten-free flour blend in place of all-purpose flour. Just make sure the oats are certified gluten-free. These swaps will make your cookies friendly for all diets while still being delicious. For the complete recipe, check out the Full Recipe section! To keep your chewy oatmeal raisin cookies fresh, store them in an airtight container. This helps prevent them from drying out. You can place a slice of bread in the container. The bread will absorb any moisture and keep the cookies soft. Store the cookies at room temperature for up to a week. If you want to keep them longer, consider freezing them. Freezing cookies is a great way to enjoy them later. To freeze your chewy oatmeal raisin cookies, let them cool completely first. Then, place them in a single layer on a baking sheet. Freeze for about an hour. Once frozen, transfer the cookies to a freezer-safe bag or container. They can last for up to three months in the freezer. When you’re ready to eat them, just thaw at room temperature or reheat in the oven. Reheating cookies brings back their fresh-baked taste. To do this, preheat your oven to 350°F (175°C). Place the cookies on a baking sheet and heat them for about 5 to 7 minutes. This warms them up and makes them soft again. You can also use a microwave. Heat each cookie for about 10-15 seconds. Enjoy them warm for the best flavor! For more tips and the full recipe, check out the [Full Recipe]. Yes, you can use quick oats. They are smaller and cook faster. This change may make your cookies softer. Rolled oats give a chewier texture. If you want chewy cookies, stick with rolled oats. Chewy oatmeal raisin cookies last about one week at room temperature. Store them in an airtight container. For longer freshness, keep them in the fridge. You can also freeze them for up to three months. If you don't like raisins, try using chocolate chips or dried cranberries. Chopped dates or apricots also work well. These options add a nice twist to the cookies. Feel free to mix and match your favorites! Yes, you can double the recipe easily. Just double each ingredient amount. Make sure to have enough space on your baking sheets. Baking in batches works well too. Enjoy sharing these cookies with friends! Check the edges of the cookies. They should be lightly golden. The centers will look soft but not wet. If they look set, they are done. Remember, they will firm up as they cool! Chewy oatmeal raisin cookies are simple and fun to make. We covered the key ingredients, step-by-step baking, and useful tips. Explore tasty variations and safe storage methods to keep them fresh. Remember to avoid common mistakes for the perfect cookie. With these insights, you can enjoy delightful treats any time. Baking is about experimenting, so feel free to try new flavors or adjustments. Happy baking!](https://joymealplan.com/wp-content/uploads/2025/06/785fb639-1a06-41d5-89d3-a942a31939ee-768x768.webp)
![To make a tasty Snickerdoodle Apple Cobbler, you need the following ingredients: - 4 medium-sized apples (Granny Smith or Honeycrisp), peeled and thinly sliced - 1 tablespoon fresh lemon juice - 1 cup granulated sugar, divided - 1 teaspoon ground cinnamon, divided - 1 cup all-purpose flour - 2 teaspoons baking powder - 1/2 teaspoon salt - 1/2 cup unsalted butter, melted and slightly cooled - 1 large egg - 1/2 cup milk - 1/2 teaspoon pure vanilla extract - 1 teaspoon ground nutmeg (for a unique twist) These ingredients come together to create a warm, comforting dessert that everyone loves. You can add some optional ingredients to make this dessert even better. Consider these: - Chopped nuts like pecans or walnuts for crunch - A scoop of caramel sauce for extra sweetness - A sprinkle of sea salt to enhance flavors - Dried fruits like raisins or cranberries for added texture These enhancements can take your cobbler to a new level. Sometimes, you may not have every ingredient on hand. Here are some substitutions you can use: - Use other apple varieties, like Fuji or Braeburn, if needed. - Swap granulated sugar with brown sugar for a deeper flavor. - Replace all-purpose flour with whole wheat flour for more fiber. - Use coconut oil or vegetable oil instead of butter for a dairy-free option. These alternatives will keep your cobbler delicious while fitting your needs. For the complete recipe, check out the [Full Recipe]. Start by preheating your oven to 350°F (175°C). This step is vital for even baking. Next, grab a 9x9-inch baking dish and grease it lightly with butter or cooking spray. This helps prevent the cobbler from sticking. In a large mixing bowl, take four medium-sized apples. I love using Granny Smith or Honeycrisp apples. Peel them and slice them thinly. Add one tablespoon of fresh lemon juice to keep the apples bright. Then, mix in 1/2 cup of granulated sugar and 1/2 teaspoon of ground cinnamon. Stir until the apples are well-coated. Pour this delicious mixture into the prepared baking dish, spreading it out evenly. Now, let’s make the batter. In another bowl, mix one cup of all-purpose flour, two teaspoons of baking powder, 1/2 teaspoon of salt, and the remaining 1/2 cup of granulated sugar. Add 1/2 teaspoon of cinnamon for flavor. In a separate bowl, whisk together 1/2 cup of melted unsalted butter, one large egg, 1/2 cup of milk, and 1/2 teaspoon of pure vanilla extract. Gradually pour the wet mixture into the dry ingredients. Stir gently with a spatula until just combined. Be careful not to overmix. This ensures the cobbler stays tender. Now, dollop the batter over the apple mixture in the baking dish. Spread it gently to cover most apples, leaving some peeking through. For a unique twist, combine one teaspoon of ground nutmeg with a pinch of cinnamon and sugar in a small bowl. Sprinkle this mix evenly over the top of the batter. Place the baking dish in the preheated oven. Bake for 35-40 minutes. Your cobbler is done when the top is golden brown. A toothpick inserted into the center should come out clean. Once baked, take the cobbler out of the oven. Let it cool for about 10 minutes before serving. This cooling time helps all the flavors meld together beautifully. Enjoy your Snickerdoodle Apple Cobbler! For the full recipe, check out the earlier sections. To make your snickerdoodle apple cobbler shine, I have some key tips. - Choose the Right Apples: Use tart apples like Granny Smith. They balance the sweetness well. - Don’t Skip the Lemon Juice: This keeps the apples fresh and adds a nice zing. - Mix Carefully: When combining wet and dry ingredients, mix just until combined. Overmixing leads to a tough texture. - Add a Nutmeg Boost: A sprinkle of nutmeg adds warmth and depth to your cobbler. - Keep an Eye on Baking Time: Ovens vary, so check for a golden top and a clean toothpick. Baking can be tricky, and mistakes often happen. Here are some to watch out for: - Using Cold Ingredients: Make sure butter and eggs are at room temperature. This helps the batter mix better. - Not Preheating the Oven: Always preheat your oven. This ensures even baking from the start. - Overcrowding the Dish: Don’t pack the apple filling too tightly. Allow space for the apples to soften. - Ignoring the Cooling Time: Let the cobbler cool for a bit before serving. This helps the flavors blend. Having the right tools makes baking easier. Here’s what I recommend: - 9x9-inch Baking Dish: This is perfect for even baking. - Mixing Bowls: Use at least two medium bowls for mixing ingredients. - Whisk: A good whisk is vital for combining wet and dry ingredients smoothly. - Spatula: A silicone spatula is great for folding and scraping batter. - Measuring Cups and Spoons: Precision matters in baking. Accurate measurements lead to better results. For the full recipe, check out the detailed instructions to guide you through each step. {{image_4}} You can change the flavor of your Snickerdoodle Apple Cobbler easily. Adding nuts gives it a nice crunch. Try using chopped walnuts or pecans. You can also change the spices. Instead of just cinnamon, add a pinch of cardamom. This gives it a warm and unique taste. For a sweeter twist, mix in some chocolate chips. They melt and add a rich flavor to each bite. To make a healthier version, swap all-purpose flour for whole wheat flour. This adds fiber and nutrients. You can also use sugar substitutes, like stevia or coconut sugar. These options lower the calories while keeping the sweetness. If you want to cut down on fat, use applesauce instead of butter. It keeps the cobbler moist while being lighter. Change up the fruit based on the season. In spring, use fresh berries like strawberries or blueberries. In fall, pears can add a different flavor profile. They pair well with apples and spices. You could also top the cobbler with a sprinkle of oats for a crunchy topping. This adds texture and makes a great twist on the classic recipe. For the full recipe, check out the guide we provide. To keep your Snickerdoodle Apple Cobbler fresh, store it in an airtight container. Let it cool for about 10 minutes after baking. Then, cover it tightly and place it in the fridge. This helps keep the flavors intact and prevents it from drying out. Enjoy the cobbler within 3-4 days for the best taste. Reheating is simple. Preheat your oven to 350°F (175°C). Place the cobbler in an oven-safe dish. Cover it loosely with foil. Heat for about 15-20 minutes. Check if it's warm throughout. You can also microwave individual servings for about 20-30 seconds. Add a scoop of ice cream on top for a warm treat. To freeze your cobbler, let it cool completely first. Cut it into portions and wrap each piece in plastic wrap. Then, place the wrapped portions in a freezer-safe bag. Remove air to prevent freezer burn. Your cobbler will stay good for up to 3 months. When you're ready to eat, thaw it in the fridge overnight and reheat as mentioned above. For the full recipe, check the link in the article. You can tell the cobbler is done when the top is golden brown. Also, insert a toothpick into the center. If it comes out clean, your cobbler is ready. Baking usually takes 35 to 40 minutes. Keep an eye on it. If it starts to brown too quickly, cover it lightly with foil. Yes, you can use different types of apples. Granny Smith and Honeycrisp are great choices. They add a nice balance of sweet and tart. Other good options include Fuji or Braeburn. Just make sure to peel and slice them thinly for even cooking. I love serving this cobbler warm with vanilla ice cream. The creamy ice cream melts into the warm cobbler. It creates a delicious mix of flavors and textures. You can also add a light dusting of cinnamon on top. For a fresh touch, add thin apple slices as a garnish. They look great and taste amazing! For the full recipe, please visit [Full Recipe]. In this post, we explored the delightful Snickerdoodle Apple Cobbler. We covered required and optional ingredients, plus substitutions. You learned step-by-step how to prepare the filling and batter. We shared tips to avoid common mistakes and suggested the best tools for success. Variations, including healthier options, added fun. Lastly, we discussed storage and reheating. Now, you're ready to create a comforting dessert. Enjoy baking and experimenting with your own twists!](https://joymealplan.com/wp-content/uploads/2025/07/db3ea963-82dc-410a-a54c-26a74516e24e-768x768.webp)

