Avocado Chickpea Salad Fresh and Flavorful Dish
![- 1 can (15 oz) chickpeas, thoroughly drained and rinsed - 1 perfectly ripe avocado, peeled and pitted - 1 cup cherry tomatoes, halved - 1 medium cucumber, diced - 1/4 red onion, finely chopped - 1/4 cup fresh cilantro, chopped - 2 tablespoons freshly squeezed lemon juice - 1 tablespoon high-quality olive oil - Sea salt and freshly ground black pepper - 1/4 teaspoon ground cumin - Extra herbs for garnish - Each serving has about 200 calories. - Key vitamins include vitamin C, vitamin K, and fiber. This avocado chickpea salad packs a punch of flavor and nutrients! You get protein from chickpeas, healthy fats from avocado, and lots of vitamins from fresh veggies. The combo is not just tasty; it is good for you too. Pair this salad with pita chips for a crunchy bite. For the full recipe, check out the [Full Recipe]. To start, you need to mash the avocado. Take a ripe avocado and cut it in half. Remove the pit and scoop the flesh into a bowl. Use a fork to mash it. You want it creamy but still chunky. This adds a nice texture to your salad. Next, mix in the chickpeas. Open a can of chickpeas, drain and rinse them well. Carefully add them to the mashed avocado. Gently fold the chickpeas into the avocado. Be careful not to mash them. You want to keep the chickpeas whole for great bites. Now it's time to add in your vegetables. Chop up one cup of cherry tomatoes in half, dice a cucumber, and finely chop a quarter of a red onion. Don’t forget the cilantro! Add all these colorful veggies to your bowl. Gently mix everything together until the ingredients are well combined and coated in avocado. Then, you’ll make the dressing. In a small bowl, whisk together two tablespoons of freshly squeezed lemon juice and one tablespoon of high-quality olive oil. Add sea salt and freshly ground black pepper to taste. If you like, you can add a quarter teaspoon of ground cumin for extra flavor. This dressing will brighten the salad and tie everything together nicely. Now, drizzle the dressing over the chickpea and avocado mixture. Toss the salad gently. Make sure each ingredient gets a nice coat of dressing. Taste the salad. If it needs more flavor, adjust your seasoning. You can add more salt or lemon juice if you want it brighter. For the best taste, serve your salad right away. If you have time, let it chill in the refrigerator for 15-20 minutes. This allows the flavors to mix well. Don’t forget to check out the Full Recipe for more details! To select ripe avocados, look for ones that yield slightly when pressed. They should feel soft but not mushy. If they are hard, leave them at room temperature for a few days. Once ripe, keep them in the fridge to slow down the ripening process. To store leftover salad, use an airtight container. This keeps the salad fresh for up to two days. If you notice browning from the avocado, add a bit more lemon juice to help keep it vibrant. For a tasty pairing, serve your salad with crispy pita chips. The crunch adds a fun texture. You can also enjoy it on toasted bread for a quick meal. To present the salad, use a colorful bowl. Garnish with extra cilantro for a lively look. A sprinkle of sea salt on top can enhance the visual appeal, too. One common mistake is over-mashing the avocado. You want a creamy yet chunky texture. This keeps the salad interesting. Another mistake is not seasoning adequately. Be sure to taste and adjust your salt and lemon juice. Proper seasoning brings out all the fresh flavors in this dish. {{image_4}} You can easily boost your avocado chickpea salad with protein. Here are two great options: - Grilled chicken or shrimp: Both add a delicious, savory flavor. Just grill them and slice them up before mixing in. - Tofu for a vegetarian option: Tofu is a great meat substitute. Use firm tofu, press it, and cube it. Then toss it in for added protein. Adding new flavors can make your salad even better. Try these ideas: - Adding feta cheese: Crumbled feta adds a tangy taste that pairs well with the creamy avocado. - Experimenting with different dressings: You can switch up the dressing to change the flavor. Try balsamic, ranch, or a spicy vinaigrette for a twist. Using fresh, seasonal ingredients makes your salad shine. Here are some tips: - Incorporating seasonal veggies: Add bell peppers, radishes, or zucchini when they are in season for extra crunch and flavor. - Switching up herbs for different flavors: Try basil, parsley, or dill instead of cilantro to give your salad a new taste. These variations can turn your avocado chickpea salad into a unique dish every time you make it. For the full recipe, check out the earlier section. To keep your salad fresh, store it in the fridge. Use an airtight container to seal in the flavors. This method helps prevent browning and keeps the salad crisp. If you have space, consider using glass containers. They do not absorb odors and help you see the salad clearly. This salad lasts about three days in the fridge. After that, the ingredients may start to spoil. Check for signs like brown avocado or a sour smell. If you see either, it’s best to toss the salad. Freshness is key to enjoying this dish. Can you freeze avocado chickpea salad? I do not recommend freezing it. The avocado and tomatoes do not freeze well. They can become mushy when thawed. If you want to freeze, store the chickpeas and veggies separately. This way, you can mix fresh ingredients when you’re ready to eat. To make your avocado chickpea salad creamy, mash the ripe avocado well. Use a fork for this step. Aim for a mix of smooth and chunky textures. This keeps it interesting. Combine the mashed avocado with chickpeas gently. Folding helps maintain the shape of the chickpeas. Also, add a drizzle of olive oil for extra creaminess. Finally, use fresh lemon juice to brighten the flavors. These steps ensure your salad has a rich, creamy base. Yes, you can prepare this salad in advance. Start by chopping all the vegetables and storing them separately. This keeps them fresh and crisp. Mash the avocado just before serving. If you mash it early, it may brown. To keep the salad fresh, store it in an airtight container. You can also add lemon juice to the avocado to slow down browning. Chill the salad in the fridge for about 20 minutes before serving. This helps the flavors blend well. If you want to switch things up, try other legumes. White beans are a great option. They have a mild taste and a creamy texture. Black beans can add a fun twist with a bolder flavor. You can also use lentils for a different texture. Each legume gives a unique taste to the salad. So, feel free to get creative with your choices. Yes, this salad is gluten-free. All the main ingredients, like chickpeas and vegetables, are naturally free from gluten. This makes it a great option for those with gluten sensitivities. Always check your ingredient labels, especially for dressings. Some pre-made dressings may contain gluten. Using fresh lemon juice and olive oil ensures your dressing stays gluten-free. Enjoy this light and healthy salad without worry! For the full recipe, check out this Creamy Avocado Chickpea Delight. This blog post covered how to make a tasty avocado chickpea salad. We discussed key ingredients and gave precise steps for preparation. I shared helpful tips on freshness, serving ideas, and common mistakes to avoid. You can customize it with proteins or seasonal veggies. In summary, this salad is simple, nutritious, and versatile. It’s perfect for any meal. I encourage you to try it and share it with others. Enjoy crafting your delicious creation!](https://joymealplan.com/wp-content/uploads/2025/06/f9e70452-dbea-4dff-b8d7-5421933c3ab4.webp)
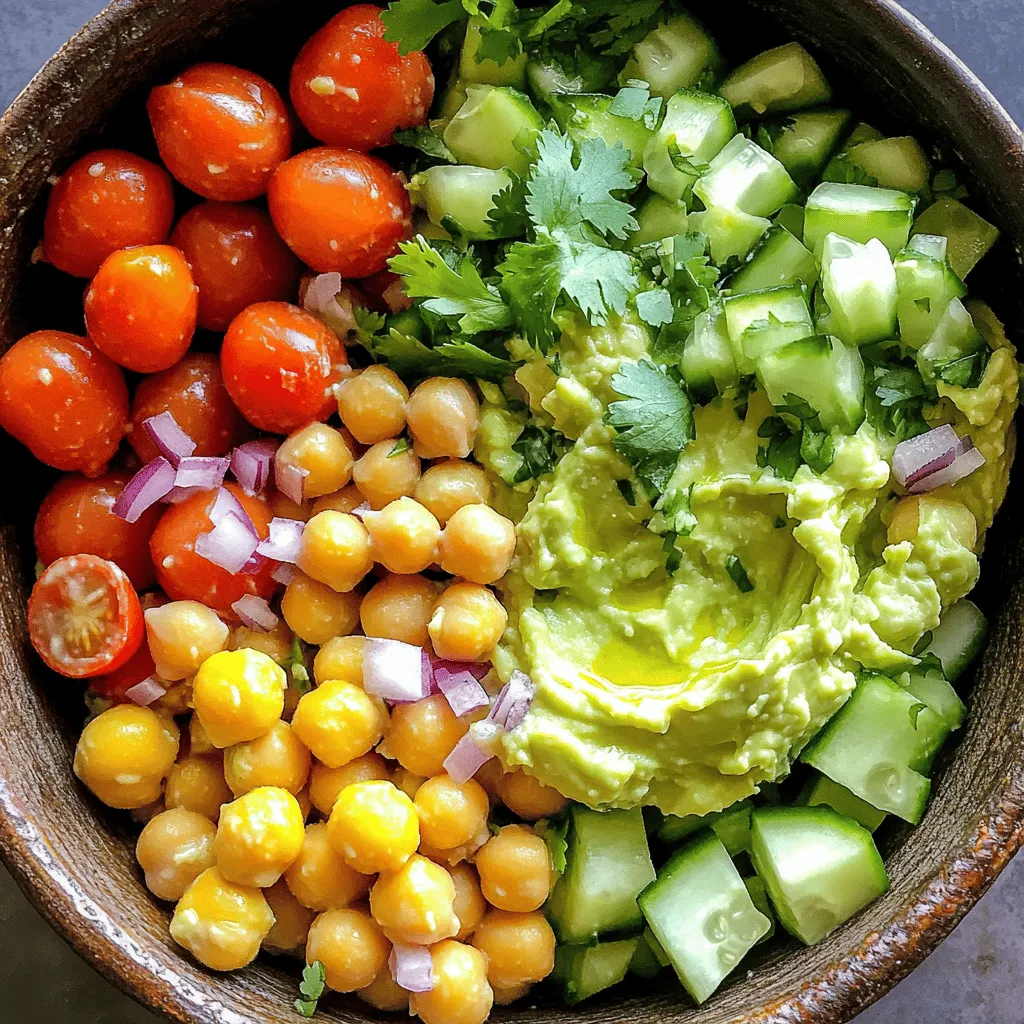
Looking for a fresh and tasty dish? This Avocado Chickpea Salad combines creamy avocado and protein-rich chickpeas, creating a healthy and satisfying meal. It’s packed with vibrant vegetables and bold flavors that will make your taste buds sing. Plus, it’s simple to make and can be customized to fit any palate. Let’s dive into this delightful recipe that’s perfect for lunch, dinner, or a light snack!
Ingredients
Main Ingredients
– 1 can (15 oz) chickpeas, thoroughly drained and rinsed
– 1 perfectly ripe avocado, peeled and pitted
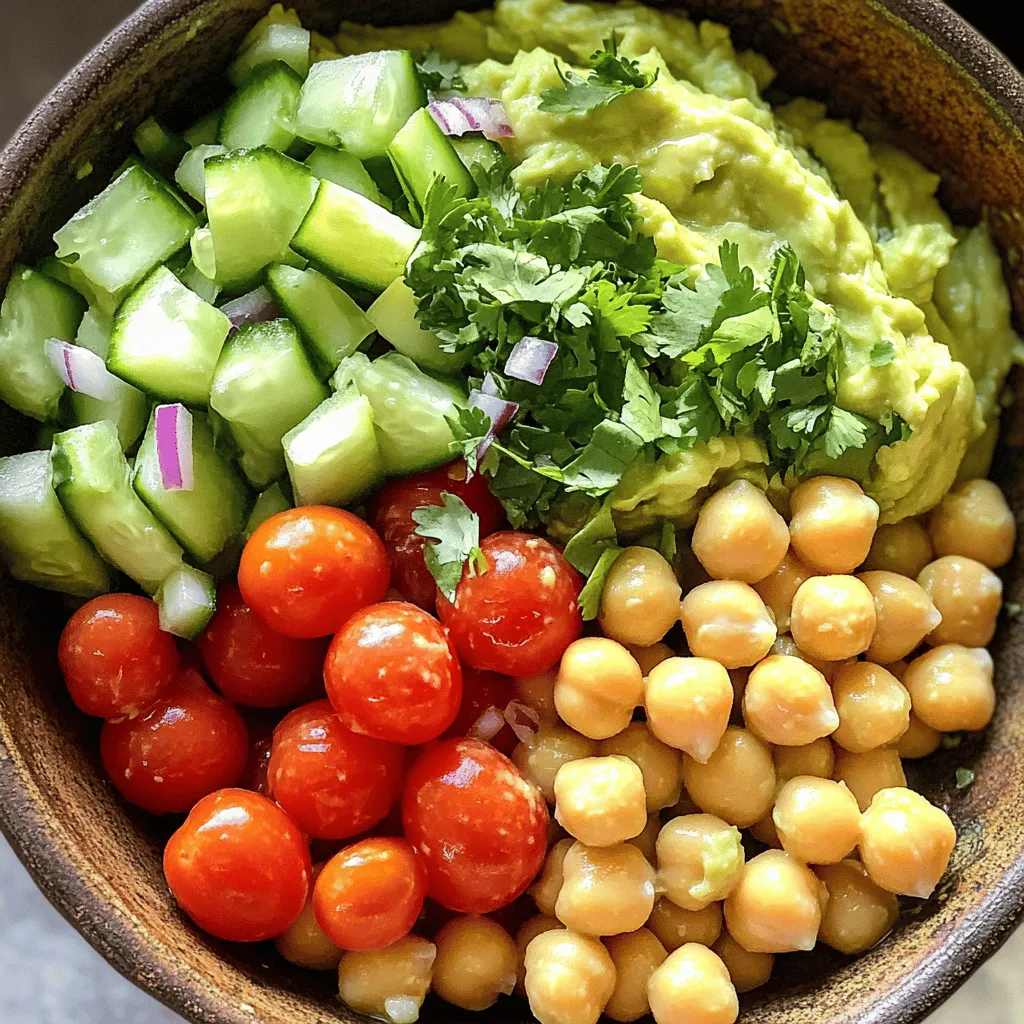
– 1 cup cherry tomatoes, halved
– 1 medium cucumber, diced
– 1/4 red onion, finely chopped
– 1/4 cup fresh cilantro, chopped
– 2 tablespoons freshly squeezed lemon juice
– 1 tablespoon high-quality olive oil
– Sea salt and freshly ground black pepper
Optional Ingredients
– 1/4 teaspoon ground cumin
– Extra herbs for garnish
Nutritional Information
– Each serving has about 200 calories.
– Key vitamins include vitamin C, vitamin K, and fiber.
This avocado chickpea salad packs a punch of flavor and nutrients! You get protein from chickpeas, healthy fats from avocado, and lots of vitamins from fresh veggies. The combo is not just tasty; it is good for you too. Pair this salad with pita chips for a crunchy bite.
Step-by-Step Instructions
Preparation Steps
To start, you need to mash the avocado. Take a ripe avocado and cut it in half. Remove the pit and scoop the flesh into a bowl. Use a fork to mash it. You want it creamy but still chunky. This adds a nice texture to your salad.
Next, mix in the chickpeas. Open a can of chickpeas, drain and rinse them well. Carefully add them to the mashed avocado. Gently fold the chickpeas into the avocado. Be careful not to mash them. You want to keep the chickpeas whole for great bites.
Assembling the Salad
Now it’s time to add in your vegetables. Chop up one cup of cherry tomatoes in half, dice a cucumber, and finely chop a quarter of a red onion. Don’t forget the cilantro! Add all these colorful veggies to your bowl. Gently mix everything together until the ingredients are well combined and coated in avocado.
Then, you’ll make the dressing. In a small bowl, whisk together two tablespoons of freshly squeezed lemon juice and one tablespoon of high-quality olive oil. Add sea salt and freshly ground black pepper to taste. If you like, you can add a quarter teaspoon of ground cumin for extra flavor. This dressing will brighten the salad and tie everything together nicely.
Combining Ingredients
Now, drizzle the dressing over the chickpea and avocado mixture. Toss the salad gently. Make sure each ingredient gets a nice coat of dressing. Taste the salad. If it needs more flavor, adjust your seasoning. You can add more salt or lemon juice if you want it brighter.
For the best taste, serve your salad right away. If you have time, let it chill in the refrigerator for 15-20 minutes. This allows the flavors to mix well.
Tips & Tricks
Ensuring Freshness
To select ripe avocados, look for ones that yield slightly when pressed. They should feel soft but not mushy. If they are hard, leave them at room temperature for a few days. Once ripe, keep them in the fridge to slow down the ripening process.
To store leftover salad, use an airtight container. This keeps the salad fresh for up to two days. If you notice browning from the avocado, add a bit more lemon juice to help keep it vibrant.
Serving Suggestions
For a tasty pairing, serve your salad with crispy pita chips. The crunch adds a fun texture. You can also enjoy it on toasted bread for a quick meal.
To present the salad, use a colorful bowl. Garnish with extra cilantro for a lively look. A sprinkle of sea salt on top can enhance the visual appeal, too.
Common Mistakes to Avoid
One common mistake is over-mashing the avocado. You want a creamy yet chunky texture. This keeps the salad interesting.
Another mistake is not seasoning adequately. Be sure to taste and adjust your salt and lemon juice. Proper seasoning brings out all the fresh flavors in this dish.

Variations
Protein Additions
You can easily boost your avocado chickpea salad with protein. Here are two great options:
– Grilled chicken or shrimp: Both add a delicious, savory flavor. Just grill them and slice them up before mixing in.
– Tofu for a vegetarian option: Tofu is a great meat substitute. Use firm tofu, press it, and cube it. Then toss it in for added protein.
Flavor Enhancements
Adding new flavors can make your salad even better. Try these ideas:
– Adding feta cheese: Crumbled feta adds a tangy taste that pairs well with the creamy avocado.
– Experimenting with different dressings: You can switch up the dressing to change the flavor. Try balsamic, ranch, or a spicy vinaigrette for a twist.
Seasonal Ingredients
Using fresh, seasonal ingredients makes your salad shine. Here are some tips:
– Incorporating seasonal veggies: Add bell peppers, radishes, or zucchini when they are in season for extra crunch and flavor.
– Switching up herbs for different flavors: Try basil, parsley, or dill instead of cilantro to give your salad a new taste.
These variations can turn your avocado chickpea salad into a unique dish every time you make it.
Storage Information
How to Store Leftovers
To keep your salad fresh, store it in the fridge. Use an airtight container to seal in the flavors. This method helps prevent browning and keeps the salad crisp. If you have space, consider using glass containers. They do not absorb odors and help you see the salad clearly.
Shelf Life of the Salad
This salad lasts about three days in the fridge. After that, the ingredients may start to spoil. Check for signs like brown avocado or a sour smell. If you see either, it’s best to toss the salad. Freshness is key to enjoying this dish.
Freezing Tips
Can you freeze avocado chickpea salad? I do not recommend freezing it. The avocado and tomatoes do not freeze well. They can become mushy when thawed. If you want to freeze, store the chickpeas and veggies separately. This way, you can mix fresh ingredients when you’re ready to eat.
FAQs
How do you make avocado chickpea salad creamy?
To make your avocado chickpea salad creamy, mash the ripe avocado well. Use a fork for this step. Aim for a mix of smooth and chunky textures. This keeps it interesting. Combine the mashed avocado with chickpeas gently. Folding helps maintain the shape of the chickpeas. Also, add a drizzle of olive oil for extra creaminess. Finally, use fresh lemon juice to brighten the flavors. These steps ensure your salad has a rich, creamy base.
Can I prepare this salad in advance?
Yes, you can prepare this salad in advance. Start by chopping all the vegetables and storing them separately. This keeps them fresh and crisp. Mash the avocado just before serving. If you mash it early, it may brown. To keep the salad fresh, store it in an airtight container. You can also add lemon juice to the avocado to slow down browning. Chill the salad in the fridge for about 20 minutes before serving. This helps the flavors blend well.
What can I substitute for chickpeas?
If you want to switch things up, try other legumes. White beans are a great option. They have a mild taste and a creamy texture. Black beans can add a fun twist with a bolder flavor. You can also use lentils for a different texture. Each legume gives a unique taste to the salad. So, feel free to get creative with your choices.
Is this salad gluten-free?
Yes, this salad is gluten-free. All the main ingredients, like chickpeas and vegetables, are naturally free from gluten. This makes it a great option for those with gluten sensitivities. Always check your ingredient labels, especially for dressings. Some pre-made dressings may contain gluten. Using fresh lemon juice and olive oil ensures your dressing stays gluten-free. Enjoy this light and healthy salad without worry!
This blog post covered how to make a tasty avocado chickpea salad. We discussed key ingredients and gave precise steps for preparation. I shared helpful tips on freshness, serving ideas, and common mistakes to avoid. You can customize it with proteins or seasonal veggies.
In summary, this salad is simple, nutritious, and versatile. It’s perfect for any meal. I encourage you to try it and share it with others. Enjoy crafting your delicious creation!
![- 1 can (15 oz) chickpeas, thoroughly drained and rinsed - 1 perfectly ripe avocado, peeled and pitted - 1 cup cherry tomatoes, halved - 1 medium cucumber, diced - 1/4 red onion, finely chopped - 1/4 cup fresh cilantro, chopped - 2 tablespoons freshly squeezed lemon juice - 1 tablespoon high-quality olive oil - Sea salt and freshly ground black pepper - 1/4 teaspoon ground cumin - Extra herbs for garnish - Each serving has about 200 calories. - Key vitamins include vitamin C, vitamin K, and fiber. This avocado chickpea salad packs a punch of flavor and nutrients! You get protein from chickpeas, healthy fats from avocado, and lots of vitamins from fresh veggies. The combo is not just tasty; it is good for you too. Pair this salad with pita chips for a crunchy bite. For the full recipe, check out the [Full Recipe]. To start, you need to mash the avocado. Take a ripe avocado and cut it in half. Remove the pit and scoop the flesh into a bowl. Use a fork to mash it. You want it creamy but still chunky. This adds a nice texture to your salad. Next, mix in the chickpeas. Open a can of chickpeas, drain and rinse them well. Carefully add them to the mashed avocado. Gently fold the chickpeas into the avocado. Be careful not to mash them. You want to keep the chickpeas whole for great bites. Now it's time to add in your vegetables. Chop up one cup of cherry tomatoes in half, dice a cucumber, and finely chop a quarter of a red onion. Don’t forget the cilantro! Add all these colorful veggies to your bowl. Gently mix everything together until the ingredients are well combined and coated in avocado. Then, you’ll make the dressing. In a small bowl, whisk together two tablespoons of freshly squeezed lemon juice and one tablespoon of high-quality olive oil. Add sea salt and freshly ground black pepper to taste. If you like, you can add a quarter teaspoon of ground cumin for extra flavor. This dressing will brighten the salad and tie everything together nicely. Now, drizzle the dressing over the chickpea and avocado mixture. Toss the salad gently. Make sure each ingredient gets a nice coat of dressing. Taste the salad. If it needs more flavor, adjust your seasoning. You can add more salt or lemon juice if you want it brighter. For the best taste, serve your salad right away. If you have time, let it chill in the refrigerator for 15-20 minutes. This allows the flavors to mix well. Don’t forget to check out the Full Recipe for more details! To select ripe avocados, look for ones that yield slightly when pressed. They should feel soft but not mushy. If they are hard, leave them at room temperature for a few days. Once ripe, keep them in the fridge to slow down the ripening process. To store leftover salad, use an airtight container. This keeps the salad fresh for up to two days. If you notice browning from the avocado, add a bit more lemon juice to help keep it vibrant. For a tasty pairing, serve your salad with crispy pita chips. The crunch adds a fun texture. You can also enjoy it on toasted bread for a quick meal. To present the salad, use a colorful bowl. Garnish with extra cilantro for a lively look. A sprinkle of sea salt on top can enhance the visual appeal, too. One common mistake is over-mashing the avocado. You want a creamy yet chunky texture. This keeps the salad interesting. Another mistake is not seasoning adequately. Be sure to taste and adjust your salt and lemon juice. Proper seasoning brings out all the fresh flavors in this dish. {{image_4}} You can easily boost your avocado chickpea salad with protein. Here are two great options: - Grilled chicken or shrimp: Both add a delicious, savory flavor. Just grill them and slice them up before mixing in. - Tofu for a vegetarian option: Tofu is a great meat substitute. Use firm tofu, press it, and cube it. Then toss it in for added protein. Adding new flavors can make your salad even better. Try these ideas: - Adding feta cheese: Crumbled feta adds a tangy taste that pairs well with the creamy avocado. - Experimenting with different dressings: You can switch up the dressing to change the flavor. Try balsamic, ranch, or a spicy vinaigrette for a twist. Using fresh, seasonal ingredients makes your salad shine. Here are some tips: - Incorporating seasonal veggies: Add bell peppers, radishes, or zucchini when they are in season for extra crunch and flavor. - Switching up herbs for different flavors: Try basil, parsley, or dill instead of cilantro to give your salad a new taste. These variations can turn your avocado chickpea salad into a unique dish every time you make it. For the full recipe, check out the earlier section. To keep your salad fresh, store it in the fridge. Use an airtight container to seal in the flavors. This method helps prevent browning and keeps the salad crisp. If you have space, consider using glass containers. They do not absorb odors and help you see the salad clearly. This salad lasts about three days in the fridge. After that, the ingredients may start to spoil. Check for signs like brown avocado or a sour smell. If you see either, it’s best to toss the salad. Freshness is key to enjoying this dish. Can you freeze avocado chickpea salad? I do not recommend freezing it. The avocado and tomatoes do not freeze well. They can become mushy when thawed. If you want to freeze, store the chickpeas and veggies separately. This way, you can mix fresh ingredients when you’re ready to eat. To make your avocado chickpea salad creamy, mash the ripe avocado well. Use a fork for this step. Aim for a mix of smooth and chunky textures. This keeps it interesting. Combine the mashed avocado with chickpeas gently. Folding helps maintain the shape of the chickpeas. Also, add a drizzle of olive oil for extra creaminess. Finally, use fresh lemon juice to brighten the flavors. These steps ensure your salad has a rich, creamy base. Yes, you can prepare this salad in advance. Start by chopping all the vegetables and storing them separately. This keeps them fresh and crisp. Mash the avocado just before serving. If you mash it early, it may brown. To keep the salad fresh, store it in an airtight container. You can also add lemon juice to the avocado to slow down browning. Chill the salad in the fridge for about 20 minutes before serving. This helps the flavors blend well. If you want to switch things up, try other legumes. White beans are a great option. They have a mild taste and a creamy texture. Black beans can add a fun twist with a bolder flavor. You can also use lentils for a different texture. Each legume gives a unique taste to the salad. So, feel free to get creative with your choices. Yes, this salad is gluten-free. All the main ingredients, like chickpeas and vegetables, are naturally free from gluten. This makes it a great option for those with gluten sensitivities. Always check your ingredient labels, especially for dressings. Some pre-made dressings may contain gluten. Using fresh lemon juice and olive oil ensures your dressing stays gluten-free. Enjoy this light and healthy salad without worry! For the full recipe, check out this Creamy Avocado Chickpea Delight. This blog post covered how to make a tasty avocado chickpea salad. We discussed key ingredients and gave precise steps for preparation. I shared helpful tips on freshness, serving ideas, and common mistakes to avoid. You can customize it with proteins or seasonal veggies. In summary, this salad is simple, nutritious, and versatile. It’s perfect for any meal. I encourage you to try it and share it with others. Enjoy crafting your delicious creation!](https://joymealplan.com/wp-content/uploads/2025/06/f9e70452-dbea-4dff-b8d7-5421933c3ab4-300x300.webp)


![- 1 block (14 oz) firm tofu, pressed and drained - 1/2 cup cornstarch - 3 tablespoons vegetable oil - 1/4 cup honey - 2 tablespoons soy sauce - 4 cloves garlic, minced - 1 teaspoon fresh ginger, grated - 1 tablespoon sesame seeds, toasted - 2 green onions, sliced - Salt and pepper to taste To make crispy honey garlic tofu, you need simple ingredients that pack big flavor. Start with firm tofu. It holds its shape well and crisps up nicely. Press and drain it to get rid of excess water. This step is key for crispy tofu. Next, grab some cornstarch. It’s your secret weapon for that crunchy coating. It sticks to the tofu and gets crispy in the hot oil. Vegetable oil helps fry the tofu evenly. Use a good amount, but don’t drown the tofu. For the sauce, honey adds sweetness. Soy sauce brings saltiness, and garlic and ginger give it a warm kick. These flavors blend perfectly. You can adjust the honey and soy sauce to fit your taste. Finally, sesame seeds and sliced green onions are for garnishing. They add a nice crunch and color to your dish. This crispy honey garlic tofu is not just tasty; it's visually appealing too. For the full recipe, check out the detailed steps. - Cut the tofu into 1-inch cubes. - Toss tofu cubes in cornstarch with salt and pepper. Start by cutting your block of firm tofu into 1-inch cubes. Make sure the pieces are even for cooking. Next, take a shallow dish and add cornstarch. Sprinkle in some salt and pepper. Toss those tofu cubes in the cornstarch mixture, coating each piece well. Shake off any extra cornstarch to keep them light and crispy. - Heat vegetable oil in a skillet over medium-high. - Sauté tofu until golden brown and crispy. Now, heat 3 tablespoons of vegetable oil in a skillet over medium-high heat. Wait until the oil is hot. Carefully place the tofu cubes in the skillet in a single layer. Sauté them for about 5 to 7 minutes. Turn the pieces so they cook evenly. You want them to turn golden brown and get nice and crispy. Once done, transfer the tofu to a paper towel-lined plate to absorb excess oil. - Sauté garlic and ginger in the skillet. - Combine honey and soy sauce, allowing to thicken. In the same skillet, lower the heat to medium. Add 4 minced garlic cloves and 1 teaspoon of grated ginger. Sauté these for about 1 minute. You'll know they're ready when they smell great and turn golden. Now, pour in 1/4 cup of honey and 2 tablespoons of soy sauce. Stir well and let it cook for 2 to 3 minutes until it thickens a bit. - Coat crispy tofu in the honey garlic sauce. - Serve with garnishes. Gently place the crispy tofu back into the skillet. Toss it in the honey garlic sauce until every piece is coated. Remove from heat and sprinkle 1 tablespoon of toasted sesame seeds and 2 sliced green onions over the dish. This adds flavor and makes it look nice. For the full recipe, check the details above! - Use firm tofu for best results: Firm tofu holds its shape and crisps up nicely. - Ensure the tofu is properly pressed and drained: Pressing removes excess water. This helps the tofu absorb flavors and get crispy. - Adjust honey and soy sauce ratios to taste: You can make it sweeter or saltier by changing these amounts. - Experiment with adding red pepper flakes for heat: A little spice can really elevate the dish. Add to your liking. - Consider using an air fryer for an even crispier finish: Air frying gives a great crunch without extra oil. - Double-fry method for ultimate crunch: Fry the tofu once, let it rest, and fry again. This makes it super crispy. For more details, check the Full Recipe. {{image_4}} You can switch tofu for other proteins. Tempeh is a great choice. It has a nutty flavor and a firmer texture. Just cut it into cubes like tofu. Cook it the same way for a tasty dish. Seitan is another option. It mimics meat well and offers a chewy texture. It absorbs flavors easily. Use seitan if you're looking for a heartier bite. Want a kick? Add sriracha to the sauce. This gives a spicy twist to the sweet honey. You can also try orange juice or maple syrup. These swaps change the flavor profile. Orange adds a fresh zest, while maple syrup gives a rich taste. Both can make your dish stand out. Crispy honey garlic tofu shines when paired with sides. Steamed vegetables bring color and nutrition. A fresh salad can add crunch. You can also use this tofu in wraps or tacos. Just fill them with your favorite veggies and tofu. It makes for a fun and easy meal. For the full recipe, follow the steps and enjoy your cooking journey! You can keep crispy honey garlic tofu in the fridge. Place it in an airtight container. It will stay fresh for up to 3 days. This way, you can enjoy it later without losing flavor. To reheat your tofu, use the oven or a skillet. This keeps it crispy and tasty. Avoid using the microwave. It makes the tofu soggy, which we want to prevent. You can also freeze cooked tofu. It will last for up to 2 months in the freezer. When you want to eat it, simply thaw it out. After thawing, re-crisp it in a skillet or oven before serving. This method helps regain its crunchy texture. Typically, crispy honey garlic tofu lasts up to 3 days when stored properly. To keep it fresh, place it in an airtight container. Ensure the tofu is cool before sealing. This helps maintain its flavor and texture. Yes, you can make this recipe vegan. Simply replace honey with agave or maple syrup. Both options add sweetness without using animal products. This change keeps the dish plant-based and equally delicious! Crispy honey garlic tofu pairs well with rice, noodles, or a fresh vegetable stir-fry. You can serve it over steamed jasmine rice for a classic combo. Noodles coated in a light sauce also work great. Adding a side of colorful stir-fried veggies brings extra nutrition and flavor. Firm or extra-firm tofu works best for a crispy texture. These types hold their shape and don’t crumble. For the best results, make sure you press and drain the tofu well before cooking. This removes excess moisture, allowing for a delightful crunch. For the full recipe, check out the [Full Recipe]. In this post, we covered how to make crispy honey garlic tofu. You learned about the key ingredients, from firm tofu to the sweet and savory sauce. I shared step-by-step cooking tips and tricks for the perfect texture and flavor. Remember, you can customize the recipe with different proteins or sauces. Store leftovers correctly to enjoy this dish later. Overall, this recipe is fun, flexible, and delicious. Give it a try, and you’ll impress your friends or family!](https://joymealplan.com/wp-content/uploads/2025/07/a62a8118-0118-41a9-8dcd-10793e5e2e73-768x768.webp)
