Skip to content
About
Contact
Cookie Policy
Copyright Policy
Disclaimer
Search
Home
Dinner
Appetizer
Desserts
Drinks
About
Contact
Privacy Policy
Toggle Menu
Home
/
Appetizer
- Page 20
Appetizer
Classic Deviled Eggs Delightful and Easy Recipe
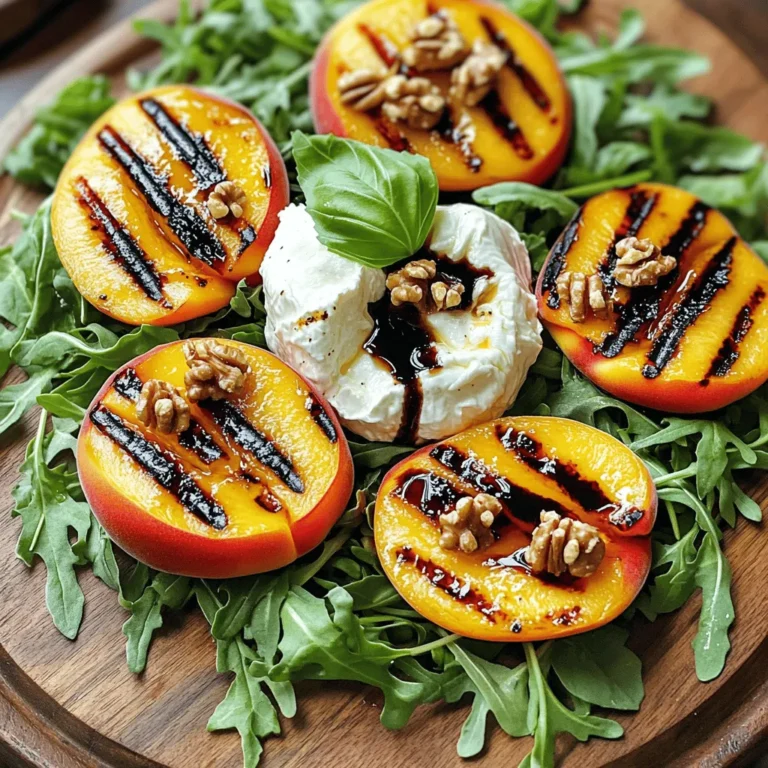
Grilled Peach Burrata Salad Fresh and Flavorful Dish
Oven Baked Zucchini Chips Crunchy and Flavorful Snack
Savory Buffalo Chicken Dip Perfect for Any Gathering
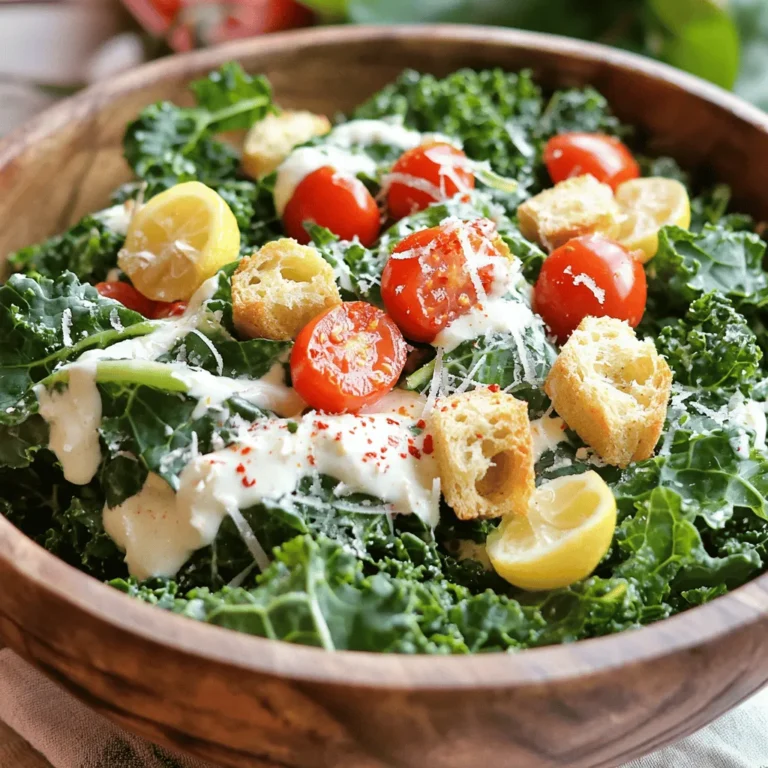
Kale Caesar Salad Fresh and Flavorful Meal Idea
Veggie Quesadillas Flavorful and Easy to Make Meal
Honey Mustard Chicken Skewers Tasty and Easy Recipe
Savory Breakfast Muffins Flavorful and Easy Recipe
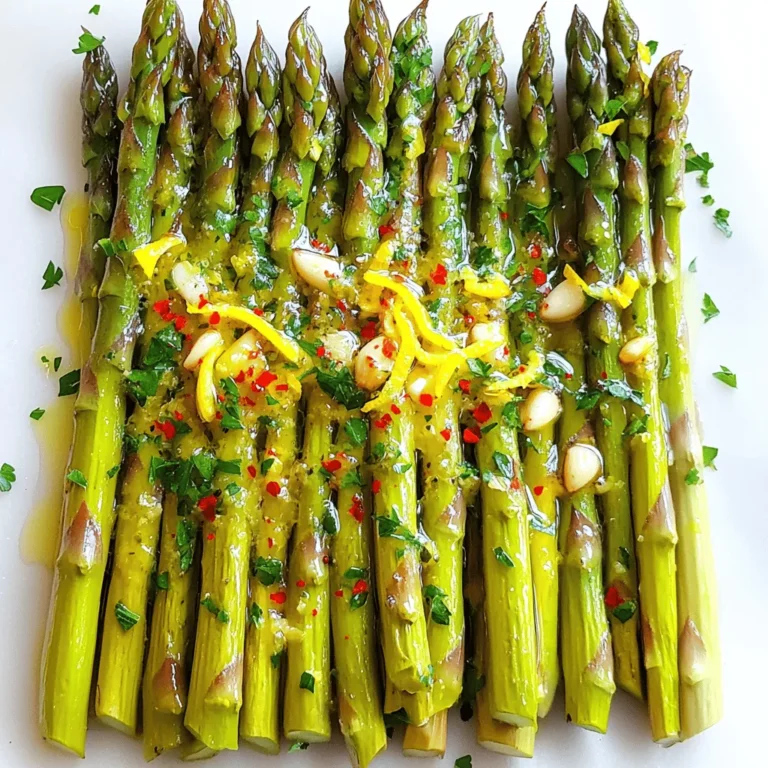
Lemon Garlic Roasted Asparagus Flavorful and Fresh Dish
Taco Ranch Bites Flavorful and Easy Party Snack
Page navigation
Previous Page
Previous
1
…
18
19
20
21
22
…
25
Next Page
Next
Home
Dinner
Appetizer
Desserts
Drinks
About
Contact
Privacy Policy
Toggle Menu Close
Search for:
Search

![To make classic deviled eggs, gather these simple ingredients: - 6 large eggs - 3 tablespoons creamy mayonnaise - 1 teaspoon Dijon mustard - 1 teaspoon apple cider vinegar - 1/4 teaspoon fine salt - 1/4 teaspoon smoked paprika (plus extra for garnish) - Fresh chives, finely chopped (for garnish) You can add some extra flavor to your deviled eggs with these fun options: - A few dashes of your favorite hot sauce - Pickle relish for a tangy twist - Chopped olives for a salty kick - Crumbled bacon for a smoky crunch Having the right tools makes cooking easier. Here’s what you’ll need: - Medium-sized saucepan - Large bowl for ice water - Sharp knife for slicing - Mixing bowl for the yolk filling - Fork for mashing yolks - Piping bag with a star tip (optional) - Serving platter for presentation These ingredients and tools will set you up for a delicious batch of deviled eggs. For the full recipe and instructions, check out the [Full Recipe]. To start, you need six large eggs. Place them in a medium saucepan. Cover the eggs with cold water by at least one inch. Set the heat to medium-high and watch for a boil. When the water bubbles, cover the pot with a lid. Turn off the heat and let the eggs sit for ten to twelve minutes. This resting time will cook the yolks just right. After that, move the eggs to a bowl of ice water. Let them cool for at least five minutes. This step makes peeling easier and keeps the eggs fresh. Once the eggs are cool, gently tap each one on a flat surface. Roll the eggs to crack the shells, then peel them under running water. This helps remove the shells cleanly. Slice each egg in half lengthwise. Carefully take out the yolks and put them in a mixing bowl. Set the empty egg whites aside on a serving platter. Now, mash the yolks with a fork until they are crumbly. Add three tablespoons of creamy mayonnaise, one teaspoon of Dijon mustard, one teaspoon of apple cider vinegar, a quarter teaspoon of fine salt, and a quarter teaspoon of smoked paprika. Mix until the filling is smooth. If you like spice, add a few dashes of your favorite hot sauce. Next, it’s time to fill the egg whites. You can use a spoon or a piping bag. If you use a piping bag with a star tip, it will look fancy. Fill each hollowed egg white with the yolk mixture. Make sure to fill them well. To finish, sprinkle extra smoked paprika on top for color. Chop some fresh chives and add them as a garnish. This adds a nice touch and fresh flavor. Now you have a perfect batch of classic deviled eggs! For more details, refer to the Full Recipe. To get the best hard-boiled eggs, start with fresh eggs. Place the eggs in a saucepan and cover them with cold water. Bring the water to a rolling boil over medium-high heat. Once boiling, cover the pot and turn off the heat. Let the eggs sit for 10 to 12 minutes. This method gives you a creamy yolk with no green ring. After cooking, cool the eggs quickly in ice water. This step makes peeling easier. For a creamy filling, mash the yolks well with a fork. The more you mash, the smoother the mix. Add the mayonnaise, mustard, vinegar, and spices slowly. Mix until everything blends perfectly. If you want a spicy twist, add hot sauce to taste. For a more gourmet touch, consider using a piping bag. It will make the filling look fancy and neat. Presentation is key for deviled eggs. Arrange them on a colorful platter for a festive look. You can sprinkle extra smoked paprika on top for color. Adding finely chopped chives gives a fresh touch. For an extra pop, consider garnishing with microgreens or edible flowers. These small touches will impress your guests and make your dish stand out. For more details on making these delightful eggs, check the Full Recipe. {{image_4}} To add heat, mix some hot sauce into the yolk filling. You can use any hot sauce you like. Sriracha gives a sweet and spicy kick. For a smoky flavor, try chipotle sauce. Adjust the amount to suit your taste. You can also add diced jalapeños for texture and extra spice. If you want to skip the classic flavors, try avocado instead of mayo. Mash ripe avocado with the yolks. This adds creaminess and a fresh flavor. You can also mix in Greek yogurt for a tangy twist. For a herbal note, add finely chopped herbs like dill or parsley. Get creative with your deviled eggs! You can mix in ingredients like bacon bits for crunch. A hint of curry powder adds warmth and a new taste. For a sweet touch, mix in a little honey or relish. Try adding lemon zest for a bright flavor boost. Each twist gives your deviled eggs a new personality. For the full recipe, check out Devilishly Delectable Deviled Eggs. Store leftover deviled eggs in an airtight container. This keeps them fresh and safe to eat. Place a piece of plastic wrap over the filling to avoid drying out. You can also place a damp paper towel on top to help maintain moisture. Consume deviled eggs within three days for the best taste. For fresh deviled eggs, follow these tips: - Keep eggs in their shells until you're ready to cook. - Use the freshest eggs possible; check the expiration date. - After making the filling, store it separately from the egg whites if you don't serve right away. This keeps both parts fresh longer. - Refrigerate eggs promptly after cooking; don’t leave them out for more than two hours. Freezing deviled eggs is not the best option. The texture changes, making them watery upon thawing. If you want to freeze the filling, do so in a sealed bag. When you're ready to use it, thaw in the fridge overnight. Then, refill fresh egg whites and serve. Enjoy your eggs fresh for the best flavor! For detailed steps, check the Full Recipe. The prep time for Classic Deviled Eggs is about 15 minutes. You can easily manage this time. While the eggs cook, you can gather your other ingredients. This helps to keep things quick and easy. Yes, you can make deviled eggs ahead of time. Prepare them a day before your event. Just store them in the fridge until you are ready to serve. This keeps them fresh and tasty. If you want to skip mayonnaise, try using Greek yogurt. It adds creaminess and a tangy flavor. Another option is avocado, which gives a smooth texture. You could also use sour cream for a rich taste. Each option brings its unique twist to the classic recipe. For the full recipe, check out my detailed instructions. Deviled eggs are easy and fun to make. We covered the classic recipe, tips, and fun variations. Remember to use fresh eggs for the best taste. You can try adding flavors like spices or herbs for a twist. Store them properly to keep them fresh. Enjoy your deviled eggs at your next gathering. They are sure to impress everyone!](https://joymealplan.com/wp-content/uploads/2025/06/26f62450-2f64-4ac8-86b4-50d05502cb9e-768x768.webp)