Skip to content
About
Contact
Cookie Policy
Copyright Policy
Disclaimer
Search
Home
Dinner
Appetizer
Desserts
Drinks
About
Contact
Privacy Policy
Toggle Menu
Home
/
Desserts
- Page 21
Desserts
Buttery Lemon Blueberry Loaf Delightful and Flavorful
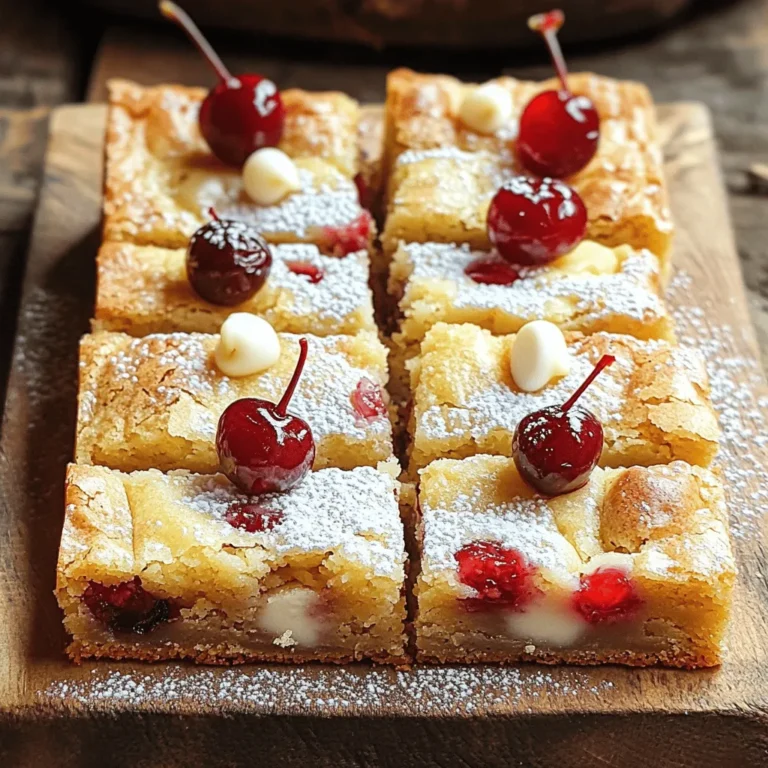
Cherry White Chocolate Blondies Irresistible and Tasty
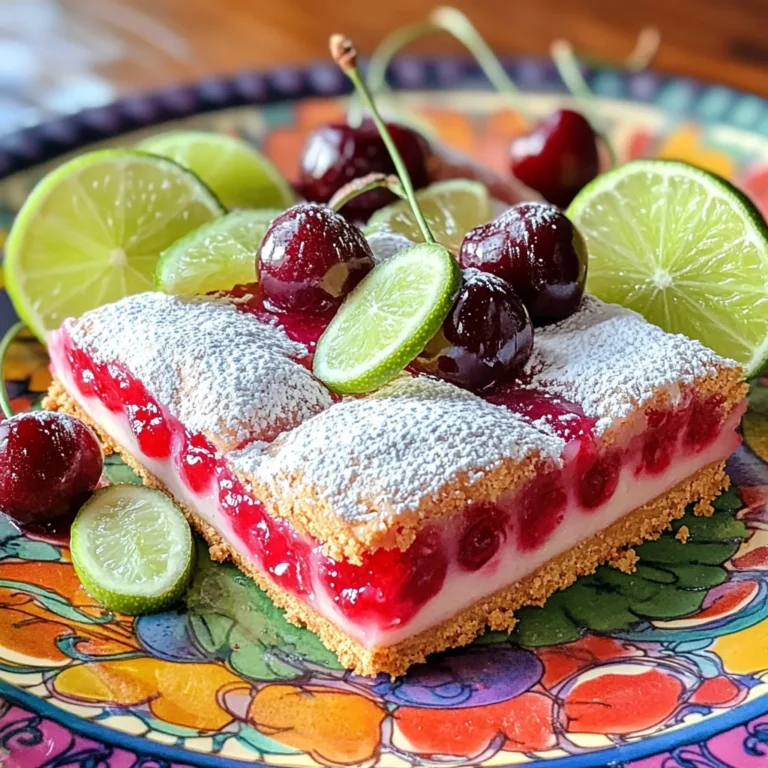
Cherry Limeade Bars Refreshing and Easy Treat
Cherry Cream Cheese Danish Delightful and Simple Treat
Cherry Greek Yogurt Parfaits Delicious Layered Treat
Lemon Blueberry Scones Flaky and Flavorful Treat
No Bake Chocolate Oat Bars Easy and Delicious Treat
Vegan Chocolate Chia Pudding Simple and Delicious Treat
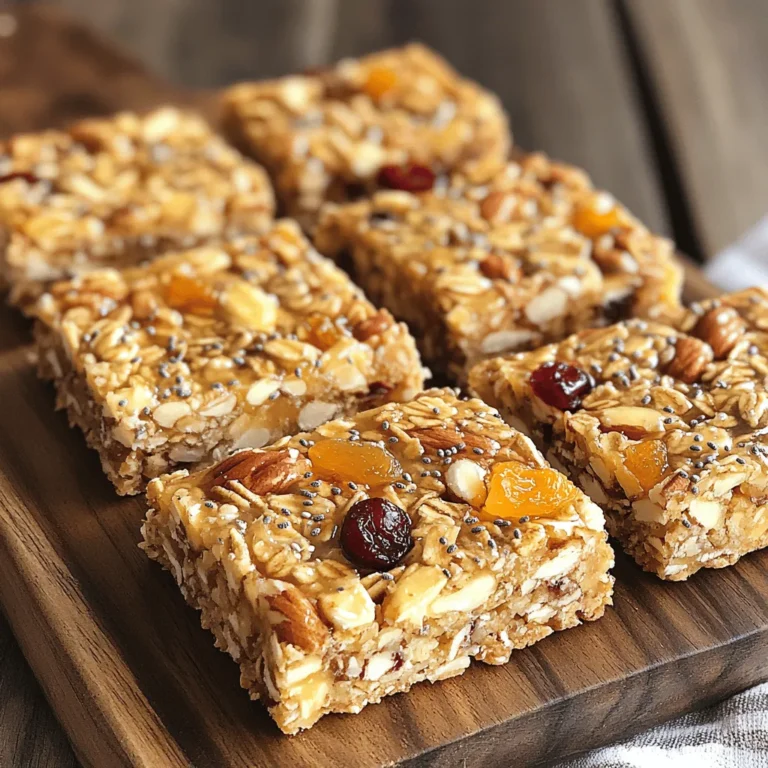
Homemade Granola Bars Tasty and Healthy Snack Idea
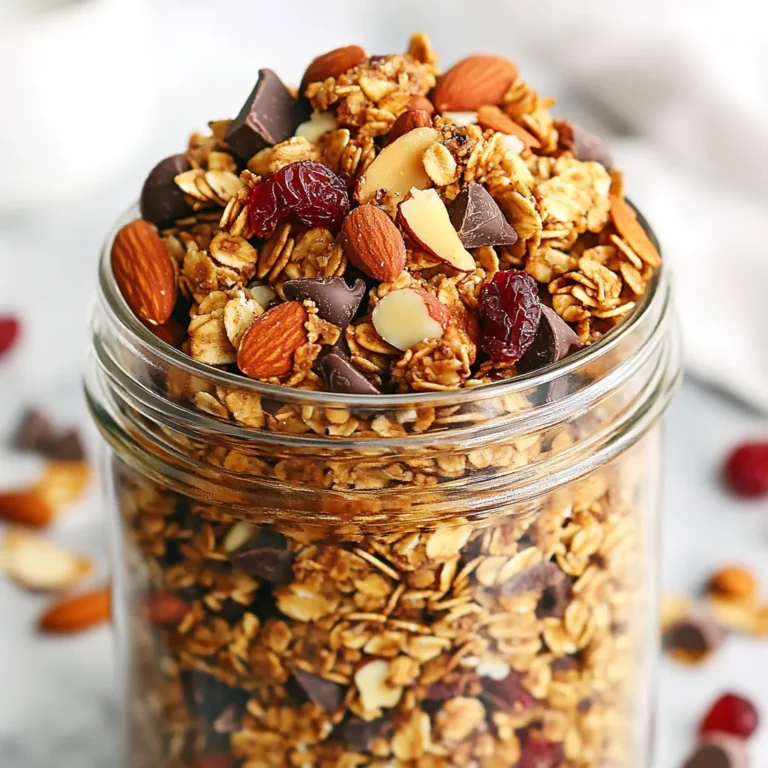
Cranberry Chocolate Granola Clusters Tasty Snack Recipe
Page navigation
Previous Page
Previous
1
…
19
20
21
22
23
…
34
Next Page
Next
Home
Dinner
Appetizer
Desserts
Drinks
About
Contact
Privacy Policy
Toggle Menu Close
Search for:
Search

![- 1 ½ cups all-purpose flour - 1 teaspoon baking powder - ½ teaspoon baking soda - ¼ teaspoon salt - ½ cup unsalted butter, softened - 1 cup granulated sugar - 2 large eggs, room temperature - Zest of 1 lemon - 2 tablespoons lemon juice - ½ teaspoon vanilla extract - ½ cup Greek yogurt - 1 cup fresh blueberries - 1 tablespoon flour (for coating blueberries) Gather these ingredients before you start baking. They are the stars of this loaf. The butter gives it a rich taste while the lemon adds brightness. The blueberries bring sweetness and color. Make sure your butter is softened. It helps mix well with sugar. Room temperature eggs also blend better. The Greek yogurt adds moisture and keeps the loaf fluffy. The flour, baking powder, baking soda, and salt work together to give the loaf structure. The lemon zest and juice infuse a fresh, zesty flavor. Coating the blueberries in flour helps them stay suspended in the batter. This step is key to a beautiful loaf. You will love how all these flavors come together. For the full recipe and instructions, check out the [Full Recipe]. - Preheat your oven to 350°F (175°C). - Grease a 9x5-inch loaf pan with butter or cooking spray. - Lightly dust the pan with flour, or line it with parchment paper. - In a medium bowl, whisk together 1 ½ cups of all-purpose flour, 1 teaspoon of baking powder, ½ teaspoon of baking soda, and ¼ teaspoon of salt. - In a large bowl, cream together ½ cup of softened butter and 1 cup of granulated sugar until light and fluffy, about 2 to 3 minutes. - Add 2 large eggs, one at a time, mixing well after each. Stir in the zest of 1 lemon, 2 tablespoons of lemon juice, and ½ teaspoon of vanilla extract until well combined. - Gradually add the dry mixture to the wet ingredients, alternating with ½ cup of Greek yogurt. Start and end with the flour mixture. Mix gently to combine without overmixing. - In a small bowl, toss 1 cup of fresh blueberries with 1 tablespoon of flour to coat them. - Fold the blueberries into the batter gently, ensuring they are spread evenly throughout. - Pour the batter into your prepared loaf pan, smoothing the top if needed. Bake for 50 to 60 minutes, or until a toothpick inserted in the center comes out clean. - If the top browns too quickly, cover it with aluminum foil. Allow the loaf to cool in the pan for about 10 minutes. Then, transfer it to a wire rack to cool completely. For more details on the ingredients and instructions, check the Full Recipe. To make a great loaf, avoid overmixing the batter. This keeps your loaf light and fluffy. When you mix the wet and dry ingredients, do it gently. Also, use eggs and butter at room temperature. This helps them blend better and gives your loaf a nice rise. For a beautiful presentation, slice the loaf neatly. Dust each slice with powdered sugar. Add a few lemon slices beside the loaf. This adds color and a fresh look. Serve your loaf with tea or coffee. The flavors of lemon and blueberry pair well with these drinks. If your loaf is overcooked, it may be dry. Lower the oven temperature next time. Check it a few minutes earlier to avoid this. If it’s undercooked, bake it longer. Insert a toothpick into the center; it should come out clean. For a moist loaf, make sure to measure your ingredients correctly. Adding Greek yogurt helps keep it tender. Follow the Full Recipe for detailed steps and tips. {{image_4}} You can make this loaf even more fun! Try adding other fruits like raspberries or strawberries. These fruits will give a nice twist to the flavor. Spices like cinnamon or nutmeg can also add warmth. Just a pinch can change the whole taste. If you need a gluten-free version, use almond flour or coconut flour instead of all-purpose flour. For a dairy-free option, swap Greek yogurt with coconut yogurt. You can also use vegan butter instead of regular butter. These small changes still keep the loaf tasty. In summer, add more citrus flavors. Try using orange zest or juice for a bright note. For the holidays, consider adding cranberries or spices like ginger and cloves. These seasonal changes will make your loaf fit the time of year. Mix and match these ideas to create your perfect buttery lemon blueberry loaf. For the complete recipe, check out the Full Recipe. Enjoy baking! To keep your buttery lemon blueberry loaf fresh, store it in an airtight container. This prevents moisture loss and keeps the loaf soft. You can also wrap it in plastic wrap before placing it in the container for extra protection. If you have leftover slices, I suggest placing parchment paper between them. This helps avoid sticking. For the best storage, use a glass or plastic container with a tight seal. Avoid metal containers, as they can affect the loaf's flavor. Keep the container at room temperature, away from direct sunlight. If you want to freeze the loaf, wrap it tightly in plastic wrap. After that, place it in a freezer-safe bag. Make sure to remove as much air as possible to prevent freezer burn. You can freeze the loaf for up to three months. When you're ready to enjoy it, thaw the loaf in the fridge overnight. For the best texture, let it sit at room temperature for a few hours after thawing before slicing. This helps restore the moisture lost during freezing. At room temperature, the buttery lemon blueberry loaf stays fresh for about three days. If you store it properly, it can last up to a week in the fridge. Watch for signs of spoilage, such as an off smell or mold. If you notice any changes in texture, it’s best to discard the loaf. Enjoy every slice while it’s fresh for the best flavor! Yes, you can use frozen blueberries. They add great flavor. Just follow these tips for best results: - Do not thaw them before adding to the batter. This helps keep the color bright. - Coat them in flour before mixing in. This keeps them from sinking to the bottom. - Reduce baking time slightly. Frozen berries can add moisture, so check for doneness a few minutes early. If you don’t have Greek yogurt, here are some great options: - Sour cream works well and gives a nice tang. - Plain yogurt can be used, but choose a thicker variety if possible. - Cottage cheese blended smooth can also work as a substitute. You can check for doneness using these signs: - The top should be golden brown and spring back when touched. - A toothpick inserted in the center should come out clean or with a few moist crumbs. - The loaf should pull away from the sides of the pan slightly. Absolutely! Here’s how to adjust: - For mini loaves, divide the batter into smaller pans. Bake for about 25-30 minutes. - For muffins, fill each muffin cup about 2/3 full. Bake for 18-22 minutes. Keep an eye on them as baking times may vary. Serving this loaf can elevate your experience: - Slice it neatly and place it on a wooden board for a rustic look. - Dust with powdered sugar for a sweet touch. - Add lemon slices or fresh blueberries on the side for color. Pair it with tea or coffee for a delightful treat. Try the Full Recipe to create your own buttery lemon blueberry loaf! This blog post covered everything you need for a delicious lemon blueberry loaf. We went through the simple ingredients, step-by-step instructions, and helpful tips. You learned about variations, storage methods, and common questions. Baking this loaf is easy and fun. Enjoy the fresh taste and share it with others. Dive in and let your baking journey begin!](https://joymealplan.com/wp-content/uploads/2025/07/6f5180c5-8cb8-4276-b09e-ab74a4ecf0f2-768x768.webp)

![- 2 cups Greek yogurt - 1 cup fresh cherries, pitted and halved - 1/2 cup granola Greek yogurt serves as the base. It gives the parfait its creamy texture. You can use plain yogurt for a tangy taste or vanilla for sweetness. Fresh cherries add a burst of flavor. They are juicy and sweet, making them perfect for this dish. Granola adds a nice crunch. Choose your favorite variety to enhance the flavor. - 2 tablespoons honey or maple syrup - 1 teaspoon vanilla extract - A pinch of cinnamon You can sweeten the yogurt with honey or maple syrup. Adjust the sweetness to your liking. Adding vanilla extract brings out a warm aroma. A pinch of cinnamon can add a cozy spice. These add-ins can elevate the yogurt's flavor, making it even more delicious. - Fresh mint leaves - Additional toppings Garnishing with fresh mint makes the parfait look pretty. It adds a pop of color and freshness. You may also add more toppings like nuts or seeds for extra texture. These simple touches can make your parfait stand out even more. For the full recipe, check the section above! - In a mixing bowl, combine 2 cups of Greek yogurt, 2 tablespoons of honey, 1 teaspoon of vanilla extract, and a pinch of cinnamon if you like. - Stir the ingredients well until the mixture is smooth and creamy. This step is key for a rich texture. - Start your parfait by adding a generous spoonful of the yogurt mixture at the bottom of your serving glass. - Next, add a layer of the halved fresh cherries on top of the yogurt. Their sweetness will shine through. - Follow this with a sprinkle of granola. This adds a nice crunch to each bite. - Repeat the layering process. Add another layer of yogurt, then more cherries and granola. - Keep layering until your glass is full, ensuring the top showcases a colorful mix of cherries and granola. - Before serving, place a fresh mint leaf on top. This not only looks good but adds a fresh touch. For the complete recipe, check the [Full Recipe]. For the best Cherry Greek Yogurt Parfaits, start with the yogurt. You can choose plain or flavored Greek yogurt. Plain yogurt gives a nice tartness. Flavored options, like vanilla, add a sweet touch. Next, consider fat content. Full-fat yogurt is creamy and rich. Low-fat yogurt has fewer calories but is still tasty. Pick what suits your taste and diet goals. You might want to adjust sweetness levels in your parfait. Adding honey or maple syrup can help. Start with a small amount and taste as you go. You can always add more if needed. Using seasonal fruits can boost flavor too. Fresh cherries are perfect for summer. In fall, consider apples or pears. In winter, try citrus fruits for a zesty twist. Your glassware matters for presentation. Tall, clear glasses show off the layers well. You can also use small jars for a rustic feel. Make sure they are clean and dry before use. For accompaniments, consider serving with herbal tea or coffee. A light snack like nuts or dark chocolate pairs nicely too. These options round out the experience and make it special. For the full recipe, check the Cherry Greek Yogurt Parfaits 🥄 section above. {{image_4}} You can switch up the fruit in your parfaits. Berries are a great choice. Strawberries, blueberries, and raspberries work well. They all add a burst of flavor. You can also use stone fruits like peaches or plums. These fruits bring a sweet and juicy taste to your dish. If you need vegan options, use plant-based yogurt. Almond or coconut yogurt is tasty. For granola, look for gluten-free brands. They add crunch without the gluten. These swaps make the parfait friendly for more diets. Want to change the flavor? Add spices like nutmeg or ginger. A few drops of almond extract can also enhance taste. For a warm cherry flavor, cook the cherries down into a compote. Just simmer them with a bit of sugar until soft. Add this layer for a delicious twist. The Cherry Greek Yogurt Parfaits can last in the fridge for up to three days. Store them in an airtight container to keep them fresh. Glass jars work well because they seal tightly and let you see the layers. You can use plastic containers too, but make sure they close securely. You can freeze these parfaits, but it may change the texture. The yogurt can become icy, and the granola might get soggy. If you decide to freeze, layer the yogurt and cherries without granola. This way, you can add fresh granola after thawing. When ready to eat, let the parfait thaw in the fridge overnight. Serve it once it's soft, and add the granola just before enjoying. To keep your parfait crunchy, store granola separately until serving. Mix it in right before you eat. This keeps it from getting soggy. Also, layer the parfaits carefully. This helps maintain the visual appeal and keeps the layers fresh longer. To make Cherry Greek Yogurt Parfaits, follow these simple steps: 1. Start with Greek yogurt in a bowl. 2. Mix in honey or maple syrup, vanilla extract, and a pinch of cinnamon. 3. Stir until the mixture is smooth and creamy. 4. Choose serving glasses and add a layer of yogurt at the bottom. 5. Add fresh cherries on top of the yogurt. 6. Sprinkle granola for some crunch. 7. Repeat these layers until glasses are full. 8. Finish with a mint leaf on top for a nice touch. This method gives you a tasty treat with layers of flavor and texture. You can find the Full Recipe for the exact amounts and instructions. Greek yogurt is a powerhouse of nutrition. Here are some key benefits: - High in Protein: Greek yogurt has more protein than regular yogurt. This helps you feel full longer. - Low in Sugar: It usually contains less sugar than other yogurts. This is great for your health. - Rich in Calcium: Calcium keeps your bones strong and healthy. - Contains Probiotics: These are good bacteria that help digestion. They can also boost your immune system. Eating Greek yogurt is a smart choice for a healthy diet. Yes, you can prepare Cherry Greek Yogurt Parfaits ahead of time. Here are some tips: - Layer Carefully: Build your parfaits in jars. This keeps layers intact. - Use Airtight Containers: Store parfaits in airtight jars to lock in freshness. - Add Granola Later: Keep granola separate until serving. This helps it stay crunchy. Making these parfaits in advance saves time and lets you enjoy a quick, healthy treat. In this post, we explored how to make delicious Cherry Greek Yogurt Parfaits. We detailed the main ingredients, including Greek yogurt, fresh cherries, and granola. You learned layering techniques and garnishes to enhance presentation. We also discussed tips for choosing yogurt and flavoring your parfaits. To wrap up, this recipe is simple and adaptable. Enjoy customizing it to fit your taste. Perfect for breakfast or a snack, these parfaits will impress everyone.](https://joymealplan.com/wp-content/uploads/2025/07/65733fee-5e95-4d8b-a9d5-f01ab2a2564e-768x768.webp)