Skip to content
About
Contact
Cookie Policy
Copyright Policy
Disclaimer
Search
Home
Dinner
Appetizer
Desserts
Drinks
About
Contact
Privacy Policy
Toggle Menu
Home
/
Desserts
- Page 23
Desserts
Healthy Banana Oat Pancakes Simple and Tasty Recipe
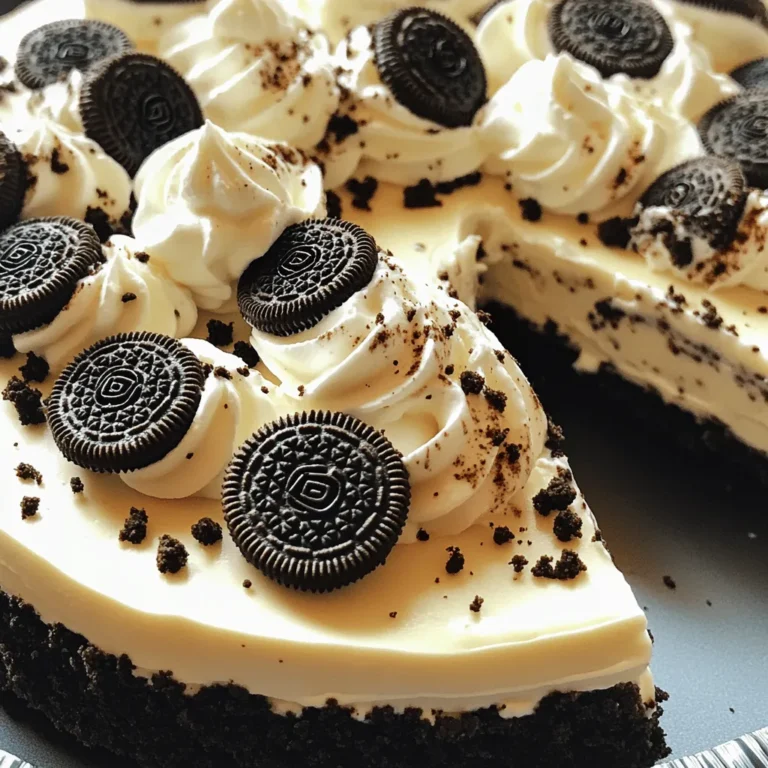
No-Bake Oreo Cheesecake Easy and Delicious Dessert
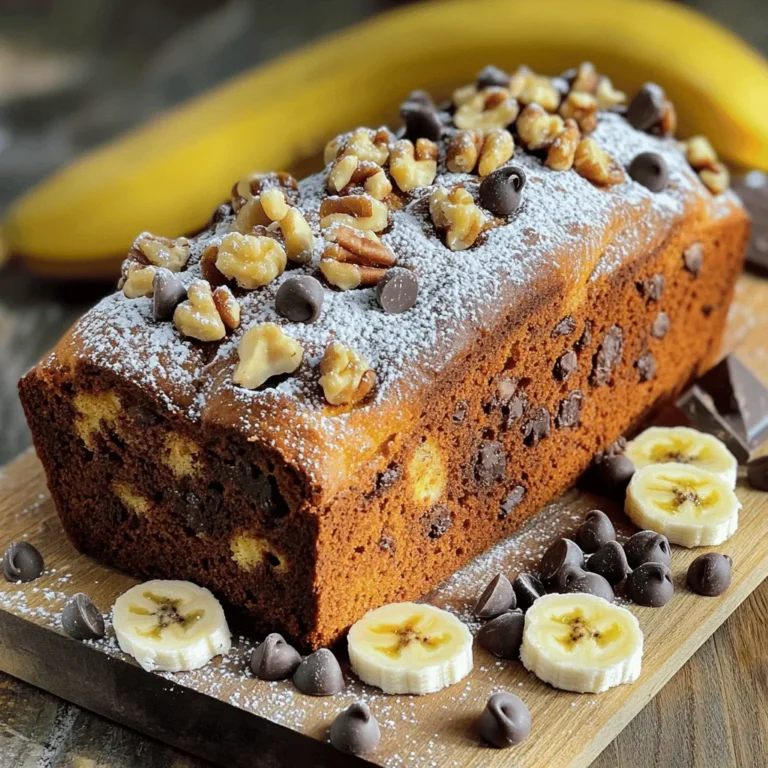
Chocolate Chip Banana Bread Delicious and Easy Recipe
Lemon Blueberry Scones Fresh and Flavorful Treat
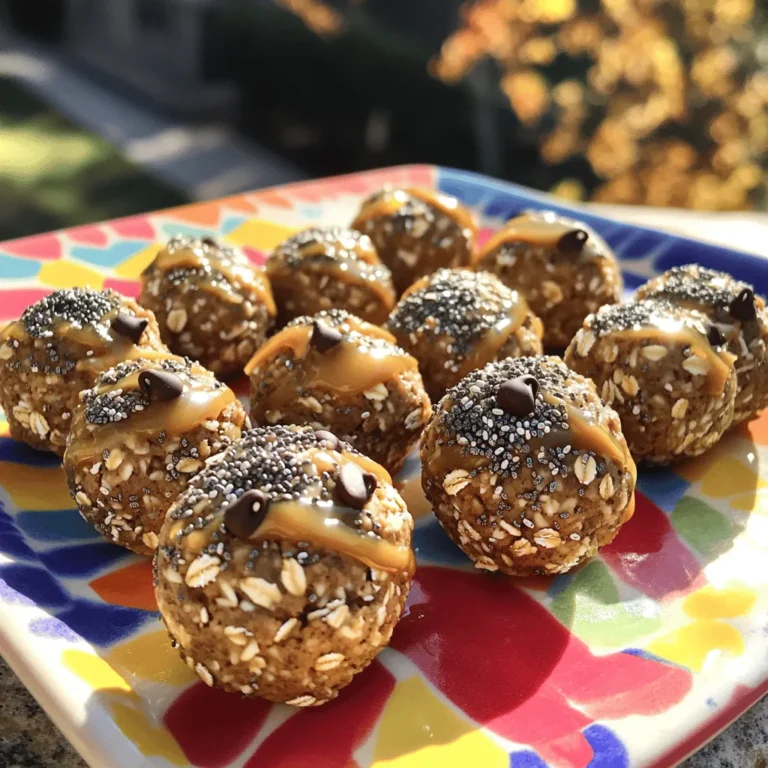
Healthy Peanut Butter Energy Bites Packed with Flavor
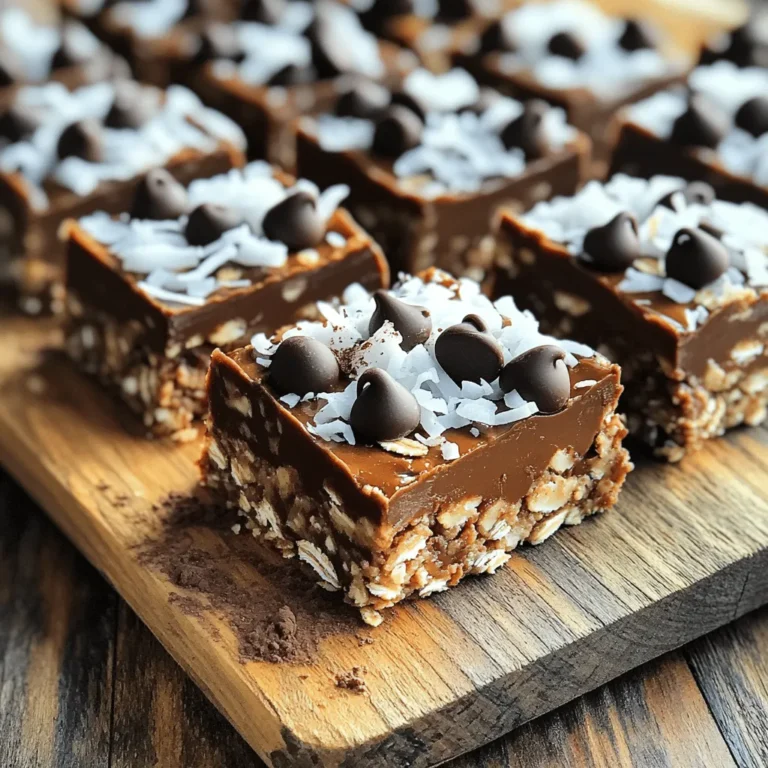
No-Bake Chocolate Oat Bars Crunchy and Tasty Treat
S’mores Cookie Bars Irresistible Sweet Treats Recipe
Strawberry Shortcake Trifle Delightful Summer Dessert
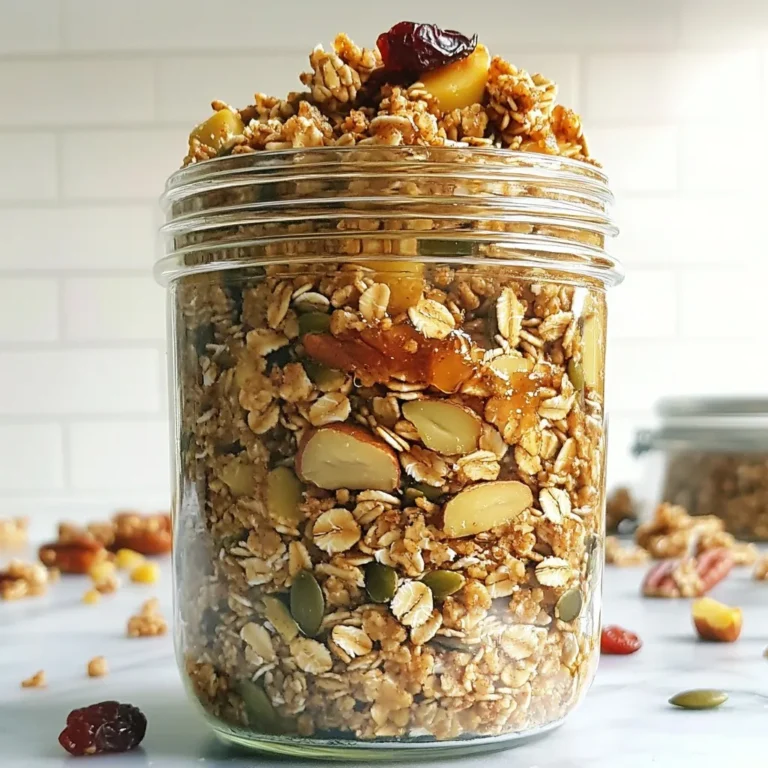
Gingerbread Granola Flavorful and Nutritious Snack
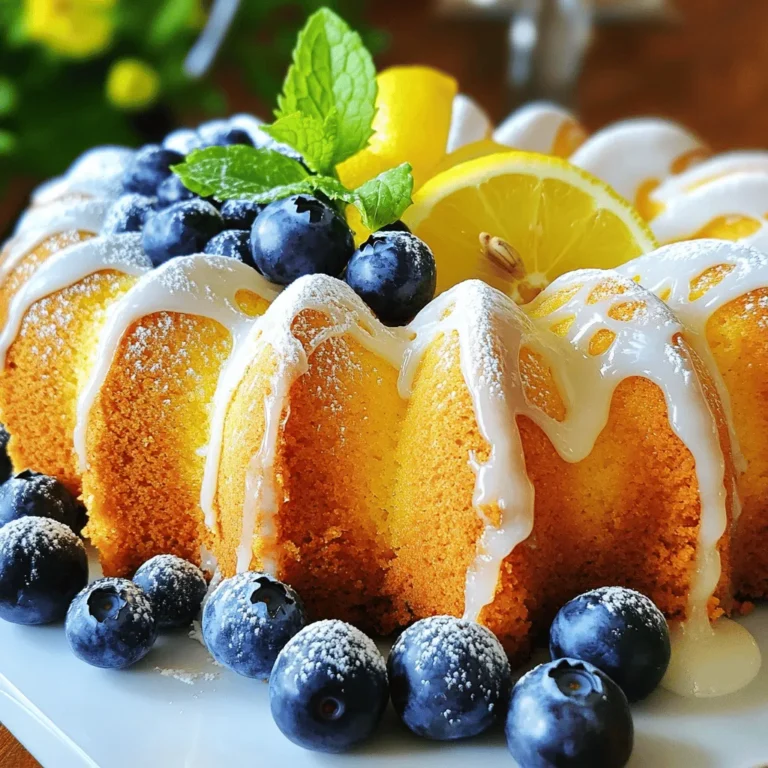
Lemon Blueberry Pound Cake Delightfully Light Recipe
Page navigation
Previous Page
Previous
1
…
21
22
23
24
25
…
34
Next Page
Next
Home
Dinner
Appetizer
Desserts
Drinks
About
Contact
Privacy Policy
Toggle Menu Close
Search for:
Search

![- 1 cup rolled oats - 2 ripe bananas - 1 cup almond milk - 1 teaspoon baking powder - 1 teaspoon vanilla extract - 1 tablespoon honey or maple syrup (optional) - 1/2 teaspoon ground cinnamon - Pinch of salt - Coconut oil or cooking spray for greasing Using rolled oats is key. They give your pancakes a hearty texture. Bananas add natural sweetness and moisture. Almond milk keeps it light and dairy-free. If you want sweetness, use honey or maple syrup. A touch of cinnamon gives warmth and flavor. Coconut oil or cooking spray is important to keep the pancakes from sticking. Choose either based on your preference. This recipe is simple. You can find the full recipe above to guide you through the steps. Enjoy making these delicious pancakes! Start by blending 1 cup of rolled oats. You want to blend them until they are fine and powdery. This oat flour acts as the main ingredient. Next, add 2 ripe bananas that you have mashed well. Then, pour in 1 cup of almond milk. This mix gives your pancakes a nice texture. Now it’s time to make the batter. Add 1 teaspoon of baking powder, 1 teaspoon of vanilla extract, and 1 tablespoon of honey or maple syrup if you want them sweeter. Don’t forget to add 1/2 teaspoon of ground cinnamon and a pinch of salt. Blend everything together until it is smooth and uniform. The batter should look nice and creamy. Let the batter rest for about 5-10 minutes. This helps it thicken. While the batter rests, heat a skillet over medium heat. Grease it with coconut oil or cooking spray to prevent sticking. Once hot, pour about 1/4 cup of batter for each pancake. Cook until bubbles form on top, which takes about 2-3 minutes. Then, flip them over. Cook for another 2-3 minutes until they are golden brown. Repeat this with the rest of the batter. You can find the full recipe [here]. To get the best texture, let the batter rest for 5-10 minutes. This helps it thicken. A thicker batter makes fluffier pancakes. Adjust the heat on your skillet. Cook on medium heat to avoid burning. If the pan is too hot, the outside cooks fast while the inside stays raw. You can change the sweetness. Instead of honey, try maple syrup or agave. Each will give a unique taste. For more flavor, think about adding spices. Nutmeg and ginger are great choices. They add warmth and depth. A pinch of each can really enhance the pancakes. For a beautiful plate, stack your pancakes high. Top them with fresh banana slices. A drizzle of honey or syrup makes them shine. You can also sprinkle crunchy nuts on top. For a creamy touch, serve with Greek yogurt. It adds richness and pairs well with the pancakes. {{image_4}} You can easily make these pancakes gluten-free. Use certified gluten-free oats. This ensures you avoid cross-contamination. Many brands offer oats that fit this need. If you are lactose intolerant, try almond milk or coconut milk. Both options work great in this recipe. They add a nice creaminess without the dairy. Want to add more fun to your pancakes? Toss in some chocolate chips or nuts. They give a sweet crunch that’s hard to resist. You can also use walnuts or pecans for added texture. You might like to incorporate fruit purees too. Applesauce or pumpkin puree can boost flavor and moisture. Vanilla or almond extract can add depth to the taste. Meal prep is easy with these pancakes. You can make a big batch and freeze extras. Just stack them with parchment paper between each pancake. This keeps them from sticking together. These pancakes pair well with yogurt or fresh fruit. A dollop of Greek yogurt adds protein. Fresh berries or banana slices on top make a lovely presentation. For the full recipe, check it out above. Enjoy your delicious and healthy banana oat pancakes! To keep your pancakes fresh, store them properly. If you have leftover pancakes, place them in an airtight container. You can refrigerate them for up to three days. This keeps them soft and tasty. For longer storage, freeze your pancakes. Lay them flat on a baking sheet. Once they freeze, transfer them to a freezer bag. This way, they won't stick together. You can freeze them for up to three months. When you're ready to enjoy your pancakes again, reheating is simple. The best way is to use a toaster or a skillet. If you choose a skillet, heat it on low. Add a tiny bit of coconut oil or spray. Place the pancakes in the skillet for about one minute on each side. This keeps them warm and fluffy. If you're in a hurry, you can use the microwave. Heat the pancakes for about 20-30 seconds. But be careful, as this may make them a bit chewy. For the best taste, always try to reheat them gently. Enjoy your Healthy Banana Oat Pancakes! For the full recipe, check out the details above. Yes, you can use quick oats. Quick oats are thinner and cook faster. This can affect the texture of your pancakes. Rolled oats give a heartier feel. If you use quick oats, your pancakes may be softer. You might also need less liquid since quick oats absorb liquid differently. Experiment and see what you like best. To make these pancakes vegan, swap out the milk and honey. Use almond milk or any plant-based milk. For sweetness, try maple syrup instead of honey. You can skip the egg, as this recipe is already egg-free. These changes keep the pancakes tasty and plant-based. If the batter is too thick, add a bit more milk to loosen it. Start with one tablespoon at a time. Blend it again after each addition. This helps keep the flavor strong while adjusting the texture. A good batter should pour easily, but not be runny. These pancakes last about 3 to 5 days in the fridge. Keep them in an airtight container to stay fresh. You can reheat them in the microwave or on a skillet. Just make sure they are heated through for the best taste. Yes, you can make the batter ahead of time. Store it in the fridge for up to 24 hours. If you wait longer, the oats may absorb too much liquid. Just add a little milk before cooking to get the right consistency. This makes breakfast quick and easy! For the full recipe, check out the detailed guide. To make these healthy banana oat pancakes, start by blending the rolled oats until they turn into a fine flour. Then mix in the mashed bananas and almond milk. This creates a smooth batter. It is important to let the batter rest for 5-10 minutes. This helps thicken the batter and improves texture. Here are some key points to remember for successful pancakes: - Always blend the oats until fine for the best texture. - Use ripe bananas for natural sweetness. - Let the batter rest; it makes a big difference. - Grease your skillet well to prevent sticking. - Cook until bubbles form, then flip carefully. These tips will help you create pancakes that are light, fluffy, and full of flavor. Enjoy making them! You learned about making delicious pancakes with simple, healthy ingredients. We covered the essential items, step-by-step cooking instructions, and helpful tips. We also explored variations to fit diets and preferences. Lastly, we discussed how to store leftovers and answered common questions. With these insights, you can create tasty pancakes that everyone will enjoy. Get cooking and delight your family or friends with these easy-to-make treats!](https://joymealplan.com/wp-content/uploads/2025/07/586e6978-884d-467f-992a-f783d71f0243-768x768.webp)
![- 2 cups all-purpose flour - 1/4 cup granulated sugar - 1 tablespoon baking powder - 1/2 teaspoon salt - 1/2 cup unsalted butter, cold and cut into small cubes - Zest of 1 large lemon - 1/2 cup fresh blueberries (or frozen blueberries, thawed and drained) - 1/2 cup heavy cream - 1 large egg, at room temperature - 1 teaspoon pure vanilla extract - 1 tablespoon freshly squeezed lemon juice The ingredients are simple but full of flavor. I love using fresh blueberries for their burst of sweetness. If you can't find fresh ones, frozen work well too. Just make sure to thaw and drain them first. The zest of lemon adds a bright touch that pairs perfectly with the blueberries. It’s key to use cold butter. This helps create flaky layers in the scones. The heavy cream gives richness, while the egg adds structure. - You can use whole milk or buttermilk instead of heavy cream. - For a different sweetness, try brown sugar or honey. - Feel free to swap blueberries for other fruits like raspberries or cranberries. These variations let you play with flavors. It’s fun to experiment and find your favorite twist! If you want a vegan option, replace the egg with a flaxseed mixture. Just combine one tablespoon of flaxseed meal with three tablespoons of water, and let it sit for a few minutes until it thickens. You can find the full recipe for these delightful scones in the section above. 1. Preheat your oven to 400°F (200°C). Line a baking sheet with parchment paper. 2. In a large bowl, mix 2 cups of all-purpose flour, 1/4 cup of granulated sugar, 1 tablespoon of baking powder, and 1/2 teaspoon of salt. Stir well with a whisk. 3. Add 1/2 cup of cold, cubed unsalted butter to the flour mix. Use your fingers or a pastry cutter. Work it until it looks like coarse crumbs, with some larger pieces remaining. 1. Gently fold in the zest of 1 large lemon and 1/2 cup of fresh blueberries. Be careful not to crush them. 2. In a separate bowl, whisk together 1/2 cup of heavy cream, 1 large egg, 1 teaspoon of pure vanilla extract, and 1 tablespoon of freshly squeezed lemon juice. Mix until smooth. 3. Pour the wet mix into the dry mix. Stir with a spatula until just combined. The dough should be slightly sticky. 1. Transfer the dough to a floured surface. Knead it lightly about 3 to 4 times until it comes together. Form it into a circle about 1-inch thick. 2. Cut the dough into 8 wedges, like slicing a pizza. Place them on the lined baking sheet, leaving space between each scone. 3. Bake for 15-20 minutes. Check for a golden brown top and use a toothpick to see if it comes out clean. 4. Let the scones cool on the baking sheet for 5 minutes. Then, move them to a wire rack to cool completely. For the complete recipe, check the Full Recipe section. To make great scones, start with cold butter. Cold butter helps create flaky layers. Cut it into small cubes before mixing. This keeps the butter pieces intact. When you mix, use a gentle touch. Overmixing can lead to tough scones. Mix just until combined; it’s okay if the dough is slightly sticky. To make your scones stand out, add spices or herbs. A pinch of cinnamon can bring warmth. Fresh basil or thyme can add a unique twist. For a glaze, mix powdered sugar with lemon juice. This adds a sweet and tangy finish. Serve your scones warm for the best taste. Serve your scones on a beautiful plate. Add a dusting of powdered sugar for flair. Pair them with clotted cream or butter for a rich experience. You can even add fresh berries on the side for color. A simple yet elegant display makes your scones shine. To get the full recipe, check out the Lemon Blueberry Dream Scones. {{image_4}} You can change the flavor of your scones easily. Try using other fruits like raspberries or cranberries. These fruits add a new twist to the classic recipe. You can also switch to citrus fruits. Instead of lemon, use orange or lime zest for a fresh taste. Each fruit brings its own unique flavor. Don't be afraid to experiment! If you need gluten-free scones, simply swap the all-purpose flour for a gluten-free blend. Many brands make great options that work well in baking. For a vegan version, replace the butter with coconut oil or a vegan butter. Use a plant-based milk instead of heavy cream. You can also use a flax egg to replace the regular egg. These changes can still yield tasty scones. Make your scones fun for special occasions! Add festive spices like cinnamon or nutmeg for fall events. For holidays, try adding a cranberry glaze. You can shape your scones into hearts for Valentine's Day or stars for the Fourth of July. These special touches make your treats stand out. You can find the full recipe to try these variations at home! To keep your scones fresh, store them in an airtight container. You can place parchment paper between layers to avoid sticking. This helps maintain their texture. If you have a lot, use a resealable bag. Make sure to squeeze out excess air. Your Lemon Blueberry Scones will stay tasty for up to three days at room temperature. When reheating scones, the goal is to keep them soft. You can use an oven or a microwave. For the oven, preheat it to 350°F (175°C). Wrap each scone in foil to keep them moist. Heat for about 10 minutes. If using the microwave, place a scone on a plate. Cover it with a damp paper towel. Microwave it for about 15-20 seconds. For longer storage, freezing is a great option. Wrap each scone tightly in plastic wrap. Then, place them in a freezer-safe bag. They can last up to three months. When you are ready to eat them, thaw in the fridge overnight. Then, reheat as mentioned above. Enjoy the fresh taste again! For the complete recipe, check out the [Full Recipe]. Can I make these Lemon Blueberry Scones ahead of time? Yes, you can prepare the dough and chill it. Wrap it in plastic wrap and store in the fridge overnight. Bake when you are ready. What is the best way to freeze scones? To freeze scones, bake them first. Let them cool, then place in an airtight bag. They stay fresh for about three months. How do I know when my scones are done baking? Scones are done when they turn golden brown. You can also insert a toothpick into the center. If it comes out clean, they are ready. Can I use frozen blueberries? Yes, frozen blueberries work well. Just make sure to thaw and drain them first. This helps avoid extra moisture in your scone dough. What should I do if my dough is too sticky? If your dough is sticky, add a bit more flour. Sprinkle a little at a time while mixing gently. You want it to be a soft dough, not too wet. Can I add more lemon zest for a stronger flavor? Absolutely! Adding more lemon zest gives a bright and fresh taste. Just be mindful not to overpower the blueberries. What other flavors pair well with lemon and blueberry? Lemon and blueberry go well with herbs like thyme or basil. You can also try adding a hint of almond extract for a unique twist. In this post, we explored how to make perfect Lemon Blueberry Scones. We covered ingredients, step-by-step instructions, essential tips, variations, and storage methods. With simple techniques, you can create delicious scones that impress everyone. Remember, using cold butter is key for the right texture. Experiment with flavors and enjoy your tasty treats. Now, go bake some scones and share them with friends and family!](https://joymealplan.com/wp-content/uploads/2025/07/84e54135-a0a0-42e2-a72a-4461fccf9179-768x768.webp)
![To make S’mores Cookie Bars, gather these key ingredients: - 1 cup unsalted butter, softened - 1 cup packed brown sugar - 1/2 cup granulated sugar - 2 large eggs - 1 teaspoon pure vanilla extract - 2 1/4 cups all-purpose flour - 1 teaspoon baking soda - 1/2 teaspoon salt - 1 cup semi-sweet or milk chocolate chips - 1 cup mini marshmallows - 3/4 cup crushed graham crackers - Additional chocolate chips and mini marshmallows for topping If you need swaps, here are a few ideas: - Use margarine instead of butter if needed. - Coconut sugar can replace brown sugar for a unique taste. - For a dairy-free option, try a plant-based butter and dairy-free chocolate chips. - You can also use large marshmallows cut into smaller pieces if mini ones are not available. When choosing your ingredients, consider these tips: - Select fresh butter for the best flavor. - Look for chocolate chips with a high cocoa content; they taste richer. - Check for freshness on your baking soda and flour. - Choose mini marshmallows that are soft and fluffy for the best texture. - For crushed graham crackers, buy a brand with simple, natural ingredients for the best taste. These ingredient insights will help you create the best S’mores Cookie Bars. Happy baking! 1. Preheat your oven to 350°F (175°C). 2. Prepare a 9x13 inch baking pan. You can grease it or line it with parchment paper for easy removal. 3. In a large bowl, cream 1 cup of softened butter, 1 cup of packed brown sugar, and 1/2 cup of granulated sugar. Beat until light and fluffy. 4. Add 2 large eggs, one at a time, and mix well after each addition. Stir in 1 teaspoon of pure vanilla extract. 5. In another bowl, mix together 2 1/4 cups of all-purpose flour, 1 teaspoon of baking soda, and 1/2 teaspoon of salt. 6. Gradually add the dry mix to the wet mix, stirring gently. Be careful not to overmix. 7. Fold in 1 cup of chocolate chips, 1 cup of mini marshmallows, and 3/4 cup of crushed graham crackers. Make sure they are evenly spread in the dough. 8. Take half of the cookie dough and spread it in the bottom of the pan. Press it down firmly. 9. Add a layer of chocolate chips and mini marshmallows over the dough. This will be your tasty filling. 10. With the remaining dough, dollop it over the filling. Gently spread it out, leaving some gaps for the marshmallows to peek through. 11. Top with extra chocolate chips and mini marshmallows. 12. Bake in the preheated oven for 25-30 minutes. Look for golden edges and a set center. 13. Once baked, let the bars cool in the pan for about 10 minutes. 14. Transfer the bars to a cutting board. Slice them into squares. 15. For the best experience, serve warm for a gooey bite or let them cool for firmer bars. You can even dust them with crushed graham crackers or serve with ice cream. This is a fun and easy way to enjoy S’mores in a cookie bar form. For the full recipe, check out the details above! To get the best texture for your S’mores cookie bars, focus on creaming the butter and sugars well. This step adds air to the dough, making it light. Don't overmix when adding the flour; this keeps the bars soft. Also, make sure to let your bars cool in the pan for a bit. This helps them set perfectly. One common mistake is overbaking. Keep an eye on the timer. The edges should look golden, but the center can be soft. Another mistake is not measuring the ingredients correctly. Use a kitchen scale when you can. Lastly, avoid pressing the dough too hard into the pan. You want a light touch for a better rise. To boost the flavor in your S’mores cookie bars, consider using dark chocolate instead of semi-sweet. It adds a richer taste. You can also mix in some toasted nuts for crunch. If you love a bit of spice, a pinch of cinnamon works wonders. Lastly, consider adding a dash of sea salt on top before baking. It enhances the sweetness and richness beautifully. For the full recipe, click here: [Full Recipe]. {{image_4}} You can elevate your S’mores cookie bars with gourmet ingredients. Try using high-quality chocolate, like dark chocolate or sea salt caramel chocolate. This gives a rich flavor that takes these bars to a new level. You can also add toasted coconut for a tropical twist. Another great idea is to sprinkle flaky sea salt on top right before serving. This adds a nice contrast to the sweetness. If you need a gluten-free option, you can easily adapt this recipe. Use gluten-free flour blends that measure cup-for-cup like regular flour. Make sure to check that your chocolate chips and graham crackers are also gluten-free. This way, everyone can enjoy these tasty bars without worry. For a fun twist, add unique flavors to your S’mores cookie bars. Swirl in Nutella or peanut butter into the dough before baking. You can also mix in chopped nuts for extra crunch. Try adding crushed peppermint candies for a festive touch during the holidays. The possibilities are endless, and you can customize these bars to fit any taste! For the complete recipe, check out [Full Recipe]. To keep your S’mores Cookie Bars fresh, store them in an airtight container. This helps avoid drying out. Place parchment paper between layers to prevent sticking. They will stay good at room temperature for about four days. If you want to keep them longer, refrigeration is a great option. Just remember to bring them to room temperature before serving for the best flavor. You can freeze S’mores Cookie Bars for up to three months. First, let them cool completely. Then, cut them into squares. Wrap each square in plastic wrap tightly. Place the wrapped bars in a freezer bag or container. Label it with the date. When you’re ready to enjoy, thaw them overnight in the fridge or for a few hours at room temperature. To reheat S’mores Cookie Bars, preheat your oven to 350°F (175°C). Place the bars on a baking sheet. Cover them loosely with foil to prevent burning. Heat for about 10 minutes or until warm. This will help restore their gooey texture and melt the chocolate again. Enjoy them warm for the best experience! For the full recipe, check out the recipe section above. S’mores cookie bars last about five days at room temperature. Store them in an airtight container. This keeps them fresh and soft. You can also refrigerate them for up to a week. Just remember to bring them to room temperature for the best taste. Yes, you can make these bars ahead of time. They are great for meal prep or parties. Bake and cool them completely. Then, cut them into squares and store them in an airtight container. You can also freeze them for up to three months. Just thaw them before serving. If you don't have mini marshmallows, you can use large marshmallows. Cut them into smaller pieces to fit. Alternatively, try using marshmallow fluff for a gooey texture. You can also skip marshmallows altogether and use caramel instead. This adds a different kind of sweetness. For the full recipe, visit the recipe section above. In this post, we covered how to make delicious s’mores cookie bars. We looked at the key ingredients and their best substitutes. You learned step-by-step how to prepare, bake, and serve these treats. We shared tips for perfect texture and flavor. You can also explore fun variations for added taste. Remember to store them well for freshness. With these tips, you're ready to create a tasty batch. Enjoy making and sharing your s’mores cookie bars!](https://joymealplan.com/wp-content/uploads/2025/07/947e80de-fe9c-4bdc-b9c7-cc0f2244d142-768x768.webp)
![For a delicious Strawberry Shortcake Trifle, you will need fresh and simple ingredients. Here’s what you need to gather: - 2 cups fresh strawberries, hulled and sliced - 1/4 cup granulated sugar (for macerating strawberries) - 1 cup heavy whipping cream - 1/4 cup powdered sugar (for the whipped cream) - 1 teaspoon pure vanilla extract - 1 package (10 oz) ladyfinger cookies or sponge cake, cut into bite-sized pieces - 1 cup vanilla pudding (store-bought or homemade) - Fresh mint leaves, for garnish (optional) Each ingredient plays a key role. The strawberries need sugar to bring out their flavor. The heavy cream and powdered sugar create a light, airy whipped cream. The ladyfingers or sponge cake form the base. Lastly, the vanilla pudding adds creaminess to the trifle. When you layer these ingredients, you create a beautiful and tasty dessert. For the full recipe, you can check [Full Recipe]. Enjoy making this sweet treat! To macerate the strawberries, start by slicing them. Place 2 cups of fresh strawberries in a bowl. Add 1/4 cup of granulated sugar on top. Gently stir the strawberries to coat them with sugar. Let them sit for 15 to 20 minutes. This helps draw out their sweet juices, creating a syrup. For optimal syrup extraction, keep an eye on the time. The longer you let them sit, the more syrup you will get. Just don’t let them sit too long, or they may become mushy. For the perfect whipped cream, you will need a large mixing bowl and a hand or stand mixer. Start by adding 1 cup of heavy whipping cream, 1/4 cup of powdered sugar, and 1 teaspoon of pure vanilla extract to the bowl. Whip the mixture on medium-high speed. Watch closely for soft peaks to form. Stop mixing as soon as you see those peaks. Overwhipping can turn your cream into butter, and we want it light and fluffy! Now comes the fun part: layering! In a large trifle bowl or individual glasses, start with ladyfinger pieces or sponge cake at the bottom. Use enough pieces to cover the base. Next, spoon a layer of vanilla pudding over the cake. Spread it evenly. Then, add a layer of your macerated strawberries, syrup included. Finish this layer with a dollop of whipped cream. Repeat these steps. Add another layer of ladyfingers, pudding, strawberries, and another dollop of cream. Keep going until you reach the top. The last layer should be whipped cream for a nice finish. Chill your trifle for at least 1 hour. Cover it with plastic wrap or a lid. If you have more time, chill it longer. The flavors blend better that way. Refrigerating helps the ladyfingers absorb moisture from the pudding and strawberries. This makes every bite taste amazing! Plus, it keeps your trifle fresh and cool, perfect for a warm summer day. For the full recipe, check out the complete instructions. To keep your trifle layers from turning soggy, use fresh, dry ladyfingers or sponge cake. Make sure to layer them quickly after preparation. You can also lightly toast the ladyfingers for added texture. This helps them hold their shape better. To whip cream correctly, start with cold equipment. Cold bowls and beaters help the cream whip faster. Whip the cream at medium speed until soft peaks form. Stop as soon as the cream holds its shape. Overwhipping makes the cream grainy and hard. Serve your trifle in a clear glass bowl to show off the layers. You can also use small jars for individual servings. This adds a fun touch for guests. For garnishes, fresh mint leaves or extra strawberry slices on top create a beautiful finish. You can also sprinkle some crushed cookies for crunch. One common mistake is not preparing ingredients well. Make sure your strawberries are hulled and sliced evenly. This ensures great flavor throughout. Layering inconsistently can lead to a messy trifle. Each layer should be even and flat. This keeps your trifle looking nice and appetizing. For the full recipe, check the Strawberry Shortcake Trifle Delight section. {{image_4}} You can change the fruit in your trifle to mix things up. Blueberries work great in place of strawberries. Peaches add a sweet twist, too. You can also try different pudding flavors. Chocolate pudding gives a rich taste, while banana adds a fun touch. Each swap gives your trifle a new vibe. If you need gluten-free options, use gluten-free ladyfingers or sponge cake. Many stores sell these now. For a dairy-free version, use coconut cream instead of heavy cream. Dairy-free pudding is also easy to find. These swaps keep the trifle tasty for all diets. You can make themed trifles for special times of the year. For example, add pumpkin spice for fall or berries for a Fourth of July treat. You can also create fun trifle recipes for parties. Layer with seasonal fruits and colorful toppings for a festive look. This way, your trifle is always a showstopper. For a full recipe, check the [Full Recipe]. To keep your trifle fresh, store it in the fridge. Use an airtight container to avoid unwanted smells. Cover the top with plastic wrap if you don't have a lid. This helps keep the layers intact. It's best to eat your trifle within three days. This way, you enjoy the best taste and texture. Avoid stacking heavy items on top of it, as this can cause squishing. Your stored trifle stays good in the fridge for up to three days. After this, the ingredients start to separate. If you see watery layers, it’s a sign that it’s no longer fresh. Trust your nose and eyes; if it smells off, it's time to toss it. Always check for any strange colors or textures before diving in. You can freeze the trifle, but it changes the texture. Freeze only the layers separately for best results. Make sure to wrap each layer tightly in plastic wrap. When you're ready to eat, thaw them in the fridge overnight. Avoid refreezing once it's thawed, as it affects quality. For the best flavor and texture, enjoy your trifle fresh, but freezing can work in a pinch. For the complete recipe, check the Full Recipe link. Making a strawberry shortcake trifle takes about 30 minutes of prep time. You will need an hour for chilling. This allows all the flavors to mix well and makes the trifle taste its best. Yes, you can make this trifle ahead of time! I suggest preparing it a few hours before serving. This gives the layers time to blend. Just keep it covered in the fridge until you are ready to serve. If you can't find ladyfingers or sponge cake, you can use pound cake or angel food cake. Both options work well. Cut them into smaller pieces, just like the ladyfingers. To avoid sogginess, use less liquid in your layers. You can also layer quickly and serve soon after making it. If you chill it too long, the cake may soak up too much liquid. Yes! You can use gluten-free ladyfingers or sponge cake. Make sure to check the labels on all ingredients. Also, consider using gluten-free pudding mix for a fully gluten-free dessert. You can use frozen strawberries! Just thaw them first and drain excess liquid. This keeps your trifle layers from becoming too wet. Frozen strawberries still give a sweet flavor, making them a great substitute. For the full recipe, check here. Now you know how to create a delicious strawberry shortcake trifle. We walked through each step, from fresh ingredients to layering tips. You learned how to prepare strawberries, whip cream, and avoid common mistakes. Remember to chill your trifle for maximum flavor. Feel free to try different fruits or flavors to make it your own. With careful preparation and creativity, your trifle will impress everyone. Enjoy serving this delightful dessert at your next gathering!](https://joymealplan.com/wp-content/uploads/2025/07/d4c251d2-a8a0-4e84-a7ee-6717c5d98257-768x768.webp)