Skip to content
About
Contact
Cookie Policy
Copyright Policy
Disclaimer
Search
Home
Dinner
Appetizer
Desserts
Drinks
About
Contact
Privacy Policy
Toggle Menu
Home
/
Desserts
- Page 26
Desserts
Pumpkin Cream Cheese Swirl Muffins Delightful Recipe
Eggnog Cheesecake Bars Festive and Creamy Delight
Texas Sheet Cake Simple and Delicious Treat
Berry Overnight Oats Simple and Nutritious Recipe
Homemade Apple Crisp Delightful and Easy Recipe
Classic Banana Pudding Scrumptious Homemade Delight
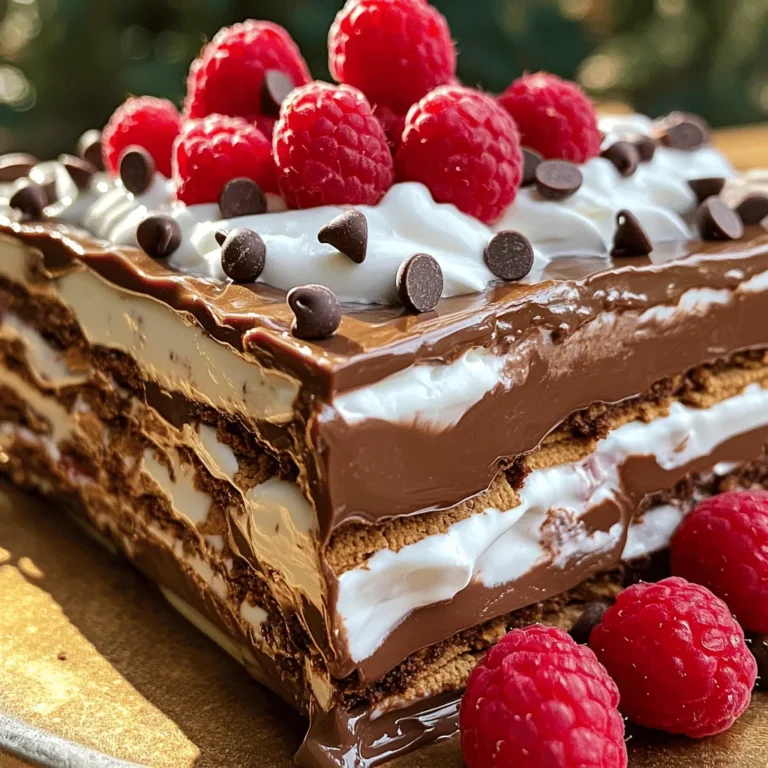
No Bake Chocolate Lasagna Delightful and Easy Treat
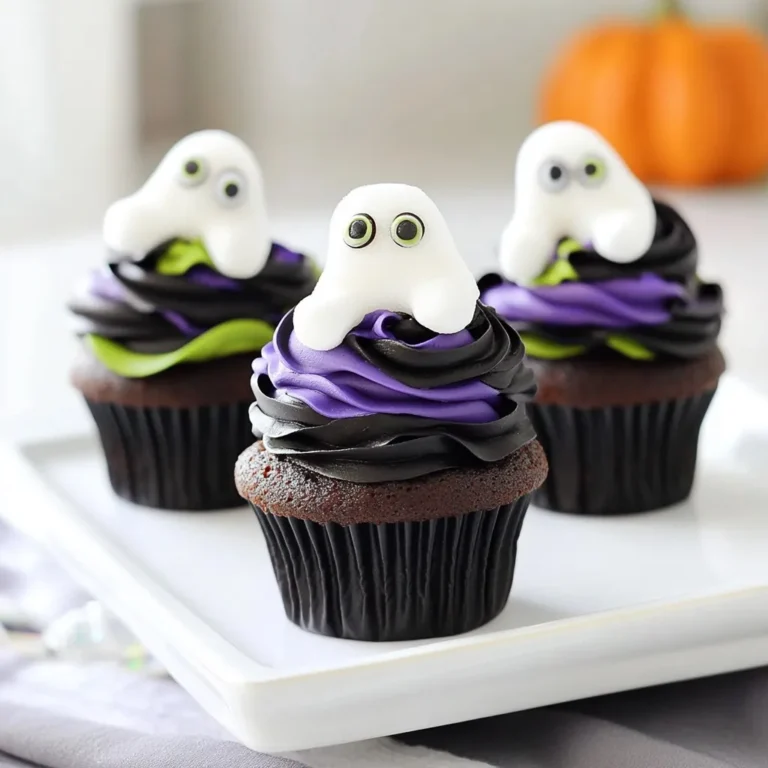
Haunted Halloween Cupcakes Spooky and Delicious Treats
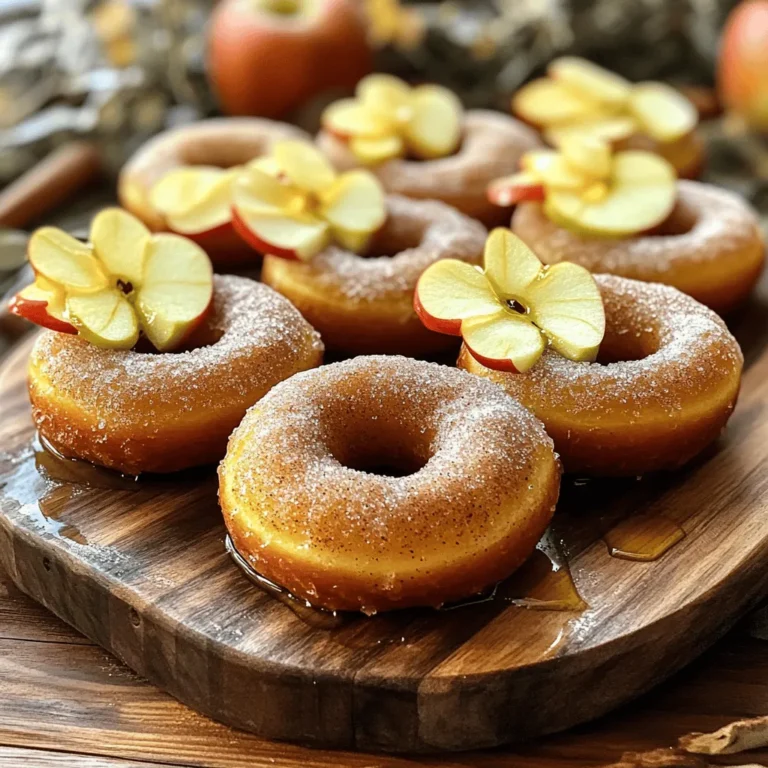
Baked Apple Cider Donuts Toasty and Flavorful Treat
Chocolate Chip Pumpkin Bread Delicious Fall Delight
Page navigation
Previous Page
Previous
1
…
24
25
26
27
28
…
33
Next Page
Next
Home
Dinner
Appetizer
Desserts
Drinks
About
Contact
Privacy Policy
Toggle Menu Close
Search for:
Search


![To make classic banana pudding, you need these key ingredients: - 4 ripe bananas, sliced into rounds - 1 cup heavy cream - 1 cup whole milk - 1/2 cup granulated sugar - 1/4 cup cornstarch - 1/4 teaspoon kosher salt - 1 teaspoon pure vanilla extract - 2 large egg yolks - 1 package (approximately 200g) vanilla wafers - Whipped cream for topping (optional) - Additional banana slices for garnish These ingredients create the creamy base and the delightful layers that make banana pudding so special. The ripe bananas add a natural sweetness. The vanilla wafers provide crunch and texture. You can enhance your banana pudding with a few optional ingredients: - A hint of cinnamon for warmth - Chocolate chips for a sweet twist - A splash of rum extract for depth These additions can give your pudding a unique flavor. Experiment with them to find your favorite mix! If you’re missing a few ingredients, don’t worry. Here are some common substitutions you can use: - Use almond milk instead of whole milk for a dairy-free option. - Substitute coconut cream for heavy cream for a tropical flair. - Replace granulated sugar with honey or maple syrup for sweetness. These substitutions will still give you a tasty result. Just remember to adjust measurements based on taste. For the full recipe, check the [Full Recipe]. To start, gather all your ingredients. You need milk, cream, sugar, cornstarch, salt, and eggs. In a medium saucepan, mix the whole milk, heavy cream, sugar, cornstarch, and salt. Use a whisk to blend everything until smooth. Make sure there are no lumps from the cornstarch. Heat this mix over medium heat. Stir it often with a wooden spoon. You want it to thicken and bubble, which takes about 5 to 7 minutes. Next, crack the two large eggs, separating the yolks into a bowl. Whisk the yolks until they look smooth and pale. To temper the yolks, take a few spoonfuls of the hot mix and whisk them into the yolks. This step keeps the eggs from cooking too fast. After that, pour the yolk mix back into the saucepan. Cook for another 2 to 3 minutes while stirring. The pudding should be thick and creamy when done. Remove it from heat and stir in the vanilla extract. Let it cool for about 10 minutes. Now it’s time to build your pudding layers. Start with a large serving dish or individual cups. Place a layer of vanilla wafers at the bottom. Next, add a layer of sliced bananas. Pour a generous amount of pudding over the bananas and cookies. Repeat this layering until you use all ingredients. Make sure the last layer is pudding. This creates a beautiful top. After layering, cover the dish tightly with plastic wrap. This step helps keep the pudding moist. Next, place it in the fridge for at least 4 hours. This time lets the pudding chill and firm up. When you’re ready to serve, add a dollop of whipped cream on top. You can also garnish with extra banana slices for a nice touch. This dessert looks as good as it tastes! If you'd like to see the complete guide, check out the Full Recipe for more details. To get that smooth, creamy texture, follow these tips: - Whisk well: When mixing the milk and cornstarch, make sure to whisk until there are no lumps. - Stir constantly: While cooking the pudding base, stir it continuously to prevent sticking and burning. - Temper the eggs: Slowly add hot mixture to egg yolks. This helps keep them from cooking too fast. - Cool gradually: Let the pudding cool for about 10 minutes before layering. It will thicken more as it cools. To keep your pudding fresh: - Cover tightly: Use plastic wrap to seal the dish. This keeps moisture out. - Refrigerate: Always store it in the fridge. It stays good for 2-3 days. - Layer with care: If you have leftovers, keep layers separate. This avoids mushy bananas. Want to make your banana pudding even better? Try these ideas: - Add spices: A pinch of cinnamon or nutmeg can add warmth. - Use flavored wafers: Try lemon or chocolate wafers for a fun twist. - Incorporate extracts: Add a drop of almond extract for an extra layer of flavor. - Top it off: Fresh berries or nuts can give a nice crunch and taste contrast. For the full recipe, check out the details above! {{image_4}} To make chocolate banana pudding, simply add cocoa powder. Use 1/3 cup of unsweetened cocoa powder. Mix it into the milk mixture after combining the sugar and cornstarch. This gives your pudding a rich chocolate flavor. Layer it just like the classic recipe. The chocolate pairs well with bananas, creating a great dessert. For a nutty twist, add chopped pecans or walnuts. You can mix in 1/2 cup of nuts into the pudding. You can also sprinkle some on each layer. This adds a delightful crunch to each bite. The nuts contrast nicely with the creamy pudding and soft bananas. To create a vegan version, swap dairy for plant-based options. Use almond or coconut milk instead of whole milk and cream. Replace egg yolks with 1/4 cup of silken tofu blended until smooth. Sweeten with maple syrup or coconut sugar. This makes a tasty, dairy-free pudding that everyone can enjoy. Each of these variations adds a new twist to the classic banana pudding. They keep the spirit of the dessert while offering different flavors and textures. For the full recipe, make sure to check out the details above. Banana pudding has a rich history that dates back to the 19th century. This dish first appeared in American cookbooks in the late 1800s. It gained popularity in the Southern states, where fresh bananas were easy to find. The sweet, creamy dessert combined layers of pudding, bananas, and vanilla wafers. This simple yet delicious treat quickly became a staple at family gatherings and potlucks. Over the years, banana pudding has evolved in many ways. In the 1930s, brands like Nabisco made vanilla wafers popular in homes. Many cooks began using these cookies as a key ingredient. Today, you can find various versions, including chocolate and vegan options. Some recipes even add whipped cream or meringue on top for extra flavor and texture. This evolution shows how versatile and beloved banana pudding truly is. In Southern cuisine, banana pudding holds a special place. It represents comfort and warmth. Families often serve it at holidays, birthdays, and reunions. Many people have fond memories of enjoying this sweet treat with loved ones. This dessert is not just a dish; it’s a tradition passed down through generations. The combination of flavors and textures captures the essence of Southern hospitality, making it a cherished part of the culture. Yes, you can use other types of bananas. While ripe Cavendish bananas are common, you can try red or plantain bananas. Each type brings a unique flavor. Red bananas are sweeter and softer. Plantains are firmer and less sweet. Just remember, the texture and taste will change. To keep bananas from browning, you can use lemon juice. Just squeeze a little juice over the banana slices. This helps slow down oxidation. You can also cover the bananas tightly with plastic wrap. Keeping them chilled also helps. Serve the pudding soon for the best look. If you don’t have vanilla wafers, don’t worry! You can use graham crackers or shortbread cookies. Both options add a nice crunch. You can even use sponge cake for a softer layer. Get creative! The pudding will still taste great, no matter what you use. This blog shows you how to make classic banana pudding. We covered key ingredients, optional add-ins, and substitutions. I also shared simple steps for preparing, layering, and chilling the pudding. You learned tips for perfect texture and storing leftovers. Plus, I explored fun variations like chocolate and vegan options. Finally, we discussed the history and cultural roots of this dish. Banana pudding is more than a dessert; it's a beloved tradition. Enjoy creating your own version and sharing it with friends and family.](https://joymealplan.com/wp-content/uploads/2025/06/2270da16-0b21-4017-a800-73ddf1839134-768x768.webp)
![- 1 ¾ cups all-purpose flour - 1 teaspoon baking soda - ½ teaspoon baking powder - ½ teaspoon salt - 1 teaspoon ground cinnamon - ½ teaspoon ground nutmeg - ½ teaspoon ground ginger - ½ cup granulated sugar - ½ cup brown sugar, packed firmly - 2 large eggs - 1 cup pumpkin puree - ½ cup vegetable oil - 1 teaspoon pure vanilla extract - 1 cup semi-sweet chocolate chips - ½ cup chopped walnuts (optional) To make Chocolate Chip Pumpkin Bread, you need simple ingredients. You’ll want to gather flour, sugars, eggs, and pumpkin puree. Pumpkin puree gives the bread moisture and flavor. The spices, like cinnamon and nutmeg, add warmth and depth. You can use canned pumpkin or make your own from fresh pumpkins. Using two types of sugar helps balance the flavor. Granulated sugar adds sweetness, while brown sugar adds a rich, caramel taste. Don’t forget the chocolate chips! They melt into gooey pockets of joy. If you like nuts, add walnuts for crunch. They complement the sweet and spicy flavors. - 9x5-inch loaf pan - Mixing bowls (medium & large) - Whisk or electric mixer - Spatula or wooden spoon - Parchment paper For baking, you’ll need some tools. A 9x5-inch loaf pan is perfect for this bread. Mixing bowls, both medium and large, will help you combine ingredients. A whisk or electric mixer makes it easy to blend. Use a spatula or wooden spoon to fold in the chocolate chips. Parchment paper is a must for easy removal after baking. This is your list of ingredients and tools to create a cozy fall treat. You can find the full recipe in the previous sections to guide you through the steps. Enjoy the process of baking and the delightful smell that fills your kitchen! - Preheat oven to 350°F (175°C). - Grease and line the loaf pan with parchment paper. To start, you need your oven hot. Preheating helps the bread rise well. Greasing the pan is key. It keeps the bread from sticking. Lining it with parchment paper makes removal easy. You’ll thank yourself later! - Whisk together flour, baking soda, baking powder, salt, and spices. - Set aside for later use. Next, grab a mixing bowl. Add the flour, baking soda, and baking powder. Toss in the salt, cinnamon, nutmeg, and ginger. Whisk them together until mixed well. This step ensures even flavors in your bread. Set this bowl aside for now. - Beat sugars and eggs until fluffy. - Stir in pumpkin puree, oil, and vanilla extract. In a large bowl, mix granulated and brown sugars with the eggs. Use an electric mixer or a whisk. Beat until it’s light and fluffy. Then, stir in the pumpkin puree, vegetable oil, and vanilla. Mix until it’s smooth. This creates the moist base for your bread. - Gradually add dry ingredients to wet mixture. - Fold gently to avoid overmixing. Now, slowly add the dry mix to the wet mix. Use a spatula for this step. Gently fold the ingredients together. Be careful not to overmix. This keeps your pumpkin bread light and airy. - Fold in chocolate chips and optional walnuts. Time for the fun part! Gently fold in the chocolate chips. If you like nuts, add the walnuts now. This gives your bread an amazing crunch and flavor. Ensure they are evenly distributed. - Pour batter into loaf pan and smooth the top. - Bake for 55-65 minutes and check for doneness. Pour your batter into the prepared loaf pan. Smooth the top with a spatula. Place it in the oven. Bake for 55 to 65 minutes. Check doneness with a toothpick. It should come out clean or with a few moist crumbs. Enjoy the aroma filling your kitchen! This step brings you closer to a delicious treat. For the full recipe, refer to the entire guide. Checking for doneness is easy. Insert a toothpick into the center of the bread. If it comes out clean or with a few moist crumbs, the bread is ready. This method helps ensure you don’t overbake. If you live at a high altitude, you may need to adjust the baking time. Start checking at the 50-minute mark to see if it is done. To keep your chocolate chip pumpkin bread light, avoid overmixing. Mix the wet and dry ingredients just until combined. This small tip makes a big difference! Also, using ingredients at room temperature helps them blend better. Eggs and oil mix more smoothly when they are warm. For a lovely presentation, serve the bread warm with butter. This adds a rich flavor that everyone loves. You can also dust the top with powdered sugar for a sweet touch. Fresh mint leaves make a nice garnish and add a pop of color. Arrange the slices on a wooden board for a rustic feel. This will impress your guests! {{image_4}} You can make this bread gluten-free. Just substitute all-purpose flour with a gluten-free flour blend. This change keeps the taste and texture similar. Look for a blend that contains xanthan gum to improve the bread's structure. Want a vegan option? You can replace the eggs with flaxseed meal or applesauce. For flaxseed, mix one tablespoon with three tablespoons of water. Let this sit until it thickens. Applesauce works well too; use ¼ cup instead of one egg. Also, choose plant-based oils and sugars for a fully vegan treat. Adding fruits like raisins or cranberries gives the bread a fruity twist. These add a burst of flavor and chewiness. You can also swap chocolate chips for white chocolate or caramel. These options create a different taste and make the bread even more exciting. Try mixing and matching for your perfect loaf! To keep your chocolate chip pumpkin bread fresh, store it in two ways. At room temperature, wrap the bread tightly in plastic wrap or place it in an airtight container. This method helps maintain its soft texture. You can also refrigerate it to extend its shelf life. In the fridge, it will stay good for about one week. If you want to save some for later, freezing is a great option! First, wrap the bread tightly in plastic wrap, then place it in a freezer-safe bag. This will help keep it fresh. When you’re ready to enjoy it, just take it out and let it thaw in the fridge overnight. To warm it up, pop slices in the microwave for a few seconds or use a toaster. Chocolate chip pumpkin bread tastes amazing with drinks! Pair it with coffee or tea for a cozy treat. The warm flavors of the bread go well with hot beverages, making it a perfect snack for fall. You can also serve it with a bit of butter or cream cheese for extra richness. Yes, you can use fresh pumpkin puree instead of canned. Using fresh pumpkin can add a deeper flavor. To make fresh puree, cut a pumpkin in half and remove the seeds. Bake the halves at 350°F for about 45 minutes, or until soft. Let them cool, then scoop out the flesh. Blend until smooth for your recipe. Look for a golden-brown top. The bread should spring back when touched gently. For the best test, insert a toothpick into the center. If it comes out clean or with a few moist crumbs, the bread is done. If it has wet batter, bake it a bit longer. Yes, you can add more chocolate chips! This will make the bread sweeter and richer. Just remember that too many chips can make the bread dense. Start with an extra half cup if you want more chocolate flavor. Use a sharp serrated knife for clean slices. Wait until the bread has cooled completely. This helps prevent the bread from squishing. Start at one end and slice straight down for even pieces. At room temperature, this bread lasts about 3 to 5 days. Keep it in an airtight container. If you put it in the fridge, it can last up to a week. Just remember that refrigeration can change the texture a bit. Sure! You can use nutmeg, allspice, or cardamom. Each spice brings a new twist to the flavor. Try mixing in a teaspoon of nutmeg for warmth or allspice for a hint of sweetness. Adjust the amount to your taste for a new fall delight. For the full recipe, check the [Full Recipe]. You now have a complete guide to making Chocolate Chip Pumpkin Bread. From the key ingredients to equipment and steps, you can easily whip up this tasty treat. Don't forget the tips for storage and variations to customize your bread. Whether you try a gluten-free version or add fruits, the options are endless. Enjoy your baking journey and share this delicious bread with family or friends!](https://joymealplan.com/wp-content/uploads/2025/06/f538d1de-de93-4194-9f26-14cc05263462-768x768.webp)