Skip to content
About
Contact
Cookie Policy
Copyright Policy
Disclaimer
Search
Home
Dinner
Appetizer
Desserts
Drinks
About
Contact
Privacy Policy
Toggle Menu
Home
/
Desserts
- Page 29
Desserts
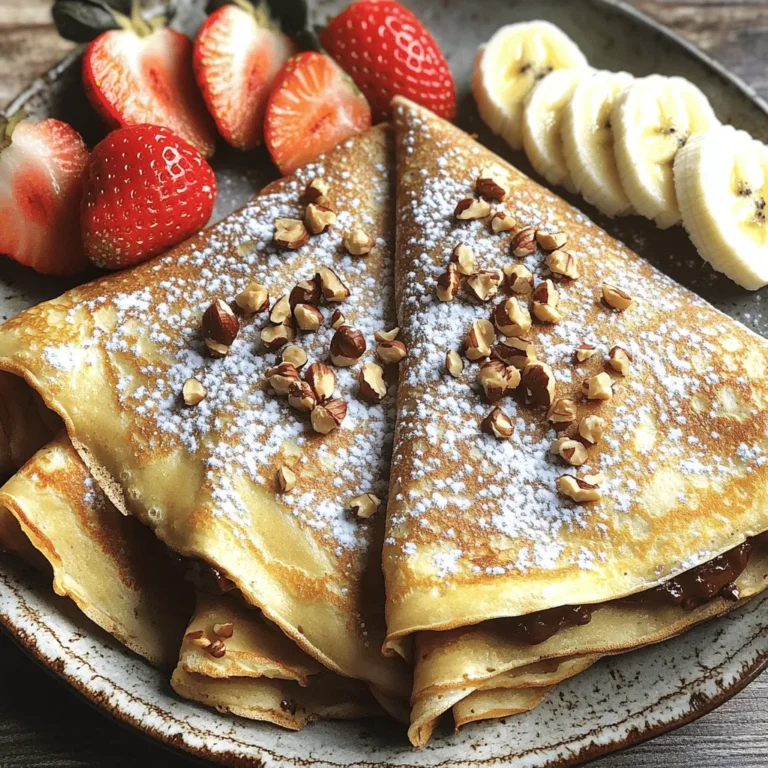
Chocolate Hazelnut Stuffed Crepes Sweet and Simple Treat
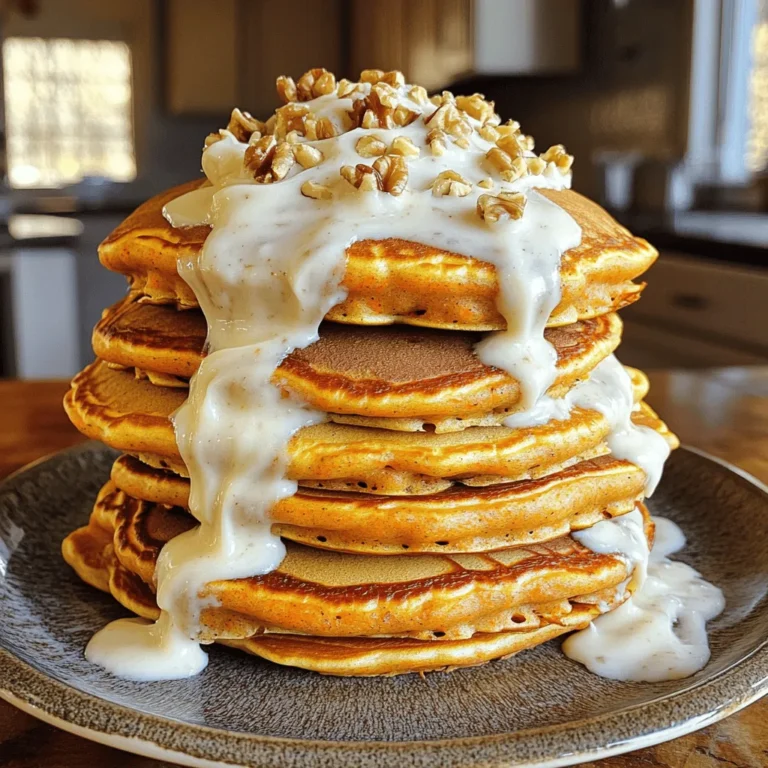
Carrot Cake Pancakes Irresistible Breakfast Delight
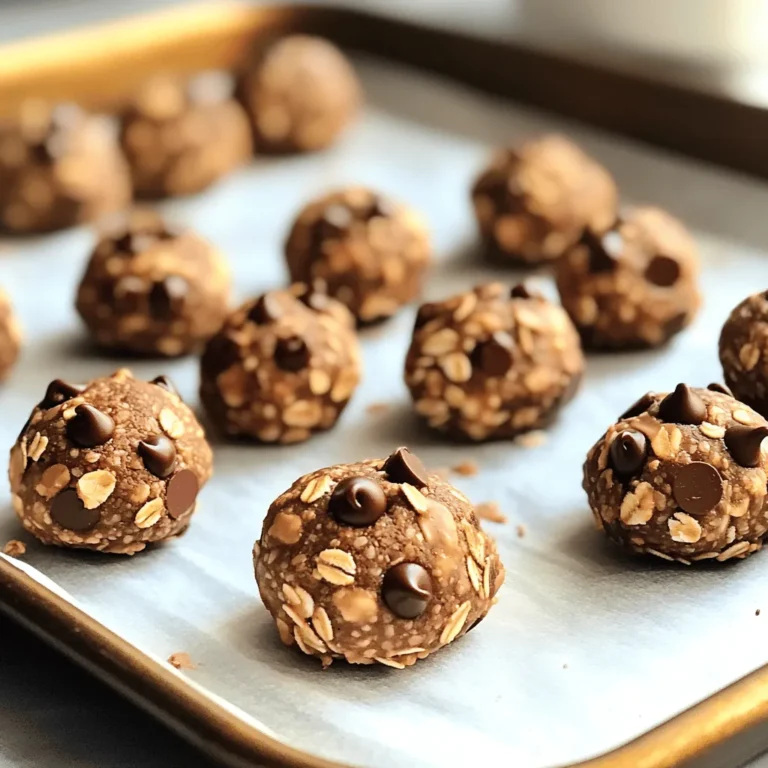
Peanut Butter Chocolate Energy Bites Simple Snack
Coconut Macaroons Delightful and Easy Dessert Treat
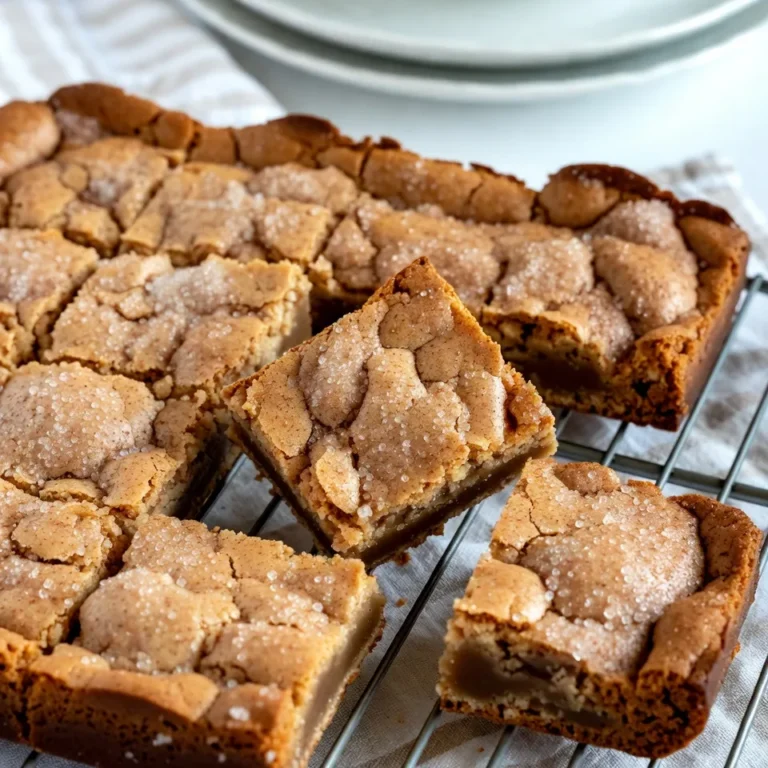
Snickerdoodle Blondies Irresistible and Easy Recipe
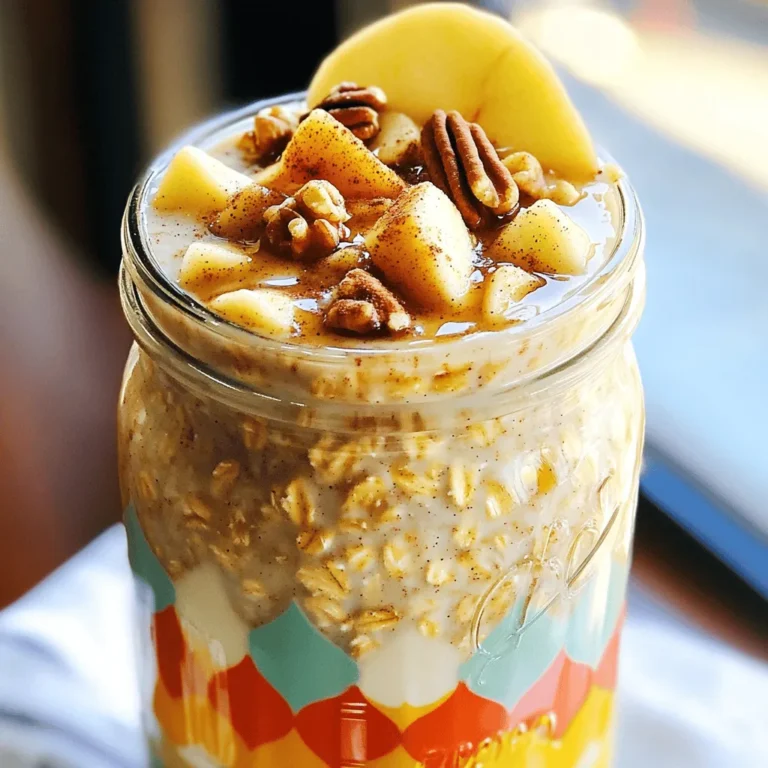
Apple Cinnamon Overnight Oats Simple Nourishing Meal
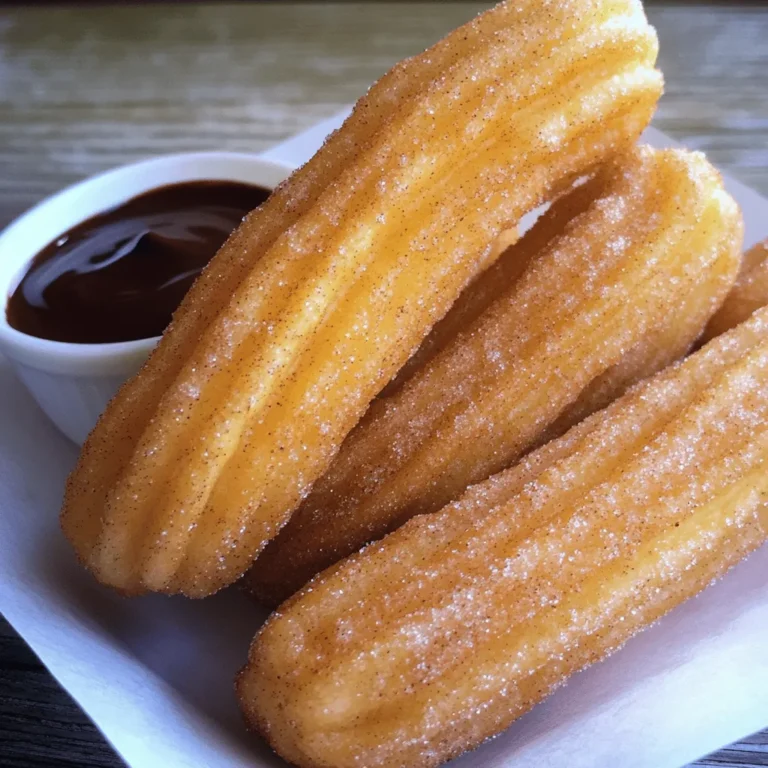
Cinnamon Sugar Churros Simple and Sweet Delight
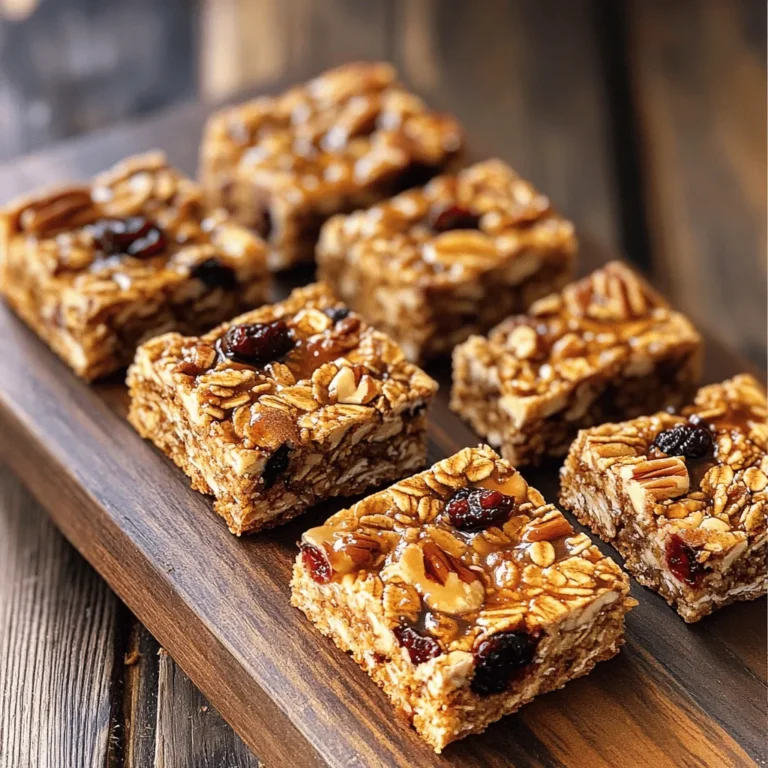
Maple Pecan Granola Bars Powerful and Nutritious Snack
Chocolate Chip Banana Bread Tasty and Simple Recipe
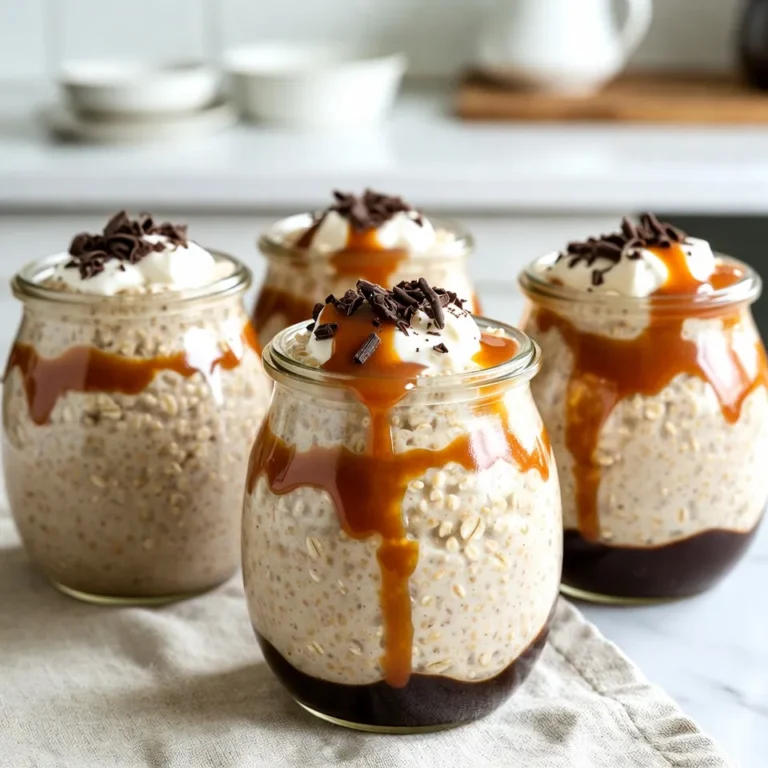
Caramel Macchiato Overnight Oats Easy Breakfast Delight
Page navigation
Previous Page
Previous
1
…
27
28
29
30
31
…
33
Next Page
Next
Home
Dinner
Appetizer
Desserts
Drinks
About
Contact
Privacy Policy
Toggle Menu Close
Search for:
Search

![- 3 cups unsweetened shredded coconut - 1/2 cup sweetened condensed milk - 2 large egg whites - 1/4 teaspoon vanilla extract - 1/4 teaspoon almond extract - Pinch of salt - 1/2 cup dark chocolate chips (optional) These ingredients create the base for your coconut macaroons. The unsweetened shredded coconut gives it that chewy texture. Sweetened condensed milk adds creaminess and sweetness, making each bite delightful. The egg whites are crucial for lightness and fluffiness. The extracts bring in a lovely depth of flavor. If you want to add a twist, dark chocolate chips can add a rich touch. - Gluten-free options: This recipe is naturally gluten-free, perfect for those with gluten issues. - Nut-free alternatives: You can enjoy these macaroons without nuts, making them safe for nut allergies. - Vegan substitutions: For a vegan version, try using aquafaba instead of egg whites and a plant-based condensed milk. These options help everyone enjoy this treat. Whether you have dietary needs or just want to try something new, there’s a way for you to make these coconut macaroons. You can find the full recipe above to get started! Start by preheating your oven to 325°F (160°C). This step is key to baking your macaroons evenly. While the oven heats, line a baking sheet with parchment paper. This helps prevent sticking and makes cleaning up easier later. In a large mixing bowl, combine 3 cups of unsweetened shredded coconut and 1/2 cup of sweetened condensed milk. Add 1/4 teaspoon of vanilla extract, 1/4 teaspoon of almond extract, and a pinch of salt. Stir well until everything is mixed together nicely. Now, in a separate bowl, take 2 large egg whites and whip them until they form stiff peaks. This is an important step because it gives your macaroons a light and airy texture. Next, gently fold the whipped egg whites into the coconut mixture. Use a spatula and be careful not to stir too hard. You want to keep the air in the egg whites. Fold until the egg whites are just mixed in; some lumps are okay. Using a tablespoon or a small cookie scoop, portion out the mixture onto the prepared baking sheet. Make sure to space each mound about 2 inches apart. This allows them to spread a bit while baking. Now, place the baking sheet in your preheated oven. Bake the macaroons for about 20 to 25 minutes. You want them to turn a lovely golden brown. Once done, take the tray out and let the macaroons cool for about 5 minutes on the sheet. This helps them firm up. After that, transfer them to a wire rack to cool completely. For those who love chocolate, you can melt some dark chocolate chips and dip the bottoms of each macaroon. Let the chocolate set on the parchment paper. Enjoy these delightful treats from the full recipe! To make great coconut macaroons, focus on the egg whites. Whipping them correctly is key. Use a clean bowl and beaters. Beat until stiff peaks form. This step adds lightness to the macaroons. Avoid overmixing when you fold them into the coconut mix. Gently combine the ingredients. Some lumps are okay. A light touch keeps the texture airy and nice. You can boost the flavor of your macaroons in fun ways. Try adding a pinch of cinnamon or nutmeg for warmth. These spices bring depth and richness. Another idea is to add citrus zest. Lemon or lime zest gives a fresh twist. Just a small amount can make a big difference in taste. How you serve your macaroons can impress your guests. Place them on a decorative platter to catch the eye. You can garnish with shredded coconut or fresh fruit. This adds color and flair. Arrange them in clusters for an inviting look. These small touches make your dessert stand out and look professional. For the full recipe, check out the Tropical Coconut Macaroons section. {{image_4}} You can make your macaroons even better by adding chocolate. Start by melting dark chocolate chips. Use a microwave-safe bowl. Heat in 30-second bursts, stirring after each. This helps prevent burning. Alternatively, you can use a double boiler for even heating. Once the chocolate is melted, dip the bottom of each macaroon in it. Make sure to coat it well. Place the dipped macaroons back on the parchment paper. Let the chocolate harden before serving. This adds a rich flavor that complements the coconut. Want to add some nuts? Almonds and pecans work great. Simply chop them finely and mix them in with the coconut. This adds a nice crunch to the soft macaroons. If you have nut allergies, you can skip the nuts. The recipe still tastes great without them. You can also use seeds like sunflower or pumpkin for a similar texture. Always be cautious and adjust based on your needs. There are endless flavor combinations for your macaroons. One tasty option is coconut-lime. Just add lime zest and a bit of lime juice to the coconut mixture. This gives a fresh twist. Another option is vanilla bean macaroons. Instead of vanilla extract, use the seeds from a vanilla bean. This adds a lovely fragrance and flavor. You can also mix in spices like cinnamon for a warm touch. Each variation brings a new taste to your delightful tropical treats. For the complete recipe, refer to the [Full Recipe]. Store your coconut macaroons at room temperature for the best taste. Keep them in a cool, dry place. Use an airtight container to keep them fresh. This helps avoid moisture and keeps them soft. If you live in a warm climate, consider refrigerating them. The cold can help them last longer. However, be aware that refrigeration may change their texture slightly. To freeze macaroons, let them cool completely first. Once cooled, place them in a single layer on a baking sheet. Freeze for about one hour. This step prevents them from sticking together. After they are firm, transfer them to a freezer-safe bag or container. When you want to enjoy a macaroon, take it out of the freezer. Let it thaw in the fridge overnight. For a quick thaw, leave it at room temperature for a few hours. Coconut macaroons can last up to one week at room temperature. If stored in the fridge, they can last for about two weeks. Check for signs of spoilage before eating. Look for changes in texture, color, or a sour smell. If you see any of these, it’s best to toss them out. Yes, you can make coconut macaroons without egg whites. Instead, use ground flaxseed or chia seeds mixed with water. This mixture acts as a binder. For every egg white, mix 1 tablespoon of ground flaxseed or chia seeds with 2.5 tablespoons of water. Let it sit for about 10 minutes to thicken. This will give your macaroons a nice texture while keeping them egg-free. To keep your macaroons from falling apart, mix the ingredients gently. Overmixing can cause them to break. When you fold in the egg whites, do it slowly and carefully. This helps maintain air and keeps the macaroons light. Make sure to space them well on the baking sheet. This allows them to bake evenly. A good tip is to form them tightly with your hands. This will help them hold their shape during baking. Leftover shredded coconut can be used in many ways. You can add it to smoothies for extra texture. It works well in oatmeal or yogurt for a tropical twist. Consider making coconut pancakes or muffins. You can also toast it for a crunchy topping on salads or desserts. If you enjoy baking, use it in granola or energy balls. This way, you won't waste any coconut, and you'll enjoy its rich flavor in other dishes. You now know how to make coconut macaroons from scratch. We covered the essential ingredients, step-by-step instructions, and storage tips. You learned about variations, dietary options, and how to enhance flavors. Give these tasty treats a try! They are fun to make and share. Don’t forget to experiment with flavors or coatings. Enjoy your baking, and let your creativity shine!](https://joymealplan.com/wp-content/uploads/2025/06/e4df15b8-ca64-4a89-a5eb-245e13ac6d80-768x768.webp)
![- 3 ripe bananas, thoroughly mashed - 1/2 cup unsweetened applesauce - 1/2 cup packed brown sugar - 1/4 cup granulated sugar - 2 large eggs, at room temperature - 1 teaspoon pure vanilla extract - 1 teaspoon baking soda - 1/2 teaspoon baking powder - 1/4 teaspoon fine salt - 1 1/2 cups all-purpose flour - 1 cup semi-sweet chocolate chips, plus an extra handful for topping - 1/2 teaspoon ground cinnamon (optional) When measuring ingredients, accuracy is key. Use standard measuring cups and spoons. For flour, spoon it into the cup and level it off with a knife. This gives you the right amount without packing it down. Bananas should be fully ripe, as this makes the bread sweeter and more flavorful. If you need alternatives, here are some options: - Substitute applesauce with yogurt for a creamier texture. - Use coconut sugar instead of brown sugar for a lower glycemic index. - If you're out of eggs, try using flaxseed meal mixed with water as a binder. - For gluten-free options, use a 1:1 gluten-free flour blend. - Swap semi-sweet chocolate chips with dark chocolate or white chocolate for a twist. These substitutions can change the flavor but keep the essence of the bread intact. You can easily customize this recipe to fit your pantry and taste! If you're curious about the full recipe, check out the Choco-Banana Bliss Bread . Start by gathering all your ingredients. You need ripe bananas, applesauce, sugars, eggs, vanilla, baking soda, baking powder, salt, flour, chocolate chips, and optional cinnamon. Preheat your oven to 350°F (175°C). Grease a 9x5-inch loaf pan with butter or cooking spray. This helps the bread come out easily after baking. In a large bowl, mash the ripe bananas until smooth. Add the applesauce, brown sugar, and granulated sugar. Mix well with a fork or whisk. Next, add the eggs and vanilla extract. Stir until everything is blended. In a separate bowl, whisk the dry ingredients: baking soda, baking powder, salt, and cinnamon if you like. Slowly add this dry mix to the wet mix. Fold gently with a spatula. Be careful not to overmix; you want a light, fluffy bread. Finally, fold in the chocolate chips, saving a few for the top. Pour the batter into the prepared loaf pan. Smooth the top with a spatula. Sprinkle the reserved chocolate chips on top for extra chocolate goodness. Bake in your preheated oven for 60-65 minutes. Check doneness by inserting a toothpick into the center. If it comes out clean or with a few moist crumbs, it's done. Once baked, let the loaf cool in the pan for 10 minutes. Then transfer it to a wire rack to cool fully before slicing. Enjoy your warm, chocolate chip banana bread! For the full recipe, check [Full Recipe]. To get the right texture in your chocolate chip banana bread, use ripe bananas. Ripe bananas are sweet and soft, making the bread moist. Mash them well to avoid lumps. Mix the wet and dry ingredients gently. Overmixing can make the bread tough. Aim for a light and fluffy loaf. Many people add too much flour, which can dry out the bread. Always measure flour correctly. Another mistake is not baking long enough. A toothpick should come out with a few moist crumbs but not wet batter. Also, don't skip the cooling time before slicing. This helps the bread set properly. For extra flavor, add ground cinnamon to your batter. It pairs well with bananas and chocolate. You can also use vanilla extract for a richer taste. If you want more texture, try adding nuts like walnuts or pecans. They add crunch and depth to your bread. For the full recipe, check out the Choco-Banana Bliss Bread details! {{image_4}} Adding nuts can give your chocolate chip banana bread a nice crunch. I often use walnuts or pecans. Chop them into small pieces. Fold in about half a cup into your batter. This step adds flavor and texture. You can also toast the nuts for extra taste. Just watch them closely to avoid burning. While semi-sweet chocolate chips are classic, feel free to switch it up. Dark chocolate chips add a rich taste. Milk chocolate chips make the bread sweeter. White chocolate creates a creamy contrast with the banana flavor. Use one type or mix them for a fun twist. Just keep the total amount around a cup. You can enhance your banana bread with spices or extracts. Ground cinnamon adds warmth. A pinch of nutmeg can make it cozy. Try adding a teaspoon of almond or coconut extract for a unique twist. These small changes can make your bread special. Get creative and find your favorite combination! To keep your chocolate chip banana bread fresh, wrap it tightly in plastic wrap or store it in an airtight container. This method helps retain moisture and flavor. You can leave it at room temperature for up to three days. If you want it to last longer, consider freezing it. Freezing banana bread is easy and smart. First, let the bread cool completely. Then, slice the bread into individual pieces. Wrap each slice in plastic wrap or foil. Place the wrapped slices in a freezer bag. You can freeze them for up to three months. For best results, label the bag with the date. When you want to enjoy your banana bread again, reheating is simple. Take out a slice and let it sit at room temperature for a few minutes. You can use a microwave for quick reheating. Heat it for about 15-20 seconds. For a crispy crust, pop it in a toaster oven for a few minutes. Enjoy your slice warm with butter or cream cheese. To ripen bananas fast, place them in a paper bag. Add an apple or a ripe banana for best results. The ethylene gas they produce speeds up ripening. Check them daily until they're soft and sweet. Yes, you can use frozen bananas. Just thaw them before mashing. Drain any excess liquid to avoid soggy bread. Frozen bananas often have more flavor, making your bread even tastier. To check if your bread is done, insert a toothpick into the center. If it comes out clean or with a few moist crumbs, it’s ready. The bread should feel firm and spring back when gently pressed. You have many options for overripe bananas! Try making smoothies for a creamy texture. You can also create banana pancakes or muffins. Another idea is to freeze them for later use in baking or smoothies. In this post, we covered key ingredients and steps for making banana bread. We explored tips to perfect its texture and avoid common mistakes. You can try fun variations by adding nuts or different chocolates. We also discussed how to store leftovers and freeze your bread. Banana bread is easy to make and delicious. Now, it’s your turn to get baking!](https://joymealplan.com/wp-content/uploads/2025/05/475bee4b-eacd-4984-83f8-73c9916382a2-768x768.webp)