Skip to content
About
Contact
Cookie Policy
Copyright Policy
Disclaimer
Search
Home
Dinner
Appetizer
Desserts
Drinks
About
Contact
Privacy Policy
Toggle Menu
Home
/
Dinner
- Page 25
Dinner
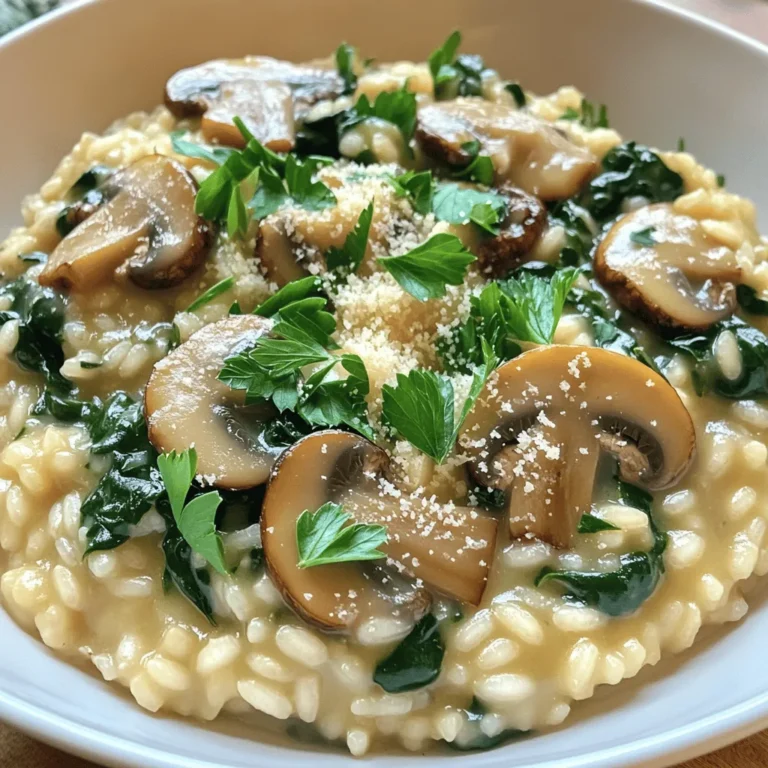
Creamy Mushroom Risotto Perfectly Rich and Filling
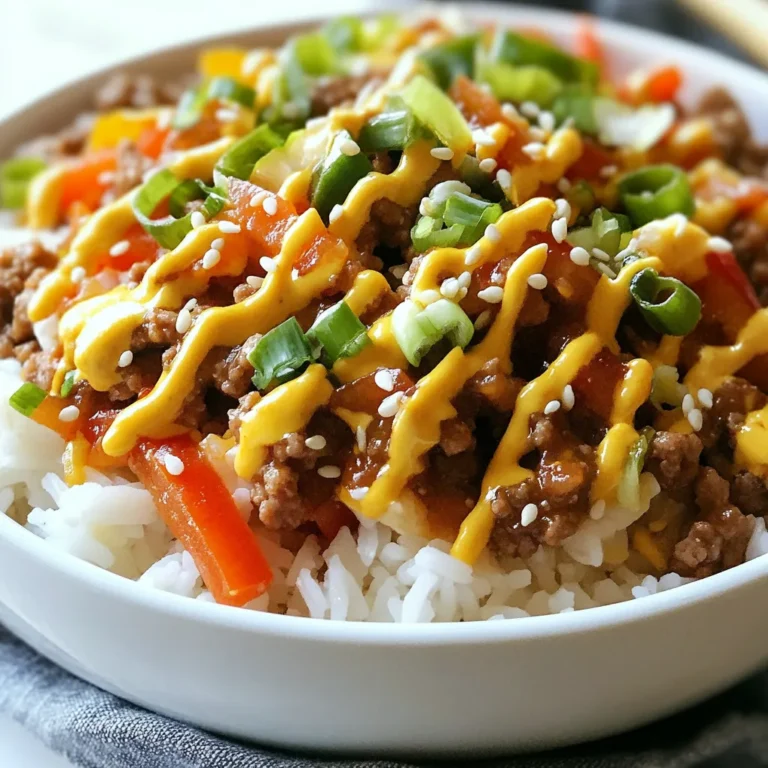
Bang Bang Ground Turkey Bowls Flavorful and Simple Meal
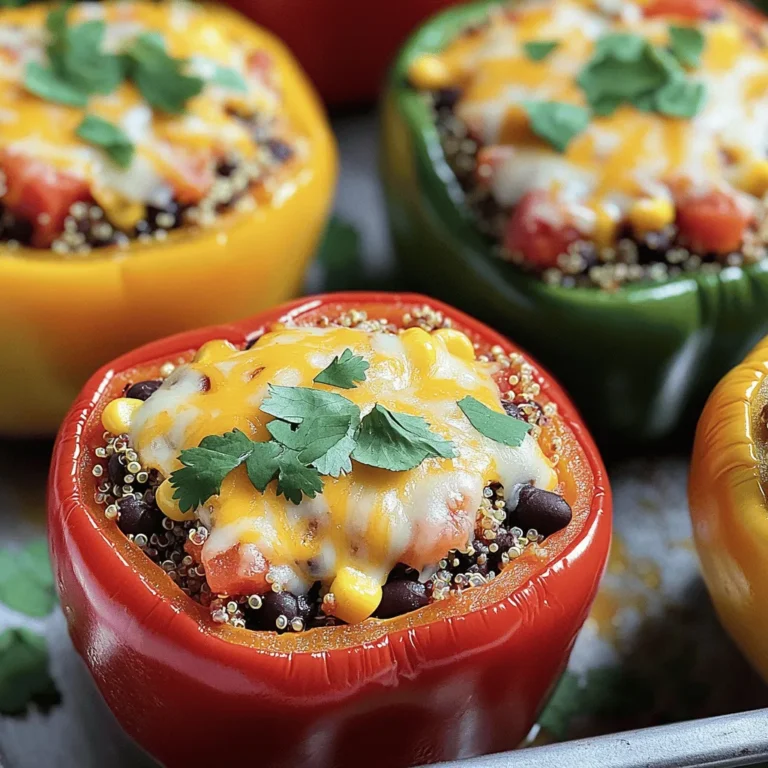
Tex-Mex Quinoa Stuffed Peppers Flavorful Veggie Dish
Savory Sunrise Breakfast Burritos Easy Morning Meal
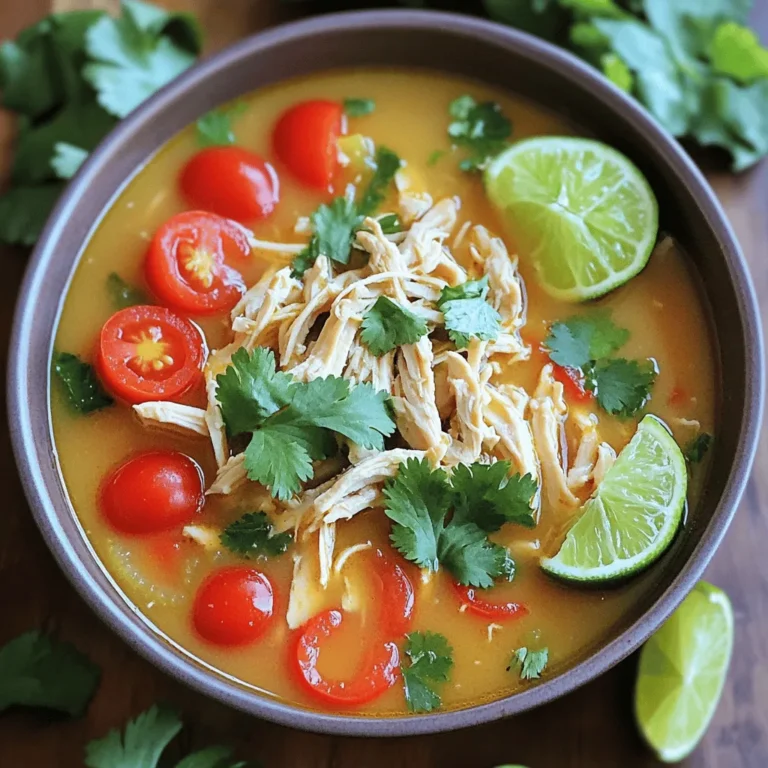
Coconut Lime Chicken Soup Hearty and Flavorful Bowl
Easy Veggie Pad Thai Flavorsome and Quick Meal
Ingredient Chicken Enchiladas Simple and Flavorful Dish
Sesame Garlic Green Beans Flavorful and Easy Side
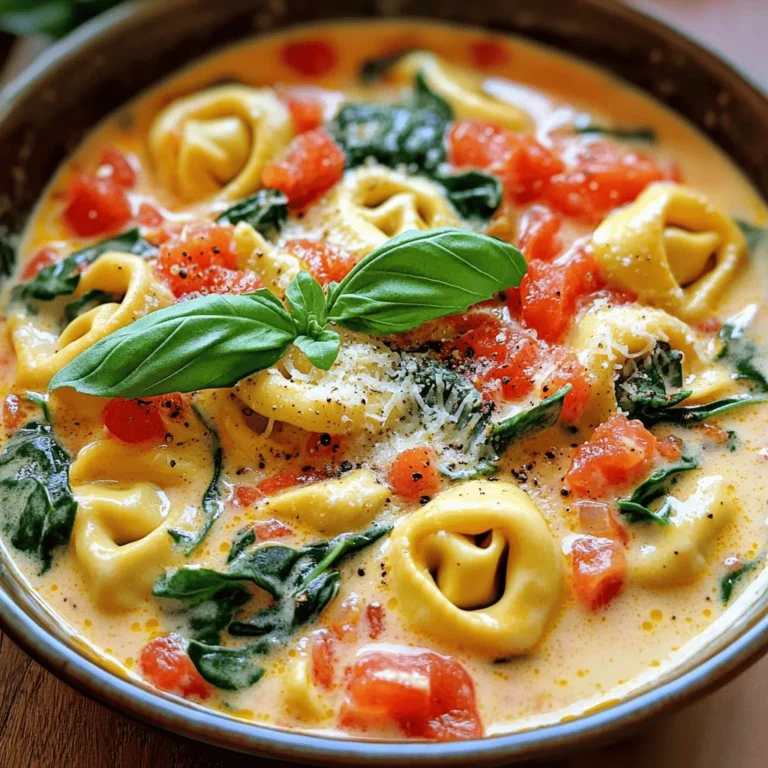
One-Pot Creamy Tomato Basil Tortellini Delight
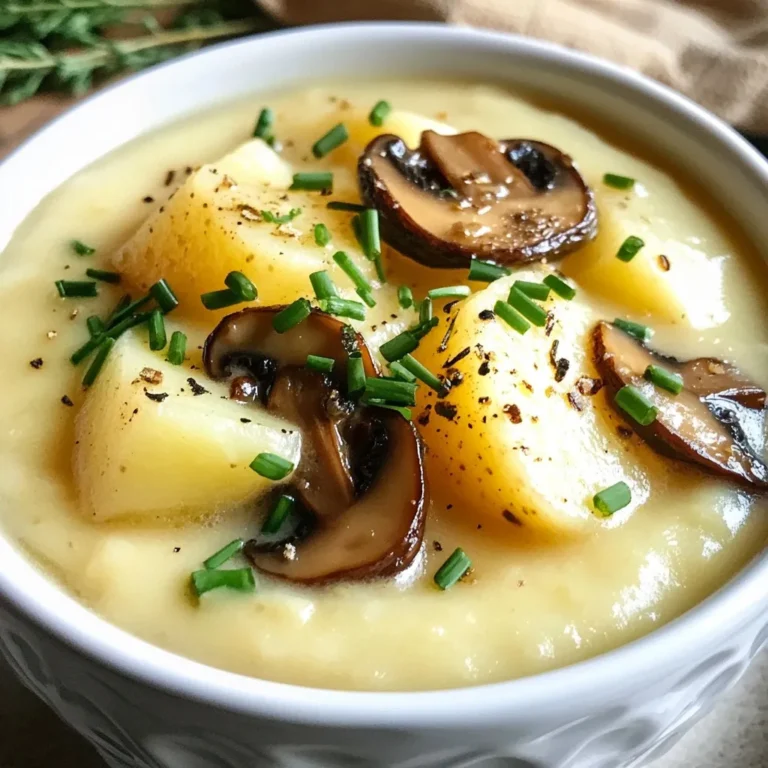
Satisfying Shiitake Potato Soup Easy Healthy Recipe
Page navigation
Previous Page
Previous
1
…
23
24
25
26
27
…
65
Next Page
Next
Home
Dinner
Appetizer
Desserts
Drinks
About
Contact
Privacy Policy
Toggle Menu Close
Search for:
Search

. To start, you need to whisk the eggs. Take a medium bowl and crack in 4 large eggs. Add 1/2 cup of milk. Whisk them together until they are smooth. Then, season this mixture with a little salt and freshly cracked pepper. This adds flavor to your eggs. Next, we need to cook the vegetables. Heat 2 tablespoons of olive oil in a large non-stick skillet over medium heat. Once the oil is hot, add 1 small yellow onion and 1 small red bell pepper, both finely diced. Sauté them for about 4-5 minutes. You want them tender and fragrant. Now comes the fun part. Add in 1/2 cup of black beans that you’ve rinsed and drained. Sprinkle in 1 teaspoon of ground cumin for a warm flavor. Stir everything together and cook for another 2-3 minutes. This warms the beans and brings the flavors together. Then, it’s time to cook the eggs. Pour the whisked egg mixture into the skillet. Gently stir them as they begin to set. Cook for about 3-4 minutes or until the eggs are fully cooked, fluffy, and light. Once done, remove the skillet from heat. To assemble your burritos, lay a whole wheat tortilla flat on your workspace. Spoon a generous portion of the egg and bean mixture into the center. Next, top it with a few slices of avocado and a sprinkle of shredded cheese. You can choose either cheddar or pepper jack. Now, let’s fold and roll the burrito. Carefully fold the sides of the tortilla over the filling. Then, roll it up from the bottom, tucking it tightly. Repeat this with the remaining tortillas and filling. For a crispy finish, return the burritos to the skillet, seam-side down. Toast them for 1-2 minutes on each side over medium heat. This will make them golden brown and slightly crisp. Serve the burritos warm, garnished with fresh cilantro leaves and a side of salsa or hot sauce. Enjoy! Achieving Fluffy Eggs To get fluffy eggs, whisk them well with milk. Air makes the eggs rise. Cook them gently over medium heat. Stir slowly as they cook. This keeps them light and fluffy. Avoiding Overcooking Watch your eggs closely while they cook. Eggs can go from soft to dry in seconds. Remove them from heat when they are just set. They will continue to cook after being taken off the stove. Adding More Vegetables or Proteins Feel free to add more veggies like spinach or mushrooms. You can also add proteins like cooked sausage or diced ham. This makes the burrito more filling and fun. Spice Variations If you like heat, add jalapeños or a dash of hot sauce. For a different flavor, try smoked paprika or chili powder. These spices can make your breakfast so exciting. Ideal Accompaniments Serve your burritos with salsa or fresh avocado. A side of fruit adds a nice touch, too. You could even add a dollop of sour cream for creaminess. Presentation Ideas Place the burritos on a colorful plate. Add a sprinkle of cilantro on top for color. Cut them in half to show off the filling. This makes your meal look tasty and fresh. For the full recipe, check out the detailed instructions. {{image_4}} For a tasty twist, you can make vegetarian sunrise burritos. Just swap the meat for tofu or extra veggies. Tofu adds protein and absorbs flavors well. You can use bell peppers, zucchini, or spinach. This way, you still enjoy a filling meal without meat. If you want more protein, try adding sausage or bacon. Cook the sausage until it's browned and crumbled. For bacon, fry until crispy, then crumble over the eggs. This gives the burritos a hearty flavor. You can even mix both for a double protein boost. For gluten-free options, consider using corn tortillas or other gluten-free wraps. They hold the filling well and add a different taste. You can also check for store-bought gluten-free tortillas. This way, everyone can enjoy your sunrise breakfast burritos. Feel free to explore these variations to make your breakfast exciting! For the full recipe, be sure to check out the provided details. To keep your burritos fresh, follow these steps: - Refrigeration Tips: Place leftover burritos in an airtight container. Store them in the fridge. They stay good for up to three days. - Freezing Instructions: If you want to keep them longer, wrap each burrito in foil. Then, put them in a freezer bag. They can last for up to three months in the freezer. To enjoy your burritos again, use these methods: - Best Methods for Preserving Texture: The oven works best. Preheat it to 350°F. Place the burrito on a baking sheet. Heat for about 15-20 minutes. This keeps the tortilla crispy. You can also use a microwave. Wrap the burrito in a damp paper towel. Heat it for 1-2 minutes. This method is quick but may make the tortilla soft. To make Sunrise Breakfast Burritos vegetarian, just leave out the eggs. Instead, use tofu or extra veggies. You can add mushrooms, spinach, or zucchini for a tasty option. Season them well with spices like cumin and paprika to keep the flavor strong. Yes, you can make these burritos ahead of time. Prepare the filling and store it in the fridge for up to three days. You can also wrap the burritos tightly in foil and freeze them. Just reheat them in the oven or microwave when you’re ready to eat! Many sauces go well with Sunrise Breakfast Burritos. Salsa is a classic choice. It adds freshness and a bit of spice. You can also try hot sauce for heat or avocado crema for creaminess. A drizzle of ranch dressing adds a tasty twist too. To change the spice level, adjust the amount of cumin and add chili powder. For more heat, include diced jalapeños or a dash of cayenne pepper. If you prefer mild flavors, skip the spicy ingredients and focus on herbs like cilantro for freshness. Yes, there are a few good ways to warm tortillas. You can heat them in a dry skillet for about 30 seconds on each side. Alternatively, wrap them in a damp paper towel and microwave for 15-20 seconds. This keeps them soft and pliable for wrapping. In this article, we explored how to create delicious Sunrise Breakfast Burritos. You learned about essential ingredients like eggs, black beans, and fresh veggies. We broke down the steps for mixing, cooking, and assembling, plus tips for perfect eggs and custom flavors. You can also modify these burritos to fit dietary needs or preferences. Remember, these burritos are easy to store and reheat well. Enjoy your cooking journey and share your tasty results!](https://joymealplan.com/wp-content/uploads/2025/07/3ee2e162-623e-4153-8713-e8e5adb7d2c4-768x768.webp)
 for more details! Start by cooking the rice noodles. Follow the package instructions. Make sure to cook them until they are al dente. This means they should have a slight bite. After cooking, drain the noodles and place them in a large bowl. Set them aside as you prepare the other ingredients. For the best texture, rinse the noodles with cold water. This helps stop the cooking process and keeps them from sticking together. In a large frying pan or wok, heat the vegetable oil over medium heat. First, add the minced garlic and sliced onion. Sauté them for about 2-3 minutes. You want the onion to become translucent and fragrant. Next, add the sliced red bell pepper and julienned carrot. Stir-fry these veggies for about 3-4 minutes. You want them to soften but still have some crunch. This adds great texture to your dish. If you want to use eggs, push the veggie mix to one side of the pan. Crack the eggs into the open space and scramble them. Cook until they are fully set. Once cooked, mix the eggs back into the veggie blend. Now, carefully add the cooked rice noodles to the pan. Gently toss everything together to combine it well. In a small bowl, mix the soy sauce, lime juice, and brown sugar. Pour this sauce over the noodle mixture and stir well. Cook for another 2-3 minutes to let the flavors meld. Finally, add fresh bean sprouts and chopped green onions. Cook for just one more minute. Your Easy Veggie Pad Thai is ready to serve hot, garnished with crushed peanuts and fresh cilantro. Enjoy it with lime wedges on the side for extra flavor! Fresh ingredients make all the difference in Easy Veggie Pad Thai. Use crisp vegetables for the best taste. Look for bright bell peppers, firm carrots, and fresh bean sprouts. The right soy sauce also boosts flavor. I prefer low-sodium soy sauce, which adds depth without too much salt. You can also try tamari for a gluten-free option. Stir-frying is key for this dish. Heat your pan well before adding oil to avoid sticking. Keep the heat high, and don’t overcrowd the pan. This helps all the veggies cook evenly and stay crunchy. Stir-fry each type of veggie separately if you want to control their doneness. Add them back together later for the best texture. How you serve your Pad Thai can make it more fun. Use a large plate or bowl to show off those colorful veggies. You can also layer your ingredients for a nice look. Pair it with spring rolls or a fresh salad to round out the meal. For drinks, a light iced tea or lemonade works great with this dish. For the full recipe, visit the Easy Veggie Pad Thai section. {{image_4}} To make this dish vegan, simply skip the eggs. You can add plant-based proteins instead. Tofu works well and adds great texture. Tempeh is another tasty choice. Both options soak up flavor and make your meal filling. If you don’t have all the ingredients, don’t worry. You can swap in what you have. For example, use zucchini instead of carrots. Snap peas can replace bell peppers. In winter, try adding Brussels sprouts or kale for a seasonal touch. Do you like heat? To make your Pad Thai spicier, add red pepper flakes or Sriracha. Start with a little, then taste as you go. If you prefer a milder dish, reduce the soy sauce. You can also add more lime juice for a zesty flavor without spice. For the full recipe, check out Easy Veggie Pad Thai. To keep your Easy Veggie Pad Thai fresh, let it cool first. Spread it out in a shallow dish. This helps the heat escape quickly. Avoid stacking it in a deep bowl. When it cools to room temperature, cover it tightly. Use plastic wrap or a lid. This keeps it from drying out. In the fridge, your Pad Thai lasts about 3-4 days. Make sure it is in an airtight container. For longer storage, you can freeze it. It stays good for about 1-2 months. To freeze, place it in freezer bags. Remove as much air as possible before sealing. When you're ready to eat, just thaw it overnight in the fridge. When reheating, I recommend using a pan or a wok. This helps keep the noodles from getting mushy. Add a splash of water or soy sauce to keep it moist. Heat on medium, stirring gently. You can also use a microwave, but do it in short bursts. Stir between heating to keep it even. This way, your Easy Veggie Pad Thai stays tasty and enjoyable! Many people make a few mistakes when making Pad Thai. First, overcooking the rice noodles is common. They should be al dente, not mushy. Second, using too much sauce can make the dish too salty. Start with a small amount and taste as you go. Lastly, don’t forget to use fresh vegetables. They add crunch and color, making your dish vibrant and healthy. Yes, you can make Easy Veggie Pad Thai ahead of time. Cook the noodles and veggies, then store them separately. You can mix them with sauce when you are ready to serve. This helps keep everything fresh and tasty. Just reheat in a pan on low heat until warm. You can serve Easy Veggie Pad Thai with many sides. Try spring rolls for a crunchy treat. A light cucumber salad adds freshness. If you want more protein, add tofu or edamame on the side. You can also serve it with a refreshing drink, like iced tea or lemonade. To make Easy Veggie Pad Thai gluten-free, use gluten-free soy sauce. Most rice noodles are gluten-free, but check the package to be sure. This way, everyone can enjoy this tasty dish without worry. Customizing Easy Veggie Pad Thai is easy. If someone doesn’t like a veggie, swap it for one they enjoy. You can also adjust the sauce to suit their taste. Start with less sauce, then add more later. If they don’t want eggs, skip them. This dish is flexible, so everyone can love it! Easy Veggie Pad Thai is a fun and tasty dish. You learned the key ingredients like rice noodles and fresh veggies. We went through the steps to make it right, from cooking noodles to sautéing vegetables. I shared tips to boost flavors and ideas for serving it up. You can even explore variations to suit your taste. In conclusion, this recipe is flexible and simple. You can enjoy it in many ways. Now, it's time to try making your own Easy Veggie Pad Thai!](https://joymealplan.com/wp-content/uploads/2025/07/b6d480dc-093e-4ee9-84ae-64c3c7fdf555-768x768.webp)
![- 2 cups cooked chicken, shredded - 1 cup canned black beans, rinsed and drained - 1 cup fresh or frozen corn kernels The main ingredients create the heart of the chicken enchiladas. First, shredded chicken offers a tender and juicy base. I love using rotisserie chicken for ease. Black beans add protein and fiber, making the meal hearty. Corn brings sweetness and a pop of color. Each ingredient plays a role in making this dish satisfying. - 1 small red onion, finely chopped - 2 cloves garlic, minced - 1 teaspoon ground cumin - 1 teaspoon chili powder Aromatics and seasonings elevate the flavor. The red onion adds a sweet, savory taste. Garlic brings depth and aroma that fills your kitchen. Cumin provides a warm, earthy note. Chili powder adds a gentle kick. These elements create a rich base for the enchiladas. - 8 small corn tortillas - 2 cups shredded cheese (cheddar or Mexican blend) - ¼ cup fresh cilantro, chopped (for garnish) Tortillas hold everything together. I prefer corn tortillas for their authentic flavor. They warm up nicely, making them easy to roll. Cheese melts beautifully, creating a creamy topping. I recommend using a blend for extra flavor. Fresh cilantro adds brightness and a fresh touch. Together, these elements create a delightful finish to your enchiladas. For the full recipe, check out the Spicy Chicken Enchiladas. - Preheat your oven to 350°F (175°C). - Sauté red onion and garlic until fragrant. Start by heating a drizzle of oil in a large skillet over medium heat. Add the finely chopped red onion. Sauté for about 3-4 minutes until the onion turns soft and clear. Then, add the minced garlic and cook for another minute. This step makes your kitchen smell amazing and sets the stage for great flavor. - Combine chicken, black beans, corn, onion-garlic mixture, salsa, cumin, and chili powder. In a big mixing bowl, add the shredded chicken, rinsed black beans, and corn. Pour in the sautéed onion and garlic mixture, along with your choice of salsa. To spice it up, add cumin and chili powder. Mix everything well. This filling is packed with protein and flavor, making your enchiladas both tasty and hearty. - Warm tortillas and fill with chicken mixture. - Roll and arrange in baking dish. Now, warm the corn tortillas in a dry skillet or microwave. This makes them soft and easy to roll. Take about ¼ cup of the chicken mixture and place it in the center of each tortilla. Sprinkle a little cheese on top, then roll them up tightly. Place the rolled tortillas seam-side down in a greased 9x13 inch baking dish. This step is where the magic begins! - Cover with salsa and cheese, bake with foil, then uncovered. Pour any remaining salsa over the top of the enchiladas. Sprinkle the rest of the cheese evenly on top. Cover your baking dish with aluminum foil to keep the moisture in. Bake in the preheated oven for 20 minutes. After that, remove the foil and bake for another 10 minutes. You want the cheese to melt and bubble. Once done, let the enchiladas cool for a few minutes. Garnish with fresh cilantro before serving. This adds a fresh flavor and a lovely touch. Enjoy your homemade chicken enchiladas! For more detailed steps, check out the Full Recipe. - Ensure tortillas are pliable to prevent cracking. Warm them in a skillet or microwave. - Use a mix of cheeses for more flavor. Try combining cheddar and pepper jack. - Serve with sour cream and additional cilantro for extra zest. - Integrate sides like rice or refried beans to complete the meal. - Overfilling tortillas can make them hard to roll. Stick to ¼ cup of filling. - Not letting them cool before serving can lead to a messy plate. Give them a few minutes. {{image_4}} You can make your chicken enchiladas even better for you. - Swap out cheese for a low-fat version. This change cuts calories. - Use whole wheat tortillas for extra fiber. This option boosts nutrition. Want to spice things up? Add some fun flavors! - Add jalapeños for extra heat. This will make your dish lively! - Experiment with different salsas. Try mild, medium, or spicy. Each adds a unique taste. Need to adjust for dietary needs? No problem! - Make it vegetarian by using black beans only. This keeps it hearty and filling. - Use corn tortillas for gluten-free options. They work perfectly in this dish. Feel free to explore these variations and make the recipe your own! To keep your chicken enchiladas fresh, store them in an airtight container. This helps prevent moisture loss and keeps flavors intact. Place them in the fridge where they can stay good for about 3-4 days. Label the container with the date, so you remember when you made them. If you want to save some for later, freezing is a great option. Wrap each enchilada tightly in foil before placing them in a freezer bag. This protects them from freezer burn. They can last for up to 3 months in the freezer. When you're ready to eat, simply thaw them overnight in the fridge. For the best taste and texture, reheat your enchiladas in the oven. Preheat your oven to 350°F (175°C). Place the enchiladas in a baking dish, cover with foil, and heat for about 20-25 minutes. Remove the foil for the last 5 minutes to crisp up the cheese. Enjoy them warm! Chicken enchiladas last about 3-4 days when stored properly. Keep them in an airtight container to maintain freshness. Always check for any signs of spoilage before eating leftovers. Yes, you can assemble chicken enchiladas ahead of time. Just prepare them and place them in the fridge before baking. This is a great way to save time, especially on busy days. You can add many tasty toppings to your enchiladas. Some options include: - Avocado - Guacamole - Green onions - Olives Feel free to get creative with your toppings. They can add color and flavor. You can easily customize this recipe. Adjust the spices to fit your taste. Add your favorite vegetables to the filling, like bell peppers or spinach. This makes the dish more personal and fun. Yes, you can use a slow cooker for this dish. Cook the filling in the slow cooker first. Then, assemble the enchiladas and bake them as usual. This method adds rich flavors and makes cooking easier. For the full recipe, check [Full Recipe]. Chicken enchiladas are simple and fun to make. You need cooked chicken, black beans, corn, and cheese. Follow the steps to prepare, mix, and bake them to perfection. Use tips to avoid common mistakes and enjoy variations for your taste. Remember, leftovers are easy to store and reheat. You can customize this dish with your favorite toppings too. Enjoy this tasty meal with friends and family!](https://joymealplan.com/wp-content/uploads/2025/07/08f715d1-a8ab-4086-9fca-7ff252efa8d5-768x768.webp)
. To make great sesame garlic green beans, avoid burnt garlic. Burnt garlic tastes bitter. Keep the heat at medium when you sauté it. Stir it often for about 30 seconds until it smells good. This way, you get all the flavor without the bad taste. For even flavor, coat every green bean with the oil and garlic. Toss them well in the skillet. This helps each bean absorb the yummy sauce. The right mix makes each bite tasty. Serving your green beans in colorful dishes makes them pop! Use a bright bowl to show off the green color. It makes the dish inviting and fun. You can add extra garnishes for flair. Try more sesame seeds or a drizzle of sesame oil on top. Fresh green onions also add a nice touch. These small details can make your dish look special. Prepping your ingredients in advance saves time. Trim the green beans and chop the garlic ahead of time. This way, you can cook quickly when you’re ready. Using frozen green beans is another great option. They are quick to cook and still taste good. Just follow the same steps as with fresh beans for a tasty dish. For the full recipe, check out the detailed steps and enjoy! {{image_4}} If you need to avoid nuts, sesame oil can be swapped. Try using olive oil or avocado oil. Both oils add a nice flavor without nuts. This makes the dish safe for those with nut allergies. To boost the taste, add crushed red pepper. It gives a spicy kick that many enjoy. You can also add other veggies. Carrots or bell peppers work well. They add color and extra nutrients. For a healthier option, consider coconut aminos. This sauce is lower in sodium than soy sauce. It works great in this recipe. You can also use a low-calorie sweetener instead of honey. This keeps the dish sweet without extra calories. For the full recipe, check out the [Full Recipe]. To store leftover sesame garlic green beans, let them cool first. Place them in an airtight container. You can refrigerate them for up to three days. This keeps the flavors fresh and tasty. When you're ready to eat, reheat the green beans carefully. I suggest using a skillet. Heat it over medium-low heat. Add a splash of water to keep them moist. Stir gently for about five minutes. This method helps maintain their crispness. You can also microwave them in short bursts. Cover the dish to keep the moisture in. If you want to freeze the green beans, do this before adding the sauce. Prepare as usual, then freeze them in a single layer on a baking sheet. Once they are frozen, transfer them to a zip-top bag. This way, they won’t clump together. To thaw, place the bag in the fridge overnight. When ready to use, sauté them with the sauce. Enjoy the fresh flavors from your freezer. For the full recipe, check out the details above. You can make this dish vegan by removing honey. Instead, use agave syrup. This keeps the sweetness while keeping it plant-based. Agave syrup is a great substitute and works well in this recipe. Yes, you can use canned green beans. However, fresh beans taste better. Canned beans save time, but they can be softer. If you use canned, rinse them well to remove extra sodium. Fresh beans will have a crunch that makes this dish shine. These green beans pair well with many dishes. Try serving them with grilled chicken or tofu. They also go great with rice or quinoa. For a full meal, add a side salad for fresh flavors. Yes, this dish can be gluten-free. Use tamari instead of soy sauce. Tamari is a gluten-free soy sauce that gives a rich taste. Always check labels to ensure your ingredients are gluten-free. Adding protein is easy! You can toss in cubed tofu or grilled chicken. Shrimp also works well. Just sauté them before adding the green beans. This will create a well-rounded meal, full of flavor and nutrients. For the full recipe, check out the details above. This post explored how to make tasty Sesame Garlic Green Beans. We covered key ingredients like fresh green beans, sesame oil, and garlic. You learned step-by-step instructions, tips for sautéing, and how to present your dish beautifully. We also discussed variations, storage methods, and common FAQs. These green beans are not just a side dish; they can shine on any table. With the skills you now have, feel confident to create this dish and impress your friends and family. Enjoy cooking!](https://joymealplan.com/wp-content/uploads/2025/07/aeac6747-6887-42be-b9f7-ffc1813a8658-768x768.webp)