Skip to content
About
Contact
Cookie Policy
Copyright Policy
Disclaimer
Search
Home
Dinner
Appetizer
Desserts
Drinks
About
Contact
Privacy Policy
Toggle Menu
Home
/
Dinner
- Page 30
Dinner
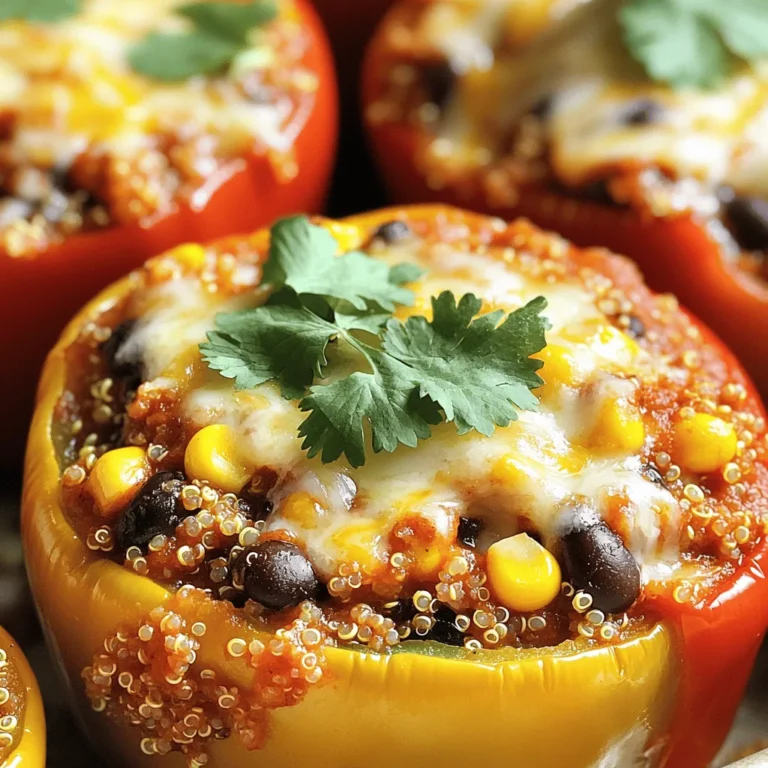
Stuffed Bell Pepper Casserole Flavorful and Easy Meal
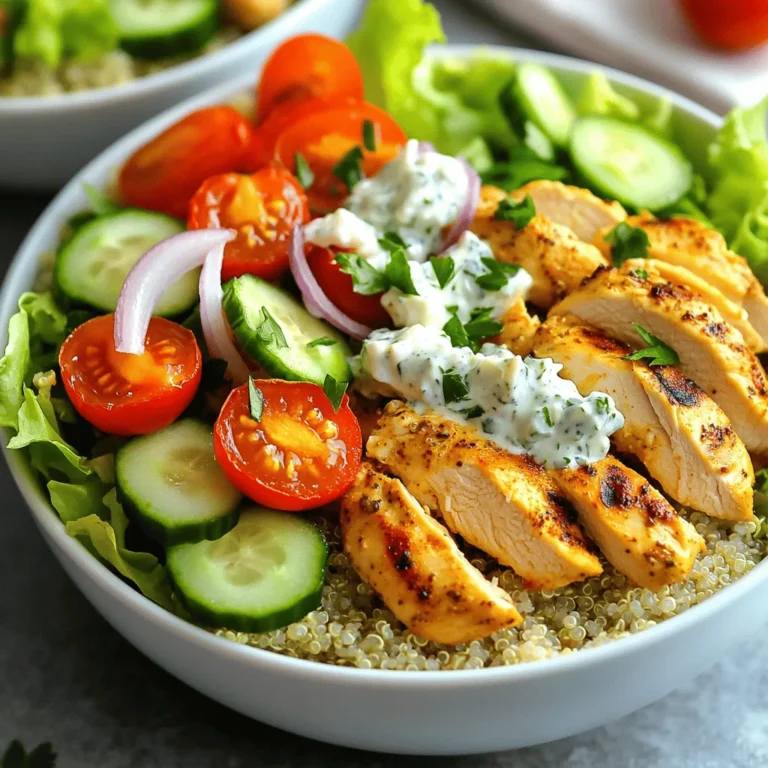
Greek Chicken Gyro Bowls Flavorful and Fresh Meal
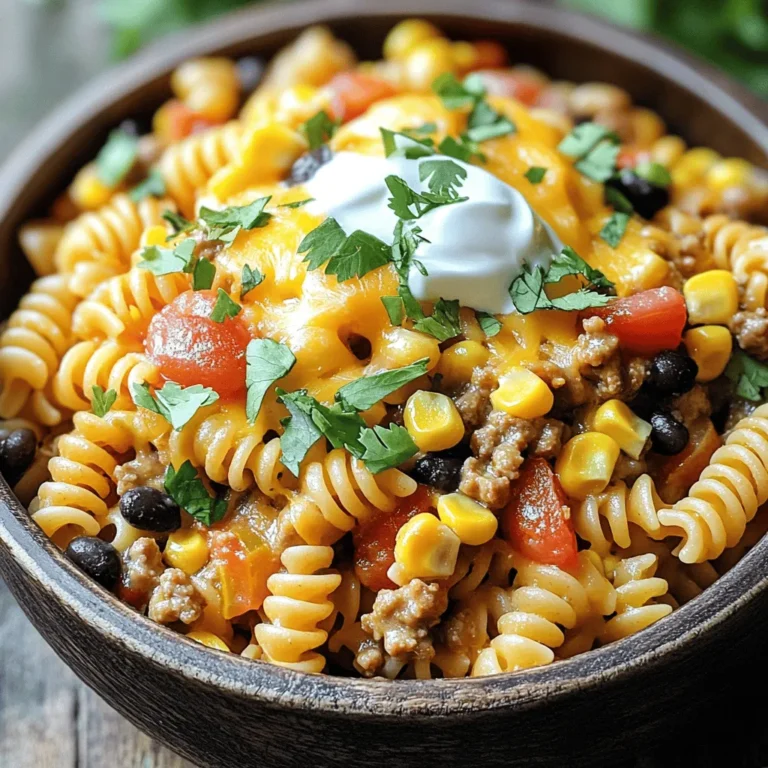
One Pot Taco Pasta Simple and Flavorful Meal
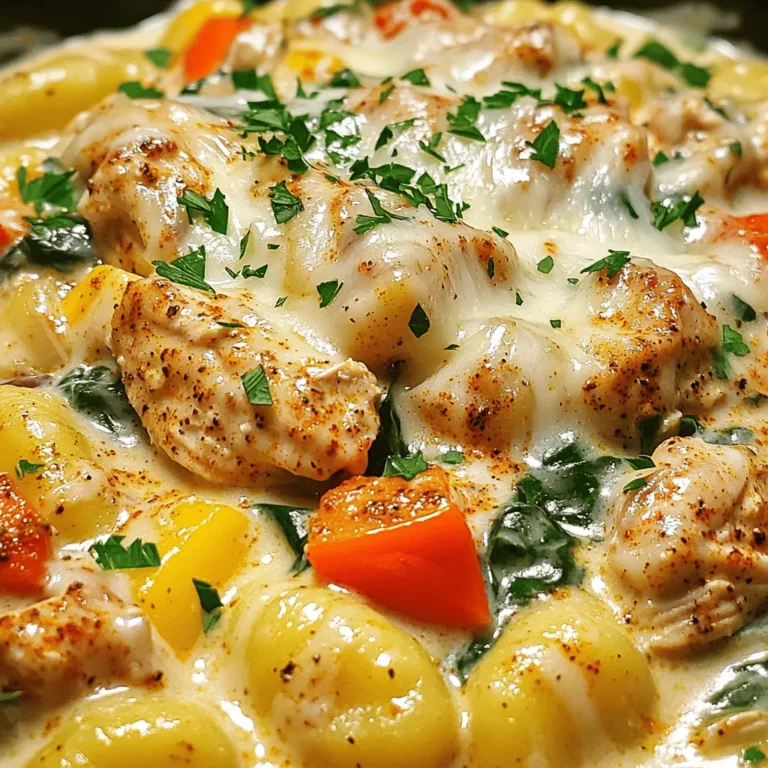
Creamy Cajun Chicken Gnocchi Flavorful Dinner Idea
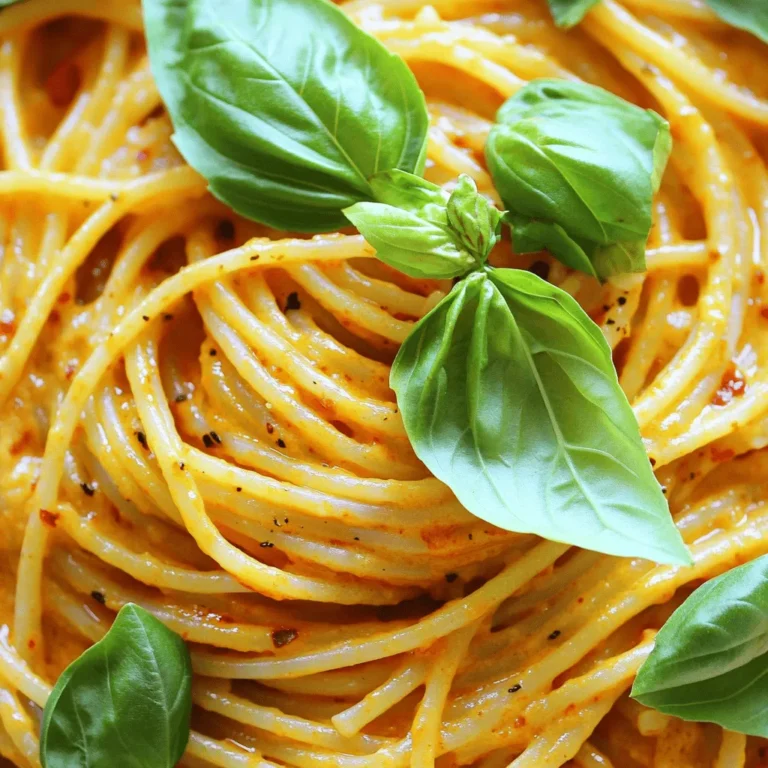
Vegan Creamy Roasted Red Pepper Pasta Delight
Sheet Pan Lemon Herb Chicken and Potatoes Delight
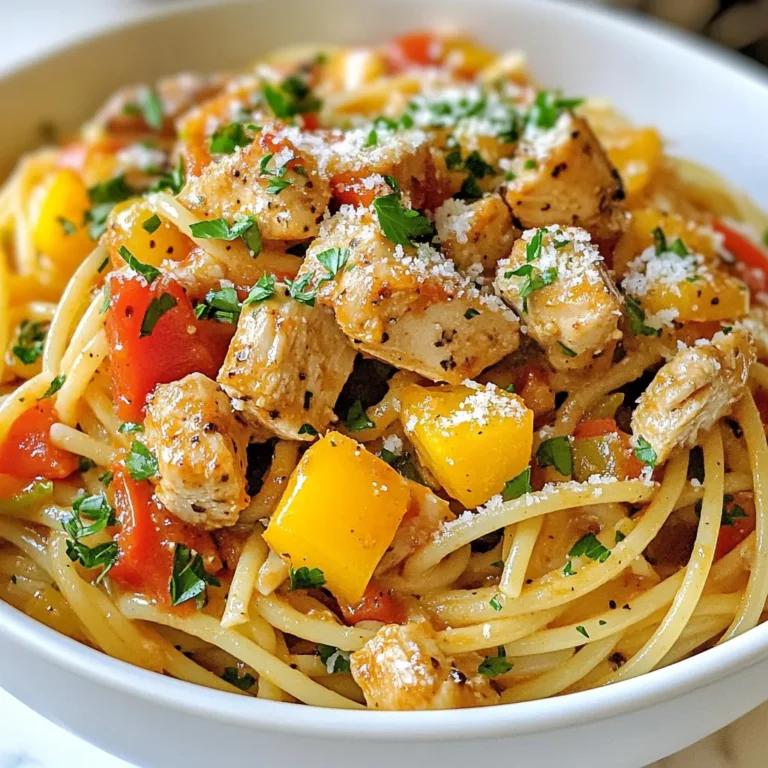
Creamy Cajun Chicken Spaghetti Flavorful Weeknight Meal
Vegan Creamy Roasted Red Pepper Pasta Delight
Savory Sheet Pan Lemon Herb Chicken and Potatoes
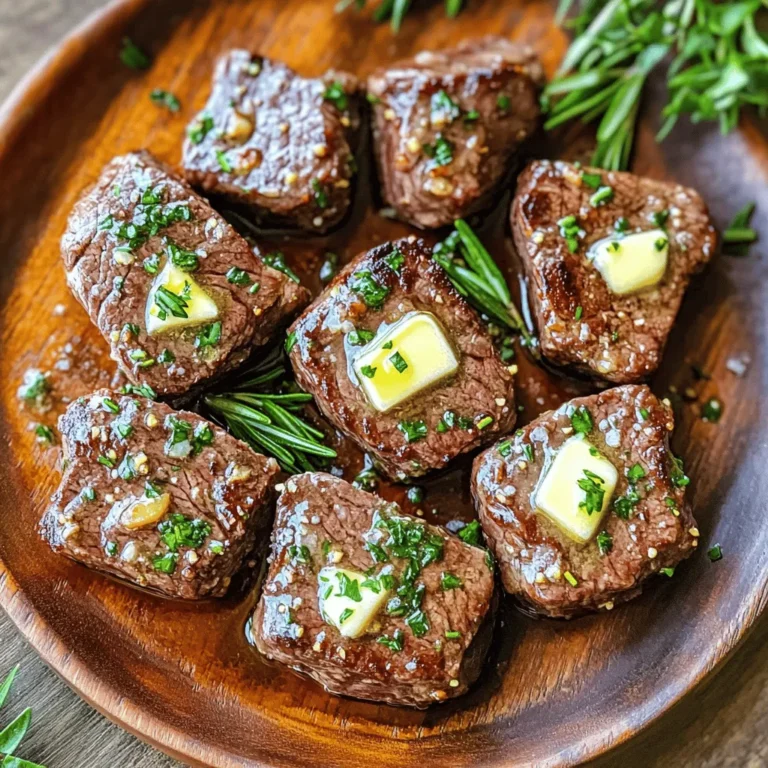
Easy Garlic Butter Steak Bites Flavorful and Simple Meal
Page navigation
Previous Page
Previous
1
…
28
29
30
31
32
…
65
Next Page
Next
Home
Dinner
Appetizer
Desserts
Drinks
About
Contact
Privacy Policy
Toggle Menu Close
Search for:
Search

![- 12 oz pasta (penne, fusilli, or preferred variety) - 2 large red bell peppers - 1 cup raw cashews (soaked in water) - 1 tablespoon olive oil - 3 cloves garlic, minced - 1 cup vegetable broth - 1 tablespoon nutritional yeast - 1 tablespoon freshly squeezed lemon juice - Salt and pepper to taste - Fresh basil leaves for garnish For this vegan creamy roasted red pepper pasta, I love using red bell peppers. They bring sweetness and a lovely color. Start with 12 ounces of your favorite pasta. I prefer penne or fusilli, but any shape you like works. Next, grab two large red bell peppers. These will be roasted to bring out their flavor. Don’t forget the cashews! Use one cup of raw cashews. Soak them in water for at least two hours. This step makes them creamy when blended. Now, let’s talk about the extra ingredients. You’ll need one tablespoon of olive oil for cooking. Garlic adds great taste, so use three cloves, minced. For a nice base, use one cup of vegetable broth. We also need one tablespoon of nutritional yeast for a cheesy flavor. Add one tablespoon of freshly squeezed lemon juice to brighten the sauce. Season with salt and pepper to taste. Finally, fresh basil leaves will make a beautiful garnish. This recipe is easy to follow and packed with flavor. Check out the Full Recipe for more details and instructions! - Preheat your oven to 425°F (220°C). - Slice the red bell peppers in half and remove seeds and stems. - Place them cut side down on a baking sheet. - Roast for 20-25 minutes until the skins blister and char. - Let the peppers cool for a few minutes. - Peel off the skins and chop the peppers into small pieces. - In a large pot, bring salted water to a boil. - Add your pasta and cook until al dente, following package instructions. - Before draining, reserve about 1 cup of the pasta water. - Drain the pasta and set it aside for later. - In a blender, add the roasted peppers, soaked cashews, and garlic. - Pour in the vegetable broth, nutritional yeast, and lemon juice. - Season with a pinch of salt and pepper. - Blend until smooth and creamy, scraping the sides if needed. - Adjust the sauce consistency with reserved pasta water as desired. - Add the cooked pasta back into the pot. - Pour the creamy sauce over the pasta and mix well. - Gently heat the mixture on low for 2-3 minutes. - Taste and adjust seasoning with more salt and pepper if needed. This simple guide helps you create a delightful vegan creamy roasted red pepper pasta that bursts with flavor. For the complete recipe, check the [Full Recipe]. Enjoy cooking! To achieve perfect pasta texture, follow these simple steps. Always cook your pasta in salted water. This enhances flavor and ensures the pasta cooks evenly. Aim for al dente, which means firm to the bite. It should not be mushy. Reserve a cup of pasta water before draining. This water helps to adjust your sauce later. For roasting peppers effectively, preheat your oven to 425°F. Slice the red bell peppers in half and remove the seeds. Place them cut side down on a baking sheet. Roast them for about 20 to 25 minutes. You want the skins to blister and char lightly. This caramelizes their sugars and boosts sweetness. Adjusting seasoning is key for a balanced dish. Start with a pinch of salt and pepper, then taste your sauce. If it needs more flavor, add more salt or lemon juice. For creaminess, you can also add a splash of vegetable broth. Using fresh or dried herbs can elevate your dish. Fresh basil adds brightness. Dried oregano or thyme brings depth. Add these herbs during the blending process for a more integrated flavor. Garnishing can transform your dish. Fresh basil leaves add a pop of color and freshness. Sprinkle some nutritional yeast on top for a cheesy flavor. Crushed red pepper flakes can add a nice kick. For visual appeal, plate your pasta with care. Swirl the noodles for a nice shape. You can also arrange extra basil leaves artfully around the dish. Serve your Vegan Creamy Roasted Red Pepper Pasta hot for the best experience. Enjoy your meal! For the full recipe, check out the details above. {{image_4}} For the sauce base, you can swap the cashews with other nuts. Almonds or macadamia nuts work well. If you want a nut-free option, try using sunflower seeds. They blend into a creamy texture too. If you need gluten-free pasta, use brown rice pasta or chickpea pasta. Both these options taste great and keep the dish healthy. They also add a unique flavor to your pasta. You can make this dish even heartier by adding proteins. Chickpeas or lentils are great choices. They cook quickly and blend well with the sauce. Just stir them in after mixing the pasta with the sauce. If you prefer something meatier, try vegan sausage or tofu. Cook them separately, then mix in with the pasta. This adds a nice texture and extra flavor. This pasta pairs well with side salads or crusty bread. A simple green salad adds freshness and crunch. Garlic bread is a great choice to soak up the creamy sauce. For meal prep, store the pasta in airtight containers. You can make it ahead and reheat it for quick lunches. Just warm it gently on the stove or in the microwave. This dish stays delicious for days! For the full recipe, check out the complete guide. To store leftovers, let the pasta cool down first. Place it in an airtight container. This keeps it fresh for up to four days. When you want to eat it again, take out the amount you need. For reheating, I recommend using the stove. Add a splash of water or vegetable broth. Heat it gently over low heat. Stir often to avoid burning. You can also use the microwave. Just cover it and heat in short bursts. Stir in between to heat evenly. For freezing, I suggest separating the sauce from the pasta. Store the sauce in a freezer-safe container. It will last up to three months in the freezer. You can freeze the pasta too, but it may change texture. If you freeze it, store it in a separate bag. When you're ready to use, thaw the sauce in the fridge overnight. Reheat on the stove, adding a splash of broth if needed. For frozen pasta, boil it for a few minutes until warm. This keeps your vegan creamy roasted red pepper pasta delightful and fresh! For the full recipe, check out the previous sections. Yes, you can use different types of pasta. Here are some suggestions: - Penne: This shape holds sauce well. - Fusilli: The spirals trap sauce nicely. - Spaghetti: Classic choice that works with creamy sauces. - Gluten-free options: Look for rice or chickpea pasta. Feel free to choose your favorite! To add heat, try these tips: - Red pepper flakes: Sprinkle them in the sauce for a kick. - Cayenne pepper: Add a pinch to the blended sauce. - Hot sauce: Mix in your favorite brand to taste. These options let you control the spice level. No, this recipe contains cashews. However, you can make it nut-free. Here are some alternatives: - Sunflower seeds: They blend smoothly and add creaminess. - Pumpkin seeds: A great nut-free option with a slightly different flavor. - Silken tofu: This gives a creamy texture without nuts. These substitutes work well and keep the dish tasty. To make it nut-free, simply substitute the cashews. Here’s how: 1. Choose a nut-free base: Use sunflower seeds or silken tofu. 2. Blend the new ingredient: Just like the cashews, blend them smooth. 3. Adjust seasoning: You may need to tweak the flavors to balance the change. This way, you can enjoy the dish without nuts. For the full recipe, check out the details above. This blog covers a tasty, creamy pasta dish using roasted peppers and cashews. You learned about the ingredients, step-by-step cooking, and tips for best results. Variations give you flexibility with proteins and flavors. Plus, I shared easy storage methods for leftovers. Remember, cooking can be fun and creative! Try different ingredients to make it your own. Enjoy making this flavorful recipe and make it a family favorite. Your kitchen adventures await!](https://joymealplan.com/wp-content/uploads/2025/07/982ba21e-a058-40ff-b3d3-28c410105247-768x768.webp)
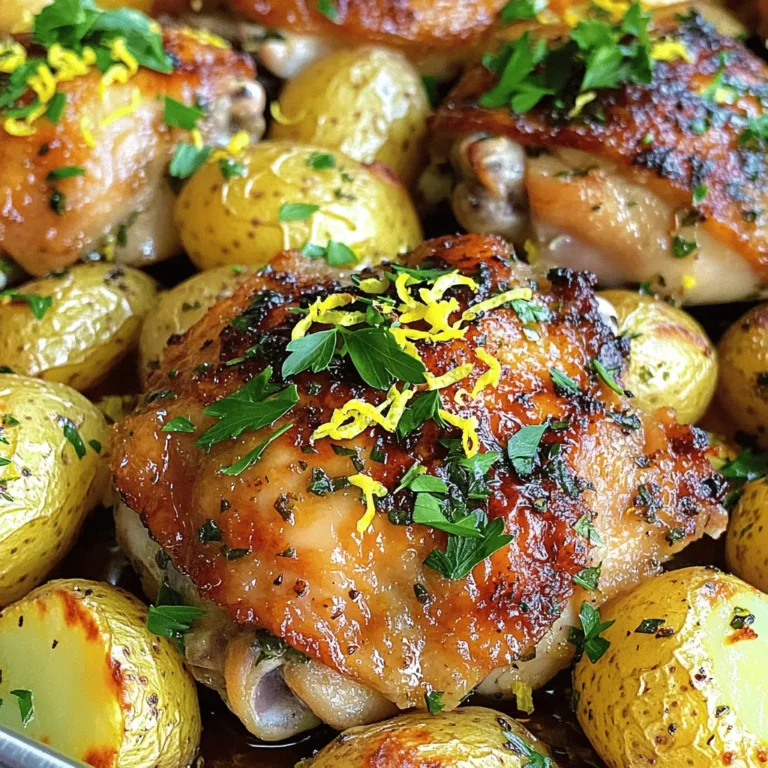
![- 4 boneless, skinless chicken thighs - 1 lb baby potatoes, halved - 1 lemon, zested and juiced - 3 tablespoons extra virgin olive oil - 4 garlic cloves, minced - 1 tablespoon fresh rosemary, finely chopped - 1 tablespoon fresh thyme, finely chopped - 1 teaspoon paprika - Salt and freshly ground pepper to taste - 1 cup broccoli florets (for added color and nutrition) When I make this dish, I get excited about using fresh ingredients. The chicken thighs are juicy and flavorful. They pair perfectly with the baby potatoes, which crisp up beautifully. The lemon adds a bright and zesty touch. It brings life to the dish. I always zest the lemon first. This step releases the essential oils, which pack a punch of flavor. Then, I squeeze the lemon juice right into the marinade. Using fresh herbs like rosemary and thyme makes a big difference. They add a lovely aroma as they cook. I love to chop them finely so their flavor spreads evenly. Garlic, of course, gives that extra depth. If you want more color and nutrition, consider adding broccoli florets. They roast nicely and add a pop of green. For the full recipe, check out the detailed instructions. Each ingredient plays a key role in making this meal a hit. Enjoy cooking! First, preheat your oven to 425°F (220°C). This temperature helps the chicken and potatoes cook evenly. Next, line a sheet pan with parchment paper. This makes cleanup easy and helps prevent sticking. In a large bowl, mix your marinade. Combine 3 tablespoons of olive oil, the juice and zest of one lemon, minced garlic, chopped rosemary, chopped thyme, paprika, and a pinch of salt and pepper. Whisk it all together. This mixture adds great flavor. Now, add your chicken thighs to the marinade. Make sure each piece gets coated well. For the best flavor, let the chicken marinate for at least 15 minutes at room temperature. If you have more time, refrigerate it for up to 1 hour. This helps the flavors soak in. While the chicken marinates, prepare the baby potatoes. Place the halved potatoes on your lined sheet pan. Drizzle them with olive oil and season with salt and pepper. Toss them well so they are coated evenly. Spread them out in a single layer. This helps them crisp up nicely. If you want to add broccoli florets, toss them on the pan as well. They add color and nutrition to the dish. Once your chicken has marinated, take it out of the bowl. Place the chicken thighs on the sheet pan with the potatoes. Arrange them so they cook evenly. Now, put the sheet pan in the oven. Roast for 30-35 minutes. Check the chicken’s internal temperature; it should reach 165°F (75°C) to be safe to eat. The potatoes should be golden and crisp. If you want a golden finish, broil the dish for an extra 2-3 minutes at the end. Keep a close eye on it to avoid burning. After cooking, carefully take the pan out of the oven. Let the dish rest for about 5 minutes. This allows the flavors to settle. Now, you can enjoy your savory Sheet Pan Lemon Herb Chicken and Potatoes! For the complete cooking guide, refer to the Full Recipe. To get juicy chicken, marinate it well. I suggest marinating for at least 15 minutes. For deeper flavor, let it sit in the fridge for up to 1 hour. This helps the flavors sink in. Use a meat thermometer to check doneness. The chicken should reach 165°F (75°C) inside. Insert the thermometer into the thickest part of the thigh. This ensures your chicken is safe to eat. Arranging the potatoes is key to crispiness. Place them cut-side down on the sheet pan. This helps them brown evenly. Roasting in a single layer is important. If you crowd the pan, your potatoes may steam instead of roast. This can lead to soggy potatoes. More space means better air flow and crisp edges. Serve the chicken and potatoes right from the sheet pan. This gives a nice, rustic feel. If you want to impress, transfer it to a big platter. Add garnishes for a pop of color. Fresh lemon slices and more herbs look great. They make your dish more appealing and delicious. {{image_4}} You can switch up the herbs in this dish. Try using basil or oregano instead of rosemary and thyme. Fresh herbs give great flavor, but dried herbs work too. If you prefer dried herbs, use about one-third the amount. Dried herbs are easy to store and use anytime. Feel free to add more veggies to your sheet pan. Carrots, bell peppers, or green beans pair well with chicken and potatoes. You can also use seasonal veggies. In spring, try asparagus or peas. In fall, sweet potatoes or brussels sprouts work nicely. These additions bring color and nutrition. For a flavor kick, think about adding spices. Paprika adds a nice warmth, but you can also try cumin or chili powder for extra heat. Zest from other citrus fruits like lime or orange can brighten the dish. Each change will give your meal a unique twist, making it fun to explore. To keep your leftovers fresh, place them in an airtight container. This helps prevent moisture loss and keeps flavors intact. Store the container in the fridge. Your lemon herb chicken and potatoes will last up to three days. If you want to keep them longer, consider freezing them. In the freezer, they can last for up to three months. For reheating, the oven works best. Preheat your oven to 350°F (175°C). Place the chicken and potatoes on a baking sheet. Cover them with foil to keep them moist. Heat for about 15-20 minutes or until warm. You can also use a microwave if you’re in a hurry. Just be careful; it may make the potatoes a bit soft. To keep the texture nice, try reheating in the oven whenever possible. For a quick snack, you can also enjoy the chicken cold. It's still tasty and full of flavor! You can serve many side dishes with this meal. Here are some tasty options: - Steamed green beans: They add crunch and color. - Simple salad: A fresh salad with mixed greens is perfect. - Rice or quinoa: These grains soak up the juice well. - Roasted carrots: They bring sweetness that pairs nicely. - Garlic bread: This adds a nice touch for bread lovers. Yes, you can! Try these cuts for a fun twist: - Chicken breasts: They cook fast and stay juicy. - Drumsticks: They add a nice crispy skin. - Wings: Great for a fun, finger-licking option. Absolutely! To prep this dish in advance: - Marinate the chicken: You can do this a day before. - Chop the potatoes: Keep them in water to stay fresh. - Store in the fridge: Use airtight containers for best results. You can make it lighter with a few simple swaps: - Use skinless chicken: This cuts down on fat. - Swap olive oil for broth: It reduces calories while keeping taste. - Add more veggies: Include spinach or bell peppers for nutrition. You can find the Full Recipe [here]. It has all the details you need to make this dish perfectly. This recipe gives you a tasty and easy sheet pan lemon herb chicken dish. We've covered ingredients, step-by-step cooking methods, and tips for perfect results. Don't forget the option to add your favorite veggies for more flavor. You can also change this dish with different herbs and spices. Follow the storage tips to keep leftovers fresh. Enjoy making this simple, healthy meal that brings great taste to your table!](https://joymealplan.com/wp-content/uploads/2025/07/eaffd7d4-0358-4ae2-a047-6502860c21d0-768x768.webp)