Skip to content
About
Contact
Cookie Policy
Copyright Policy
Disclaimer
Search
Home
Dinner
Appetizer
Desserts
Drinks
About
Contact
Privacy Policy
Toggle Menu
Home
/
Dinner
- Page 31
Dinner
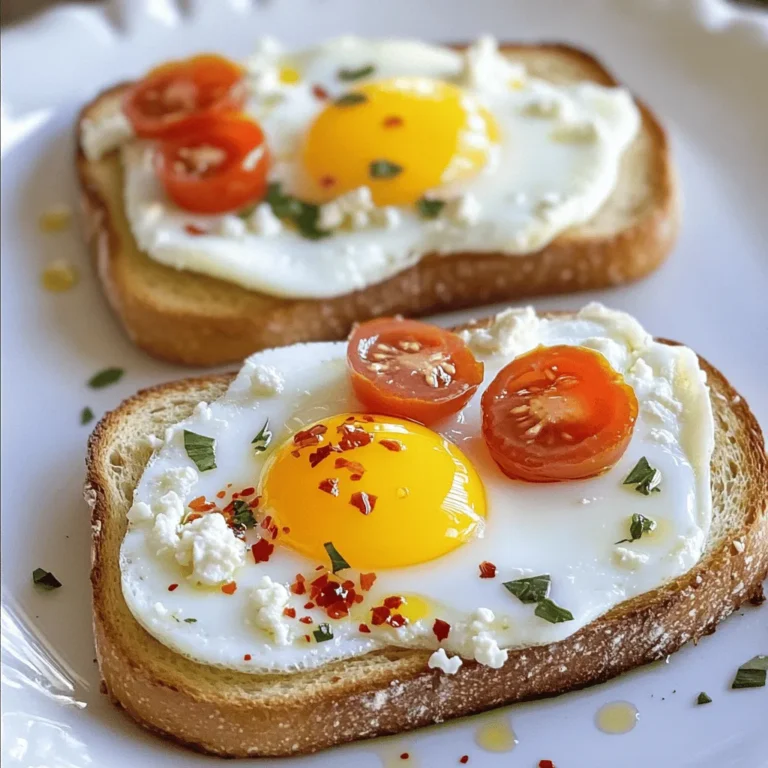
Viral Feta Egg Toast Simple and Delicious Recipe
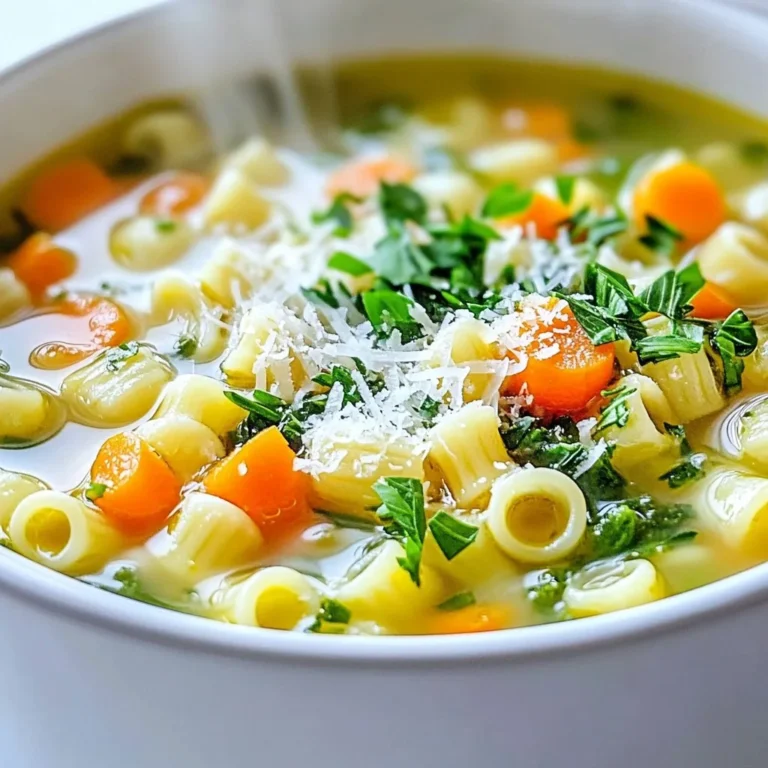
Italian Pastina Soup Comforting and Simple Recipe
Pickle Ranch Pasta Bake Hearty and Flavorful Dish
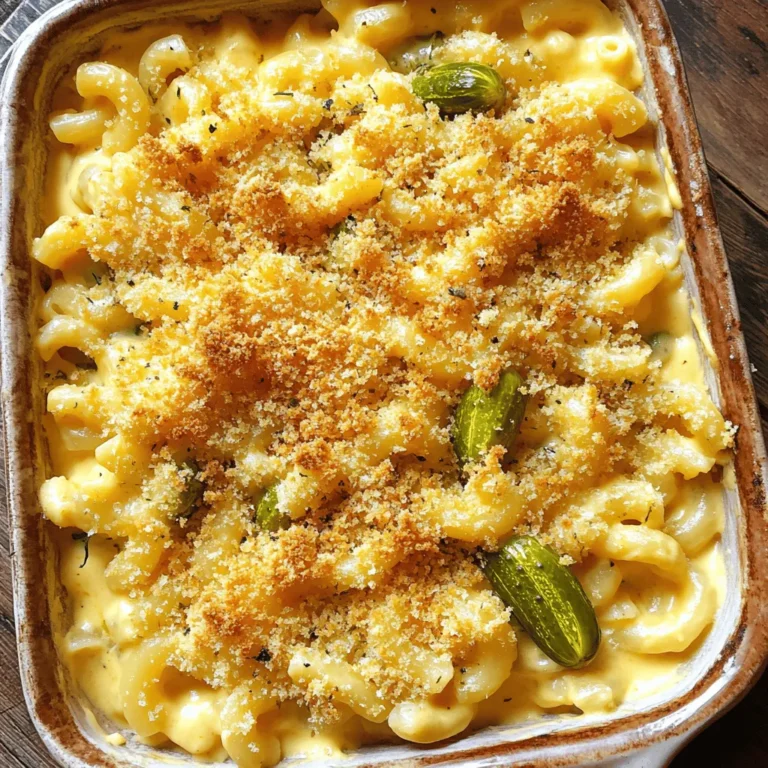
Pickle Mac and Cheese Savory Comfort Food Delight
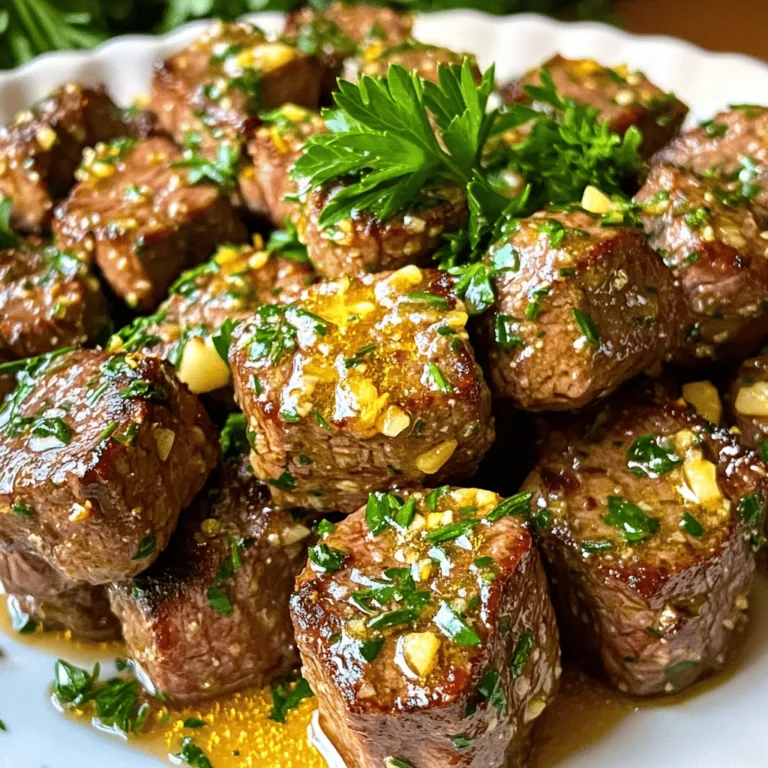
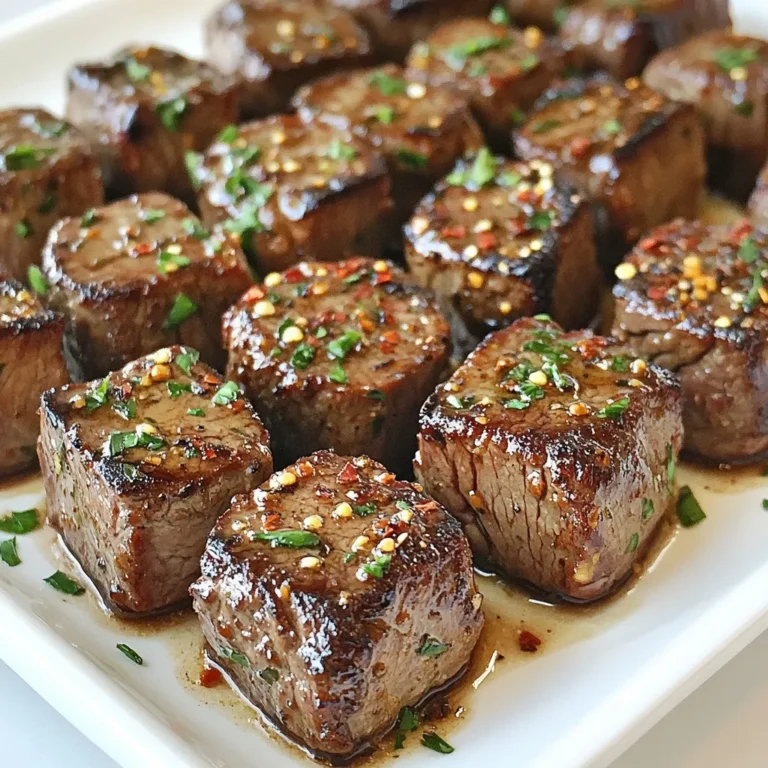
Garlic Butter Steak Bites Easy and Flavorful Recipe
Rainbow Veggie Sushi Rolls Colorful and Nutritious Bite
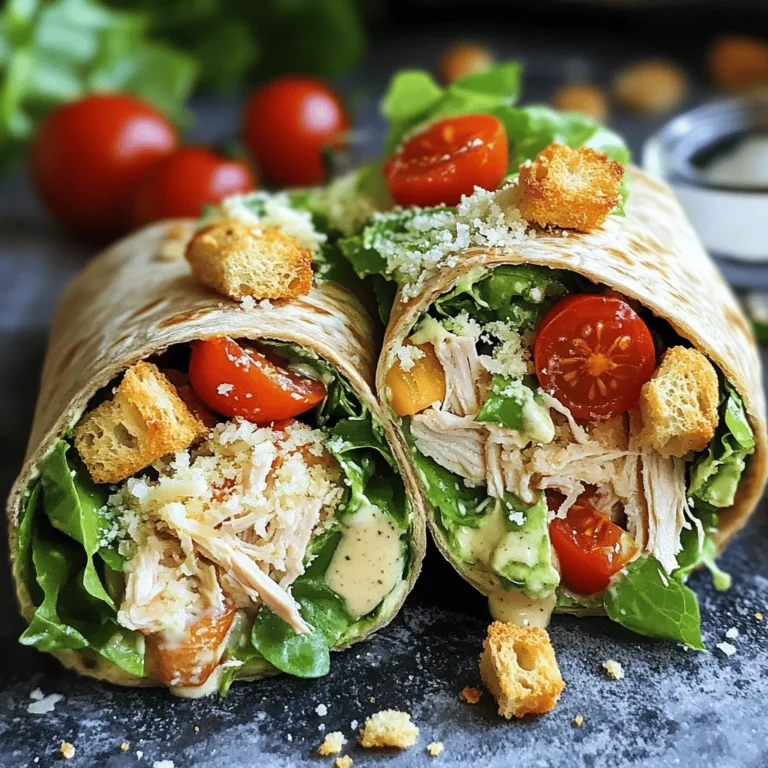
Classic Chicken Caesar Wraps Simple and Tasty Meal
Garlic Butter Steak Bites Savory and Quick Recipe
Vegan Mac and Cheese Creamy Comfort Food Delight
Savory BLT Pasta Salad Fresh and Flavorful Recipe
Page navigation
Previous Page
Previous
1
…
29
30
31
32
33
…
65
Next Page
Next
Home
Dinner
Appetizer
Desserts
Drinks
About
Contact
Privacy Policy
Toggle Menu Close
Search for:
Search

![To make the Pickle Ranch Pasta Bake, you need the following ingredients: - 8 ounces elbow macaroni - 1 cup dill pickles, chopped - 1 cup cooked chicken, shredded (optional for added protein) - 1 cup ranch dressing - 1 cup cheddar cheese, shredded - 1/2 cup cream cheese, softened - 1/2 teaspoon garlic powder - 1/2 teaspoon onion powder - 1/2 teaspoon black pepper - 1/2 cup breadcrumbs - Fresh dill for garnish (optional) These ingredients create a rich and fun dish. The elbow macaroni serves as the base, providing a nice bite. Dill pickles add a tangy crunch that surprises the taste buds. If you want more protein, shredded chicken works great. Ranch dressing brings a creamy flavor that ties it all together. Cream cheese makes it rich, while garlic and onion powders add depth. Shredded cheddar gives a gooey finish, and breadcrumbs add a crispy top. For garnish, fresh dill is a lovely touch. You can find the complete recipe in the Full Recipe section. - Preheat the oven to 350°F (175°C). - Cook the elbow macaroni until it is al dente. This means it should be firm but not hard. Follow the package directions for timing. After cooking, drain the pasta well and let it cool slightly. - In a mixing bowl, combine the softened cream cheese and ranch dressing. - Add garlic powder, onion powder, and black pepper. - Mix everything well until the sauce is smooth and creamy without any lumps. - In the bowl with the sauce, add the chopped dill pickles. If you want more protein, add shredded chicken too. - Gently fold in the cooked macaroni, ensuring all pieces are covered in sauce. - Grease a 9x13 inch baking dish with cooking spray or a bit of olive oil. - Pour the pasta mixture into the dish, spreading it out evenly. - Top it all with shredded cheddar cheese to create a nice, cheesy layer. - In a small bowl, mix the breadcrumbs with a tablespoon of olive oil until they are coated. - Sprinkle this breadcrumb mix over the cheese layer for a crunchy top. - Place the baking dish in your preheated oven and bake for 25-30 minutes. - Look for the cheese to be bubbly and the breadcrumbs to turn golden brown. Now you have a warm, hearty dish ready to serve. For more details, check the Full Recipe. To make your Pickle Ranch Pasta Bake shine, try different types of pickles. You can use sweet pickles for a fun twist or spicy ones for a kick. Each variety adds its unique taste. Always taste your dish as you cook. Adjust the seasoning to suit your preferences. More garlic powder? Add it! Need more zest? A touch of lemon juice can work wonders. For a creamier sauce, mix in a bit more cream cheese. This change makes the sauce rich and smooth. If you prefer a crunchy topping, add more breadcrumbs or even crushed potato chips. They will give the bake an exciting crunch that contrasts nicely with the soft pasta. Presentation matters! Serve the pasta bake right from the dish for a cozy look. For a pop of color, sprinkle fresh dill on top before serving. This not only looks good but also adds fresh flavor. Consider adding extra dill pickles on the side. They make a fun garnish and give guests a chance to customize their plates. For the full recipe, check out the [Full Recipe]. {{image_4}} You can switch out pasta types in this dish. Gluten-free pasta works well if you need it. You can also try whole wheat or penne for a twist. The dressing is flexible too. Use a ranch with herbs for more flavor. Different cheeses can change the taste. Try pepper jack or mozzarella for a new experience. This dish is fun because you can add more veggies or proteins. Bell peppers, spinach, or even corn can boost the flavor. You can add cooked bacon or sausage for extra heartiness. If you want a vegan option, use plant-based cream cheese and cheese. You can skip the chicken and still have a tasty meal. This pasta bake can fit many diets and tastes. To keep your Pickle Ranch Pasta Bake fresh, store leftovers in an airtight container. Place it in the fridge right after it cools. This helps keep it moist and tasty. Consume leftovers within three to four days for the best flavor. If you want to save some for later, freezing works great. First, let the pasta bake cool completely. Then, cut it into portions. Wrap each piece in plastic wrap, then place them in a freezer-safe bag. Label the bag with the date. It can last up to three months in the freezer. When it's time to enjoy your pasta bake again, you want it to taste just as good. The best way to reheat it is in the oven. Preheat your oven to 350°F (175°C). Place the portioned bake in a baking dish and cover it with foil. This keeps it from drying out. Heat for about 20 minutes or until it's warm throughout. If you're in a hurry, you can use a microwave. Place a piece on a microwave-safe plate. Cover it with a damp paper towel to keep moisture in. Heat on medium power for about two minutes. Check and stir if needed. Enjoy your delicious dish just like the first time! Yes, you can make this dish ahead of time. To do this, prepare the pasta and sauce as usual. Then, combine everything in the baking dish. Cover it tightly with foil or plastic wrap. You can store it in the fridge for up to 24 hours before baking. When you are ready to bake, remove the cover and heat your oven to 350°F (175°C). Bake for about 30 to 35 minutes. Check for bubbly cheese and a golden crust. This tip saves time during busy weeknights. Absolutely! The Pickle Ranch Pasta Bake is very kid-friendly. Kids often love the creamy texture and cheesy flavor. To make it even better for picky eaters, you can leave out the dill pickles. You might also want to reduce the ranch dressing. If your kids like it, you can try adding some cooked broccoli or peas. This adds color and nutrition without changing the taste too much. To add some heat, consider mixing in some diced jalapeños or crushed red pepper flakes. You can also use a spicy ranch dressing instead of the regular one. If you enjoy hot sauce, drizzle some over the top before baking. Just remember to taste as you go. This way, you can adjust the heat to your liking. Enjoy experimenting with flavors! This dish blends macaroni, ranch dressing, and pickles into a tasty bake. You can customize it with various ingredients and adjust flavors. For a creamy dish, mix the sauce well; for crunch, use more breadcrumbs. Store leftovers properly to enjoy later. You can make it ahead or cater to picky eaters with simple swaps. Overall, this recipe provides versatility and fun for your cooking adventures. Get creative and enjoy your delicious meal!](https://joymealplan.com/wp-content/uploads/2025/07/1b3a3990-0373-4e07-90bf-a46c97a9e002-768x768.webp)


![For a tasty BLT pasta salad, you need a few key ingredients. Here’s what you will use: - 8 oz fusilli pasta - 1 cup cherry tomatoes, halved - 1 cup fresh spinach, roughly chopped - 1 cup cooked turkey bacon, finely chopped - 1/2 cup red onion, diced These ingredients give your salad great flavor and texture. The fusilli pasta holds dressing well. Cherry tomatoes add a burst of sweetness. Fresh spinach adds color and nutrients. Turkey bacon gives a nice crunch. Now, let’s talk about the dressing. The right seasoning makes a big difference. Here’s what you need: - 1/2 cup mayonnaise - 2 tablespoons Greek yogurt - 1 tablespoon apple cider vinegar - 1 teaspoon garlic powder - Salt and black pepper to taste This creamy dressing balances the salad. Mayonnaise and yogurt add richness. Apple cider vinegar brings a tangy touch. Garlic powder enhances the flavors, while salt and pepper season everything just right. To make your salad even better, you can add some fun toppings. Consider these options: - Fresh basil leaves, for garnish Basil adds a fresh aroma and flavor. You can also use extra cherry tomatoes or some nuts for crunch. These extras can make your dish more colorful and appealing. For the full recipe, check out the details to create this delightful dish! To start, bring a large pot of salted water to a boil. The salt helps add flavor to the pasta. Add 8 oz of fusilli pasta to the pot. Cook it according to the package instructions. You want it to be al dente, which means it should be firm but not hard. This usually takes around 8 to 10 minutes. Once the pasta is done, drain it in a colander. Rinse it under cold water to stop the cooking. This step cools the pasta down and helps it not stick together. In a large mixing bowl, combine the cooled pasta with the salad ingredients. Add 1 cup of halved cherry tomatoes and 1 cup of roughly chopped fresh spinach. Then, mix in 1 cup of finely chopped cooked turkey bacon and 1/2 cup of diced red onion. Gently stir everything together until well mixed. This will create a colorful and tasty base for your salad. Now, it’s time to make the dressing. In a separate bowl, whisk together 1/2 cup of mayonnaise, 2 tablespoons of Greek yogurt, and 1 tablespoon of apple cider vinegar. Then, add 1 teaspoon of garlic powder along with salt and black pepper to taste. Mix until the dressing is smooth and creamy. This dressing adds richness and flavor to your salad. Pour it over the pasta mixture and carefully fold it in. Make sure every bite gets some dressing. Taste your salad and adjust the seasoning if needed. Cover the bowl and refrigerate for at least 30 minutes. This will help the flavors blend nicely. You can find the full recipe at [Full Recipe]. To cook pasta just right, start with a large pot. Fill it with water and add salt. The salt gives flavor to the pasta. Bring the water to a boil before adding your fusilli. Stir the pasta right away to prevent sticking. Cook it according to the package time until it's al dente, which means firm but not hard. After cooking, drain the pasta and rinse it under cold water. This stops the cooking and cools it down for the salad. To make your salad burst with flavor, use fresh herbs. Fresh basil works great, adding a sweet and peppery taste. You can also try adding a pinch of crushed red pepper for heat. Garlic powder gives a nice depth, but fresh garlic can add a sharper taste. Don’t forget to taste your salad as you season. This way, you can adjust the flavors to your liking. Making your salad ahead of time is smart. It allows the flavors to mix well. I suggest making it at least 30 minutes before serving. Just cover the bowl and chill it in the fridge. If you want to prep even earlier, you can cook the pasta and chop the veggies a day ahead. Keep the dressing separate until you’re ready to serve. This keeps everything fresh and crunchy. For the full recipe, check out the detailed instructions. {{image_4}} You can make simple swaps to boost nutrition. Use whole wheat pasta instead of regular. This adds fiber and keeps you full longer. Try Greek yogurt in place of mayonnaise for a lighter dressing. You can also add more fresh veggies, like bell peppers or cucumbers, for extra crunch and vitamins. To make this salad vegan, swap turkey bacon for tempeh or crispy chickpeas. Both options give great flavor and texture. Use vegan mayonnaise for the dressing. You can also add avocado for creaminess and healthy fats. This keeps the salad rich and satisfying without animal products. Adding ingredients can make your salad more exciting. Toss in fresh herbs like parsley or chives for brightness. You could also add nuts, like walnuts or pine nuts, for a crunchy bite. Cheese lovers can sprinkle in feta or goat cheese for a tangy twist. These additions elevate the taste and make each bite special. For the full recipe, check out the complete guide. After making your BLT pasta salad, let it cool. Transfer it to an airtight container. Cover it tightly to keep air out. This helps maintain freshness. Place it in the fridge right away. Avoid leaving it out for too long. Your pasta salad will stay fresh for about three days. After that, it may lose its flavor and texture. Check for any signs of spoilage. If it smells off or looks strange, it’s best to toss it. Freezing BLT pasta salad is not recommended. The creamy dressing can separate when thawed. The texture of pasta and veggies may change, too. If you want to save it, consider freezing the pasta and dressing separately. This way, you can enjoy fresh flavors when you reassemble it. For the full recipe, check out the details provided above. Fusilli pasta works great for this salad. Its spiral shape holds the dressing well. You can also use rotini or penne if you prefer. Both types add texture to the dish. Choose any pasta that you enjoy. Just make sure it's cooked al dente for the best bite. Yes, you can use regular bacon. It will add a rich flavor to your salad. Just cook it until crispy and chop it finely. However, turkey bacon is a lighter option. It keeps the salad healthier without losing taste. To make this salad gluten-free, use gluten-free pasta. Many brands offer great options made from rice or quinoa. Always check the label to ensure it's certified gluten-free. This way, everyone can enjoy the dish without worry. Serve this salad chilled as a side dish. It pairs well with grilled meats or sandwiches. You can also enjoy it as a light main dish. For a fun twist, serve it in lettuce cups or avocado halves for added crunch. Absolutely! This salad tastes even better after chilling. You can prepare it up to a day ahead. Just store it in the fridge until ready to serve. The flavors will blend nicely, making each bite delicious. Store any leftovers in an airtight container. Keep it in the fridge for up to three days. If it seems dry, add a bit more dressing before eating. This will help refresh the flavor and texture. For the full recipe, check out the details above! This post covers all you need for making a tasty BLT pasta salad. We explored the key ingredients, step-by-step cooking, and helpful tips. You learned about variations and storage methods to keep your salad fresh. Enjoy your own twist on this dish. Whether you want to make it healthier or add more flavor, the options are yours. Now, gather your ingredients and have fun cooking!](https://joymealplan.com/wp-content/uploads/2025/07/ece4661f-932b-46ab-84ac-afef4fdb42e9-768x768.webp)