Skip to content
About
Contact
Cookie Policy
Copyright Policy
Disclaimer
Search
Home
Dinner
Appetizer
Desserts
Drinks
About
Contact
Privacy Policy
Toggle Menu
Home
/
Dinner
- Page 35
Dinner
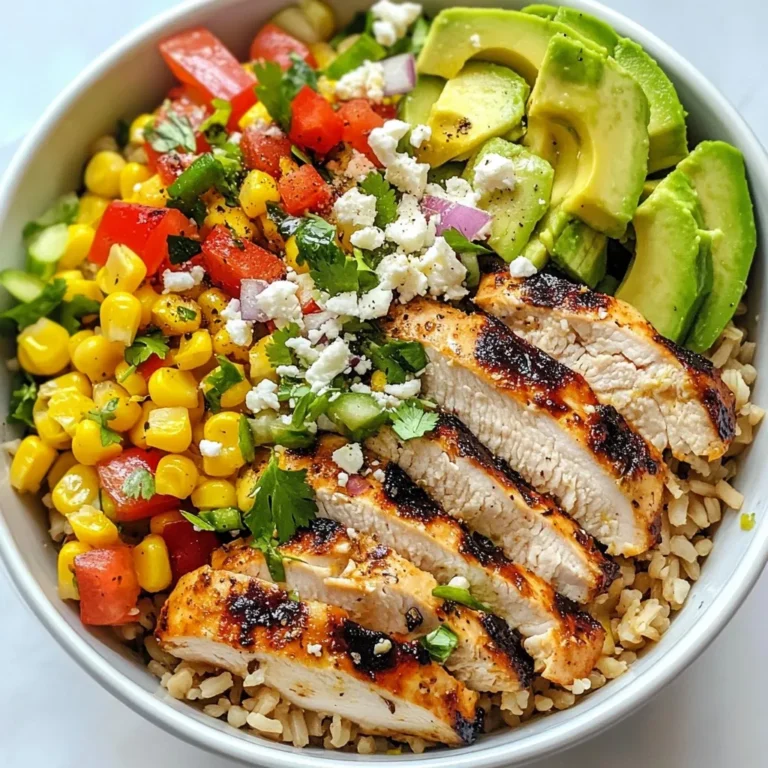
Street Corn Chicken Bowls Flavorful and Easy Recipe
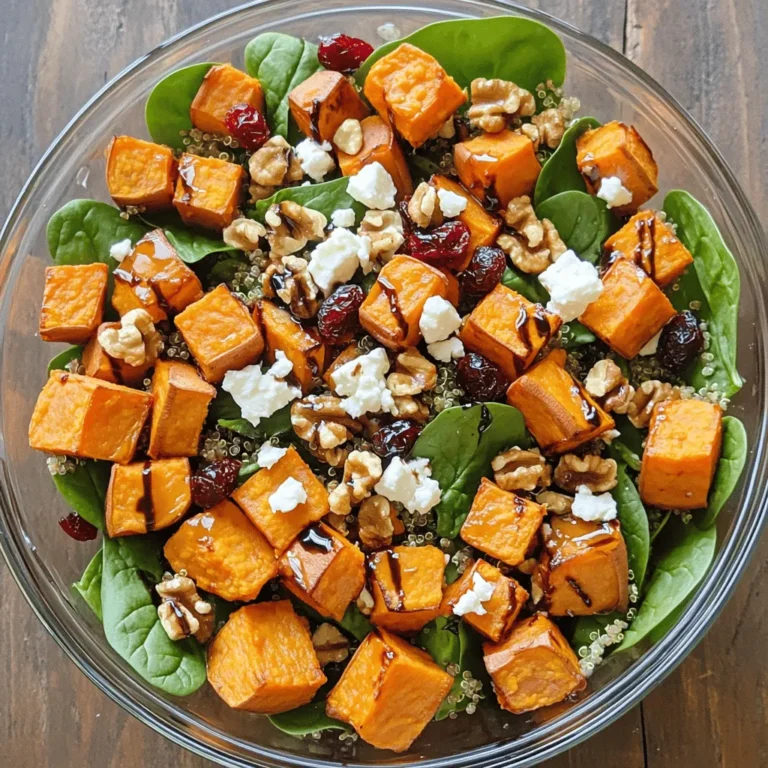
Roasted Sweet Potato Salad Flavorful and Nutritious Dish
Easy Chicken Shawarma Bowls Flavorful and Quick Meal
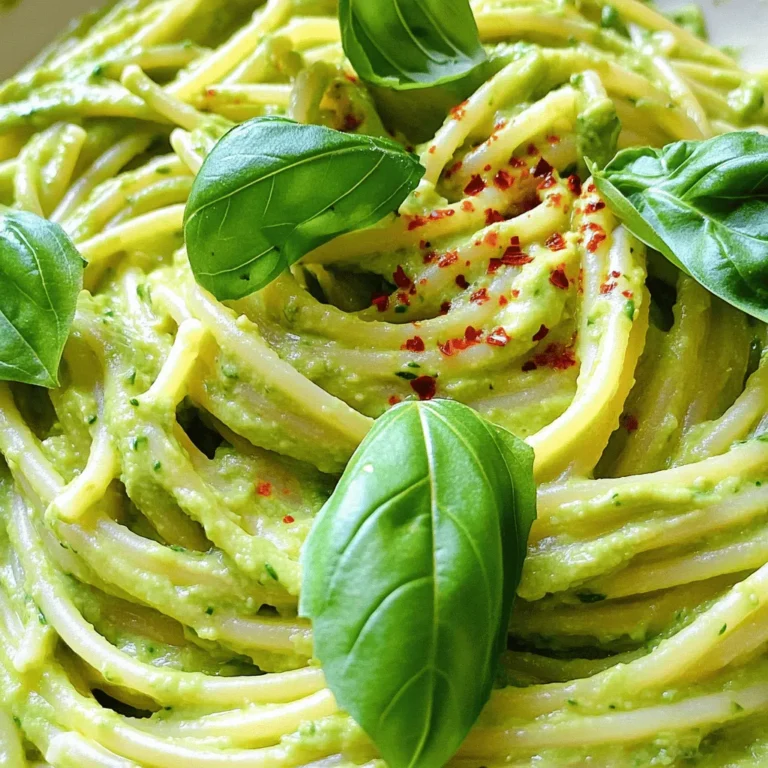
Creamy Avocado Pasta Tasty and Simple Delight
Savory Sesame Ginger Chicken Bowls Easy and Quick Meal
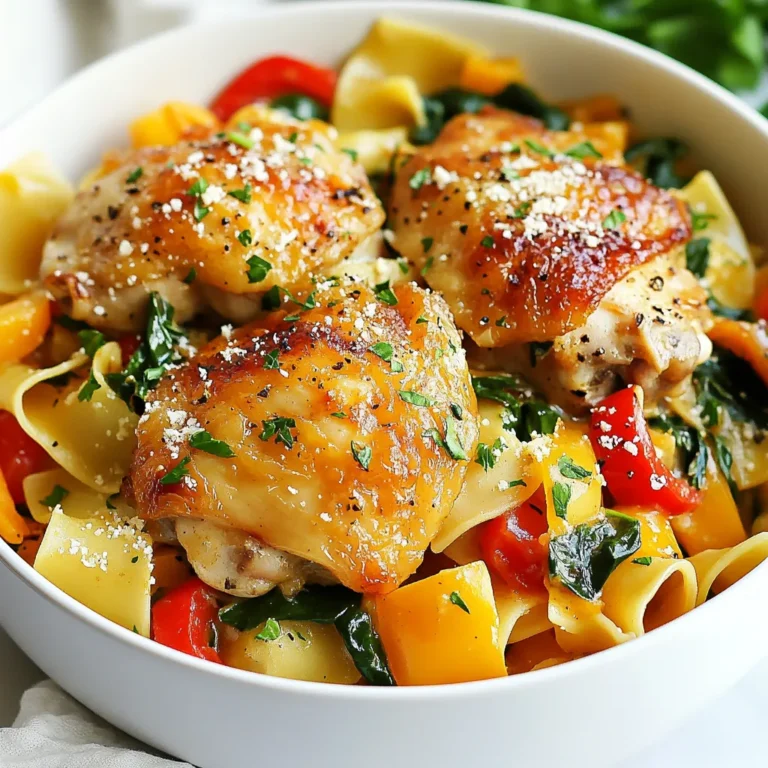
One-Pan Chicken with Buttered Noodles Simple Delight
Taco Stuffed Zucchini Boats Flavorful and Easy Recipe
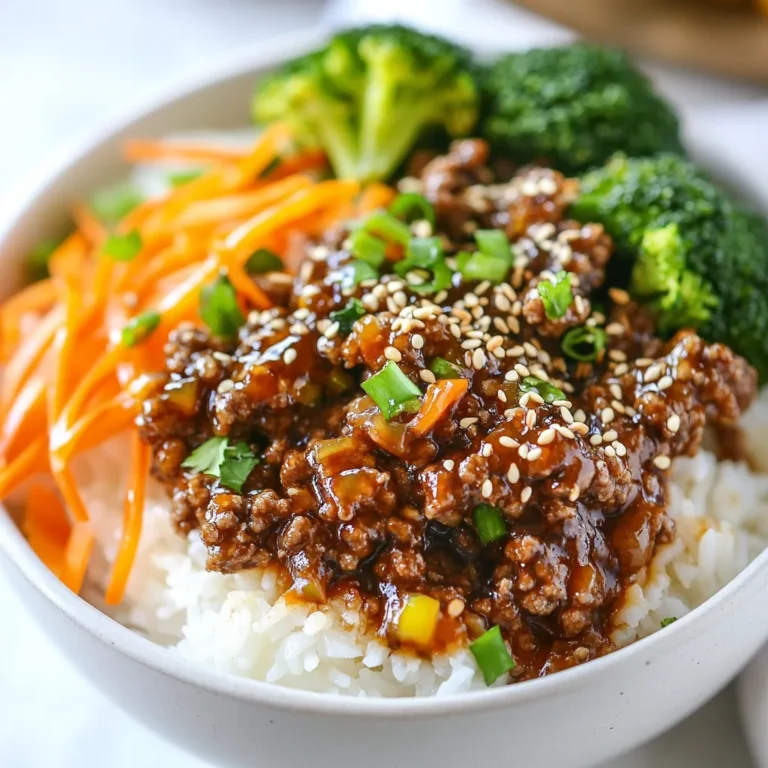
Korean Ground Beef Bowls Quick and Flavorful Meal
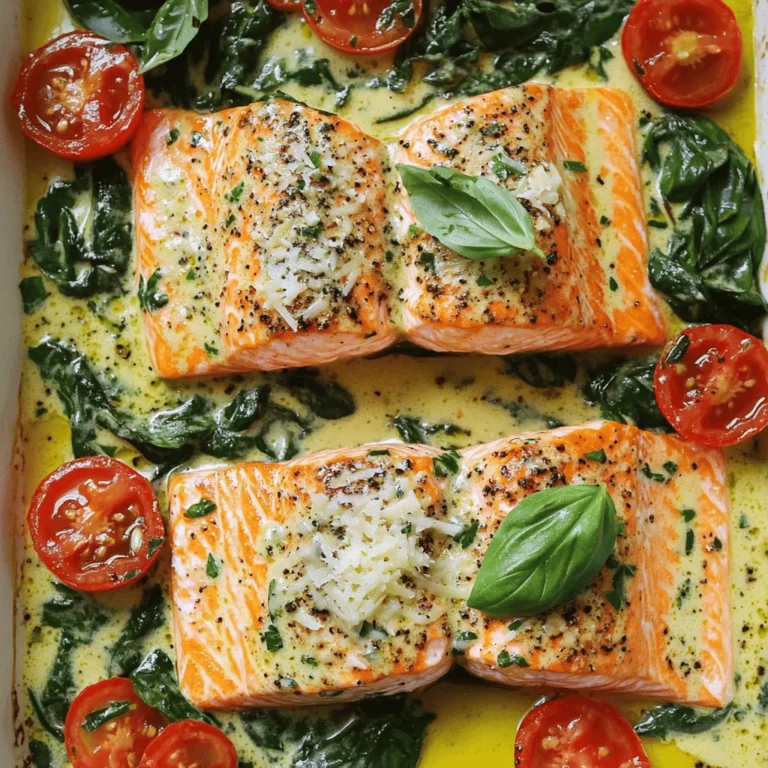
Creamy Tuscan Salmon Delightful and Simple Recipe
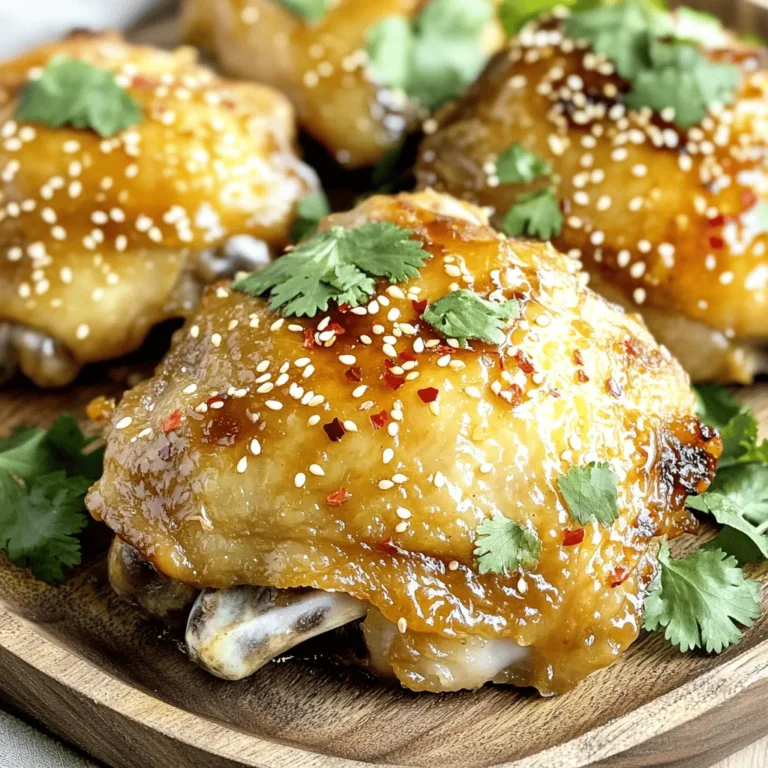
Spicy Honey Garlic Chicken Thighs Irresistible Flavor
Page navigation
Previous Page
Previous
1
…
33
34
35
36
37
…
65
Next Page
Next
Home
Dinner
Appetizer
Desserts
Drinks
About
Contact
Privacy Policy
Toggle Menu Close
Search for:
Search

![- 1 lb boneless, skinless chicken thighs - 2 tablespoons olive oil - 3 cloves garlic, minced - 2 teaspoons ground cumin - 2 teaspoons ground paprika - 1 teaspoon ground turmeric - 1 teaspoon ground cinnamon - 1 teaspoon cayenne pepper (adjust according to spice preference) - Salt and pepper to taste - 1 cup cooked quinoa or couscous (your choice) - 1 cup cherry tomatoes, halved - 1 cucumber, diced into bite-sized pieces - 1/2 red onion, thinly sliced - 1 cup mixed greens or baby spinach - 1/4 cup plain Greek yogurt - 2 tablespoons tahini - Juice of 1 fresh lemon - Fresh parsley, chopped, for garnish For these Chicken Shawarma Bowls, chicken thighs shine as the star. They stay juicy and tender, making each bite a delight. Olive oil and spices create a fantastic marinade. The blend of garlic, cumin, and paprika gives a warm, rich flavor. The cayenne adds a kick, but you can adjust it to suit your taste. Fresh toppings like cherry tomatoes and cucumber bring crunch. Mixed greens or baby spinach add a lovely green touch. Topping it all off with Greek yogurt and tahini creates a creamy finish. This mix of flavors makes each bowl special. - Additional vegetables - Different types of grains or bases - Garnishes for enhanced flavor While the main ingredients are fantastic, you can personalize your bowls. Add extra vegetables like bell peppers or carrots for more color and texture. You can switch grains too—try brown rice or farro for a unique twist. Garnishes like chopped nuts or seeds give a nice crunch. Fresh herbs, like mint or dill, can brighten the dish. Feel free to experiment based on what you love or have at home. These options add fun and flavor to your meal. For the complete recipe, check out the Full Recipe. To start, you need to prepare the marinade. In a large bowl, mix together the olive oil, minced garlic, cumin, paprika, turmeric, cinnamon, cayenne pepper, salt, and pepper. Whisk until everything combines well. This creates a tasty blend that makes your chicken shine. Next, it’s time to coat the chicken. Add the boneless, skinless chicken thighs to your bowl. Make sure each piece is covered in the marinade. For the best flavor, let it sit for at least 30 minutes. If you have more time, refrigerate it overnight. Now, let’s cook the chicken. You can grill it or pan-sear it. Preheat your grill pan or skillet over medium-high heat. When it’s hot, place the marinated chicken thighs in the pan. Cook each side for about 6-7 minutes. You want the chicken fully cooked with a nice char. After cooking, take the chicken off the heat. Let it rest for a few minutes before slicing it into bite-sized pieces. This helps keep it juicy. It’s time to build your bowls. Start with a base of quinoa or couscous in a large serving bowl. Next, add a layer of mixed greens or baby spinach. After that, pile on the diced cucumber, halved cherry tomatoes, and sliced red onion. This makes for a colorful and fresh salad. Now, carefully arrange the sliced chicken on top. For a lovely finish, mix Greek yogurt, tahini, and lemon juice in a small bowl. Drizzle this over the chicken and salad. Finally, sprinkle chopped fresh parsley on top. This adds color and boosts the flavor. For a great presentation, serve the bowls with extra lemon wedges on the side. A colorful bowl can also make the dish pop! For the full recipe, check out the main article. To get the best flavor from your chicken shawarma, marinate the chicken well. I recommend using the marinade for at least 30 minutes. If you have time, let it sit overnight. This gives the spices time to work their magic. Use a mix of cumin, paprika, turmeric, and cinnamon for depth. The cayenne pepper adds a kick, so adjust it to your taste. When cooking, keep the chicken juicy. I suggest using a grill pan or skillet. Preheat it over medium-high heat. Cook each side for 6-7 minutes. Check that the chicken is fully cooked. It should be charred and have nice grill marks. Let the chicken rest before slicing. This helps keep it moist and flavorful. If you want to switch up the dressing, try alternatives to Greek yogurt and tahini. You can use sour cream or hummus for a creamy base. For a lighter option, mix plain yogurt with lemon juice. This will brighten the flavors. Feel free to adjust the spices in the dressing too. Adding a pinch of smoked paprika or a dash of garlic powder can enhance the taste. Experiment with different herbs like dill or mint for unique flavors. Pair your chicken shawarma bowls with refreshing drinks. I recommend serving it with a cool lemonade or mint tea. These drinks balance the spices well. For side dishes, consider serving warm pita bread or a light salad. A simple cucumber and tomato salad can add freshness. You can also add roasted vegetables for a hearty touch. Enjoy your colorful and tasty meal! {{image_4}} If you want a vegetarian or vegan twist, you can easily swap out the chicken. Here are some great substitutes: - Chickpeas: Use canned or cooked chickpeas. They add protein and texture. - Tofu: Firm tofu works well. Marinate it just like the chicken. - Seitan: This wheat-based protein is chewy and absorbs flavors nicely. For toppings, consider: - Roasted vegetables: Try zucchini, bell peppers, or eggplant. - Avocado: Creamy avocado adds richness. - Feta cheese: If you're not vegan, crumbled feta adds a nice tang. You can change the flavors of your chicken shawarma bowls by using different spices and herbs. Here are some ideas: - Coriander: Adds a fresh, citrusy taste. - Allspice: Gives a warm, aromatic flavor. - Mint: Fresh mint can brighten up the dish. You can also explore regional variations. For example, if you want a Mediterranean twist, add: - Olives: They bring a salty punch. - Pine nuts: These add crunch and a nutty flavor. Feel free to mix and match flavors. Your chicken shawarma bowls can be as unique as your taste! For the full recipe, check out the [Full Recipe]. To keep your chicken shawarma bowls fresh, you need proper storage. First, let the bowls cool down to room temperature. Next, place the leftovers in airtight containers. This helps keep moisture in and air out. You can store them in the fridge for up to three days. If you notice any off smells or changes in color, it’s best to toss them. Freezing is a great way to save your chicken shawarma bowls for later. To freeze, separate the chicken from the other ingredients. This prevents sogginess when thawing. Wrap the chicken tightly in plastic wrap and place it in a freezer bag. For the veggies and grains, use freezer-safe containers. You can freeze these for up to three months. When you're ready to eat, thaw the chicken in the fridge overnight. Reheat it on the stove or in the microwave. Then, enjoy a tasty meal that feels fresh! If you need the full recipe again, just check back. The best way to marinate chicken is to coat it evenly in the marinade. Use a bowl for mixing. My favorite marinade combines olive oil, garlic, and spices. For chicken shawarma, let it sit for at least 30 minutes. If you have time, refrigerate it overnight. This lets the flavors soak in deeply. Yes, you can make chicken shawarma bowls ahead of time. Prepare the chicken and marinate it in advance. You can also cook the chicken and store it in the fridge. Keep the toppings separate until you are ready to serve. This keeps everything fresh and tasty. You can assemble the bowls quickly when it's time to eat. To make the recipe spicier, add more cayenne pepper or chili powder. You can also use fresh chili peppers for a kick. If you prefer a milder flavor, reduce the cayenne or skip it altogether. You can add more yogurt or tahini to balance the heat. Adjust the spices to fit your taste! You’ve learned how to make delicious chicken shawarma bowls that please everyone. We covered the essential ingredients, from chicken thighs to tasty toppings. I shared tips for marinating and cooking the chicken to keep it juicy. Don’t forget the fun variations and meal prep ideas! Experimenting with flavors makes this dish even better. Enjoy your cooking journey, and explore new ways to make it your own!](https://joymealplan.com/wp-content/uploads/2025/07/e03f62b6-42d7-4413-8d7f-397ee404e053-768x768.webp)
![- 1 lb boneless, skinless chicken thighs, cut into bite-sized pieces - 2 tablespoons sesame oil - 2 tablespoons fresh ginger, finely grated - 3 cloves garlic, minced - 3 tablespoons low-sodium soy sauce - 2 tablespoons honey - 1 teaspoon rice vinegar - 1 teaspoon cornstarch mixed with 2 tablespoons water (for thickening) - 1 cup cooked brown rice - 1 cup broccoli florets - 1 cup shredded carrots - 1 red bell pepper, sliced into thin strips The chicken thighs give this dish a rich flavor. I love using chicken thighs because they stay juicy and tender. Sesame oil adds a nice nutty taste. Fresh ginger and garlic bring warmth and a hint of spice. Soy sauce gives that classic umami kick. Honey brings sweetness to balance the flavors. Rice vinegar adds a touch of brightness. Cornstarch helps the sauce thicken perfectly. Brown rice serves as a hearty base. The broccoli, carrots, and bell pepper add color and crunch. - Green onions, finely chopped - 2 teaspoons sesame seeds - Lime wedges - Other vegetable options like snap peas or bok choy Garnishes make the dish pop! Green onions and sesame seeds add a lovely texture. Lime wedges are great for a fresh squeeze of citrus. You can swap in other vegetables based on your taste. This way, you can make the dish your own. You can find the full recipe in the article above. 1. Heat 2 tablespoons of sesame oil in a large skillet over medium-high heat. 2. When the oil is hot, add 2 tablespoons of freshly grated ginger and 3 cloves of minced garlic. Sauté for 30 seconds until they smell great. 3. Now, add 1 pound of bite-sized chicken thighs to the skillet. Cook for 6-7 minutes, stirring often. Make sure the chicken is no longer pink inside and is golden-brown. 1. While the chicken cooks, take a small bowl. Whisk together 3 tablespoons of low-sodium soy sauce, 2 tablespoons of honey, and 1 teaspoon of rice vinegar. 2. Pour this delicious sauce over the cooked chicken. Stir well to coat each piece. 1. Reduce the heat to medium. Let the chicken simmer in the sauce for 2-3 minutes. This helps the flavors blend together. 2. Mix 1 teaspoon of cornstarch with 2 tablespoons of water. Stir this into the skillet until it’s well combined. Cook for another minute until the sauce thickens and shines. 3. While the chicken simmers, steam 1 cup of broccoli florets for 3-4 minutes. They should be bright green and tender-crisp. 4. To put your bowls together, start with 1/2 cup of cooked brown rice in each bowl. Top with a scoop of ginger sesame chicken, steamed broccoli, shredded carrots, and sliced red bell pepper. 5. Finally, garnish each bowl with chopped green onions and sesame seeds. This adds flavor and looks nice. For the full recipe, check out the [Full Recipe]. Fresh ingredients make a big difference. Use high-quality chicken and vibrant veggies. This will enhance the taste of your dish. Adjust the sweetness and saltiness to your liking. Add more honey for sweetness or soy sauce for salt. Taste as you go; this helps you find the perfect balance. Cook chicken thighs for about 6-7 minutes. Stir often to ensure even cooking. To check if the chicken is done, cut a piece open. The inside should be white, with no pink. If you see any pink, cook it a bit longer. Make your bowl visually pleasing. Arrange the vegetables in colorful layers. Start with the rice at the bottom, then add the chicken, and top with veggies. For garnish, add green onions and sesame seeds. You can also serve with a lime wedge. A squeeze of lime adds freshness and brightness to each bite. {{image_4}} You can easily swap chicken for other proteins. If you want a vegetarian option, use tofu. Tofu absorbs flavor well and adds a nice texture. Just cube it and sauté it like chicken. For seafood lovers, shrimp works great too. Cook it until pink and tender. You can also use beef. Thinly slice it and cook it until it’s just right. Each protein offers a unique taste and texture. Feel free to change up the veggies in your bowl. Seasonal vegetables can add freshness. Think of zucchini in summer or sweet potatoes in fall. Quick-cooking vegetables are also great. Snap peas and baby corn cook fast and add crunch. Just steam or sauté them briefly. This way, you keep the nutrients and color bright. If you need gluten-free options, try tamari instead of soy sauce. It has a similar taste and works well in this dish. For those watching carbs, use cauliflower rice instead of brown rice. It’s light and absorbs flavors well. You can still enjoy the same taste without the extra carbs. Just sauté it briefly, and you’re good to go. After a tasty meal, you may want to save some for later. Store your Sesame Ginger Chicken Bowls in airtight containers. This keeps the flavors fresh and tasty. Make sure to let the dish cool before sealing it up. You can keep leftovers in the fridge for about 3 to 4 days. If you want to save it longer, freezing is a great option. Place the chicken and veggies in freezer-safe bags or containers. Remove as much air as possible to prevent freezer burn. You can freeze the bowls for up to 3 months. When you're ready to eat, thaw them overnight in the fridge. To reheat, warm them on the stove or in the microwave until hot. Meal prepping helps save time during busy weeks. You can chop and store all your veggies in advance. Cook the chicken and make the sauce separately. This way, you can mix and match throughout the week. Prepare multiple servings at once to enjoy these bowls several times. Each time, just reheat the rice and combine everything for a quick meal. You can add chili flakes or hot sauce to the dish. Start with a small amount and taste it. You can always add more to reach your preferred spice level. This kick can enhance the flavor and make it even more exciting. Yes, you can skip the cornstarch if you prefer. You can use arrowroot powder or flour as a thickening alternative. These options work well in sauces, but you may need to adjust the amount. Just be careful not to add too much, or it may change the taste. I recommend serving your bowls with steamed vegetables or a light salad. A refreshing cucumber salad pairs well. You can also enjoy the bowls with a cold drink, like iced green tea, for a balanced meal. These Sesame Ginger Chicken Bowls are easy to make and packed with flavor. You now have a full guide, covering ingredients, step-by-step cooking, tips, variations, and storage. Fresh ingredients give the best taste, while swapping proteins and veggies keeps it fun. Don't forget to use garnishes for that special touch. Enjoy these bowls any day of the week, and feel free to get creative with your own twists! They make for great leftovers, too. Cook well, and enjoy your tasty meal!](https://joymealplan.com/wp-content/uploads/2025/07/ee8b11ee-19fa-4955-830a-ea8ab42ba55e-768x768.webp)
![- 4 medium zucchinis - 1 pound ground turkey (or beef) - 1 small onion, finely diced - 2 cloves garlic, minced - 1 tablespoon taco seasoning - 1 can (14 oz) diced tomatoes, drained - 1 cup canned black beans, rinsed and drained - 1 cup corn kernels (fresh or frozen) - 1 cup shredded cheese (cheddar or Mexican blend) - 2 tablespoons olive oil - Fresh cilantro, chopped (for garnish) - Sour cream (optional) - Salt and pepper to taste When picking zucchinis, look for ones that are firm and bright. They should feel heavy for their size. Avoid any that are soft or have blemishes. For measuring, use a scale for the ground meat and a measuring cup for the beans and corn. When chopping onions and garlic, a sharp knife helps avoid tears. This ensures even cooking and great flavor in your dish. This taco stuffed zucchini boats recipe is full of fun and taste. You can find the full recipe above. Enjoy every bite! - Preheat your oven to 375°F (190°C). - Take 4 medium zucchinis and cut them in half lengthwise. Scoop out the seeds carefully. Leave enough flesh for support. - Brush the insides of the zucchini halves with 2 tablespoons of olive oil. Arrange them cut-side up on a baking sheet. - In a large skillet, heat 1 tablespoon of olive oil over medium heat. - Add 1 small onion, finely diced, and sauté until it is soft, about 3-4 minutes. - Next, add 2 minced cloves of garlic. Sauté for another minute until fragrant. - Add 1 pound of ground turkey (or beef) to the skillet. Break the meat apart with a spatula. Cook until it is browned, about 5-7 minutes. - Season with 1 tablespoon taco seasoning, salt, and pepper to taste. - Stir in 1 can of drained diced tomatoes, 1 cup of rinsed black beans, and 1 cup of corn kernels. Cook for another 2-3 minutes until everything is hot. - Remove from heat and fold in half of the 1 cup of shredded cheese until it melts slightly. - Carefully fill each zucchini boat with the taco mixture. Press down gently to pack it in. - Sprinkle the remaining cheese over the top of each stuffed zucchini. - Place the baking sheet in the oven and bake for 20-25 minutes. Check for tenderness and ensure the cheese is melted and golden. - Once cooked, remove from the oven and garnish each zucchini with chopped cilantro. - Serve warm with a dollop of sour cream, if desired. For the full recipe, check the Full Recipe section above. To make your zucchinis tender yet not mushy, follow these tips: - Choose medium zucchinis: They cook evenly and hold their shape well. - Scoop carefully: Leave enough flesh for support, but remove the seeds. - Preheat your oven: A hot oven helps the zucchinis cook just right. For sautéing your filling, use these methods: - Heat your skillet well: This helps to cook onions and garlic faster. - Add oil before ingredients: Olive oil prevents sticking and enhances flavor. - Stir often: This keeps your mixture from burning and ensures even cooking. Garnishing your taco stuffed zucchini boats adds a fresh touch. Here are some ideas: - Chop fresh cilantro: Sprinkle it on top for a pop of color and flavor. - Add a dollop of sour cream: It adds creaminess and balances the spice. Pair your zucchini boats with sides or salads. Some great options include: - Rice or quinoa: These grains add texture and heartiness. - A fresh garden salad: Crisp greens complement the warm, savory boats. For the full recipe, check out the [Full Recipe]. {{image_4}} You can change the meat in this dish easily. Ground chicken works great in place of turkey or beef. It gives a lighter flavor while still being filling. If you want a plant-based option, try using lentils or crumbled tofu. Both can soak up the tasty taco seasoning. You can also swap out the black beans. Try pinto beans or kidney beans for a new twist. They add different textures and flavors that make the dish fun. Adding spices can really change the taste. Try cumin or smoked paprika for an extra kick. You could also mix in some chili powder if you like it hot. Each spice brings its own personality to your zucchini boats. Cheese is another place to get creative. Instead of cheddar, use pepper jack for a spicy twist. Or, try a mix of different cheeses for depth. Condiments can also change the game. Consider adding salsa or guacamole on top. These add fresh flavors and make every bite exciting. You can find the full recipe for Taco Stuffed Zucchini Boats to explore all these variations! Store leftover zucchini boats in an airtight container. Use parchment paper to separate layers if stacking. This keeps them fresh for up to three days. Make sure to cool them down before sealing to avoid moisture buildup. To maximize freshness, place them in the fridge as soon as they cool. Reheat zucchini boats in the oven for the best results. Set your oven to 350°F (175°C) and bake for about 10-15 minutes. This method warms them evenly and keeps the texture nice. If you want a quicker option, use the microwave. Heat them for 1-2 minutes, but watch for sogginess. To avoid this, place a paper towel under the zucchini boats while reheating. This helps absorb extra moisture. For detailed cooking steps, check the Full Recipe. Enjoy your tasty leftovers! To make taco stuffed zucchini boats healthier, use low-fat ground turkey instead of beef. You can also choose low-fat cheese or skip it entirely for a lighter option. Adding more veggies boosts the nutrition. Consider mixing in diced bell peppers, spinach, or mushrooms. You can also serve them with a side salad for extra greens. This way, you enjoy a tasty dish while keeping it nutritious! Yes, you can freeze taco stuffed zucchini boats! Start by letting them cool completely. Wrap each boat in plastic wrap or foil. Place them in a freezer bag to save space. They can stay in the freezer for up to three months. When you’re ready to eat, let them thaw overnight in the fridge. Then, heat them in the oven until warm. Taco stuffed zucchini boats pair well with rice or quinoa. You can also serve them with tortilla chips and salsa for a fun crunch. For gatherings, consider adding some guacamole as a dip. Fresh fruit like watermelon or mango is a great side too. These options make your meal more exciting and flavorful! Taco stuffed zucchini boats offer a fun and tasty twist on dinner. You learned how to prepare fresh ingredients, cook a hearty filling, and assemble a dish that's sure to please. Remember, you can mix and match proteins and spices to fit your taste. Storing and reheating tips will help you enjoy leftovers without losing flavor. Dive into this dish for a healthy meal that’s easy to make and customize. Enjoy experimenting and sharing your tasty creations!](https://joymealplan.com/wp-content/uploads/2025/07/a6f85fbf-686b-42b4-a399-5784f990ec67-768x768.webp)