Skip to content
About
Contact
Cookie Policy
Copyright Policy
Disclaimer
Search
Home
Dinner
Appetizer
Desserts
Drinks
About
Contact
Privacy Policy
Toggle Menu
Home
/
Dinner
- Page 37
Dinner
Tuscan White Bean Soup Flavorful Comfort Food Dish
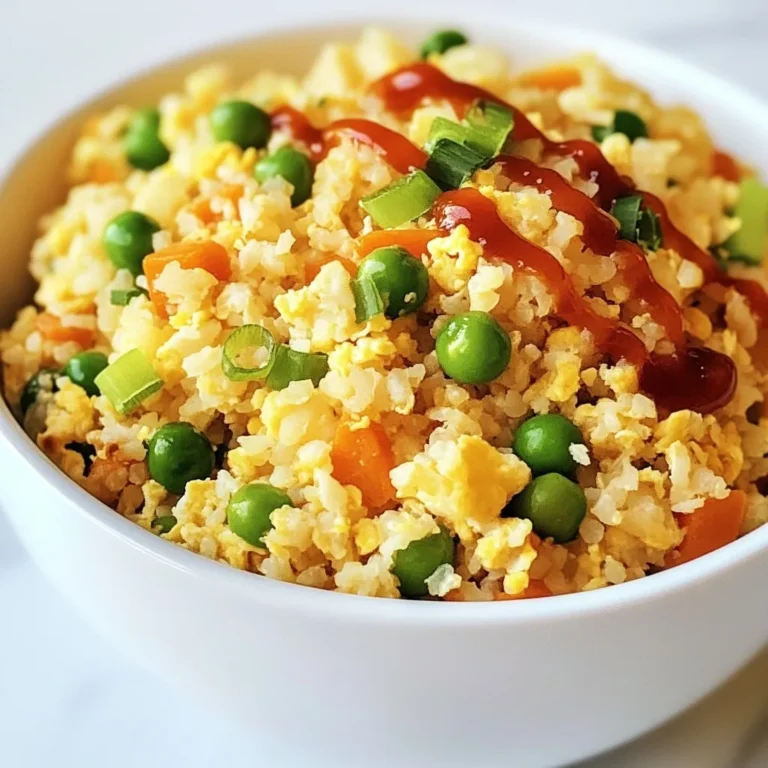
Cauliflower Fried Rice Healthy and Flavorful Meal
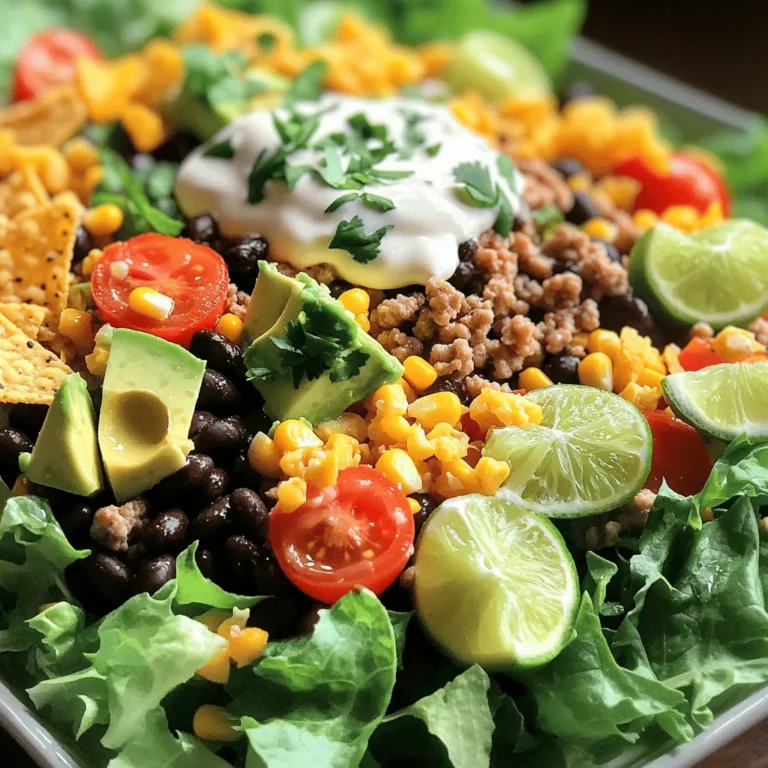
Loaded Taco Salad Flavorful and Easy Recipe Guide
Vegan Chickpea Caesar Salad Flavorful and Refreshing Dish
Baked Feta Pasta Simple and Tasty Dinner Idea
One Pan Maple Dijon Chicken Flavorful and Easy Meal
Kielbasa Potato Soup Hearty and Flavorful Delight
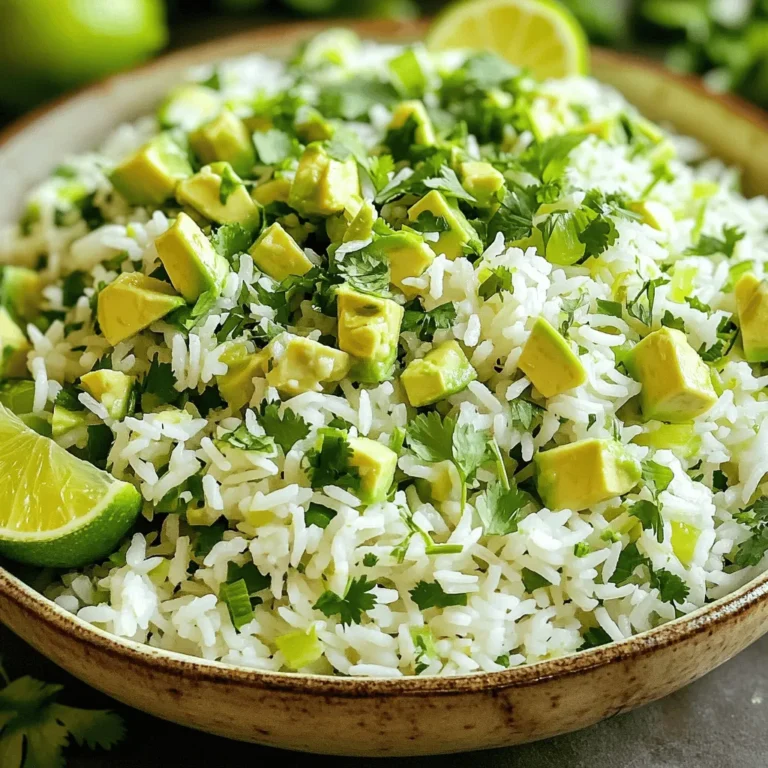
Avocado Cilantro Lime Rice Flavorful and Fresh Dish
Easy Chicken Shawarma Wraps Flavorful and Quick Meal
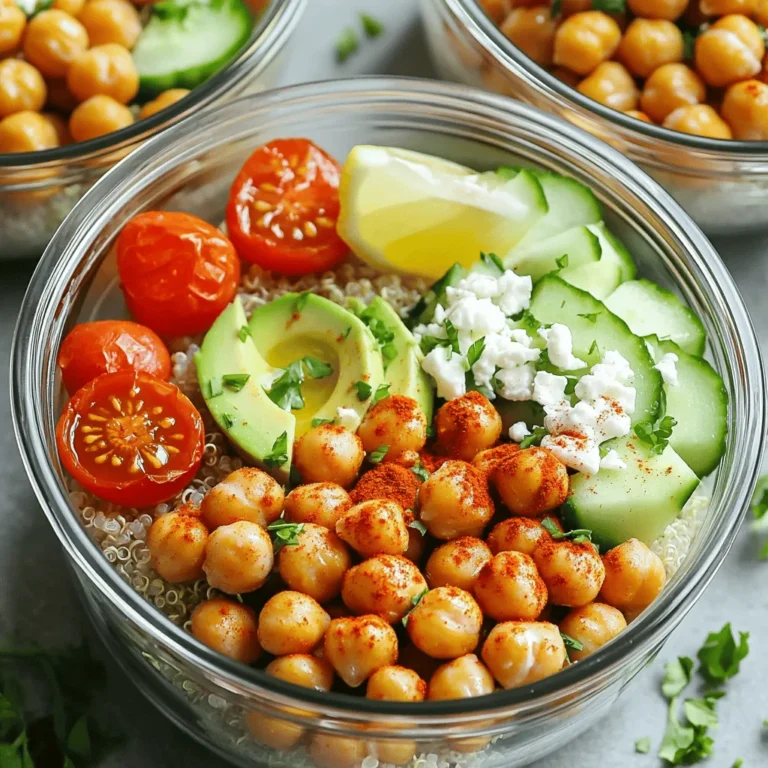
Crispy Chickpea Power Bowls Healthy and Tasty Meal
Page navigation
Previous Page
Previous
1
…
35
36
37
38
39
…
65
Next Page
Next
Home
Dinner
Appetizer
Desserts
Drinks
About
Contact
Privacy Policy
Toggle Menu Close
Search for:
Search


![- 1 can (15 oz) chickpeas, thoroughly drained and rinsed - 4 cups romaine lettuce, roughly chopped into bite-sized pieces - 1/2 cup cherry tomatoes, sliced in half - 1/4 cup red onion, thinly sliced for a pop of color - 1/4 cup nutritional yeast, for a cheesy essence - 1/4 cup vegan mayonnaise, creamy base of the dressing - 2 tablespoons Dijon mustard, adding a tangy kick - 1 tablespoon fresh lemon juice, for brightness - 1 tablespoon extra virgin olive oil, for richness - 1 teaspoon garlic powder, enhancing flavor - Salt and fresh ground pepper to taste - Croutons (store-bought or homemade) for the finishing crunch The chickpeas in this salad add protein and fiber. They make the dish filling and healthy. Romaine lettuce gives a nice crunch and freshness. Cherry tomatoes bring sweetness, while red onion adds a burst of flavor. For the dressing, I love using nutritional yeast. It gives a cheesy taste without dairy. Vegan mayonnaise makes it creamy, while Dijon mustard adds a nice tang. Fresh lemon juice brightens everything up. Olive oil adds richness, and garlic powder boosts flavor. You can add salt and pepper to taste. For extra crunch, top it off with croutons. This salad is not just tasty; it’s also colorful and fun to eat. If you want to make it even better, check out the [Full Recipe]. - Combine chickpeas, romaine, cherry tomatoes, and red onion in a large bowl. - Mix well to ensure an even distribution of ingredients. In this step, I love to use my hands to mix. It helps me feel the textures and see how colorful the salad becomes. The chickpeas add protein, while the romaine gives a nice crunch. Cherry tomatoes burst with flavor, and red onion adds a sweet bite. - In a separate bowl, whisk together vegan mayonnaise, Dijon mustard, lemon juice, olive oil, nutritional yeast, garlic powder, salt, and pepper until smooth. This dressing is magic! The vegan mayonnaise makes it creamy. The Dijon mustard gives it a tangy kick, while lemon juice brightens it up. Nutritional yeast brings a cheesy taste without dairy. I whisk until it’s really smooth, so every bite is delicious. - Pour dressing over the salad mixture, gently toss to coat. - Let the salad sit for 5-10 minutes to allow flavors to meld. - Top with croutons just before serving, and optionally sprinkle with additional nutritional yeast. Now, I pour the dressing over the salad and toss gently. I let it rest for a bit. This helps all the flavors mix well. Right before serving, I add the croutons for that perfect crunch. If you want more cheesy flavor, sprinkle extra nutritional yeast on top. It's so good! For the full recipe, check the earlier section. To make this salad shine, adjust the salt and pepper to fit your taste. Everyone’s palate is different, so find your perfect balance. Letting the salad sit for a bit allows the flavors to mix and deepen. I suggest giving it 5 to 10 minutes for best results. When serving, you can use a large bowl for sharing or individual plates for a personal touch. To make it look even better, add halved cherry tomatoes and a sprinkle of nutritional yeast on top. This adds color and a bit of flair to your dish. For easy meal prep, make the dressing first and keep it in the fridge. This way, you can use it later without any hassle. Assemble the salad just before serving to keep everything fresh and crisp. The crunch of the romaine is key to enjoying this salad fully. {{image_4}} You can add other beans or lentils to your salad for more protein. Chickpeas are great, but black beans or lentils work well too. They add unique flavors and textures. Avocado or tofu can also join your salad. Both add creaminess and extra protein, making your meal even more filling. To spice things up, try different vinegars in your dressing. Balsamic or apple cider vinegar can change the taste in exciting ways. You might also want to add spices like cayenne or smoked paprika. These spices bring flavor complexity and a fun kick to your dish. If you want to try something new, swap out romaine lettuce for spinach or kale. These greens change the texture and add their own taste. You can also change the dressing base. Cashew cream or tahini can replace the vegan mayonnaise if you want to try something different. This will give your salad a fresh twist. For the full recipe, check out the Chickpea Caesar Bliss Salad. - Refrigerate in an airtight container for up to 3 days. - Store dressing separately to prevent sogginess in greens. Leftovers can stay fresh, but the greens will wilt if mixed with the dressing. I recommend keeping the salad and dressing apart. This way, you can enjoy the crispness of the romaine lettuce each time you serve it. - Not recommended for freezing due to texture changes in salad components. Freezing this salad is not a good idea. The chickpeas and vegetables will lose their nice crunch. Plus, the dressing will separate and become watery. Enjoy it fresh for the best taste and texture. - Prepare ingredients in advance and assemble fresh before consuming. Meal prep can save time. Chop your veggies and drain your chickpeas ahead of time. When you are ready to eat, toss everything together. This keeps the salad fresh and tasty, making it a great option for busy days. For the full recipe, check the Chickpea Caesar Bliss Salad 🥗. Yes, prepare ingredients and dressing in advance, assembling just before serving. This way, your salad stays fresh and crunchy. You can cut the veggies and make the dressing a day ahead. Just store them separately in the fridge. When it’s time to eat, toss it all together for a quick meal. Yes, the ingredients used are naturally gluten-free; ensure croutons are gluten-free if using. If you want homemade croutons, use gluten-free bread. This makes the salad safe for those with gluten sensitivities. Adding seeds, nuts, or extra veggies can boost nutrients and flavor diversity. Try adding sunflower seeds or pumpkin seeds for crunch. You can also include sliced cucumbers or bell peppers for extra color and vitamins. Each addition makes the salad even more satisfying. Pair with vegan garlic bread, roasted vegetables, or a light soup for a complete meal. These sides complement the salad nicely and provide a variety of textures and flavors. They also make for a filling and balanced dinner. If you want to explore more, check out the Full Recipe for ideas! This salad blends fresh ingredients with a creamy dressing. You start with chickpeas, lettuce, and tomatoes, adding a vibrant kick from red onion. The dressing, made from vegan mayonnaise and nutritional yeast, brings a cheesy and tangy flavor. Adjust seasonings to suit your taste, and enjoy optional toppings like croutons. Finalize your meal prep by storing dressing separately. This keeps your salad crisp and fresh. With all these tips and variations, you can create a delicious salad that fits your flavor preferences and keeps nutrition in mind. Dive in and enjoy!](https://joymealplan.com/wp-content/uploads/2025/06/b140c7e6-ada9-439d-98fe-37f2f6e6ca2c-768x768.webp)


![- 1 lb boneless, skinless chicken thighs - 4 large whole wheat tortillas or pita bread - 1 cup romaine lettuce, shredded - 1 large tomato, diced - 1 cucumber, diced - 3 tablespoons extra virgin olive oil - 1 tablespoon ground cumin - 1 tablespoon smoked paprika - 1 teaspoon ground turmeric - 1 teaspoon ground coriander - 1 teaspoon garlic powder - 1 teaspoon onion powder - Salt and freshly cracked black pepper, to taste - 1 cup creamy Greek yogurt - 1 tablespoon tahini - 1 tablespoon freshly squeezed lemon juice These ingredients create a rich and tasty chicken shawarma wrap. Chicken thighs are key for their juicy texture. Whole wheat tortillas or pita bread give your wrap a healthy base. Fresh veggies like lettuce, tomato, and cucumber add crunch and flavor. The marinade is full of spices like cumin and paprika that bring warmth and depth. Olive oil helps the spices cling well to the chicken. The sauce made with Greek yogurt, tahini, and lemon juice offers a creamy, tangy kick. For the full recipe, check the section above. Enjoy crafting your easy chicken shawarma wraps! To start, you need to make the marinade. In a bowl, combine: - 3 tablespoons extra virgin olive oil - 1 tablespoon ground cumin - 1 tablespoon smoked paprika - 1 teaspoon ground turmeric - 1 teaspoon ground coriander - 1 teaspoon garlic powder - 1 teaspoon onion powder - Salt and freshly cracked black pepper, to taste Whisk these ingredients together until they mix well. This step adds lots of flavor. Next, take 1 lb of boneless, skinless chicken thighs. Coat the chicken with the marinade, making sure every piece is covered. Cover the bowl with plastic wrap. You should refrigerate it for at least 30 minutes. For the best taste, let it sit for up to 2 hours. Now, it’s time to cook the chicken. Preheat your grill or a heavy skillet over medium-high heat. Once it’s hot, place the marinated chicken thighs on the grill. Cook each side for about 6-7 minutes. You want the chicken to be fully cooked and have a nice char. After cooking, remove the chicken from the heat. Let it rest for a few minutes. This helps keep the juices in. Then, slice the chicken into thin strips. Now, let’s assemble your wraps! Start by spreading sauce on the tortilla. For the sauce, mix 1 cup of creamy Greek yogurt, 1 tablespoon tahini, and 1 tablespoon freshly squeezed lemon juice in a bowl. Add a pinch of salt and pepper to taste. Once the sauce is on the tortilla, layer on the sliced chicken. Next, add a handful of shredded romaine lettuce, diced tomatoes, and diced cucumbers. These veggies add crunch and freshness. To finish, sprinkle with fresh cilantro or parsley. Carefully fold the sides of the tortilla inwards and roll it up tightly. For an extra crispy finish, grill the wrapped shawarma for 1-2 minutes. This makes the outside golden and crispy. Finally, slice the wrap in half diagonally and serve it right away. You can also serve any extra creamy dressing for dipping. Enjoy your Easy Chicken Shawarma Wraps! For the complete recipe, check out the [Full Recipe]. To get the best taste from your chicken shawarma, marinate the chicken for at least 30 minutes. If you have time, aim for 2 hours. This allows the flavors to soak in deeply. Want to spice up your marinade? Add a pinch of cayenne for heat. You can also toss in some smoked paprika for a richer flavor. Fresh herbs like thyme or mint will add a nice twist. Even a splash of vinegar can brighten the taste. When you assemble your wraps, wrap them tightly. Start by laying the chicken and veggies in the center. Fold the sides in, then roll from the bottom. This keeps everything inside. If you like a crispy wrap, grill it after rolling. Heat a skillet over medium heat. Grill each side for 1-2 minutes until golden. This extra step gives you a crunchy texture that contrasts with the juicy filling. {{image_4}} You can easily modify chicken shawarma wraps to fit your diet. If you want a gluten-free option, try using lettuce wraps. Just take large leaves of romaine or butter lettuce. They make a great, crunchy shell for your fillings. For a vegetarian option, consider using falafel or grilled veggies. Falafel adds a nice crunch and flavor. Grilled veggies like zucchini, bell peppers, and eggplant work well too. These options keep the meal tasty and satisfying. To make your wraps even better, think about adding toppings. Chopped olives and crumbled feta cheese can give a salty kick. You could also add sliced radishes for a nice crunch. Alternative sauces can enhance the dish too. Tzatziki sauce made with yogurt, cucumber, and garlic adds a cool and refreshing taste. You can mix it up by trying different sauces like hummus or spicy harissa. These additions help you create a wrap that suits your own taste perfectly. Don't forget to check the Full Recipe for more ideas! To keep your chicken shawarma wraps fresh, store them well. Wrap each shawarma tightly in plastic wrap or foil. This prevents air from getting in and keeps them from drying out. You can also place them in an airtight container. In the fridge, they will stay good for up to three days. After that, the taste and texture might change. When it's time to eat, reheating should keep the wraps tasty. I suggest using a skillet over low heat. This method warms the shawarma without making it soggy. Heat them for about 3-5 minutes on each side. You can also use an oven. Wrap them in foil and heat at 350°F for about 10 minutes. If you have extra chicken, use it in salads or grain bowls. It adds flavor and protein to any meal. The wraps are also great for lunch the next day. Just remember to store them well! For the full recipe, check out the detailed instructions above. You can marinate chicken shawarma for at least 30 minutes. For better flavor, marinate for up to 2 hours. This time allows the spices to soak into the meat. If you have more time, feel free to marinate it overnight. Just remember to keep it in the fridge to stay fresh. Yes, you can use chicken breast. However, thighs have more fat and flavor. This gives shawarma a juicier taste. Breasts may dry out more easily. If you choose breasts, keep an eye on cooking time to avoid overcooking them. Chicken shawarma wraps pair well with many sides. Try serving them with: - Hummus - Pita chips - Tabouli salad - Roasted vegetables - Pickled vegetables These sides add more flavor and texture to your meal. To add heat to your chicken shawarma, try these tips: - Mix in cayenne pepper or red pepper flakes to the marinade. - Add sliced jalapeños when assembling the wraps. - Serve with a spicy sauce like harissa or sriracha. These options will give your wraps a nice kick without overpowering the other flavors. For the full recipe, check out the complete guide. In this post, we covered making delicious chicken shawarma wraps. We started with the main ingredients: chicken thighs, whole wheat tortillas, and fresh veggies. Then, we looked at creating a tasty marinade and sauce. I shared step-by-step cooking and assembly instructions, plus tips for the best flavor. We explored variations, from gluten-free options to flavor additions. Finally, proper storage and reheating tips will keep your leftovers fresh. Now you can enjoy these wraps anytime. Make it your own with different toppings and spices!](https://joymealplan.com/wp-content/uploads/2025/06/27d0fa19-e080-46bc-ad73-80725d86a56a-768x768.webp)