Skip to content
About
Contact
Cookie Policy
Copyright Policy
Disclaimer
Search
Home
Dinner
Appetizer
Desserts
Drinks
About
Contact
Privacy Policy
Toggle Menu
Home
/
Dinner
- Page 39
Dinner
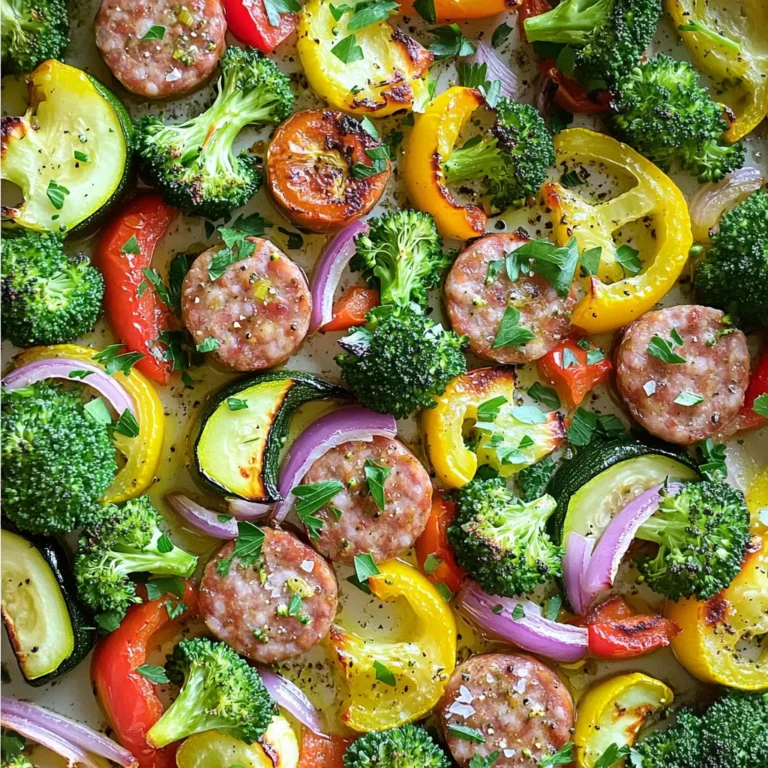
Sheet Pan Sausage and Veggies Tasty One-Pan Meal
Easy Breakfast Burritos Quick and Tasty Recipe
Healthy Greek Pasta Salad Fresh and Flavorful Dish
Easy Chicken Noodle Soup Simple Comfort Recipe
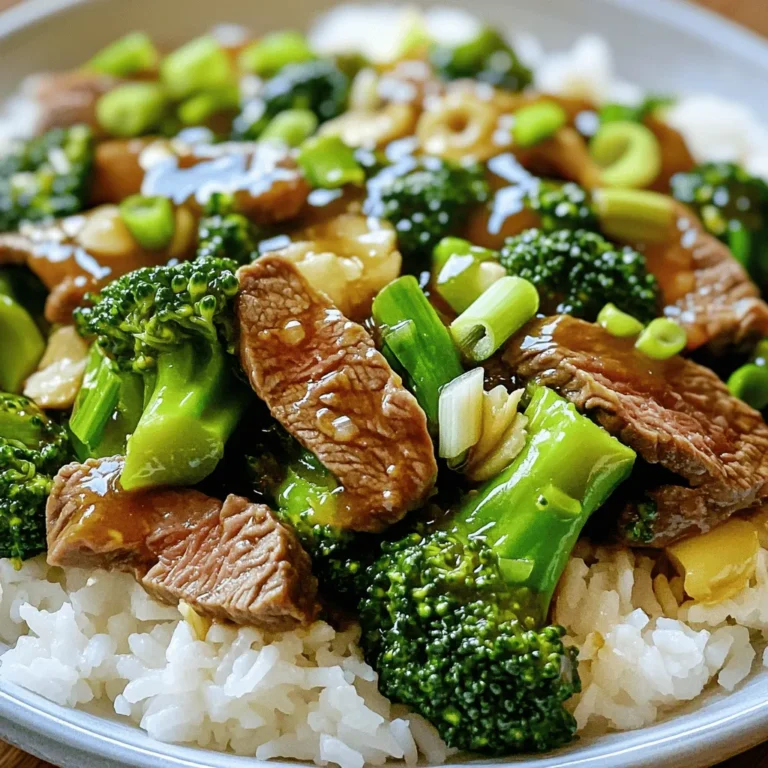
Easy Beef and Broccoli Flavor-Packed Dinner Recipe
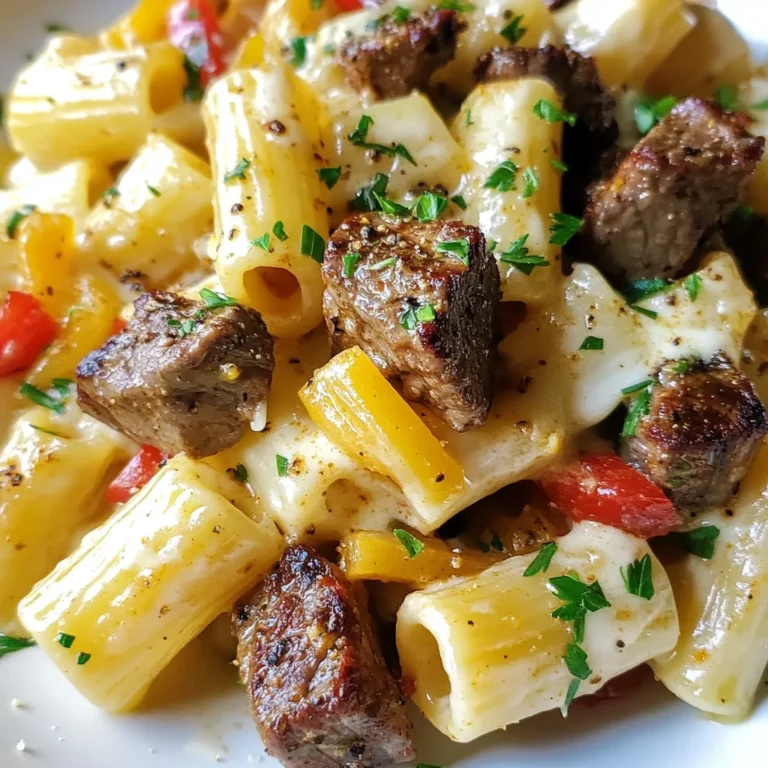
Cajun Steak Tip Rigatoni Flavor-Packed Dinner Recipe
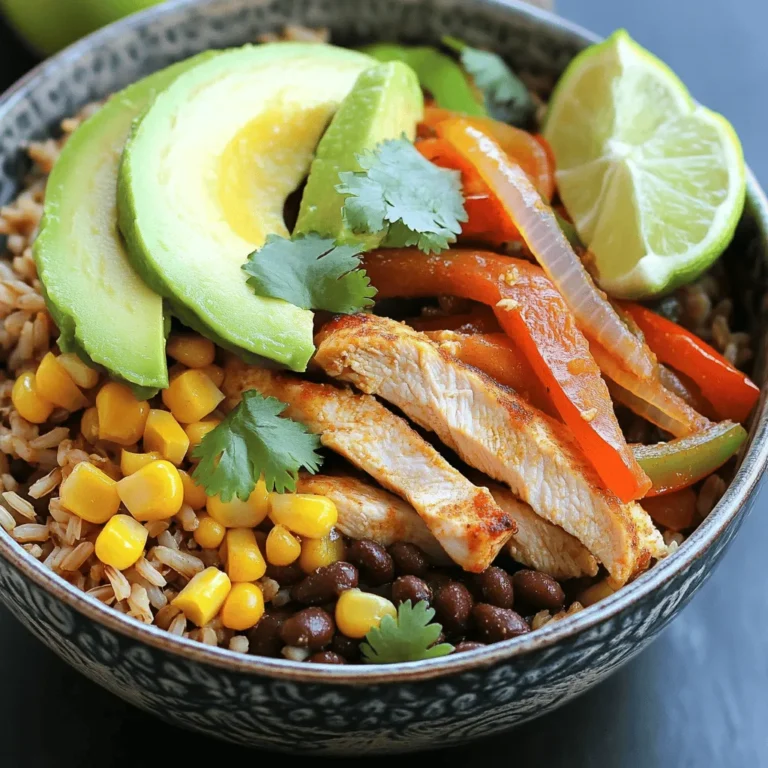
Chicken Fajita Bowls Flavorful and Easy Recipe Guide
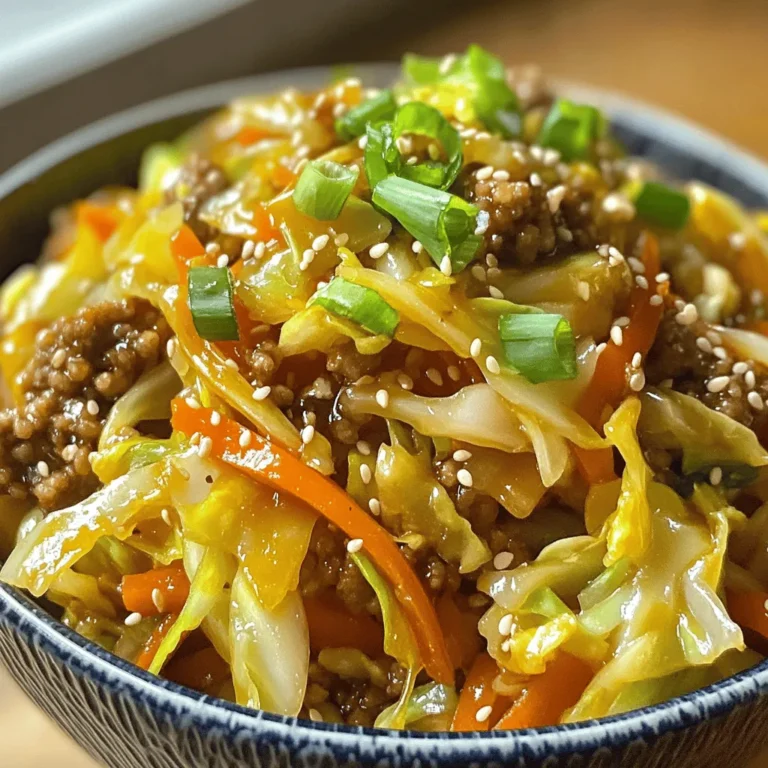
Savory Egg Roll in a Bowl Easy Weeknight Meal
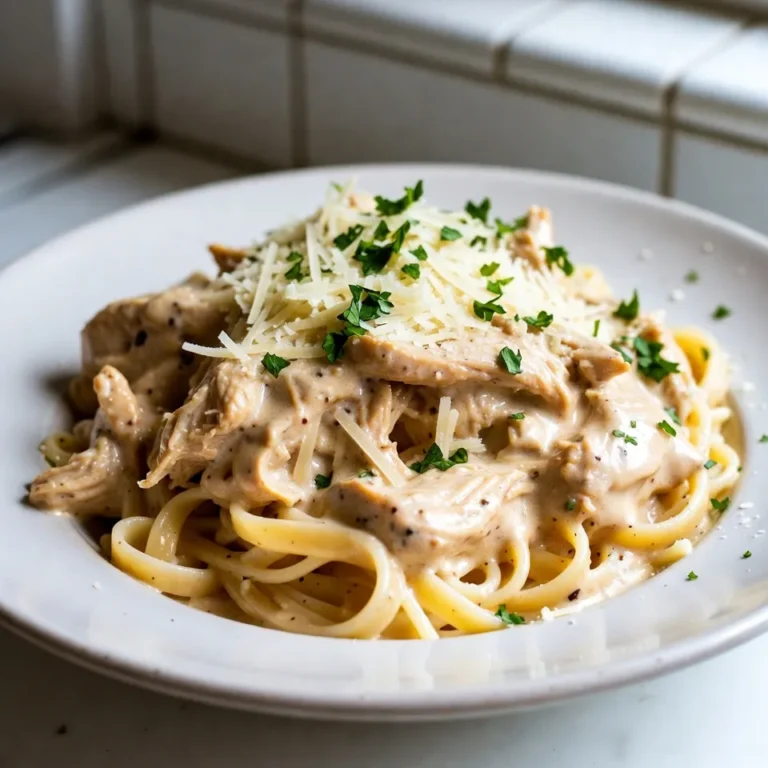
Slow Cooker Chicken Alfredo Creamy and Flavorful Dish
Blueberry Grilled Cheese Savory and Sweet Delight
Page navigation
Previous Page
Previous
1
…
37
38
39
40
41
…
65
Next Page
Next
Home
Dinner
Appetizer
Desserts
Drinks
About
Contact
Privacy Policy
Toggle Menu Close
Search for:
Search


![To make a vibrant Greek pasta salad, gather these key ingredients: - 8 oz whole grain pasta (fusilli or penne work well) - 1 cup cherry tomatoes, halved - 1 medium cucumber, diced - 1 bell pepper, diced - ½ red onion, chopped - 1 cup Kalamata olives, pitted and halved - 1 cup feta cheese, crumbled - ¼ cup fresh parsley, chopped - 2 tablespoons extra virgin olive oil - 1 tablespoon red wine vinegar (or lemon juice) - 1 teaspoon dried oregano - Salt and pepper to taste These ingredients create a mix that bursts with flavor and color. Whole grain pasta adds fiber and nutrients. Fresh vegetables bring crunch and vitamins. Feta cheese adds a creamy touch and saltiness. This salad is not just tasty; it is also packed with nutrition. Whole grain pasta gives you energy and fiber. Fresh veggies like tomatoes and cucumbers offer vitamins and antioxidants. Kalamata olives are rich in healthy fats. Feta cheese provides protein and calcium. Each serving contains: - High fiber content from whole grain pasta - Vitamins A and C from tomatoes and bell peppers - Heart-healthy fats from olives and olive oil This salad is a great choice for a healthy meal that keeps you full and satisfied. You can customize your salad with these optional add-ins: - 1 cup cooked chickpeas for extra protein - Grilled chicken for a heartier option - Artichoke hearts for a tangy twist - Spinach or arugula for more greens - Avocado for creaminess and healthy fats These add-ins allow you to make the dish your own. Mix and match based on your taste and dietary needs. Each addition brings its own flair to this delightful Greek pasta salad. For detailed preparation steps, check the Full Recipe. Start by boiling water in a large pot. Add a pinch of salt for flavor. Once the water boils, add 8 ounces of whole grain pasta. I like using fusilli or penne. Cook the pasta according to the package instructions until it’s al dente. This usually takes about 8 to 10 minutes. After cooking, drain the pasta and rinse it under cold water. This stops the cooking and cools it down. While the pasta cooks, grab your knife and cutting board. Chop 1 cup of cherry tomatoes in half. Dice 1 medium cucumber into bite-sized pieces. Chop 1 bell pepper, any color you like. Finely chop ½ of a red onion. Finally, cut 1 cup of Kalamata olives in half. Place all these colorful veggies into a large mixing bowl. They add great flavor and texture. In a small bowl, whisk together 2 tablespoons of extra virgin olive oil and 1 tablespoon of red wine vinegar. You can use lemon juice if you prefer a zippier taste. Add 1 teaspoon of dried oregano for a nice aroma. Season with a pinch of salt and pepper. Mix well until the dressing is smooth and blended. Next, gently add the cooled pasta to the mixing bowl with the veggies. Toss everything together carefully with your hands or a spatula. This ensures that every piece is coated in flavor. Now, sprinkle 1 cup of crumbled feta cheese and ¼ cup of fresh parsley on top. Drizzle the dressing over the salad and toss once more. This is where all the flavors come together! For the best taste, cover the salad and chill it in the fridge for at least 30 minutes before serving. If you want the full recipe, check out the details above. To cook pasta perfectly, start with a large pot of water. Add a good amount of salt to the water. This helps the pasta taste better. Bring the water to a rolling boil before adding the pasta. Use whole grain pasta for a healthy touch. Cook it until it is al dente, which means it should still have a firm bite. After cooking, drain the pasta and rinse it under cold water. This stops the cooking process and cools it down quickly. Chilling your pasta salad is key to enhancing the flavors. Once you mix all the ingredients, cover the bowl with plastic wrap or a lid. Place it in the refrigerator for at least 30 minutes. This time lets the flavors blend well. If you have more time, chill it for an hour or more. Just remember, the longer you chill, the tastier it gets! Fresh herbs make a big difference in your salad's taste. Parsley adds a fresh touch and brightens the dish. You can also try fresh basil or mint for a new twist. Chop the herbs finely and sprinkle them over the salad just before serving. This keeps them vibrant and aromatic. The fresh herbs will bring your Healthy Greek Pasta Salad to life. They offer a burst of flavor that will impress everyone at the table. For the complete recipe, check out the [Full Recipe]. {{image_4}} You can change the whole grain pasta for gluten-free pasta. Gluten-free pasta works well with this salad. It gives you a similar taste and texture. Just follow the cooking time on the package. You will still have a healthy and tasty meal. For more protein, add canned chickpeas or grilled chicken. Chickpeas add fiber and nutrients. Rinse and drain them before mixing into the salad. For grilled chicken, cook it until it’s golden. Then, chop it into small pieces. This will make your salad heartier and keep you full. To make this salad vegan, skip the feta cheese. You can use avocado for creaminess. Another option is to add a vegan cheese. It provides a similar taste without dairy. Ensure you check the ingredient list to keep it plant-based. These simple swaps keep the salad fresh and flavorful. Try these variations to make your Healthy Greek Pasta Salad unique and fun! For the complete recipe, check out the [Full Recipe]. To store leftover Greek pasta salad, first, let it cool to room temperature. Then, place it in an airtight container. This helps keep the salad fresh and prevents it from drying out. You can store it in the fridge for up to three days. Be sure to label the container with the date. This way, you’ll know when to use it. Freezing Greek pasta salad isn’t recommended. The veggies and feta may lose their texture and taste when thawed. However, if you must freeze it, leave out fresh ingredients like tomatoes and cucumbers. Store the base of the salad in a freezer-safe container. It can last for up to two months. When ready to eat, thaw it overnight in the fridge. Reheating Greek pasta salad is simple. If you prefer it warm, add it to a pan over low heat. Stir gently until it warms through. Avoid high heat to keep the veggies crunchy. If the salad has been in the fridge, you can enjoy it cold as well. Just give it a good toss with a little olive oil to freshen it up. For the full recipe, check out the vibrant Greek-inspired whole grain pasta salad! To make a gluten-free version, choose gluten-free pasta. There are many options, like rice or quinoa pasta. Cook it just as you would regular pasta. Use the same ingredients for the salad. This way, you still enjoy the fresh flavors without gluten. Yes, you can prepare this salad a day ahead. Make the salad and store it in the fridge. The flavors will blend well overnight. Just remember to add the feta just before serving for the best taste. If you want a feta substitute, try goat cheese. It adds a nice creaminess. You can also use vegan feta for a dairy-free option. Crumbled tofu can work too, giving a similar texture without the dairy. Absolutely! This salad is perfect for meal prep. It keeps well in the fridge for several days. You can pack it in individual containers for easy lunches. Just ensure you store the dressing separately for freshness until you're ready to eat. For the full recipe, follow the details provided above! In this blog post, we explored the ingredients for a Healthy Greek Pasta Salad. We discussed key ingredients, nutritional highlights, and optional add-ins. I shared step-by-step instructions, tips for cooking, and variations for dietary needs. Finally, I covered storage methods and answered common FAQs. Making this salad is simple and fun. Whether you’re enjoying it fresh or storing leftovers, this dish is a tasty choice. Enjoy the flavors and nourish your body with this healthy recipe.](https://joymealplan.com/wp-content/uploads/2025/06/b0373296-86bf-4053-9c3f-2e765b8fd918-768x768.webp)
![To make easy chicken noodle soup, gather these simple ingredients: - 1 tablespoon olive oil - 1 medium onion, finely chopped - 2 carrots, peeled and sliced into thin rounds - 2 celery stalks, diced into small pieces - 3 cloves of garlic, minced - 1 pound boneless, skinless chicken breasts - 6 cups chicken broth (homemade or low-sodium) - 1 teaspoon dried thyme - 1 bay leaf - 8 ounces egg noodles - 1 cup frozen peas - Salt and freshly ground black pepper to taste - Fresh parsley, chopped (for garnish) These ingredients work together to create a warm, hearty dish. The chicken adds protein, while the veggies give great flavor. The egg noodles soak up the broth, making each bite comforting. I always choose low-sodium broth for control over salt. Using fresh parsley at the end makes the dish pop with color. For the full recipe, you can check out the detailed steps to bring this soup to life. Sautéing Aromatics Start by heating 1 tablespoon of olive oil in a large stockpot over medium heat. Once the oil is hot, add the finely chopped onion, sliced carrots, and diced celery. Sauté these for about 5-7 minutes. You want them to become tender and smell great. Next, add 3 cloves of minced garlic and sauté for another 1-2 minutes. Stir it constantly to avoid burning the garlic. Cooking the Chicken Now, it’s time for the star of the show: the chicken. Carefully place 1 pound of boneless, skinless chicken breasts into the pot. Pour in 6 cups of chicken broth, then add 1 teaspoon of dried thyme and 1 bay leaf. Bring this mixture to a boil. Once it’s boiling, reduce the heat to low. Let it simmer for about 15-20 minutes. The chicken should reach an internal temperature of 165°F (75°C). Shredding the Chicken After cooking, carefully remove the chicken from the pot using tongs or a slotted spoon. Shred the chicken into bite-sized pieces using two forks. Once shredded, return the chicken to the pot to soak up all the flavors. Adding Noodles and Peas Next, stir in 8 ounces of egg noodles and 1 cup of frozen peas. Cook the soup for an additional 7-10 minutes. The noodles should be al dente and tender, ready to enjoy. Seasoning the Soup Taste your soup! Season it with salt and freshly ground black pepper, adjusting to your liking. Don’t forget to remove the bay leaf before serving. Tips for Serving Serve the soup hot in bowls. For a nice touch, sprinkle some freshly chopped parsley on top. This adds color and a burst of flavor. Enjoy this comforting bowl of easy chicken noodle soup! For complete details, check out the Full Recipe. Choosing the Right Broth Use homemade broth for the best flavor. If you don’t have time, low-sodium store-bought broth works too. It keeps the soup light and lets other flavors shine through. How to Properly Shred Chicken After cooking the chicken, let it cool slightly. Use two forks to pull the chicken apart. This keeps it moist and tender. You can also use your hands if you prefer. Ensuring Perfect Noodles Cook the noodles separately if you want them to stay firm. Overcooked noodles can turn mushy in the soup. If you add them straight to the pot, just keep an eye on the cooking time. Adding Fresh Herbs and Spices Fresh herbs like parsley or thyme brighten the soup. You can also add a squeeze of lemon juice for a touch of zest. Experiment with flavors to find your perfect mix. Substituting Ingredients Feel free to swap out chicken for turkey or use veggie broth for a vegetarian version. You can also add other veggies like spinach or corn for extra nutrition. Slow Cooker/Instant Pot Options For a slow cooker, add all the ingredients and cook on low for 6-8 hours. In an Instant Pot, cook on high pressure for 15 minutes, then shred the chicken. Both methods make great soup with less effort. For the complete recipe, check out the [Full Recipe]. {{image_4}} - Switching to Whole Wheat Noodles Whole wheat noodles add more fiber. They make the soup heartier. Plus, they keep you full longer. - Using Low-Sodium Ingredients Low-sodium chicken broth helps control salt intake. It is great for those watching their sodium levels. You still keep all the flavor without the extra salt. - Adding Spinach or Kale Spinach or kale boosts nutrition. They add vitamins and minerals. Toss them in just before serving for a fresh taste. - Mexican Chicken Noodle Soup Add cumin and lime juice for a twist. Include black beans and corn for extra texture. This gives your soup a bright, zesty flavor. - Creamy Chicken Noodle Soup Stir in some heavy cream or coconut milk. This makes the soup rich and smooth. It feels like a warm hug in a bowl. - Spicy Chicken Noodle Soup Use red pepper flakes or jalapeños to spice things up. This adds a kick that warms you from the inside. Perfect for chilly days or when you need a little heat. For detailed steps on how to make your soup, check the Full Recipe. Store your easy chicken noodle soup in an airtight container. This keeps it fresh and tasty. Let the soup cool down before sealing it. You can keep it in the fridge for up to four days. Just remember to reheat it well before serving. If you notice any off smell or change in color, it’s best to discard it. To freeze your soup, use freezer-safe containers. Leave some space at the top, as the soup will expand. It can last up to three months in the freezer. When you’re ready to eat it, let it thaw overnight in the fridge. Reheat the soup on the stove over low heat. Stir it often to keep it warm and to avoid burning. You can also use a microwave. Just heat it in short bursts and stir in between. This keeps the soup delicious and helps it warm evenly. For the best taste, add fresh herbs or a squeeze of lemon after reheating. For the full recipe, visit the link provided. Can I use rotisserie chicken? Yes, rotisserie chicken works great! It saves time and adds rich flavor. Just shred it and add it to your soup near the end of cooking. How do I make chicken noodle soup thicker? To thicken your soup, try adding more noodles or use a cornstarch slurry. Mix equal parts cornstarch and cold water, then stir it in while the soup simmers. Can I substitute egg noodles with another type? Absolutely! You can use any pasta you like. Just adjust the cooking time based on the type of pasta you choose. Is chicken noodle soup healthy? Yes, chicken noodle soup is healthy. It offers protein from the chicken and nutrients from the veggies. Plus, it can soothe a cold! What are the calories in easy chicken noodle soup? A serving has about 250-300 calories, depending on your ingredients. It’s a light meal that fills you up. What to serve with chicken noodle soup? I love pairing it with crusty bread or a fresh salad. Both add texture and flavor to your meal. How long does it take to make chicken noodle soup? It takes about 40 minutes from start to finish. This includes prep time and cooking time, so it’s quick and easy. Can I double the recipe? Yes, you can double the recipe! Just make sure your pot is big enough. Adjust cooking time if needed, but it should stay about the same. For the full recipe, check out the detailed instructions above! This blog post covered how to make a tasty chicken noodle soup. I shared the ingredients you need, step-by-step instructions, and useful tips. Plus, you learned about healthy and flavorful variations and storage options. Remember, chicken noodle soup can be easy and fun to make. With a few tweaks, you can personalize it to fit your taste. Enjoy making this comforting dish for yourself and others!](https://joymealplan.com/wp-content/uploads/2025/06/a8abc01f-2283-4b1e-aacb-1aa29c0460c5-768x768.webp)