Skip to content
About
Contact
Cookie Policy
Copyright Policy
Disclaimer
Search
Home
Dinner
Appetizer
Desserts
Drinks
About
Contact
Privacy Policy
Toggle Menu
Home
/
Dinner
- Page 43
Dinner
Easy Garlic Mashed Potatoes Perfectly Creamy Delicacy
One Pan Lemon Asparagus Chicken Quick and Easy Meal
Creamy Garlic Parmesan Brussels Sprouts Delight Recipe
Sheet Pan Lemon Herb Shrimp Flavorful and Easy Recipe
Teriyaki Chicken Stir Fry Delicious and Easy Recipe
Honey Garlic Glazed Salmon Simple and Tasty Recipe
Lemon Herb Grilled Chicken Savory and Simple Recipe
Easy Veggie Stir Fry Quick and Healthy Dinner Idea
Easy Keto Casserole Night Flavorful and Simple Meal
Italian Penicillin Soup Hearty and Flavorful Delight
Page navigation
Previous Page
Previous
1
…
41
42
43
44
45
…
65
Next Page
Next
Home
Dinner
Appetizer
Desserts
Drinks
About
Contact
Privacy Policy
Toggle Menu Close
Search for:
Search


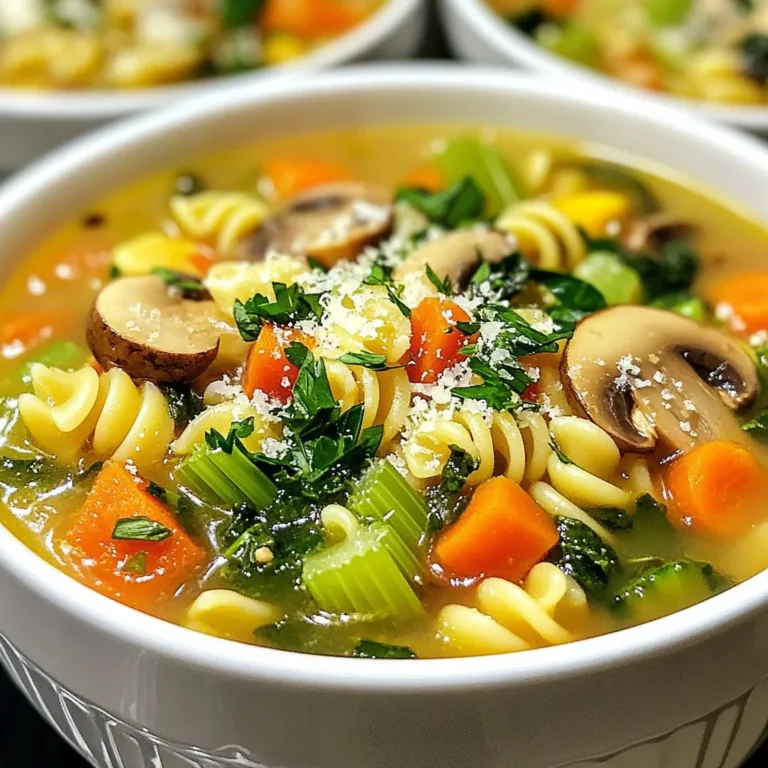
![- 1 pound large shrimp, peeled and deveined - 2 cups broccoli florets - 1 cup cherry tomatoes, halved - 1 medium yellow bell pepper, sliced into strips - 3 tablespoons extra virgin olive oil - 4 cloves garlic, finely minced - Zest and juice of 1 large lemon - 1 teaspoon dried oregano - 1 teaspoon dried thyme - Salt and freshly cracked black pepper to taste - Fresh parsley for garnish The main ingredients in this recipe create a bright, fresh dish. The shrimp are the star. Their sweet flavor pairs well with the crunchy broccoli and juicy tomatoes. The yellow bell pepper adds color and sweetness. For the drizzle, I love using olive oil. It adds richness and helps the garlic blend well with the other flavors. The lemon brings a zesty kick. Its zest adds a fragrant aroma, while the juice brightens the dish. Dried oregano and thyme lend an earthy note. They balance the freshness of the lemon and shrimp. Finally, salt and pepper bring out all the flavors. Fresh parsley adds a splash of color and a hint of freshness when you serve. You can find the full recipe here: [Full Recipe]. Enjoy cooking! 1. First, preheat your oven to 400°F (200°C). 2. Line a large baking sheet with parchment paper. This makes cleanup simple. 3. In a big bowl, mix 1 pound of shrimp, 2 cups of broccoli, 1 cup of halved cherry tomatoes, and 1 sliced yellow bell pepper. Toss them gently to combine. 1. In a small bowl, whisk together 3 tablespoons of olive oil, 4 minced garlic cloves, the zest of 1 lemon, and its juice. 2. Then, add 1 teaspoon each of dried oregano and thyme, plus salt and pepper. Mix it well. 1. Pour the lemon herb mix over the shrimp and veggies. Toss everything together to coat well. 2. Spread the mixture evenly on the baking sheet. 3. Place it in the oven and bake for about 12-15 minutes. The shrimp should turn pink, and the veggies should soften. 4. After baking, sprinkle chopped parsley on top for a fresh look and taste. This recipe is quick and makes a colorful dish that bursts with flavor. For the full recipe, check the details above. To know when shrimp are done, look for a bright pink color. They should also be opaque. If you see these signs, they are ready to eat. Cooking time may change with different ovens. Start checking for doneness at around 12 minutes. Your oven may cook faster or slower, so keep an eye on them. Adding more flavors can make this dish even better. You might try a pinch of red pepper flakes for some heat. A dash of smoked paprika adds a nice smoky taste. Fresh herbs are key in this dish. They give a bright and fresh flavor that dried herbs can't match. Always use fresh parsley for a vibrant finish. You can serve the shrimp right from the baking sheet. This gives a fun, casual feel. If you want to impress, transfer them to a nice platter. Drizzle with extra lemon juice for zing. Pair this dish with a light salad or some rice to soak up the juices. These sides complement the shrimp beautifully. For the full recipe, check out the details above. {{image_4}} You can use many vegetables in this dish. Instead of broccoli and bell peppers, try zucchini or asparagus. These options add color and flavor. You can also use seasonal veggies. In summer, fresh corn or green beans work well. In fall, add butternut squash or Brussels sprouts. Mix and match to suit your taste. If you want to change the protein, scallops or chicken are great swaps. Scallops cook fast like shrimp. They need about 8-10 minutes in the oven. Chicken takes longer, around 20-25 minutes. Cut it into small pieces for even cooking. Adjust your bake time based on the protein you choose. This recipe is easy to adapt for different diets. For a gluten-free option, make sure your seasonings are gluten-free. You can also make it dairy-free. Just skip any dairy-based sides. Want a vegan version? Use chickpeas or tofu instead of shrimp. Season them the same way for a delicious meal. Store leftover shrimp and veggies in an airtight container. Keep it in the fridge for up to two days. If you want to save some for later, freezing is a good option. Place shrimp and vegetables in a freezer-safe bag. Remove as much air as you can before sealing. They can last up to three months in the freezer. When reheating, use the oven or stovetop for best results. Preheat your oven to 350°F (175°C) and place the shrimp and veggies on a baking sheet. Heat for about 10 minutes. This keeps everything warm and tasty. You can also use a skillet on low heat. Stir gently to warm the dish without overcooking the shrimp. Avoid the microwave if possible, as it can make shrimp tough. For the full recipe of Sheet Pan Lemon Herb Shrimp, check the earlier section! Shrimp cook quickly. The best time is 12 to 15 minutes at 400°F. They turn pink and opaque when done. Overcooking makes them tough, so watch closely. Each oven is different, so check them a little early. Yes, you can prep this dish in advance. Mix the shrimp and veggies, then store them in the fridge. You can also make the marinade ahead. Just keep the shrimp and marinade separate until you are ready to bake. This keeps the shrimp fresh. This shrimp pairs well with many sides. Here are some great options: - Quinoa salad for a healthy touch - Garlic bread for a filling option - Steamed rice for a classic choice - A fresh garden salad for crunch These sides balance the flavors and make a complete meal. In this post, I shared how to make a delicious sheet pan lemon herb shrimp dish. We covered main ingredients, step-by-step instructions, and tips for perfecting the recipe. I also included variations based on your taste. Cooking should be fun and easy. With quick steps and fresh ingredients, you can create a meal everyone will love. Enjoy experimenting with flavors and make this recipe your own!](https://joymealplan.com/wp-content/uploads/2025/06/8195c318-04ef-4784-9bf9-d5c1a8395797-768x768.webp)
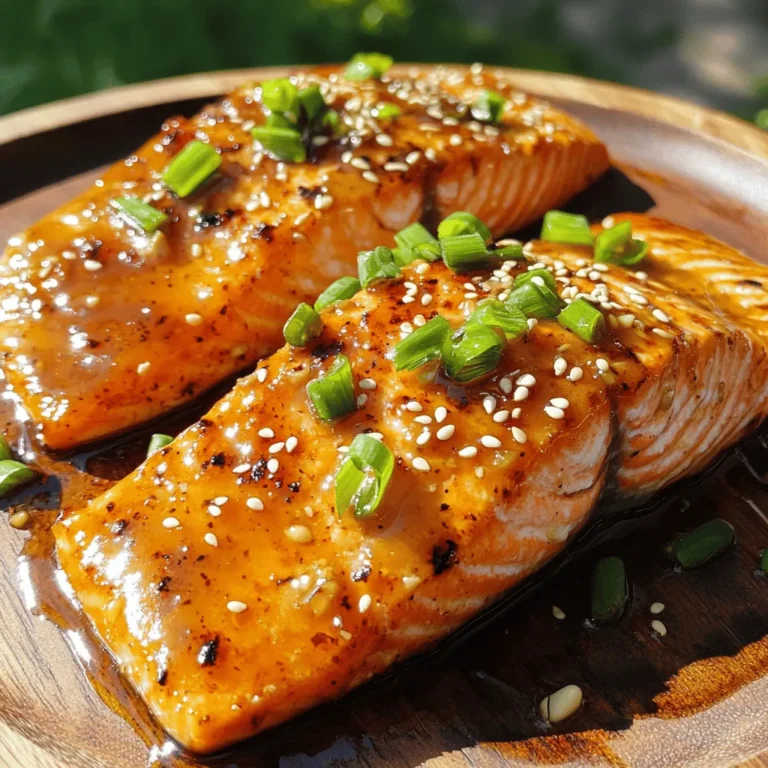
![- 1 lb boneless, skinless chicken thighs, cut into bite-sized chunks - 2 tablespoons olive oil - 1 cup broccoli florets, washed and trimmed - 1 red bell pepper, sliced into thin strips - 1 cup snap peas, ends trimmed - 1 small carrot, julienned - 3 green onions, finely chopped - 2 cloves garlic, minced - 1 tablespoon fresh ginger, grated - 1/4 cup low-sodium soy sauce - 2 tablespoons honey - 1 tablespoon rice vinegar - 1 teaspoon sesame oil - Salt and freshly ground black pepper to taste - Toasted sesame seeds for garnish The chicken is the star here. I use boneless, skinless thighs for juiciness. They cook quickly and stay tender. For veggies, I choose bright broccoli, sweet bell pepper, crisp snap peas, and a touch of carrot for color. Fresh garlic and ginger add a zing. The sauce blends soy sauce, honey, rice vinegar, and sesame oil for a sweet and savory mix. - Other protein options: shrimp, beef, or tofu - Additional veggies: zucchini, mushrooms, or bell peppers - Garnishes and toppings: cilantro, green onions, or chili flakes You can swap chicken for shrimp, beef, or even tofu for a vegetarian twist. Feel free to add other veggies like zucchini or mushrooms. They all taste great! Top with fresh cilantro or chili flakes for extra flavor. This dish is fun to customize based on what you have at home. For more details, you can check the Full Recipe. To start, gather your teriyaki sauce ingredients. You need low-sodium soy sauce, honey, rice vinegar, sesame oil, garlic, and ginger. In a small bowl, mix these ingredients well. A whisk works great here. This sauce adds a sweet and savory taste to your dish. Next, heat olive oil in a large skillet or wok. Use medium-high heat for the best results. When the oil shimmers, add the chicken chunks. Sprinkle a pinch of salt and black pepper over it. Cook for about 5-7 minutes. Turn the chicken often until it is brown and cooked through. Remove the chicken and set it aside on a plate. In the same skillet, add your vegetables: broccoli, bell pepper, snap peas, and carrot. Stir them for 3-4 minutes. You want the veggies to stay bright and start to soften. This keeps them crunchy and full of flavor. Now, return the cooked chicken to the skillet. Pour the teriyaki sauce over everything. Toss gently to coat the chicken and veggies evenly. Cook for another 2-3 minutes. This allows the flavors to meld nicely. Finally, remove the skillet from the heat. Stir in finely chopped green onions. This adds a fresh taste. To serve, spoon the stir fry onto plates. Sprinkle toasted sesame seeds on top for a nice finish. You can serve it over jasmine rice or alongside quinoa. This makes a complete meal. Enjoy the vibrant colors and flavors! - Overcooking the chicken: Overcooked chicken turns dry and tough. Cook it just until it's no longer pink inside. This usually takes about 5-7 minutes on medium-high heat. - Vegetable texture issues: If you overcook the veggies, they lose their crispness. Stir fry them for about 3-4 minutes. They should be bright and tender but still crunchy. - Flavor tweaks: Want more heat? Add chili flakes or sriracha to your teriyaki sauce. Prefer a sweeter taste? Mix in more honey or brown sugar. Adjust the sauce to match your taste. - Alternative vegetables: You can swap out the veggies based on what you have. Try bell peppers, zucchini, or even bok choy. Mix and match for fun flavors and colors. - Sweetness adjustments: If the sauce is too sweet, add a splash of soy sauce. If it’s not sweet enough, add more honey. Taste as you go to get it just right. - Thickness options: To thicken your sauce, simmer it longer in the pan. For a thinner sauce, add a bit of water or broth. This helps you control the sauce for your liking. By following these tips, you'll create a teriyaki chicken stir fry that's both delicious and fun to make. If you're ready to dive in, check out the Full Recipe for all the details! {{image_4}} You can easily make this dish fit your diet. - Low-Carb Options: Swap the chicken for shrimp or tofu. Use cauliflower rice instead of white rice. This keeps the flavor but cuts carbs. - Vegetarian or Vegan Swaps: For a plant-based dish, use tofu or tempeh. You can also add more veggies like bell peppers or mushrooms. You can give your stir fry a twist. - Different Sauce Options: Try a hoisin sauce or sweet chili sauce for a different taste. You can even add peanut butter for a creamy texture. - Cultural Twists on Stir Fry: Add spices like curry powder for an Indian flavor. Or use a teriyaki sauce recipe from Japan. Each culture adds its unique flair. Using seasonal produce can enhance your dish. - Best Vegetables to Use Per Season: In spring, use asparagus and snap peas. In summer, add zucchini and bell peppers. Fall is great for carrots and squash. Winter brings hearty greens like kale. - Sustainable Sourcing Tips: Shop local farmers' markets. This supports local farms and gets you fresh ingredients. You can also look for organic labels to ensure quality. Explore these options to make your teriyaki chicken stir fry even more special! To store your teriyaki chicken stir fry, first let it cool down. Place it in an airtight container. This helps keep the flavors fresh. You can refrigerate it for up to three days. If you want to keep it longer, freezing is a good option. Use a freezer-safe container or bag. It can last up to three months in the freezer. When you're ready to eat your leftovers, reheating is easy. For the microwave, place the stir fry in a bowl. Cover it with a microwave-safe lid. Heat it for one to two minutes, stirring halfway. This ensures even heating. If you prefer a skillet, heat a small amount of oil over medium heat. Add the stir fry and stir until warm, about three to five minutes. In the fridge, your teriyaki chicken stir fry lasts about three days. Be sure to check for signs of spoilage before eating. If you see any mold or if it smells off, it's best to throw it away. When frozen, the stir fry can sit for up to three months. After that, the taste may not be as good. Always trust your senses when it comes to food safety. You can serve teriyaki chicken stir fry with rice or noodles. Here are some great options: - Jasmine rice: This fluffy rice pairs well with teriyaki sauce. - Brown rice: A healthier option with more fiber. - Egg noodles: These add a nice chew to your meal. - Quinoa: A protein-rich choice that adds texture. - Side salad: A fresh salad can balance the flavors. Try pairing your stir fry with steamed or sautéed vegetables. Broccoli, bok choy, and carrots work well. You can also serve it with a light soup for a complete meal. Yes, you can make teriyaki chicken stir fry in advance. Here are some tips: - Cook and cool: Prepare the dish fully, then cool it quickly. - Store properly: Place it in an airtight container in the fridge. - Reheat gently: When ready to eat, heat it on the stove or in the microwave. Meal prep makes busy nights easier. You can also chop veggies ahead of time. This saves time and lets you enjoy a fresh meal. Teriyaki chicken stir fry is tasty and nutritious. Here are the key facts: - Caloric content: One serving has about 350 calories. - Protein: It has around 30 grams of protein from chicken. - Carbohydrates: Expect about 30 grams, mostly from veggies and sauce. - Fat: It contains about 10 grams, mostly healthy fats from olive oil. This dish is rich in vitamins and minerals, thanks to the colorful veggies. Broccoli offers vitamin C, while carrots are high in beta-carotene. Enjoy this dish for a balanced meal! For the complete instructions and ingredient list, check out the [Full Recipe]. Teriyaki chicken stir fry is a simple dish to make at home. You learned key ingredients, how to prepare the sauce, and tips for cooking. Avoid common mistakes like overcooking chicken. Customize your stir fry with different veggies or proteins to suit your taste. Remember, fresh ingredients make a big difference. Whether you serve it fresh or store leftovers, this dish is delicious. Enjoy creating your own unique stir fry!](https://joymealplan.com/wp-content/uploads/2025/06/4a36c5e3-194c-4011-88f6-f3f1f5f34a05-768x768.webp)
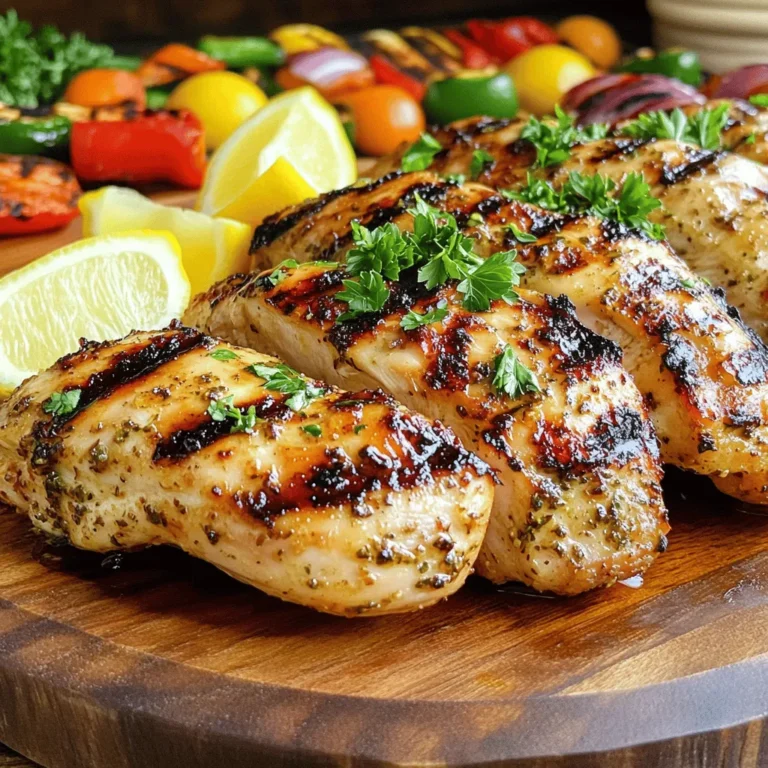
![For a great veggie stir fry, you need fresh veggies. Here’s what I use: - 1 cup broccoli florets - 1 bell pepper (red or yellow), sliced into thin strips - 1 cup sugar snap peas, trimmed - 1 medium carrot, cut into julienne strips - 1 cup mushrooms (shiitake or button), sliced Spices and oils bring flavor to your dish. I recommend these: - 2 cloves garlic, finely minced - 1 tablespoon fresh ginger, grated - 3 tablespoons soy sauce (or tamari for gluten-free) - 1 tablespoon sesame oil - 1 tablespoon vegetable oil for high-heat cooking - Salt and pepper, to taste You can add more fun to your stir fry with these options: - Cooked tofu or tempeh for protein - Cooked rice or noodles for a fuller dish - Chili flakes for some heat - Fresh herbs like cilantro for a fresh touch For the full recipe, check out [Full Recipe]. These ingredients make a colorful and tasty meal that’s easy to prepare. To start, wash all your vegetables. This step is super important. Cut the broccoli into small florets. Slice the bell pepper into thin strips. Julienne the carrot for a nice crunch. Slice your mushrooms too. Having everything ready makes cooking fast and fun. Grab a large skillet or wok for this part. Heat the vegetable oil over medium-high heat. You want the oil to shimmer a little. Now, add the minced garlic and grated ginger. Sauté them for around 30 seconds. Watch closely so they don’t burn! Next, toss in the broccoli, bell pepper, and carrot. Stir-fry these for about 3 to 4 minutes. They should be a bit soft but still crunchy. Then, add the sugar snap peas and sliced mushrooms. Keep cooking for another 3 to 4 minutes. This makes sure all veggies are tender but still bright. Once your veggies are just how you like them, pour in the soy sauce. Drizzle the sesame oil over the top. Stir everything well to mix the flavors. Let them cook together for 1 to 2 more minutes. Season with salt and pepper to taste. Remove from heat and sprinkle with toasted sesame seeds. This adds a nice touch! Serve the stir fry in a big bowl. You can add rice or noodles for a full meal. Check the Full Recipe for more details. Enjoy your vibrant dish! To get the right texture, cut your veggies small and even. This way, they cook quickly and stay crisp. Start with the harder veggies first, like carrots and broccoli. Cook them for a few minutes before adding softer ones like bell peppers and mushrooms. Stir the mix often to avoid burning. Keep an eye on the color; vibrant hues mean freshness! Adding flavor is key. Use fresh garlic and ginger for a bold taste. A splash of soy sauce brings saltiness. You can also try adding a bit of chili paste for heat. For a nutty touch, drizzle sesame oil right at the end. Also, sprinkle toasted sesame seeds on top for crunch and flavor. These simple changes can elevate your dish. Avoid overcrowding the pan. If you add too many veggies at once, they steam instead of fry. This makes them soggy. Always have your ingredients prepped before you heat the pan. Another mistake is cooking on low heat. High heat keeps the veggies crisp and colorful. Lastly, don’t skip the seasoning; it makes all the difference! For more details, check the Full Recipe. {{image_4}} You can use many different vegetables in your stir fry. If you don't have broccoli, try cauliflower or zucchini. Green beans add a nice crunch too. For a sweeter taste, add some baby corn or bell peppers. Just keep in mind that cooking times may change based on what you pick. Always cut the veggies into similar sizes. This helps them cook evenly and look great. This veggie stir fry is easy to adapt for special diets. To make it vegan, just stick with the current ingredients. Use tamari instead of soy sauce for a gluten-free option. You can even add some coconut aminos for a sweeter flavor. This keeps it tasty without gluten. Always check labels to ensure all ingredients meet your dietary needs. To make your stir fry more filling, add protein. Tofu is a great choice. Press it first to remove extra moisture, then cube it. You can also add chickpeas or edamame for plant-based protein. If you eat meat, try chicken or shrimp. Cook the protein first, then add it back with the veggies. This way, everything blends well together. For the full recipe, check the section above. After enjoying your veggie stir fry, let it cool down. Use an airtight container to keep it fresh. Store it in the fridge for up to three days. This way, you can savor your delicious meal again! Reheating is simple. You can use a microwave or stovetop. If using a microwave, heat in short bursts. Stir in between to ensure even heating. On the stovetop, add a splash of water to keep it moist. Heat on medium until warm. If you want to save some for later, freezing works well too. Place the cooled stir fry in freezer-safe bags. Remove as much air as possible before sealing. It can last for up to three months in the freezer. When ready to eat, thaw in the fridge overnight before reheating. Enjoy your easy veggie stir fry again with fresh flavors! For the full recipe, check the details above. It takes about 10 to 15 minutes to cook veggie stir fry. The prep time is around 15 minutes, and the actual cooking time is quick. You want to heat your pan and cook the veggies at high heat. This helps keep them crisp and colorful. Yes, you can use frozen vegetables for stir fry. They are handy and save time. Just remember that frozen veggies may release more water. Cook them for a bit longer to get rid of the moisture. This way, your stir fry stays flavorful and not soggy. Besides soy sauce, you can try other sauces for different flavors. Here are some great options: - Teriyaki sauce for a sweet touch - Hoisin sauce for a thicker, rich flavor - Oyster sauce for umami - Coconut aminos for a soy-free option These sauces can add a unique twist to your dish. To make your stir fry taste better, use fresh ingredients. Fresh veggies bring bright flavors. Adding garlic and ginger enhances the taste, too. You can also experiment with spices like red pepper flakes for heat. Lastly, finish with toasted sesame oil for a nutty flavor. For more ideas, check out the Full Recipe. To sum up, this blog post gives you all you need for a great stir fry. You learned about fresh veggies, essential spices, and fun add-ins. I showed you how to prepare, cook, and season your dish. The tips shared help avoid common mistakes and enhance flavor. You can also explore different variations and learn how to store leftovers. Stir fry is versatile and fun to make. Enjoy your cooking journey and make it your own!](https://joymealplan.com/wp-content/uploads/2025/06/d6e89b1e-9902-47ff-ae43-a4ac0f8c3362-768x768.webp)