Skip to content
About
Contact
Cookie Policy
Copyright Policy
Disclaimer
Search
Home
Dinner
Appetizer
Desserts
Drinks
About
Contact
Privacy Policy
Toggle Menu
Home
/
Dinner
- Page 45
Dinner
Viral TikTok Salmon Rice Bowl Flavorful Fresh Delight
Keto Taco Salad Bowl Packed with Flavor and Freshness
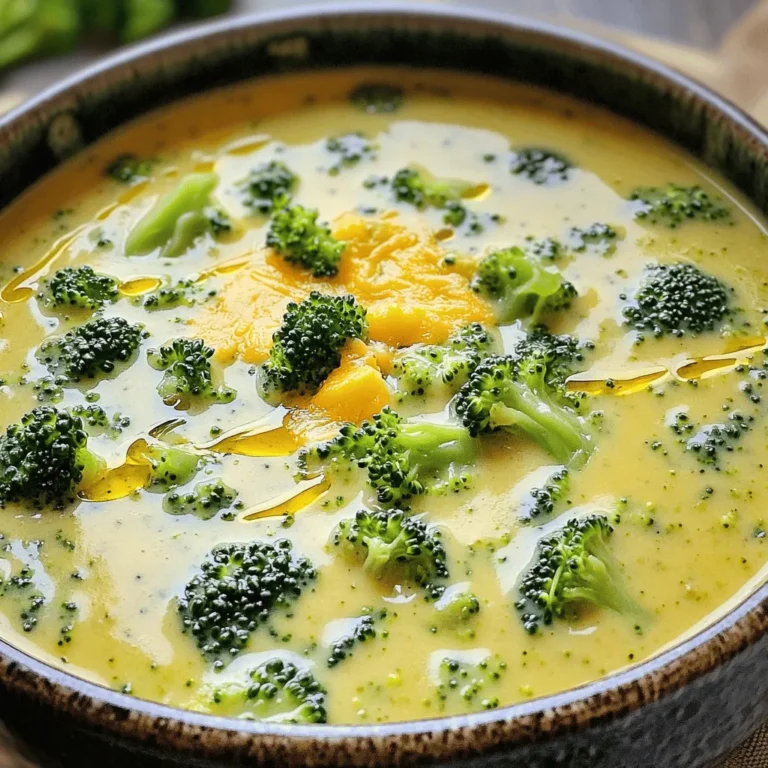
Creamy Broccoli Cheddar Soup Flavorful and Simple Recipe
Easy Garlic Shrimp Scampi Simple and Savory Recipe
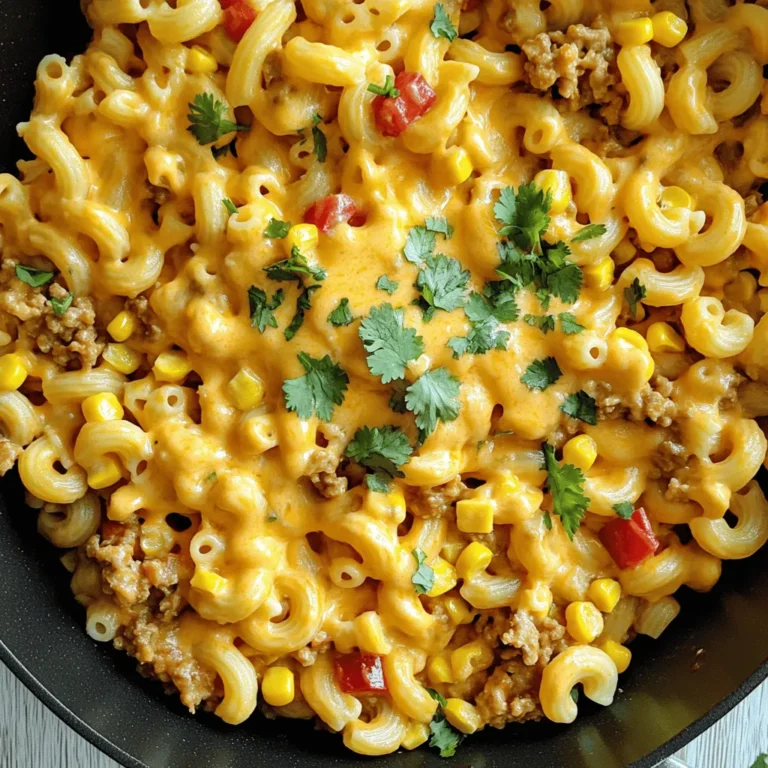
One-Skillet Cheesy Taco Pasta Quick and Flavorful Dish
Broccoli Cheese Stuffed Chicken Flavorful Dinner Idea
Garlic Butter Steak Bites Savory and Simple Recipe
Savory Sweet Potato Black Bean Tacos Easy Recipe
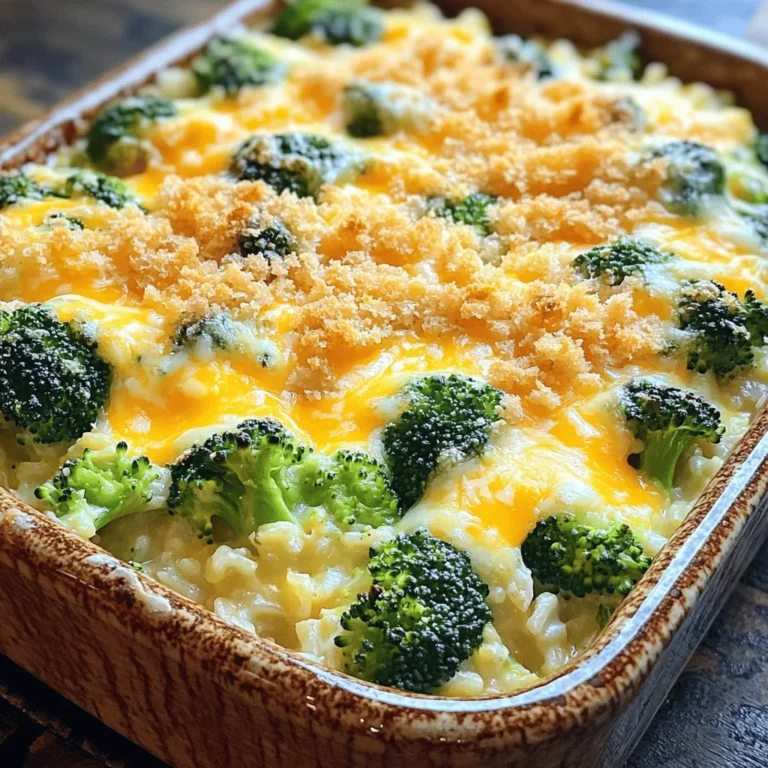
Cheesy Broccoli Rice Casserole Creamy and Comforting Dish
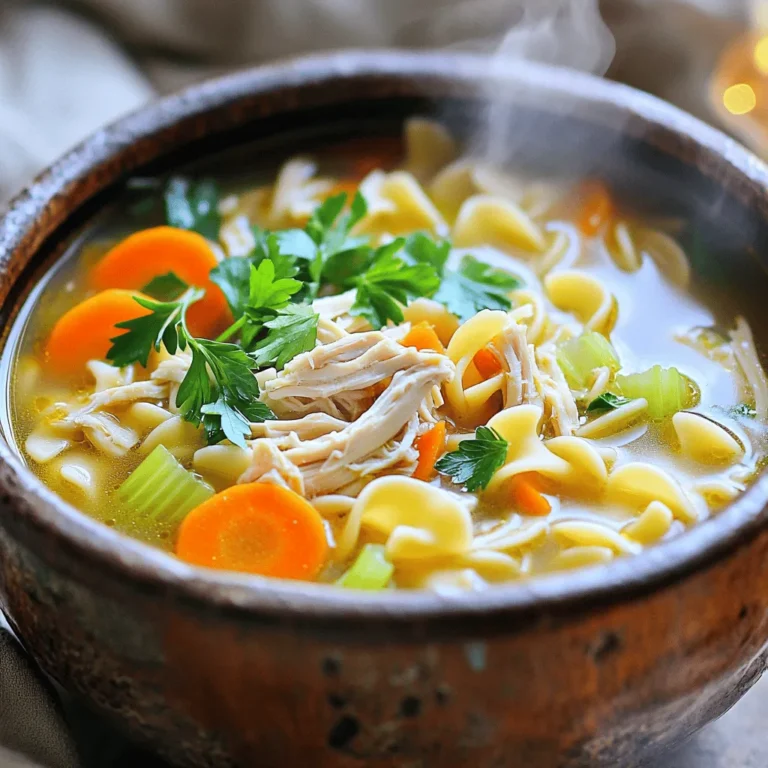
Classic Chicken Noodle Soup Cozy and Nourishing Meal
Page navigation
Previous Page
Previous
1
…
43
44
45
46
47
…
65
Next Page
Next
Home
Dinner
Appetizer
Desserts
Drinks
About
Contact
Privacy Policy
Toggle Menu Close
Search for:
Search


![This recipe is simple and fun to make. Here’s what you need: - 1 lb large shrimp, peeled and deveined - 4 tablespoons unsalted butter - 4 cloves garlic, minced - 1 teaspoon red pepper flakes (adjust to taste) - 1 lemon, juiced and zested - 1/4 cup chicken broth - 1/4 cup freshly chopped parsley - Salt and pepper to taste - 8 oz linguine or spaghetti - Grated Parmesan cheese for serving (optional) If you don’t have some ingredients, don’t worry! Here are some easy swaps: - Shrimp: You can use scallops or chicken instead. - Butter: Olive oil works well for a lighter touch. - Chicken broth: Vegetable broth or white wine can add nice flavor. - Parsley: Fresh basil or cilantro can give a different taste. - Lemon: Lime juice can be a zesty alternative. These substitutes keep the dish tasty and fun. You can mix and match as you like! This easy garlic shrimp scampi takes just 25 minutes to make. You will need about 10 minutes for prep and 15 minutes for cooking. It’s quick and perfect for busy nights. You can serve it to four people, so it’s great for a small family meal or a cozy dinner. 1. Cook the pasta: Start by boiling a large pot of salted water. Add 8 oz of linguine or spaghetti. Cook it according to the package directions until it is al dente. Remember to save 1/2 cup of the pasta water before you drain it. Set the pasta aside in a bowl. 2. Sauté the shrimp: In a large skillet, melt 2 tablespoons of butter over medium heat. Once it is bubbly, add 1 lb of peeled and deveined shrimp in a single layer. Sprinkle with salt and pepper. Cook for 2-3 minutes until they turn pink. Flip them and cook for another 1-2 minutes. Remove the shrimp and set them aside. 3. Make the garlic sauce: In the same skillet, lower the heat to medium-low. Add the remaining 2 tablespoons of butter and 4 cloves of minced garlic. Sauté for 1 minute until it smells great and turns lightly golden. Be careful not to burn the garlic. 4. Add flavor: Stir in 1 teaspoon of red pepper flakes, the juice and zest of 1 lemon, and 1/4 cup of chicken broth. Raise the heat a bit to bring this to a gentle simmer. Let it reduce for 2-3 minutes so the flavors blend well. 5. Combine everything: Add the shrimp back to the skillet, along with the cooked pasta and half of the 1/4 cup of chopped parsley. Toss gently, adding the reserved pasta water a little at a time until you reach a creamy sauce. It should not be too thick. 6. Finish and serve: Taste the dish and adjust with more salt and pepper if needed. Serve hot, topped with the rest of the parsley and some grated Parmesan cheese if you like. - Use fresh shrimp for the best taste. - Don’t overcrowd the pan when cooking shrimp. This helps them cook evenly. - Be careful with the garlic; it should be fragrant but not burnt. - Save some pasta water to adjust the sauce later. - Garnish with fresh parsley and lemon for a bright finish. For the full recipe, check out the [Full Recipe]. Enjoy your cooking! When making garlic shrimp scampi, avoid these common errors: - Overcooking shrimp: Cook shrimp for just 2-3 minutes on one side. Flip and cook for another 1-2 minutes. They should be pink and firm, not rubbery. - Burning garlic: Sauté garlic on medium-low heat. Brown garlic adds flavor, but burnt garlic ruins your dish. - Skipping pasta water: Reserve some pasta cooking water. It helps create a creamy sauce. To make your scampi even tastier: - Use fresh ingredients: Fresh shrimp and garlic will give the best flavor. - Add herbs: Fresh parsley brightens the dish. You can also try basil or oregano for extra flavor. - Experiment with spices: Adjust red pepper flakes for heat. A pinch of smoked paprika can add depth. Cooking pasta is simple, but there are key tips: - Use plenty of water: A large pot helps the pasta cook evenly. - Salt the water: This adds flavor to the pasta. Aim for a tablespoon of salt per gallon of water. - Don’t rinse pasta: Rinsing washes away the starch that helps the sauce stick. Keep it warm and toss it with the shrimp and sauce right away. For the full recipe, check out the [Full Recipe]. {{image_4}} You can easily add vegetables to your garlic shrimp scampi. Spinach, broccoli, or bell peppers work well. Just sauté them for a few minutes before adding the shrimp. This adds color and nutrients without changing the dish's taste much. Plus, you get a nice crunch with each bite. It’s a great way to sneak in some veggies for the kids or anyone who needs more greens. If you want to switch things up, you can use chicken or scallops instead of shrimp. For chicken, cut it into bite-sized pieces. Sauté it until golden and cooked through, just like the shrimp. For scallops, sear them for a few minutes on each side. Both options add their own unique flavor to the dish. This makes it fun to try new things while keeping the same garlic sauce. For a gluten-free version, use gluten-free pasta. There are many options available now, like rice or quinoa pasta. They cook similarly to regular pasta. Just follow the package instructions. You can also serve the garlic shrimp over zucchini noodles as a fresh twist. This gives you a light meal that is still full of flavor. To store leftover shrimp scampi, let it cool first. Place it in an airtight container. It can stay in the fridge for up to three days. Make sure to cover it well to keep flavors fresh. Avoid leaving it out for too long, as this can lead to spoilage. When reheating, do it gently to prevent overcooking the shrimp. Use a skillet over low heat and add a splash of broth or water. This keeps the dish moist. Stir often and check the shrimp closely. You want them warm but not rubbery. You can freeze shrimp scampi if needed. Use a freezer-safe container and leave some space for expansion. It can last for up to three months in the freezer. To thaw, place it in the fridge overnight. Reheat gently as described above. Enjoy your meal even after a long time! Yes, you can use frozen shrimp for this recipe. Just be sure to thaw them first. Place the shrimp in cold water for about 15-20 minutes. This helps them defrost quickly and evenly. Using frozen shrimp is a great time saver and still gives you a tasty dish. You can tell shrimp are done when they turn bright pink and curl slightly. This usually takes about 3-5 minutes of cooking. If they look opaque and firm, they are ready to eat. Overcooking can make them tough, so keep a close eye! Garlic shrimp scampi pairs well with several dishes. Here are some ideas: - A fresh green salad with lemon vinaigrette. - Garlic bread for a delicious side. - Steamed vegetables like broccoli or asparagus for color. - A glass of white wine, such as Sauvignon Blanc, to enhance the meal. Exploring these options will make your meal even better. Enjoy mixing flavors and textures! You can create a delicious Garlic Shrimp Scampi using easy ingredients and simple steps. The recipe includes cooking tips to prevent mistakes and ways to boost flavor. You can also make variations by adding veggies or using chicken. Remember to store leftovers properly and reheat them for the best taste. This dish brings joy to any meal. By following this guide, you can impress family and friends with your cooking skills. Enjoy making your own tasty Shrimp Scampi!](https://joymealplan.com/wp-content/uploads/2025/06/198ad0f3-6fc3-464f-bcc6-4256f6587cb9-768x768.webp)

![- 1 pound sirloin steak, cut into bite-sized cubes - 4 tablespoons unsalted butter - 4 cloves garlic, finely minced - 1 tablespoon fresh rosemary, finely chopped - 1 tablespoon fresh thyme, finely chopped - Salt and freshly ground black pepper, to taste - 1 tablespoon olive oil - ¼ teaspoon red pepper flakes (optional for heat) - Fresh parsley, finely chopped, for garnish The right ingredients make all the difference. For this dish, you want a good cut of meat. Sirloin steak works well because it’s tender and flavorful. Cut it into bite-sized cubes. This size helps them cook quickly and evenly. Butter adds richness. The unsalted kind allows you to control the salt level. Garlic gives a strong, tasty punch. Fresh herbs, like rosemary and thyme, add a nice touch. They bring out the beefy flavor. You can add red pepper flakes for a bit of heat. If you prefer a milder dish, just skip this ingredient. Fresh parsley is perfect for garnishing. It adds color and freshness to the final plate. Every ingredient plays a role. Together, they create joy in every bite. For the complete recipe, check out the Full Recipe section. Start by patting the steak cubes dry with a paper towel. This helps create a nice crust when searing. Moisture can make it hard to get that perfect sear. Next, season each steak cube with salt and freshly ground black pepper. This simple step packs in flavor. Let the seasoned steak sit for a bit. This allows the salt to work its magic. In a large skillet, heat the olive oil over medium-high heat until it shimmers. This means the oil is hot enough for searing. Carefully add the steak cubes. Make sure they are in a single layer. Sear the steak for 2-3 minutes without moving them. This helps form a beautiful crust. After that, flip the cubes and sear for another 2-3 minutes. Adjust the time if you want your steak more done. Once they’re seared to your liking, take the steak bites out and set them aside. In the same skillet, lower the heat to medium. Add the unsalted butter and minced garlic. Then toss in the chopped rosemary, thyme, and red pepper flakes if you want some heat. Stir everything together until the butter melts and the garlic smells great. This should take about a minute. Now, return the cooked steak bites to the skillet. Toss them gently in the garlic butter sauce. Cook for another 1-2 minutes. This lets all the flavors mix well together. Take the skillet off the heat. For the final touch, garnish the steak bites with freshly chopped parsley. Serve them on a colorful platter for a nice look. For fun, you can skewer the bites with toothpicks. This makes them easy to eat. Drizzle some of that garlic butter sauce on top to make them even more tasty! For the full recipe, check out the details provided earlier. Enjoy your cooking! To make the best garlic butter steak bites, start with patting the steak dry. This step is key. Dry steak creates a nice crust when you sear it. Use a paper towel to soak up any moisture. Next, adjust your cooking times based on how you like your steak. For medium-rare, sear the cubes for 2-3 minutes on each side. If you prefer your steak more done, add an extra minute or two. Remember, don’t overcrowd the pan. This helps the steak cook evenly. To boost flavor, consider adding spices and herbs. Fresh rosemary and thyme work wonders. The aroma will fill your kitchen and make the bites irresistible. You can also customize your steak bites with optional add-ins. If you like heat, sprinkle in some red pepper flakes. Want a bit of sweetness? Try adding a splash of balsamic vinegar. Each tweak can create a new taste experience. For the full recipe, click here: [Full Recipe]. {{image_4}} You can swap steak for chicken or shrimp. Chicken thighs work well because they stay juicy. Cut the pieces into bite-sized chunks. Cook for about 5-7 minutes until they are golden brown. Shrimp cooks quickly and adds a sweet taste. Use large shrimp and cook them for 2-3 minutes on each side until they turn pink. Both options absorb the garlic butter flavor nicely. For a gluten-free meal, use gluten-free soy sauce instead of regular soy sauce. Always check the label on your butter and spices. Most of them are naturally gluten-free. This keeps the dish safe for those with gluten sensitivities. Enjoy the same great taste without worry. If you want a vegetarian version, mushrooms are a great substitute. Portobello or cremini mushrooms can mimic the texture of meat. Slice them into bite-sized pieces and cook until golden. You can also use tofu for added protein. Press the tofu to remove moisture, then cut it into cubes. Sauté in the garlic butter for a tasty, plant-based dish. To keep your leftover steak bites fresh, store them in an airtight container. Make sure to cool them first. Place them in the fridge within two hours of cooking. This way, they stay safe to eat. Good storage helps keep the flavor and texture. Leftover steak bites last about three to four days in the fridge. When you're ready to enjoy your steak bites again, reheating is key. Use a skillet for the best results. Heat it over medium-low heat. Add a small amount of butter or oil to help keep them moist. Stir gently for about five minutes. This way, you keep the great taste and tender bite. Avoid using the microwave, as it can make the steak chewy. If you want to save steak bites for later, freezing is a good option. First, let them cool completely. Then, place them in a freezer-safe container. You can also use freezer bags, making sure to remove as much air as possible. They can last up to three months in the freezer. When ready to eat, thaw in the fridge overnight. Reheat them in a skillet for the best flavor. Enjoy your Garlic Butter Steak Bites with these storage tips for later meals! For the full recipe, check out the earlier section. Garlic butter steak bites pair well with many sides. Here are some great options: - Roasted vegetables: Carrots, Brussels sprouts, or asparagus are tasty choices. - Mashed potatoes: Creamy potatoes balance the rich steak flavor. - Rice: Fluffy rice soaks up the garlic butter sauce nicely. - Salad: A fresh green salad adds a crisp bite. - Garlic bread: Perfect for dipping into the garlic butter sauce. Yes, you can prep some parts ahead. Here are my tips: - Season the steak: You can season the steak cubes a few hours before cooking. This helps the flavors soak in. - Make the garlic butter sauce: Prepare the sauce in advance and store it in the fridge. Just warm it up before tossing in the steak. - Cook and store: You can cook the steak bites and store them in the fridge for up to two days. Reheat them gently before serving. If you want more heat, try these ideas: - Add more red pepper flakes: Increase the amount to your taste. - Use hot sauce: Drizzle some hot sauce over the finished dish. - Add jalapeños: Sauté sliced jalapeños with the garlic for extra spice. - Try chili powder: Sprinkle some chili powder on the steak while seasoning. These changes will add a nice kick to your garlic butter steak bites! For the full recipe, check out the [Full Recipe]. In this guide, we explored making garlic butter steak bites. We covered key ingredients, step-by-step cooking instructions, and tips for perfecting your dish. Remember to use fresh herbs for great flavor and adjust cooking times for your preference. You can also try alternatives like chicken or mushrooms. This dish is easy to store and reheat, making it perfect for any meal. Enjoy experimenting with flavors and creating a delicious steak experience!](https://joymealplan.com/wp-content/uploads/2025/06/487cc2c4-861e-43bd-80e8-4492eb920a60-768x768.webp)