Skip to content
About
Contact
Cookie Policy
Copyright Policy
Disclaimer
Search
Home
Dinner
Appetizer
Desserts
Drinks
About
Contact
Privacy Policy
Toggle Menu
Home
/
Dinner
- Page 47
Dinner
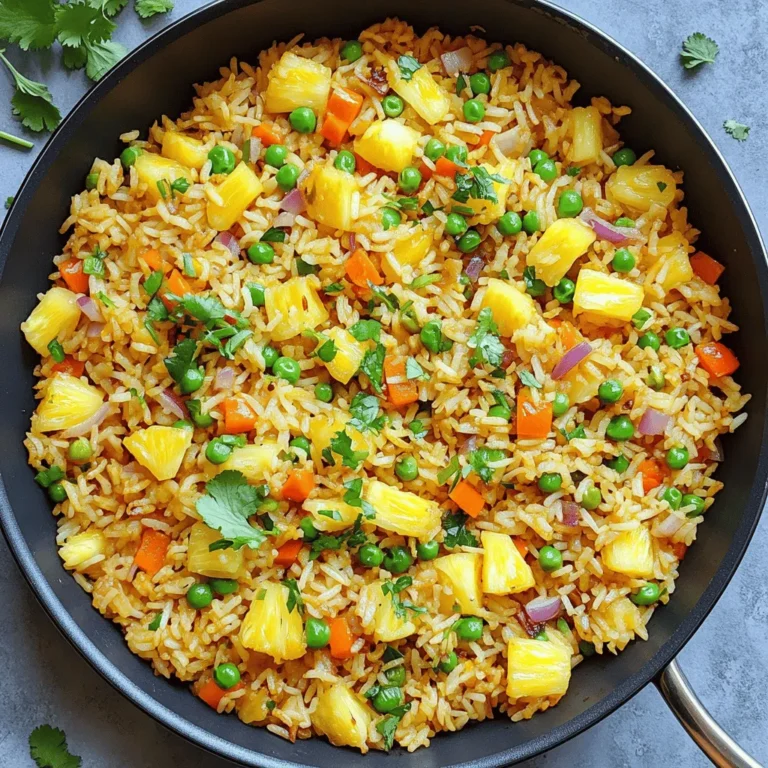
Pineapple Fried Rice Flavorful and Easy Recipe
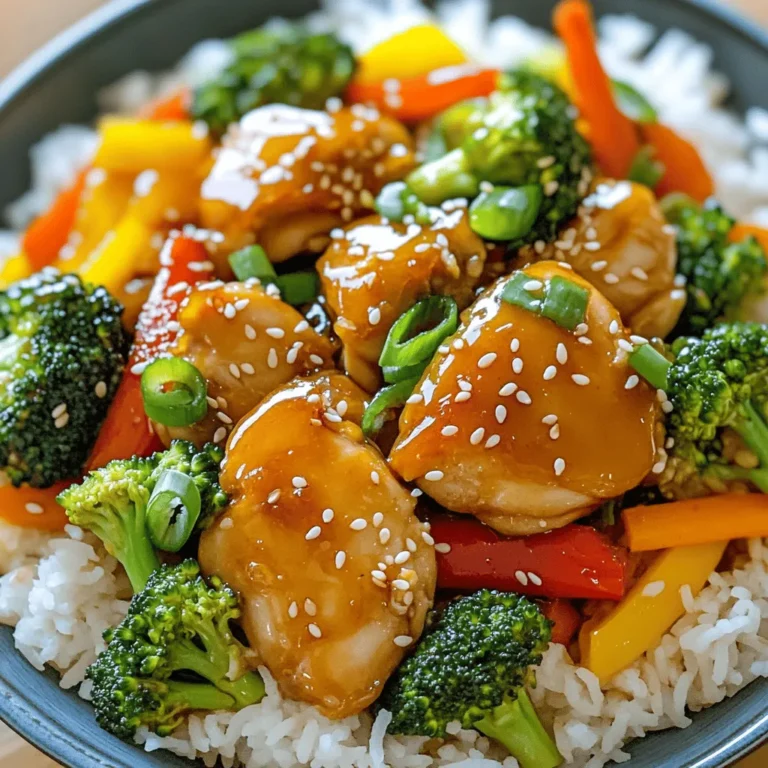
Honey Garlic Chicken Stir-Fry Simple and Tasty Meal
Vegetarian Enchiladas Flavorful and Easy Recipe
Ratatouille with Quinoa Flavorful and Nutritious Meal
Creamy Avocado Pasta Quick and Flavorful Recipe
Savory Oatmeal Bowls Nutritious and Flavorful Meal
One-Pot Creamy Tuscan Pasta Quick and Simple Dish
Spaghetti Aglio e Olio Delightful and Simple Recipe
Tex Mex Chicken and Zucchini Flavorful Dinner Delight
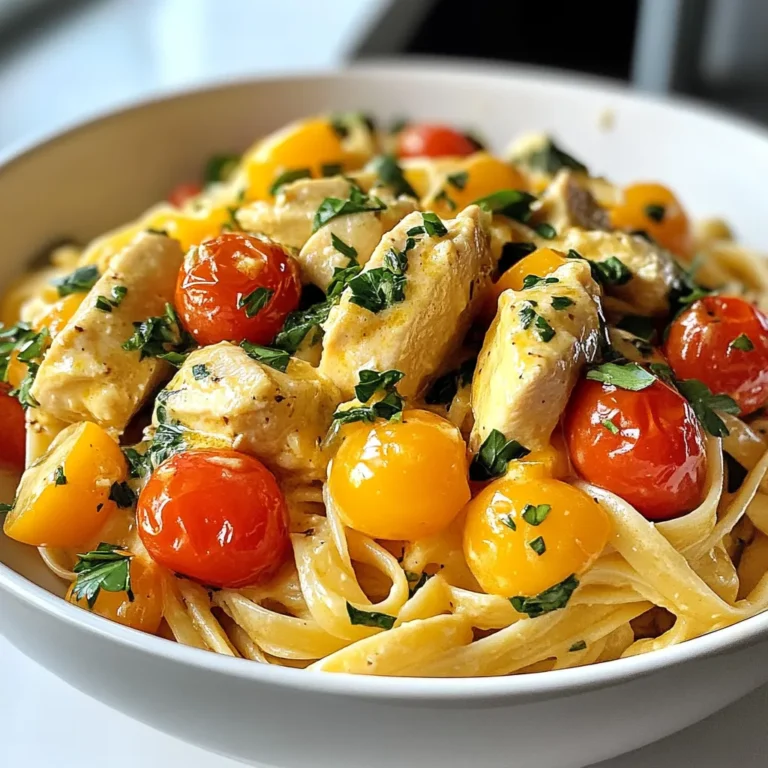
Cowboy Butter Chicken Linguine Tasty Pasta Delight
Page navigation
Previous Page
Previous
1
…
45
46
47
48
49
…
64
Next Page
Next
Home
Dinner
Appetizer
Desserts
Drinks
About
Contact
Privacy Policy
Toggle Menu Close
Search for:
Search

![- 8 corn tortillas - 1 cup black beans, drained and rinsed - 1 cup corn kernels (fresh or frozen) - 1 red bell pepper, diced - 1 small zucchini, diced - 1 cup fresh spinach, chopped - 1 teaspoon ground cumin - 1 teaspoon chili powder - 1/2 teaspoon garlic powder - 1 1/2 cups enchilada sauce - 1 cup shredded cheese - 1 tablespoon olive oil - Salt and pepper to taste - Fresh cilantro for garnish You can swap black beans for pinto or kidney beans. You might also try non-dairy cheese if you want a vegan option. If you need gluten-free, use gluten-free tortillas. These swaps keep the recipe flexible and fun! Each serving has about 300 calories. You get protein from beans and fiber from veggies. Black beans boost heart health, while spinach adds iron. Corn gives you energy, making these enchiladas not just tasty but also good for you. - Preheat the oven to 375°F (190°C). - In a large skillet, heat 1 tablespoon of olive oil over medium heat. - Add 1 diced red bell pepper and 1 small diced zucchini. - Sauté for about 5 minutes until they soften. Stir often to avoid sticking. - Next, stir in 1 cup of drained black beans, 1 cup of corn, and 1 cup of chopped spinach. - Cook for 3-4 minutes until the spinach wilts. - Season the mix with 1 teaspoon of ground cumin, 1 teaspoon of chili powder, and 1/2 teaspoon of garlic powder. - Add salt and pepper to taste. Mix well and cook for another 2 minutes. - Pour 1/2 cup of enchilada sauce into a baking dish. Spread it evenly across the bottom. - Warm 8 corn tortillas in the microwave for 20 seconds, or heat them in a skillet. - Take one tortilla and spoon a portion of the filling into the center. - Sprinkle some shredded cheese on top, then roll it up tightly. Place the rolled tortilla seam-side down in the baking dish. - Repeat this for all the tortillas until the filling is used up. - Pour the remaining enchilada sauce over the assembled enchiladas. - Sprinkle the remaining shredded cheese on top of the sauce. - Place the dish in the oven and bake for 20-25 minutes. Look for melted and bubbly cheese. - Allow the enchiladas to cool for a few minutes before serving. Enjoy with fresh cilantro if you like! For the full recipe, check the details above. - Add smokiness with chipotle peppers: Chipotle peppers add a rich, smoky taste. You can use them in the filling or mix them into the sauce. Just chop a few and add them to your veggies while cooking. This will elevate the flavor profile. - Use fresh herbs for garnish: Fresh herbs brighten up your dish. I love adding cilantro or parsley on top before serving. It adds color and freshness, making the enchiladas look even more appealing. - Importance of softening tortillas: Softening the tortillas is key. If they are too hard, they will crack when you roll them. Heat them in the microwave for 20 seconds or warm them on a skillet. This makes them easy to roll and fill without breaking. - Tips for perfectly melted cheese: To get that perfect melt, use a cheese blend with good melting properties. Cheddar and Monterey Jack work great. Add a little extra cheese on top when baking for a delicious, bubbly finish. - Pair with side dishes: Serve your enchiladas with rice or beans on the side. These help balance the meal and add more protein. You can also serve them with a simple salad for extra crunch. - Ideas for toppings: Top your enchiladas with sour cream or guacamole. These creamy toppings add richness and flavor. You can also sprinkle some diced onions or jalapeños for extra spice. These tips will help you make your vegetarian enchiladas even more delicious. For the full recipe, check out the [Full Recipe]. {{image_4}} You can make your enchiladas even better by changing the filling. - Adding roasted vegetables: Roasting veggies like carrots, eggplant, or butternut squash adds depth. The sweet, caramelized flavor makes the filling more exciting. - Using different kinds of cheese: Try mixing cheeses like queso fresco or pepper jack. Each cheese brings its unique taste. This change can keep your enchiladas fresh and fun. The sauce can change the whole dish. - Homemade enchilada sauce recipe: Making your own sauce is simple and rewarding. Blend tomatoes, chili powder, and spices for a rich flavor. This way, you control the heat and taste. - Alternatives like verde sauce: If you like a fresh twist, try verde sauce made with tomatillos. It adds a nice tangy kick that contrasts well with the cheese and veggies. You can adjust the recipe to fit various diets. - Vegan version of enchiladas: Swap cheese for a nut-based cheese or leave it out. Use more beans and veggies to fill the tortillas. You still get a hearty meal without animal products. - Low-carb or keto adaptations: Use lettuce wraps instead of tortillas. This swap keeps the taste while reducing carbs. You can still enjoy the flavors of enchiladas without the extra carbs. For a complete guide on making these delicious meals, check out the Full Recipe. To store leftovers, first, let the enchiladas cool down. Place them in an airtight container. This keeps them fresh and tasty. Glass or plastic containers work well. I prefer glass for easy reheating. If you want to freeze enchiladas, wrap them tightly in plastic wrap. Then, place them in a freezer-safe bag or container. Label the bag with the date. To reheat frozen enchiladas, remove them from the freezer. Let them thaw in the fridge overnight. Bake in a preheated oven at 350°F (175°C) until hot. In the fridge, these enchiladas last about 3 to 5 days. Always check for signs of spoilage. Look for off smells, mold, or changes in color. If you see any of these, it’s best to throw them out. Enjoy your tasty vegetarian enchiladas with confidence! For the full recipe, check the earlier sections. To prevent soggy enchiladas, apply the sauce wisely. Use a thin layer on the bottom of your dish. Do not drown the rolled enchiladas in sauce. Pour the rest of the sauce on top after filling them. Bake them just right. Overcooking can cause sogginess. Bake at 375°F for 20-25 minutes. This keeps them firm and tasty. Yes, you can use flour tortillas. They are softer and easier to roll. However, corn tortillas add a nice flavor. They are also gluten-free. Flour tortillas can get too soft and break. Each type has its charm. Choose based on your taste and needs. Many sides pair well with vegetarian enchiladas. Try Mexican rice for a classic touch. Beans add protein and fiber. A fresh salad can balance the meal. Guacamole or sour cream makes a great dip. You can also serve with a refreshing drink. Consider agua fresca or a light beer. These sides enhance the flavor of your enchiladas. Enjoy exploring different pairings! This blog post covered all you need for delicious vegetarian enchiladas. We discussed key ingredients, from black beans to fresh spinach. I shared tips on prepping and cooking, plus variations for your taste. You learned how to store leftovers and reheat them. These enchiladas are tasty, healthy, and easy to make. Enjoy trying different flavors and ingredients. Whether for a quick dinner or a party, these enchiladas will impress everyone. Now, get in the kitchen and start cooking!](https://joymealplan.com/wp-content/uploads/2025/06/0bc30ee8-fb20-468c-811c-2f42a5691433-768x768.webp)
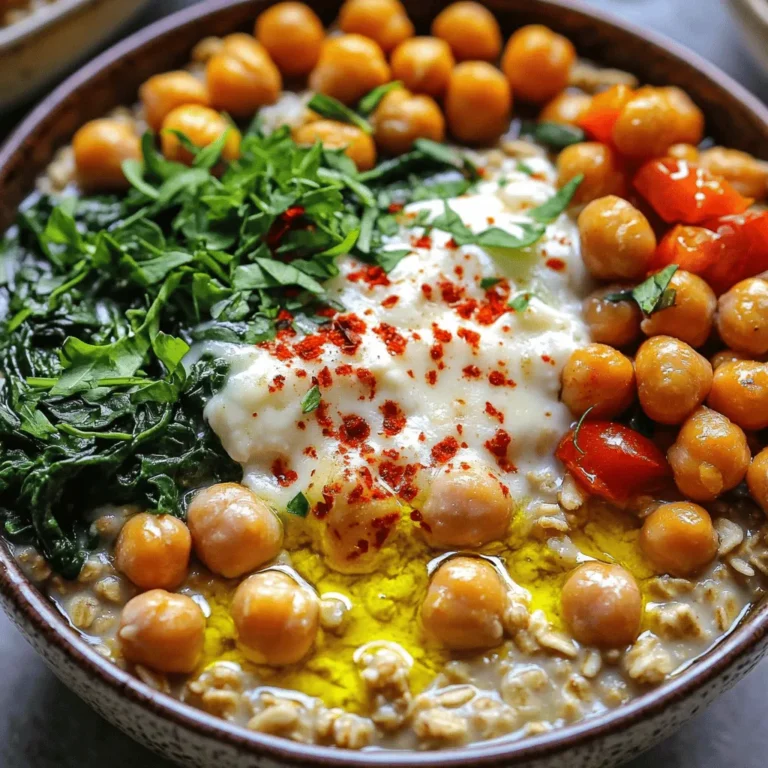
. To get the best flavor in your ratatouille with quinoa, start with fresh veggies. Fresh vegetables bring out the natural taste. Use ripe tomatoes for a juicy base. Add herbs like thyme and basil early in the cook. This helps release their oils and flavors. Sautéing the onions and garlic first adds depth to your dish. A common mistake is overcooking the vegetables. You want them soft but not mushy. Another mistake is not seasoning enough. Taste as you cook and adjust. Don't skip the olive oil; it adds richness. Lastly, avoid using pre-cooked quinoa. Cooking it fresh makes a big difference in texture. Serve your quinoa ratatouille warm in shallow bowls. Drizzle with extra virgin olive oil for a touch of luxury. Fresh basil leaves make a great garnish. They add color and flavor. You can also sprinkle some crushed red pepper for heat. Pair it with crusty bread or a simple salad for a full meal. For more details, check the Full Recipe. {{image_4}} Ratatouille with quinoa is naturally vegan and gluten-free. You can enjoy this dish without any animal products. Quinoa itself is a great choice. It is a whole grain that is safe for those avoiding gluten. You can feel good about serving this meal to friends and family with dietary needs. If you want to boost the protein in your dish, consider adding beans or tofu. Black beans or chickpeas mix well with ratatouille. They add texture and protein. Tofu is another option. Just cube it and sauté it with the veggies. It soaks up all the flavors of the dish. Ratatouille is flexible when it comes to vegetables. You can switch out the veggies based on what you have. Try adding carrots, mushrooms, or even spinach. Each vegetable brings its own taste and texture. You can make the dish more colorful and exciting. Experiment with what you love. Each combination can lead to a new favorite dish! To store leftovers, let the quinoa ratatouille cool down. Place it in an airtight container. This keeps the dish fresh and tasty. You can keep it in the fridge for up to three days. Make sure to label the container with the date. When you are ready to eat, you can reheat the dish. You can use the microwave or a stovetop. To microwave, place it in a bowl and cover it. Heat on high for about 2-3 minutes. Stir halfway through to heat evenly. If you prefer the stovetop, warm it in a skillet over medium heat. Stir and cook for about 5 minutes until hot. If you want to freeze the dish, use a freezer-safe container. Portion out servings to make it easy to reheat later. Freeze for up to three months. To thaw, move it to the fridge overnight. Reheat as mentioned above before serving. Enjoy your tasty meal even when you are busy! Yes, you can make Ratatouille with Quinoa ahead of time. I often prepare it a day before. This allows the flavors to mix well. Just store it in an airtight container in the fridge. When you are ready to eat, just reheat it on the stove or in the microwave. Ratatouille with Quinoa is a complete meal. You can serve it with crusty bread for dipping. A simple green salad also pairs well. If you want to add protein, try grilled chicken or fish. This makes a balanced meal that everyone will enjoy. Adjusting the spice level is easy. If you like it mild, stick to the recipe. For more heat, add red pepper flakes. You can also use spicy bell peppers or a dash of hot sauce. Always taste as you go to find the right balance for you. This blog post covered the key steps to make Ratatouille with Quinoa. We reviewed the ingredients and their benefits, plus substitutions for dietary needs. The step-by-step instructions simplify preparation and cooking. Tips and tricks help you avoid common mistakes and enhance flavor. We also explored variations to suit different diets and preferences. Ratatouille with Quinoa is versatile and easy to store. You can enjoy it fresh or as leftovers. Embrace your creativity with this dish, and feel confident in your cooking skills. Enjoy making this healthy meal!](https://joymealplan.com/wp-content/uploads/2025/06/988dfaac-430c-4a57-a4f4-203d0c398d72-768x768.webp)
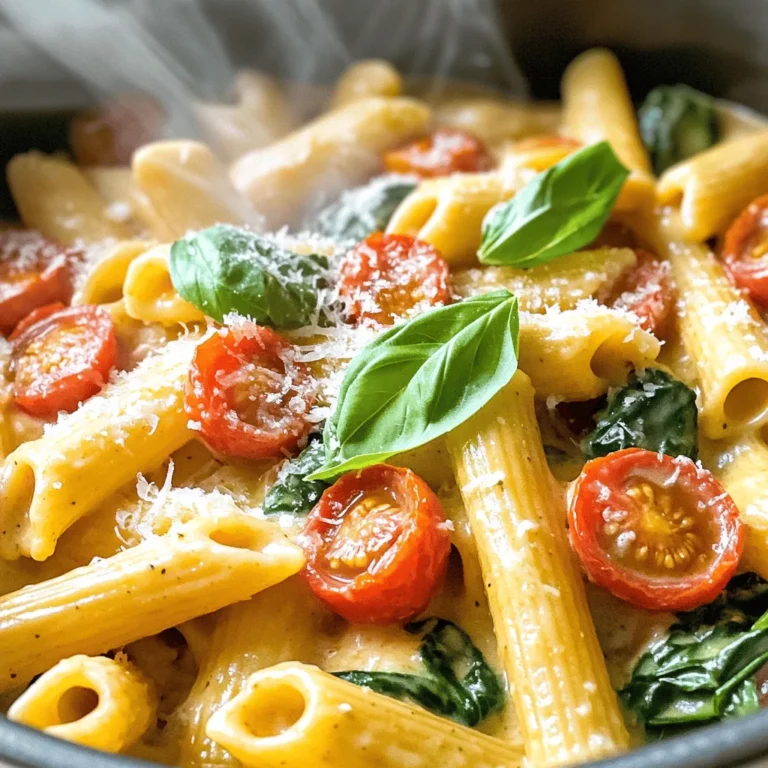
. First, fill a large pot with water. Add a good amount of salt. Bring the water to a rolling boil. Once it boils, add the spaghetti. Cook it until it’s al dente, which usually takes about 8 to 10 minutes. Don't forget to check the package for exact times. After cooking, drain the pasta. Make sure to save about half a cup of the starchy water for later. Set the pasta aside. While the pasta cooks, it’s time to make the sauce. Grab a food processor. Add the ripe avocado flesh, minced garlic, lemon juice, basil, and olive oil. Blend everything together until it’s smooth and creamy. If your sauce looks too thick, don’t worry. Just add a bit of the reserved pasta water. Blend again until you reach your desired consistency. Now that the pasta is ready, return it to the pot. Keep the heat low. Pour the creamy avocado sauce over the warm pasta. Gently toss everything together. Make sure every strand of spaghetti gets coated in the sauce. To make your creamy avocado pasta shine, use ripe avocados. Ripe avocados blend smoothly and offer a rich texture. They should feel soft but not mushy. Next, gradually add pasta water when blending your sauce. This step helps to reach your desired creaminess. Start with a little, then add more as needed. Salt and pepper play a key role in flavor. Always taste before serving. If it feels bland, add more salt or pepper. You can also adjust with Parmesan cheese. This cheese adds a savory note and enhances the dish's richness. If you prefer a vegetarian option, skip the cheese and rely on the avocados for flavor. First impressions matter, especially in food. Garnish with cherry tomatoes for a pop of color. Their sweetness pairs well with the creamy sauce. Next, sprinkle some red pepper flakes for heat. This touch not only looks good but adds a nice kick. Remember, we eat with our eyes first, so make it beautiful! {{image_4}} If you want a gluten-free dish, you can swap regular pasta for gluten-free options. Look for pasta made from brown rice, quinoa, or lentils. These types work well and keep the same great taste. Cook them according to the package directions. This way, everyone can enjoy this creamy avocado pasta. To make this dish vegan, skip the Parmesan cheese. Instead, you can add nutritional yeast. It gives a cheesy flavor without the dairy. Just mix in about 1/4 cup of nutritional yeast into the avocado sauce. This keeps your dish creamy and rich while staying plant-based. You can boost protein by adding grilled chicken or shrimp. Cook the proteins separately until done. Then, slice the chicken or toss the shrimp in with the pasta. The added protein makes this dish heartier and more filling. It’s a great way to turn a light meal into a satisfying feast. For the full recipe, check out the Creamy Avocado Pasta Delight. After making creamy avocado pasta, you may want to save some for later. Store any leftovers in airtight containers. This keeps the pasta fresh and avoids any unwanted odors. Place it in the fridge within two hours of cooking. Enjoy the leftovers within three days for the best taste. If you want to freeze the sauce, that's an option too. To do this, pour the creamy avocado sauce into freezer-safe bags or containers. Make sure to remove as much air as possible to prevent freezer burn. The sauce will stay fresh for about three months. When you’re ready to use it, thaw it in the fridge overnight. When it's time to enjoy your leftovers, reheating is key. The best way to reheat creamy avocado pasta is on the stove. Place the pasta in a pan over low heat. Add a splash of water or olive oil to help loosen the sauce. Stir gently until warm. Avoid the microwave if you can, as it can make the sauce grainy. Enjoy your meal! For the full recipe of creamy avocado pasta, check the earlier section. Yes, you can use frozen avocado. Frozen avocado is convenient and often cheaper. It may not have the same taste as fresh, but it still works well. Just thaw the avocado before blending. This way, you get a creamy sauce without waiting for ripe avocados. If you want a dairy-free option, try nutritional yeast. It adds a cheesy flavor without dairy. You can also use a vegan cheese blend. These substitutes keep the dish tasty while catering to different diets. Feel free to experiment with flavors until you find what you love. Creamy avocado pasta stays fresh for about 2 days in the fridge. Store it in an airtight container. To prevent browning, cover the pasta tightly. If you notice any changes in color or smell, it’s best to toss it. Enjoy your leftovers quickly for the best taste! This recipe combines ripe avocados, pasta, and garlic for a creamy dish. You can adjust ingredients to fit your taste. Adding cheese or protein can enhance flavors. Don't forget to store leftovers properly to enjoy later. Cooking can be fun and simple. Now it's your turn to make this delicious pasta! Enjoy every bite.](https://joymealplan.com/wp-content/uploads/2025/06/e38e2670-4076-4ca9-b5ff-23e6aadb6cf7-768x768.webp)