Skip to content
About
Contact
Cookie Policy
Copyright Policy
Disclaimer
Search
Home
Dinner
Appetizer
Desserts
Drinks
About
Contact
Privacy Policy
Toggle Menu
Home
/
Dinner
- Page 50
Dinner
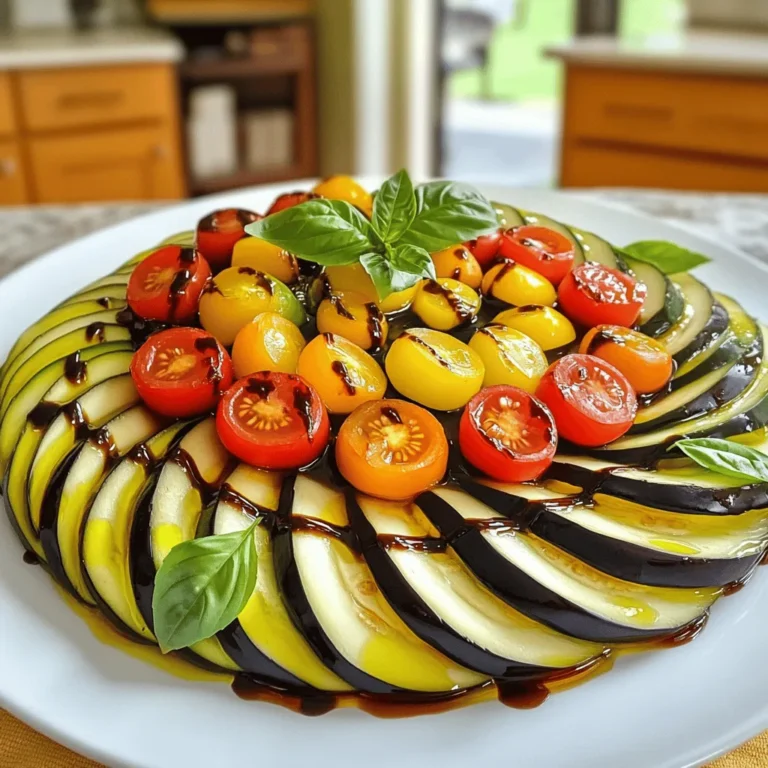
Baked Ratatouille Flavorful Vegetable Delight
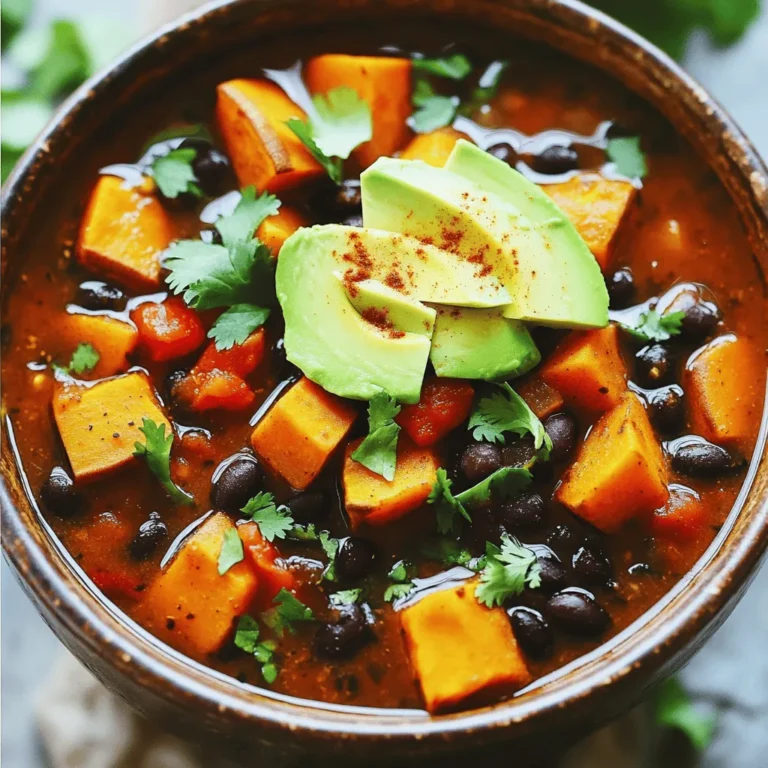
Savory Sweet Potato and Black Bean Chili Recipe Guide
Savory Breakfast Hash Quick and Flavorful Recipe
Classic Clam Chowder Savory and Comforting Recipe
Easy Shrimp Tacos Quick and Flavorful Recipe
Crispy Baked Chicken Tenders Simple and Tasty Recipe
Creamy Garlic Mushroom Pasta Easy and Flavorful Dish
Teriyaki Ground Beef Stir-Fry Flavorful Dinner Delight
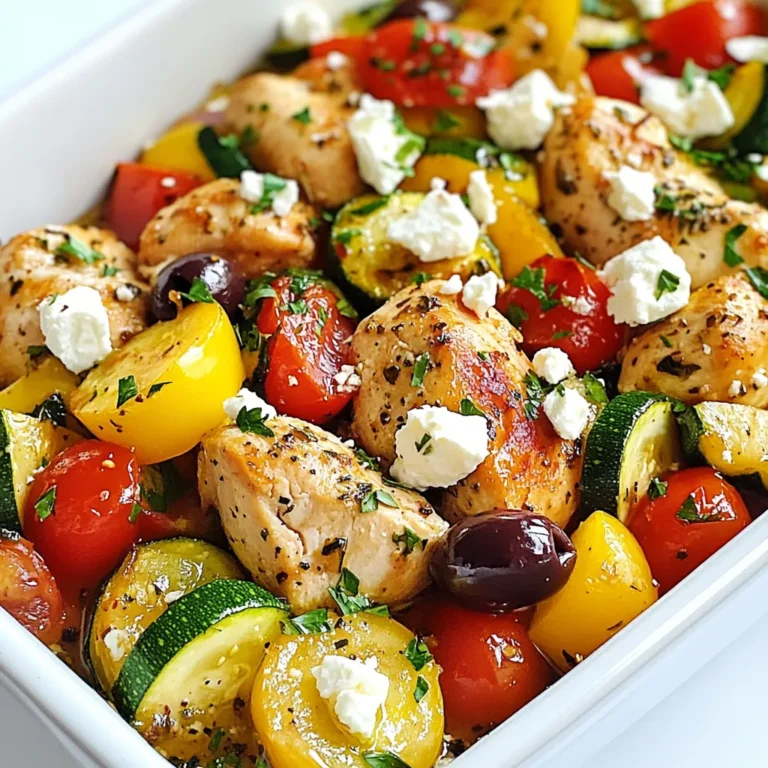
Mediterranean Chicken Zucchini Bake Simple and Tasty
Savory Mushroom and Spinach Quiche Delightful Recipe
Page navigation
Previous Page
Previous
1
…
48
49
50
51
52
…
64
Next Page
Next
Home
Dinner
Appetizer
Desserts
Drinks
About
Contact
Privacy Policy
Toggle Menu Close
Search for:
Search

![To make a tasty savory breakfast hash, gather these key items: - 2 medium potatoes, diced into small cubes - 1 cup bell peppers, a mix of red and green, diced - 1 small onion, finely diced - 1 cup cooked breakfast sausage, crumbled (or a plant-based option) - 4 large eggs - 2 tablespoons olive oil - 1 teaspoon smoked paprika - ½ teaspoon garlic powder - ½ teaspoon freshly ground black pepper - Salt, to taste - Fresh parsley, chopped, for garnish These ingredients work well together. The potatoes give a hearty base, while the bell peppers and onions add sweetness and color. The sausage provides a savory touch. You can make your breakfast hash unique by adding: - Spinach or kale for greens - Cherry tomatoes for a burst of flavor - Cheese for creaminess - Hot sauce for some heat - Avocado slices for extra richness Feel free to mix and match these options based on what you like. This lets you create a dish that fits your taste. To whip up this savory breakfast hash, have the following tools ready: - A large skillet for cooking - A spatula for stirring and serving - A sharp knife for chopping - A cutting board for easy prep With these ingredients and tools, you can create a breakfast hash that is quick and full of flavor. Don't forget to check the Full Recipe for detailed steps! Start by heating 1 tablespoon of olive oil in a large skillet over medium heat. When the oil shimmers, add the diced potatoes. Season them with salt and black pepper. Cook for about 10 to 12 minutes, stirring now and then. You want the potatoes to be tender and golden. Next, add the diced onion and bell peppers to the skillet. Stir well and cook for another 5 to 7 minutes. The veggies should be soft and smell great. Now, mix in the crumbled breakfast sausage. Add the smoked paprika and garlic powder, stirring everything together. Let it cook for another 3 to 4 minutes to blend the flavors. Choose medium-sized potatoes for even cooking. Russet or Yukon Gold work great. Cut them into small cubes for quicker cooking. Soak the diced potatoes in water for 10 minutes before cooking. This helps remove excess starch and makes them crispier. Don’t overcrowd the skillet; use a large enough pan to allow space. Stir regularly to avoid burning and ensure even browning. Creating small wells in the hash is key. Crack one egg into each well gently. Cover the skillet to trap steam and cook the eggs evenly. For runny yolks, check them at around 5 minutes. For firmer yolks, let them cook for about 7 minutes. If you prefer scrambled eggs, whisk them in a bowl first. Pour them into the hash after adding the sausage and spices. Cook until they’re just set for a light and fluffy texture. For the full recipe, refer to the above section and enjoy this delicious dish! To boost flavor, use fresh herbs. Parsley adds brightness. You can also try cilantro or chives. Adding a splash of hot sauce can give your hash a kick. Use smoked paprika for a deep, rich taste. If you want a bit more heat, add cayenne pepper. For a savory touch, consider a dash of Worcestershire sauce. One common mistake is undercooking potatoes. Make sure they are tender and golden. Avoid overcrowding the skillet. This can lead to steaming instead of browning. Another mistake is not seasoning well. Taste your hash as you cook. Adjust salt and pepper as needed. Lastly, don’t rush the eggs. Let them cook gently to your liking for the best texture. To change serving sizes, simply scale the ingredients. For two servings, use one potato and two eggs. If you want to make more, double the recipe. This hash is easy to adapt. Just keep the ingredient ratios similar. You can also add more vegetables or proteins if you want extra portions. Experiment and enjoy your perfect breakfast hash! {{image_4}} You can make a tasty vegetarian hash without meat. Use a mix of veggies like zucchini, mushrooms, or spinach. Replace sausage with black beans or chickpeas. These add protein and flavor. You can also use tofu for a protein boost. Season with herbs like thyme and basil for more taste. This dish stays colorful and healthy. If you like heat, add jalapeños or red pepper flakes. This will give your hash a kick. You can also try spicy sausage or chorizo. These meat choices add a rich flavor. For extra zest, mix in a splash of hot sauce. Remember, balance the spice with creamy avocado or sour cream. This will help cool it down. Making a gluten-free breakfast hash is simple. The main ingredients, like potatoes and veggies, are naturally gluten-free. Just check your sausage label to ensure it’s gluten-free. You can also use quinoa as a base. This adds a nutty flavor and is packed with protein. Serve with a side of gluten-free toast for a complete meal. Feel free to explore these variations to make the hash your own! For the full recipe, check out the Savory Breakfast Hash. To keep your savory breakfast hash fresh, allow it to cool down. Use an airtight container to store the leftovers. Make sure to seal it tightly. You can keep it in the fridge for up to three days. This way, you can enjoy it again soon! When you are ready to eat your leftovers, you can reheat them in a skillet or the microwave. If using a skillet, add a splash of olive oil. Heat over medium until warm. Stir it often to heat evenly. If using a microwave, cover it with a microwave-safe lid. Heat for one to two minutes, stirring halfway through. This keeps the eggs from overcooking. If you want to store your breakfast hash for longer, freezing is a great option. Divide the hash into portions and place them in freezer-safe bags. Press out any extra air before sealing. You can store it in the freezer for up to three months. When you are ready to enjoy it, thaw it overnight in the fridge. Then reheat it as described above. This will help maintain the taste and texture. For the full recipe, check out the [Full Recipe]. The best potato for breakfast hash is the Yukon Gold. It has a creamy texture and holds its shape well. Russet potatoes are also a good choice. They give a crispy outer layer when cooked. Try to avoid waxy potatoes like red potatoes. They can become mushy during cooking. Yes, you can make Savory Breakfast Hash ahead of time. Cook the hash without eggs and store it in the fridge. When ready to eat, reheat the hash in a skillet. Then, add the eggs and cook them fresh. This keeps the eggs from becoming rubbery. You can also store the hash for up to three days. Good side dishes to serve with breakfast hash include fresh fruit, toast, or yogurt. A simple green salad can add freshness. If you want more protein, serve it with bacon or ham. For a fun twist, pair it with avocado slices or guacamole. These add creaminess and flavor to the dish. Savory breakfast hash offers a tasty way to start your day. We covered essential and optional ingredients, cooking steps, and great tips. You can customize it to fit your tastes, whether vegetarian or spicy. Remember the right cooking tools for best results. Store your leftovers properly to enjoy later. A well-made hash is not just a meal; it’s a chance to explore flavors. Experiment and find your favorite version for a delightful breakfast treat.](https://joymealplan.com/wp-content/uploads/2025/06/6aa0d9ce-cbc8-4487-b08c-a378fe8215a9-768x768.webp)


![- 1 pound boneless, skinless chicken breasts - Marinade: 1 cup buttermilk - Breading elements: 1 cup panko breadcrumbs, 1/2 cup all-purpose flour - Seasonings: 1 teaspoon garlic powder, 1 teaspoon onion powder, 1 teaspoon smoked paprika, 1/2 teaspoon salt, 1/2 teaspoon black pepper, 1/4 teaspoon cayenne pepper (optional) - Cooking oil: 2 tablespoons extra virgin olive oil - Garnish: Fresh parsley, finely chopped I love using fresh, simple ingredients for my crispy baked chicken tenders. The chicken breasts are the star here. I always choose boneless and skinless for easy handling. This keeps them juicy and tender. For the marinade, I use buttermilk. It helps to make the chicken soft and adds great flavor. Soak the chicken for at least 30 minutes. You can go up to two hours for the best taste. Next comes the breading. I prefer panko breadcrumbs because they give the best crunch. The all-purpose flour helps the breadcrumbs stick. Mixing garlic powder, onion powder, smoked paprika, salt, and pepper adds a nice depth of flavor. I add cayenne pepper for those who like a bit of heat. It’s optional, but it gives a great kick. Finally, a drizzle of extra virgin olive oil helps the tenders bake to a golden brown. You can finish with fresh parsley for a pop of color. Want the full recipe? Check out the [Full Recipe]. It’s a delicious way to enjoy chicken! First, set your oven to 425°F (220°C). While it heats up, grab a baking sheet. Line it with parchment paper. This will help the chicken not stick. It also makes cleanup easy. Take a big bowl and pour in the buttermilk. Add the chicken strips. Make sure they are all covered. Cover the bowl with plastic wrap. Let it sit for at least 30 minutes. For even more flavor, you can marinate it for up to 2 hours in the fridge. In another shallow dish, mix the flour, garlic powder, onion powder, smoked paprika, salt, black pepper, and cayenne pepper. Whisk it well. In a separate bowl, place the panko breadcrumbs. This is what will give your chicken that crunchy outside. After marinating, take the chicken out of the buttermilk. Let the excess drip off. Next, coat each piece in the flour mixture. Make sure each strip is covered. Gently shake off the extra flour. For extra crunch, dip the chicken back into the buttermilk. Then, roll it in the panko breadcrumbs. Press down a bit to help the crumbs stick. Arrange the coated chicken on the lined baking sheet. Drizzle a little olive oil on top. This helps it get golden brown. Bake the chicken for 20-25 minutes. Check with a meat thermometer. It should reach 165°F (75°C). Once the chicken is baked, take it out of the oven. Let it rest for about 5 minutes. This helps keep the juices in. Finally, garnish with fresh parsley. It adds a nice touch. Serve hot with your favorite sauces. Don't forget to check the Full Recipe for all the details! For the crispiest chicken tenders, use panko breadcrumbs. Panko adds a light and airy crunch that regular breadcrumbs can't match. Their larger flakes create a wonderful texture. To take it up a notch, use the double-dipping technique. First, coat the chicken in flour, then dip it back into the buttermilk before rolling it in panko. This extra layer of breading will give you an amazing crunch. To make your chicken tenders more flavorful, add spices to the breading mix. Garlic powder, onion powder, and smoked paprika all work great. Feel free to adjust the amounts to fit your taste. You can also try different marinades. A simple mix of lemon juice and herbs can change the flavor profile entirely. Experiment with your favorites to find the perfect taste. If you want a healthier option, consider using an air fryer. It cooks the chicken tenders with less oil while still keeping them crispy. Adjust the cooking time to about 12-15 minutes at 400°F (200°C). Another great tip is to place the chicken tenders on a wire rack. This allows hot air to circulate around the tenders, leading to even cooking and a crispier finish. {{image_4}} You can easily change the flavor of your chicken tenders. Here are two fun ideas: - Lemon pepper chicken tenders: Add lemon zest and black pepper to the flour mix. This gives a bright and zesty taste that wakes up your meal. - BBQ chicken tenders: Brush the tenders with your favorite BBQ sauce before baking. This adds a sweet and tangy flavor that kids love. If you have dietary needs, you can still enjoy these tenders: - Gluten-free options: Use gluten-free breadcrumbs instead of regular. This way, everyone can enjoy the meal without any worry. - Low-carb alternatives: Swap regular flour with almond flour or coconut flour. Both options give you a nice crunch while keeping carbs low. Pair your chicken tenders with tasty sides and dips: - Suggested dipping sauces: Try ranch dressing, honey mustard, or spicy sriracha. Each adds a unique kick to your tenders. - Side dish pairings: Serve them with a fresh salad, crispy fries, or steamed veggies. These sides complete your meal and add more nutrition. For more ideas, check out the Full Recipe to explore different flavors and tips! To keep your chicken tenders fresh, store them right. First, let the cooked tenders cool. Then, place them in an airtight container. You can store them in the fridge for up to three days. If you want to keep them longer, freezing is a great option. Use containers that seal tightly. Glass or plastic containers work well. If you use plastic wrap, make sure it hugs the tenders closely. This way, they won’t dry out. When you want to enjoy your leftovers, reheating is key. The best way to keep them crispy is to use the oven. Preheat your oven to 375°F (190°C) and bake for about 10 to 15 minutes. This method makes the chicken hot and crispy again. You can also use an air fryer. Set it to 375°F (190°C) and heat for about 5 to 7 minutes. This method is quick and gives great results. You can freeze both uncooked and cooked chicken tenders. For uncooked tenders, place them on a baking sheet to freeze individually first. Once they are frozen, transfer them to a freezer bag. This keeps them from sticking together. For cooked tenders, let them cool, then store them in an airtight container. They can last up to three months in the freezer. When you are ready to eat, just reheat them as mentioned earlier. For more detailed cooking methods, check the Full Recipe. Bake chicken tenders for 20 to 25 minutes at 425°F. This time gives them a golden color and keeps them juicy. Always check their internal temperature; it should reach 165°F for safety. Yes, you can make these chicken tenders ahead of time. Prepare them fully and store them in the fridge for up to 24 hours. When you're ready to eat, just pop them in the oven to reheat. This way, you save time while still enjoying a tasty meal. If you don't have buttermilk, use regular milk with a splash of vinegar or lemon juice. Let it sit for about five minutes. This method mimics buttermilk's acidity and helps tenderize the chicken just as well. Check chicken tenders with a meat thermometer. They are done when they hit 165°F inside. If you don’t have a thermometer, cut one open. The meat should be white, not pink, and the juices should run clear. Yes, chicken thighs work well in this recipe. They are more flavorful and juicy than breasts. Just cut them into strips like you would with the chicken breasts. The cooking time may be similar, so keep an eye on them. Crispy baked chicken tenders are easy and tasty. You start with simple ingredients, like chicken, buttermilk, and spices. The steps are clear, from marinating to baking. I shared tips for extra crunch and tasty flavors. Finally, you can personalize these tenders with countless variations and sides. Whether it's for a family dinner or meal prep, these tenders will impress. Enjoy making them and exploring your options!](https://joymealplan.com/wp-content/uploads/2025/06/4bfc5954-182f-42e7-9a90-e67bfbd9568b-768x768.webp)
![- 300g fettuccine or tagliatelle - 300g mushrooms (button or cremini), thinly sliced - 1 cup heavy cream - 1 cup vegetable broth - 4 cloves garlic, finely minced - 2 tablespoons extra virgin olive oil - 1 tablespoon unsalted butter - 1 teaspoon dried thyme - Salt and black pepper to taste - Grated Parmesan cheese (optional, for serving) - Fresh parsley, finely chopped (for garnish) When I make creamy garlic mushroom pasta, I always start with fresh ingredients. The fettuccine or tagliatelle gives a nice bite. I like using button or cremini mushrooms for their rich flavor. Heavy cream adds that luscious texture, while vegetable broth keeps it light and tasty. For seasonings, I finely mince garlic. I use just the right amount of extra virgin olive oil and unsalted butter for a rich base. Dried thyme adds a nice herbal note, and salt and black pepper bring the dish to life. If you want to elevate your meal, consider garnishing with grated Parmesan cheese. Fresh parsley not only adds a pop of color but also freshness. This combination makes the dish not only easy but also full of flavor. For the full recipe, check out Creamy Garlic Mushroom Pasta Delight. To start, bring a large pot of salted water to a rolling boil. Salt adds flavor, so don't skip it! Add 300g of fettuccine or tagliatelle. Cook according to package instructions until al dente. This usually takes about 8-10 minutes. You want the pasta firm but not hard. Once it's ready, drain the pasta. Make sure to reserve 1 cup of the cooking water. This water is full of starch, which helps thicken your sauce later. Next, we move to the mushrooms. In a large skillet, heat 2 tablespoons of extra virgin olive oil and 1 tablespoon of unsalted butter over medium heat. Wait until the oil shimmers and the butter melts. Then, add 300g of thinly sliced mushrooms. You can use button or cremini mushrooms for this dish. Sauté them for about 5-7 minutes. Stir occasionally, so they cook evenly. You want them to be golden brown and tender. Now comes the magic! Add 4 finely minced garlic cloves and 1 teaspoon of dried thyme to the skillet. Sprinkle in some salt and black pepper for taste. Sauté for another 1-2 minutes, but be careful not to burn the garlic. Next, pour in 1 cup of vegetable broth. Bring this mixture to a gentle simmer. Slowly stir in 1 cup of heavy cream. Mix well until all the ingredients blend together. Let this simmer for about 5 minutes. The sauce will thicken slightly, creating a rich flavor. Finally, add the drained pasta into the skillet. Use tongs or a spatula to toss the pasta in the creamy mushroom sauce. If you find the sauce is too thick, gradually add some of the reserved pasta water. This will help you reach the perfect consistency. Taste your dish and adjust with more salt and black pepper if needed. Now, your creamy garlic mushroom pasta is ready to serve! For the full recipe, check out the complete instructions. To keep your sauce from curdling, avoid boiling it. Use low heat when adding cream. Stir frequently to combine all the flavors without any lumps. For a smooth texture, whisk the cream before adding it to the pan. This will help it blend well with the broth. When choosing mushrooms, button and cremini are great options. They add depth and umami to the dish. Feel free to mix them for more flavor. For seasoning, add salt and pepper as you sauté. You can also try adding a pinch of nutmeg for warmth and richness. Serve the pasta in wide bowls. This makes the dish look fancy and inviting. Top with fresh parsley for color. Add a sprinkle of grated Parmesan for extra flavor. A drizzle of olive oil can enhance the look and taste, making your meal feel special. This will impress anyone who sees your dish! For the full recipe, check the [Full Recipe]. {{image_4}} You can easily enhance your creamy garlic mushroom pasta by adding proteins. If you like chicken, cook diced pieces in the skillet. They will add a nice flavor and texture. Just make sure to cook the chicken fully before adding the mushrooms. If you prefer seafood, shrimp works great too. Cook them until they turn pink, then mix them into the sauce. Both options give a hearty twist to the dish. If you want a vegetarian option, consider legumes like chickpeas or lentils. They add protein and fiber. Tofu is another great choice. Just sauté it until crispy, then toss it in with the pasta. While fettuccine or tagliatelle is classic, you can try other pasta shapes. Penne or fusilli offers fun textures. The sauce clings to the nooks and crannies, making every bite flavorful. For those who need gluten-free options, many brands offer great gluten-free pasta now. Corn or rice-based pasta works well. They may change the taste slightly, but the dish still shines. To elevate the flavor, think about adding white wine. Just pour a splash into the skillet after sautéing the mushrooms. Let it simmer down to enhance the sauce. Lemon juice also brightens the dish. A squeeze at the end adds a fresh zing. You can experiment with different herbs too. Basil or oregano can give a new twist. Don’t be afraid to play around with spices for a unique taste. For the full recipe, check out the Creamy Garlic Mushroom Pasta Delight . To keep your creamy garlic mushroom pasta fresh, store leftovers in the fridge. Use an airtight container to prevent drying out. For long-term storage, you can freeze it in a freezer-safe container. Make sure to label it with the date. This helps you track how long it has been stored. When reheating, avoid the microwave as it can make the pasta soggy. Instead, use a skillet over low heat. Add a splash of vegetable broth or water to help rehydrate the sauce. Stir gently to warm it up. This method keeps the creamy texture intact. Be careful not to overcook; heat just until warm. In the fridge, your creamy garlic mushroom pasta lasts about 3 to 5 days. If frozen, it can stay good for up to 2 months. Always check for signs of spoilage. If you see mold or an off smell, it’s best to throw it away. Safe storage ensures you enjoy this dish at its best. Yes, you can make creamy garlic mushroom pasta vegan. For the cream, use coconut milk or cashew cream. These options give a rich texture. Instead of butter, try vegan margarine or olive oil. Both work well and keep the flavor. I love using button and cremini mushrooms. Button mushrooms are mild and soft. Cremini mushrooms have a deeper, earthier flavor. You can also try shiitake or portobello mushrooms for a bolder taste. Each type adds a different twist. To add heat, use red pepper flakes or crushed chili peppers. You can also add a dash of hot sauce. Mixing in some black pepper gives a nice kick too. Adjust the spice based on your taste. Creamy garlic mushroom pasta is simple yet delicious. You learned about the key ingredients, cooking steps, and useful tips. I shared variations and storage advice, so your meal lasts longer. Remember, you can customize this dish to fit your tastes and needs. Whether you want it vegan or spicier, the options are endless. Enjoy your cooking journey and serve a dish everyone will love!](https://joymealplan.com/wp-content/uploads/2025/06/13e3dff8-112f-438a-8538-46fdbb61cecc-768x768.webp)

![Here is what you need to make the savory mushroom and spinach quiche: - 1 pre-made pie crust - 2 cups fresh spinach - 1 cup sliced mushrooms - 1 small onion - 3 large eggs - 1 cup heavy cream - 1 cup shredded Swiss cheese - 1 teaspoon garlic powder - 1/2 teaspoon nutmeg - Salt and pepper - 1 tablespoon olive oil These ingredients come together to create a rich and flavorful quiche. The fresh spinach and mushrooms add a nice earthy taste. The Swiss cheese gives it a creamy texture. When picking mushrooms, I love using cremini or button mushrooms. They both add a wonderful depth of flavor. The spinach should be fresh and vibrant for the best taste and color. Using a pre-made pie crust saves time. You can also make your own for a special touch. Just remember, the crust forms the base for all the delicious layers you will build. This recipe really shines with the heavy cream, eggs, and spices. They blend together to create a smooth custard that holds everything in place. The nutmeg adds warmth and pairs well with the cheese. Once you gather these ingredients, you are ready to start cooking. For a full recipe, you can follow the detailed steps to create this delightful dish. Enjoy the process! Let’s dive into making a savory mushroom and spinach quiche! Follow these steps for a delicious meal. - Preheat the oven to 375°F (190°C). - Prepare the pie crust. If you use a store-bought one, it saves time. - Step 1: Sauté onions Heat 1 tablespoon of olive oil in a large skillet over medium heat. Add 1 small finely chopped onion. Cook until the onion is clear, about 3-4 minutes. This adds great flavor to your quiche. - Step 2: Add mushrooms and cook Next, toss in 1 cup of sliced mushrooms. Cook for about 5 minutes. Stir often until the mushrooms soften and turn golden brown. This step builds a solid base for your quiche. - Step 3: Stir in spinach and seasonings Now, add 2 cups of roughly chopped spinach, 1 teaspoon of garlic powder, 1/2 teaspoon of nutmeg, and some salt and pepper to taste. Cook for about 2 minutes until the spinach wilts down. Remove the skillet from heat and let it cool slightly. - Step 4: Mix eggs and cream In a mixing bowl, whisk together 3 large eggs and 1 cup of heavy cream. Make sure they blend well. Season with a pinch of salt and pepper. - Step 5: Combine all layers and bake Spread the cooked mushroom and spinach mix evenly over the pie crust. Pour the egg and cream mixture over the veggies. Top with 1 cup of shredded Swiss cheese. Bake in the oven for 30-35 minutes. The quiche is done when the center is firm and the top is golden brown. Enjoy making this savory mushroom and spinach quiche! For the full recipe, check out the details provided above. Using fresh ingredients really makes a difference in taste. Fresh spinach and mushrooms add a bright flavor. Choose a good cheese, too. Swiss gives a nice melt, but Gruyère can add a deeper flavor. Experiment with different cheeses to find your favorite. One common mistake is overbaking the quiche. Keep an eye on it while it bakes. The center should be set, but not dry. Another mistake is slicing too soon. Let the quiche rest for about 10 minutes after baking. This helps it firm up, making cutting easier. Enjoy your quiche warm or at room temperature. For the full recipe, check out the Savory Mushroom and Spinach Quiche. {{image_4}} You can swap the spinach for other greens. Kale and chard work well too. They add a nice twist to the dish. If you want a different cheese, try feta or goat cheese. Both add a tangy flavor and creamy texture. To boost the taste, add herbs like thyme or dill. They give the quiche a fresh aroma. You can also add bacon or ham for protein. This change makes the quiche heartier and more filling. Experimenting with these options keeps the meal fun and exciting. Each choice brings a new flavor to your Savory Mushroom and Spinach Quiche. For the complete recipe, check the [Full Recipe]. After enjoying your quiche, you can store leftovers easily. Place them in an airtight container. This keeps your quiche fresh and tasty. It's best to eat it within 3-4 days. If you wait too long, it may lose flavor and texture. Want to save some for later? You can freeze slices or the whole quiche. Wrap it tightly in plastic wrap and then in foil. This way, it stays safe from freezer burn. When you want to enjoy it again, simply thaw it in the fridge overnight. To reheat, bake it at 350°F (175°C) for about 20-25 minutes. This warms it through and helps keep it crispy. For the best taste, don’t freeze it for more than two months. You can pair your quiche with many great side dishes. A fresh garden salad adds crunch and color. You might also enjoy serving it with roasted vegetables. Another option is a light soup, like tomato or butternut squash. These sides balance the rich flavors of the quiche. Yes, you can prepare this quiche ahead of time. Make it the day before and store it in the fridge. Just bake it when you are ready to serve. You can also freeze the quiche before baking. Wrap it well and freeze for up to three months. When ready, thaw it in the fridge and then bake. Yes, this quiche is perfect for vegetarians. It contains no meat, only fresh veggies and cheese. You can enjoy it guilt-free while still getting a tasty meal. This makes it a great option for brunch with friends or family. This blog post detailed making a savory mushroom and spinach quiche. We covered ingredients, step-by-step instructions, and tips to avoid common mistakes. You can switch greens and cheeses to suit your taste. Make sure to store leftovers properly for the best flavor. Quiche is easy to prepare ahead and fits many diets. Enjoy cooking and experimenting with this tasty dish in your kitchen! You will love the results.](https://joymealplan.com/wp-content/uploads/2025/05/4f96e432-6eff-473a-ad1c-af8e2bef75c4-768x768.webp)