Classic Caprese Skewers Fresh and Flavorful Treats
. Yes, you can prepare Classic Caprese Skewers in advance. Assemble the skewers up to a few hours ahead of time. Just keep them in the fridge. To keep them fresh, cover them with plastic wrap. Avoid adding olive oil or balsamic glaze until you are ready to serve. This keeps the skewers from getting soggy. Right before serving, drizzle the oils and season with salt and pepper. To serve Caprese Skewers, presentation matters. Arrange them upright in a jar or glass. This creates a lovely display. You can add extra basil leaves around them for color. A small bowl of balsamic glaze on the side is a great touch. It invites guests to dip the skewers. Make sure each skewer is easy to grab. This helps keep the party fun and relaxed. You now have all the steps to create delicious Caprese skewers. From gathering fresh ingredients to assembling and serving them, it’s simple and fun. Remember to choose quality produce and experiment with variations to keep things exciting. These skewers not only look great but taste amazing too. Serve them at your next gathering, and watch your guests enjoy every bite. Enjoy your kitchen adventure, and savor the delicious results!](https://joymealplan.com/wp-content/uploads/2025/06/97cab98c-e756-45a3-bf7b-ace4126d32cb.webp)
If you’re looking for a quick, fresh treat, you’ve landed in the right spot! Classic Caprese skewers are packed with flavor and easy to make. I’ll show you how to combine bright cherry tomatoes, creamy mozzarella, and aromatic basil for a colorful dish. Plus, I’ll share tips for perfect skewers, fun variations, and how to store them. Let’s dive in!
Ingredients
To make Classic Caprese Skewers, you need fresh and simple ingredients. Each one adds flavor and color to your dish. Here’s what you will need:
– Cherry tomatoes
– Fresh mozzarella balls (bocconcini)
– Fresh basil leaves
– Balsamic glaze
– Extra-virgin olive oil
– Sea salt and black pepper
– Wooden skewers
When you choose your cherry tomatoes, look for ones that are bright and firm. They should feel heavy for their size. Use fresh mozzarella balls for a creamy texture that pairs well with the other ingredients. Fresh basil leaves should be vibrant and fragrant. This will enhance the dish’s aroma and taste.
For the balsamic glaze, pick a high-quality brand. It should have a nice balance of sweetness and tanginess. Extra-virgin olive oil should be fresh and fruity. This adds richness to your skewers. Finally, a sprinkle of sea salt and black pepper brings out all the natural flavors.Enjoy the process of assembling these fresh and flavorful bites!
Step-by-Step Instructions
Preparation Step 1
– Rinse cherry tomatoes and basil leaves
– Pat dry to remove moisture
Start by rinsing the cherry tomatoes and basil leaves under cool water. This step helps remove any dirt. After rinsing, pat them dry with a clean kitchen towel. Removing moisture is key. It keeps the flavors bright and fresh.
Assembly Steps
– Thread ingredients onto skewers
– Alternate between cherry tomato, basil leaf, and mozzarella
Next, grab your wooden skewer. Carefully poke a cherry tomato on one end. Follow it with a basil leaf. Let the leaf drape down slightly for a nice touch. Then, slide on a mozzarella ball. It should rest close to the tomato and basil.
Continue this pattern. Alternate between cherry tomato, basil leaf, and mozzarella ball. Aim for three sets of each item. Leave a bit of space at the ends for easy handling.
Finishing Touches
– Drizzle olive oil and balsamic glaze
– Season with salt and pepper
Once your skewers are ready, arrange them on a platter. Make them look inviting and colorful. Next, drizzle high-quality olive oil and balsamic glaze over the skewers. This adds flavor and shine.
Finally, sprinkle a little sea salt and freshly cracked black pepper on top. This enhances the flavors. Allow the skewers to sit for five minutes. This wait helps the flavors blend, making every bite delicious.
Tips & Tricks
Selecting Quality Ingredients
Choosing the right cherry tomatoes is key. Look for tomatoes that are firm and bright. Ripe tomatoes burst with flavor. They should feel heavy for their size and have a smooth skin. Avoid any that are soft or have blemishes. Fresh mozzarella is another important choice. Always opt for fresh mozzarella balls, or bocconcini, rather than pre-packaged varieties. Fresh mozzarella has a creamy texture and a mild taste. It offers the perfect balance to the tomatoes and basil.
Assembly Tips
When assembling your skewers, efficiency saves time. Start by puncturing a cherry tomato on one end of the skewer. Alternate with a fresh basil leaf and a mozzarella ball. Repeat this until the skewer is full. Aim for three of each item on each skewer. Leave space at the ends for easy handling. For visual appeal, arrange the skewers in a staggered pattern on your platter. This helps highlight the colors and textures of the ingredients.
Serving Suggestions
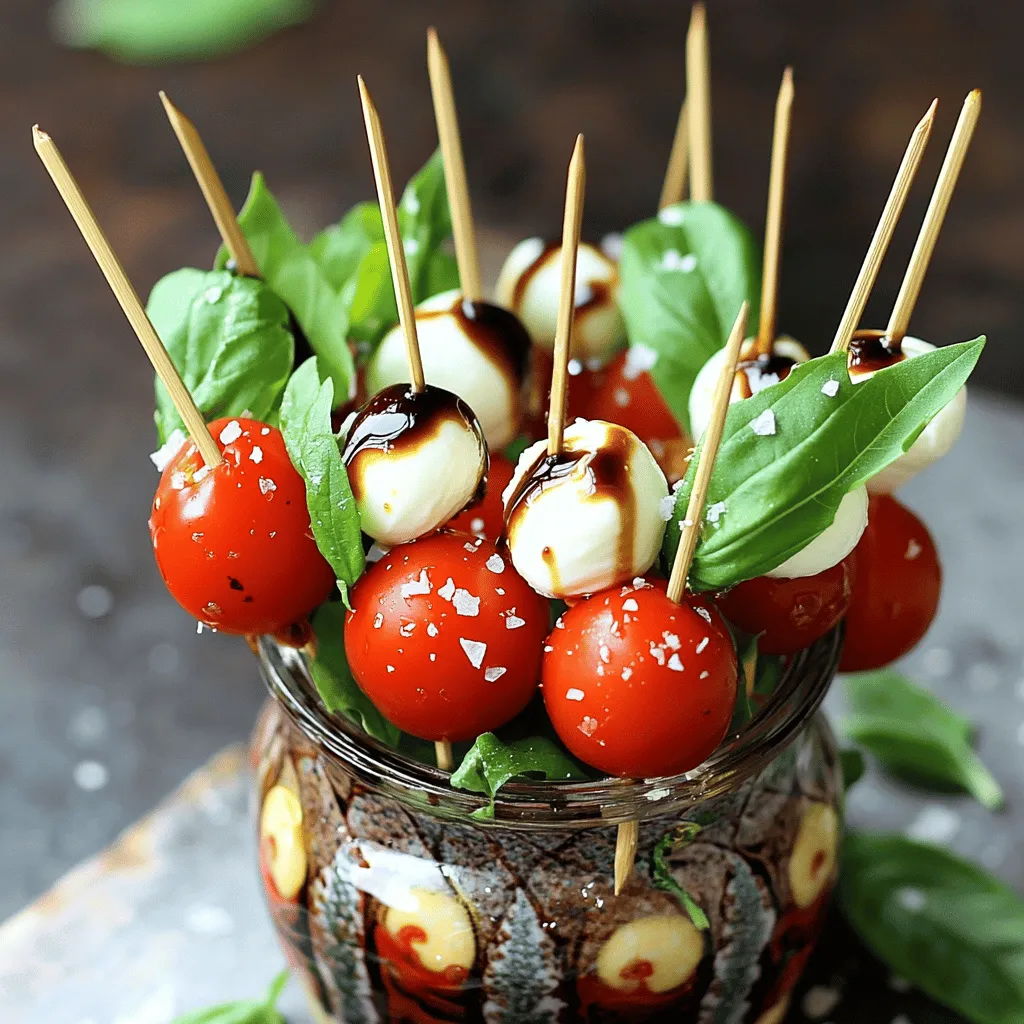
Presentation matters when serving skewers. An eye-catching display makes a great impression. Arrange skewers upright in a tall glass or jar. This creates a fun and rustic centerpiece. You can also add extra basil leaves around the skewers for flair. Pair these delicious bites with a light beverage. A crisp white wine or sparkling water complements the flavors well. For a twist, serve with a small bowl of balsamic glaze for dipping. This adds another layer of taste and excitement.

Variations
Ingredient Substitutions
You can easily switch ingredients in classic Caprese skewers to add your twist. Using heirloom tomatoes instead of cherry tomatoes gives a richer flavor. Burrata cheese is creamier than mozzarella and adds a delightful touch. You can also add olives for a briny kick or prosciutto for a savory bite. Both options enhance the flavor and make the skewers more filling. These simple swaps keep your dish fresh and exciting.
Seasonal Variations
Seasonal herbs can transform your skewers. Try using fresh oregano or rosemary in summer. In winter, consider adding sage or thyme for a warm flavor. You can also adjust the presentation based on holidays. For Christmas, use red and green ingredients or add festive garnishes. These seasonal touches keep your Caprese skewers relevant all year round. They invite creativity while staying true to the classic recipe.
Storage Info
Short-Term Storage
To keep your Caprese skewers fresh overnight, follow these simple steps. First, cover the skewers with plastic wrap or place them in an airtight container. This helps keep moisture in and prevents them from drying out. Store them in the fridge. The cool temperature keeps the tomatoes firm and the mozzarella creamy. If you want even more freshness, you can keep the basil leaves separate. Just add them right before serving. This way, they stay vibrant and tasty.
Long-Term Storage
For long-term storage, freezing is an option, but it changes texture. The tomatoes and mozzarella may become mushy when thawed. If you still want to freeze them, remove the skewers and place the ingredients in a freezer bag. Make sure to squeeze out all the air before sealing. When you’re ready to eat, thaw them in the fridge overnight. The flavors will be there, but the texture won’t be the same. Enjoy your Caprese skewers fresh for the best taste!
FAQs
How do I make Classic Caprese Skewers?
To make Classic Caprese Skewers, you start by gathering fresh ingredients. You need cherry tomatoes, mozzarella balls, and basil leaves. Rinse the tomatoes and basil under cool water. Pat them dry gently. Then, take an 8-inch wooden skewer.
Puncture a cherry tomato at one end. Follow with a basil leaf, letting it drape. Next, slide on a mozzarella ball. Alternate this process until your skewer holds three of each item.
Once all skewers are ready, arrange them on a platter. Drizzle with extra-virgin olive oil and balsamic glaze. Finally, sprinkle sea salt and black pepper to taste. Allow the skewers to sit for 5 minutes before serving so the flavors blend.
Can I prepare these skewers in advance?
Yes, you can prepare Classic Caprese Skewers in advance. Assemble the skewers up to a few hours ahead of time. Just keep them in the fridge. To keep them fresh, cover them with plastic wrap.
Avoid adding olive oil or balsamic glaze until you are ready to serve. This keeps the skewers from getting soggy. Right before serving, drizzle the oils and season with salt and pepper.
What is the best way to serve Caprese Skewers?
To serve Caprese Skewers, presentation matters. Arrange them upright in a jar or glass. This creates a lovely display. You can add extra basil leaves around them for color.
A small bowl of balsamic glaze on the side is a great touch. It invites guests to dip the skewers. Make sure each skewer is easy to grab. This helps keep the party fun and relaxed.
You now have all the steps to create delicious Caprese skewers. From gathering fresh ingredients to assembling and serving them, it’s simple and fun. Remember to choose quality produce and experiment with variations to keep things exciting. These skewers not only look great but taste amazing too. Serve them at your next gathering, and watch your guests enjoy every bite. Enjoy your kitchen adventure, and savor the delicious results!
. Yes, you can prepare Classic Caprese Skewers in advance. Assemble the skewers up to a few hours ahead of time. Just keep them in the fridge. To keep them fresh, cover them with plastic wrap. Avoid adding olive oil or balsamic glaze until you are ready to serve. This keeps the skewers from getting soggy. Right before serving, drizzle the oils and season with salt and pepper. To serve Caprese Skewers, presentation matters. Arrange them upright in a jar or glass. This creates a lovely display. You can add extra basil leaves around them for color. A small bowl of balsamic glaze on the side is a great touch. It invites guests to dip the skewers. Make sure each skewer is easy to grab. This helps keep the party fun and relaxed. You now have all the steps to create delicious Caprese skewers. From gathering fresh ingredients to assembling and serving them, it’s simple and fun. Remember to choose quality produce and experiment with variations to keep things exciting. These skewers not only look great but taste amazing too. Serve them at your next gathering, and watch your guests enjoy every bite. Enjoy your kitchen adventure, and savor the delicious results!](https://joymealplan.com/wp-content/uploads/2025/06/97cab98c-e756-45a3-bf7b-ace4126d32cb-300x300.webp)


![- 6 large eggs - 1 cup fresh spinach, roughly chopped - 1/2 bell pepper, diced - 1/2 cup cherry tomatoes, halved - 1/4 cup red onion, finely minced - 1/2 cup feta cheese, crumbled - Seasonings and oil These ingredients make a tasty breakfast that is also healthy. The eggs provide protein, while the veggies add color and nutrients. You can use any bell pepper you like for a fun twist. You can swap out the spinach for other greens like kale or Swiss chard. Zucchini and mushrooms also work well in this recipe. If feta isn’t your favorite, try cheddar or goat cheese for a different taste. Each muffin has about 100 calories. They offer around 8 grams of protein, 7 grams of fat, and 2 grams of carbs. This makes them a great option for a filling breakfast. If you want the full recipe, check out [Full Recipe]. 1. Preheat your oven to 350°F (175°C). This ensures even cooking. 2. Grease your muffin tin using cooking spray or olive oil. This helps the muffins release easily. 1. In a large bowl, crack the 6 eggs. Whisk them vigorously until mixed well. 2. Fold in the chopped spinach, diced bell pepper, halved cherry tomatoes, and minced red onion. Make sure the veggies spread evenly. 3. Add the crumbled feta cheese for extra flavor. Mix in garlic powder, dried oregano, salt, and black pepper. Stir until everything is well combined. 1. Carefully pour the egg-veggie mix into the muffin tin. Fill each cup about three-quarters full. 2. Place the muffin tin in the oven and bake for 18-20 minutes. Check for doneness by pressing lightly on the tops. They should feel firm and slightly golden. 3. After baking, let the muffins cool in the tin for about 5 minutes. Use a butter knife to run around the edges. This helps them come out easily. Then, transfer them to a wire rack to cool completely. For the full recipe, check the earlier sections. Enjoy these tasty muffins as a quick breakfast! To get the perfect texture in your veggie muffins, cook them until they are just firm. If you bake them too long, they can become dry. Use a toothpick to check doneness. Stick it in the center, and if it comes out clean, they are ready. Do not overfill the muffin cups. Fill them about three-quarters full. This gives the muffins room to rise without spilling over. If you overfill, you will have a messy oven and uneven muffins. To keep your muffins fresh, store them in an airtight container in the fridge. They can last up to a week this way. If you want to keep them longer, consider freezing them. Wrap each muffin in plastic wrap and place them in a freezer bag. They will last for about three months in the freezer. When you want to enjoy a muffin, take it out and reheat it. You can warm it in the microwave for about 30 seconds or until hot. If you prefer a crispy edge, heat it in an oven at 350°F for 10 minutes. These muffins pair well with many toppings. Try them with fresh salsa for a zesty kick. Avocado adds creaminess and healthy fats. For a fun twist, serve them with a dollop of Greek yogurt. For a great presentation, arrange the muffins on a colorful platter. Garnish with freshly chopped herbs like parsley or basil. This adds a nice pop of color and makes the dish more inviting. Enjoy your veggie-packed egg muffins! {{image_4}} You can easily modify these muffins for different diets. For gluten-free options, just use gluten-free flour or a gluten-free muffin mix. This makes them safe for those with gluten sensitivities. If you're looking for a vegan alternative, replace eggs with chickpea flour or a plant-based egg substitute. This keeps the muffins tasty and healthy while meeting vegan needs. Want to add more flavor? Consider spices like cumin or smoked paprika. Fresh herbs like basil or parsley also work well. They can really wake up the taste of the muffins. For creative mix-ins, think about adding cooked bacon or sausage for extra protein. You can also try different cheeses, like cheddar or goat cheese, to change the taste. You can make mini muffins or standard size muffins. Mini muffins are great for snacks or kids. They bake faster, so check them at about 12-15 minutes. For standard muffins, stick to the 18-20 minute baking time. Just keep an eye on them, so they don't overcook. Adjusting the size helps you serve the muffins just how you like them. For the full recipe, you can refer back to the main section. Veggie packed egg muffins are small, baked dishes made with eggs and vegetables. They are light, nutritious, and perfect for breakfast. These muffins are easy to make and customizable. You can add your favorite veggies and cheeses. They provide protein from eggs and fiber from vegetables. This makes them a healthy choice for busy mornings. Veggie muffins last about 4 to 5 days in the fridge. Store them in an airtight container to keep them fresh. Signs of spoilage include a sour smell or mold. If you see either, throw them away. Always check before eating leftovers to ensure safety. Yes, you can freeze veggie packed egg muffins. Allow them to cool completely first. Place them in a freezer-safe bag or container. They can last up to 3 months in the freezer. To thaw, simply place them in the fridge overnight. You can also heat them in the microwave for a quick meal. Veggie packed egg muffins are easy to make and healthy. First, you prep your ingredients. The recipe takes about 10 minutes to prep and 18-20 minutes to cook. You can make 12 muffins in total. 1. Prep the oven: Preheat it to 350°F (175°C). 2. Grease the muffin tin: Use cooking spray or olive oil. 3. Whisk the eggs: Crack 6 large eggs into a bowl. Mix them well. 4. Add veggies: Mix in 1 cup of spinach, 1/2 diced bell pepper, 1/2 cup cherry tomatoes, and 1/4 cup red onion. 5. Season and add cheese: Add 1/2 cup of feta cheese, 1 tsp garlic powder, 1 tsp oregano, and salt and pepper. 6. Fill the muffin tin: Pour the mix into the cups, filling them about three-quarters full. 7. Bake: Put the tin in the oven for 18-20 minutes. Check if they are firm and golden. 8. Cool and serve: Let them cool for 5 minutes before removing them from the tin. These muffins are perfect for a quick breakfast or snack. Enjoy them warm or store them for later. This blog post covered how to make veggie-packed egg muffins. We discussed ingredients, nutritional info, and step-by-step instructions. You learned about tips for perfect muffins and various fun variations. With clear directions, you can create tasty muffins that fit your diet. I hope you feel inspired to try making these muffins. They are good for breakfast, snacks, or meal prep. Enjoy experimenting with flavors and share your results!](https://joymealplan.com/wp-content/uploads/2025/07/ffbefcb5-f112-4a21-bd30-7331a5bc5463-768x768.webp)
