Classic Chicken Noodle Soup Cozy and Nourishing Meal

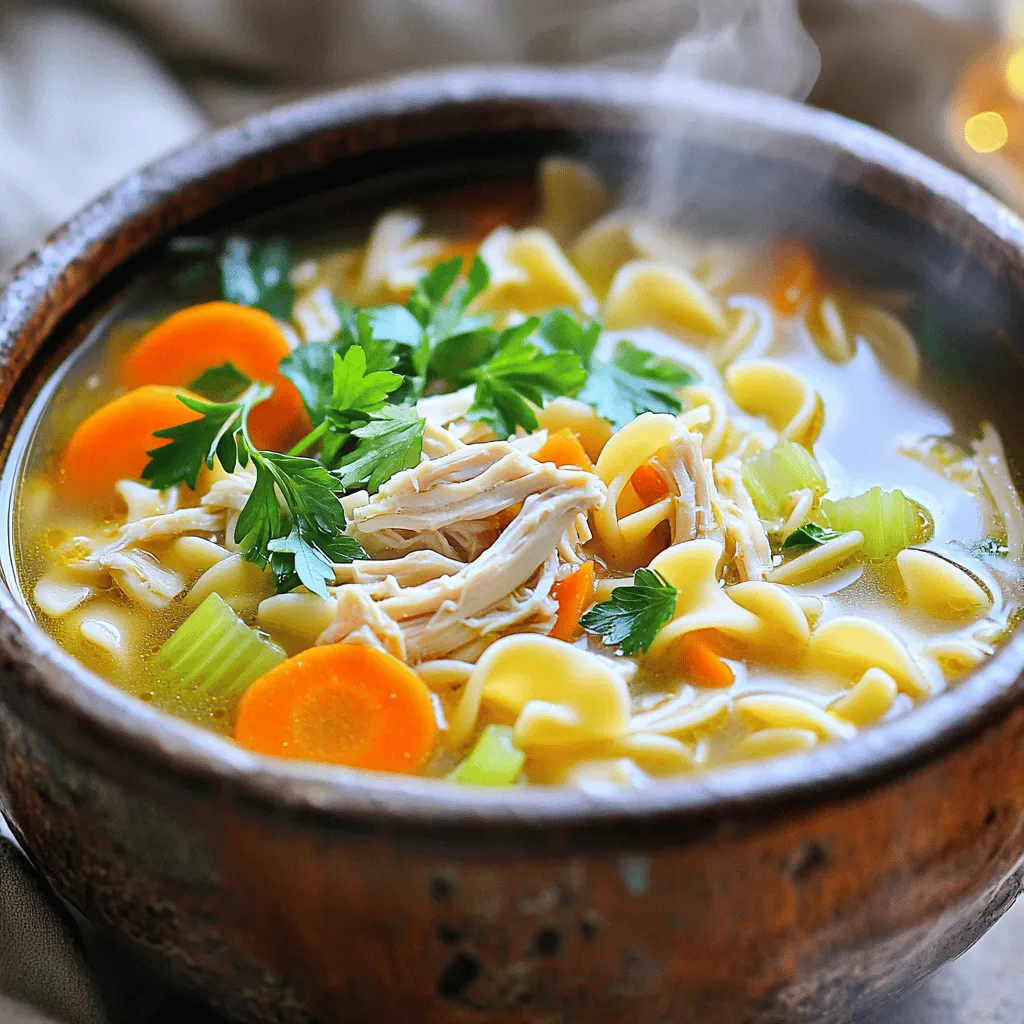
When you’re craving warmth and comfort, few snacks rival a bowl of classic chicken noodle soup. This easy recipe brings together fresh ingredients and pantry staples to create a meal that nourishes your body and soul. Whether you’re feeling under the weather or just want something cozy, this soup will chase your worries away. Join me as we explore how to make this timeless dish, perfect for any day of the week!
Ingredients
Fresh Ingredients List
– 2 tablespoons extra virgin olive oil
– 1 medium onion, finely diced
– 2 medium carrots, peeled and sliced into rounds
– 2 celery stalks, thoroughly chopped
– 3 cloves garlic, minced
Pantry Staples
– 8 cups low-sodium chicken broth
– 1 pound boneless, skinless chicken breasts
– 1 teaspoon dried thyme
– 1 teaspoon dried oregano
– Salt and freshly cracked black pepper
Optional Ingredients
– 2 cups egg noodles
– 1 cup fresh spinach leaves
– Fresh parsley, finely chopped (for garnish)
When I make classic chicken noodle soup, I focus on fresh, quality ingredients. The fresh vegetables provide flavor and nutrition. The olive oil adds a nice richness. You can use any low-sodium broth you like. Chicken breasts are my go-to protein for this dish. The dried herbs, thyme and oregano, give warmth to the soup.
Egg noodles are a fun addition. They soak up the broth well. Spinach adds color and nutrients, but it’s optional. Fresh parsley brightens the dish at the end.
Step-by-Step Instructions
Preparing the Vegetables
– Start by heating 2 tablespoons of extra virgin olive oil in a large pot over medium heat.
– Add 1 medium onion, finely diced, 2 medium carrots, peeled and sliced into rounds, and 2 celery stalks, thoroughly chopped. Sauté these for about 5-7 minutes. Stir occasionally. You want the vegetables to be tender and the onion to look translucent.
– Next, add 3 cloves of minced garlic. Cook for another minute. This will fill your kitchen with a wonderful aroma.
Building the Soup Base
– Carefully pour 8 cups of low-sodium chicken broth into the pot. Raise the heat to bring it to a gentle boil.
– Once it boils, add 1 pound of boneless, skinless chicken breasts. Season with 1 teaspoon of dried thyme, 1 teaspoon of dried oregano, and salt and freshly cracked black pepper to taste.
Final Cooking Steps
– Lower the heat and let the soup simmer uncovered for about 20 minutes. You want the chicken to be fully cooked and tender.
– After the chicken is cooked, take it out of the pot and place it on a cutting board. Use two forks to shred it into bite-sized pieces. Then, return the shredded chicken back to the pot.
– Add 2 cups of egg noodles into the soup. Cook them according to the package instructions, which usually takes about 6-8 minutes. Stir occasionally to prevent sticking.
– If you like, gently stir in 1 cup of fresh spinach leaves during the last minute of cooking. This will help it wilt nicely.
– Before serving, taste the soup. Adjust the seasoning if needed with salt, pepper, or herbs.
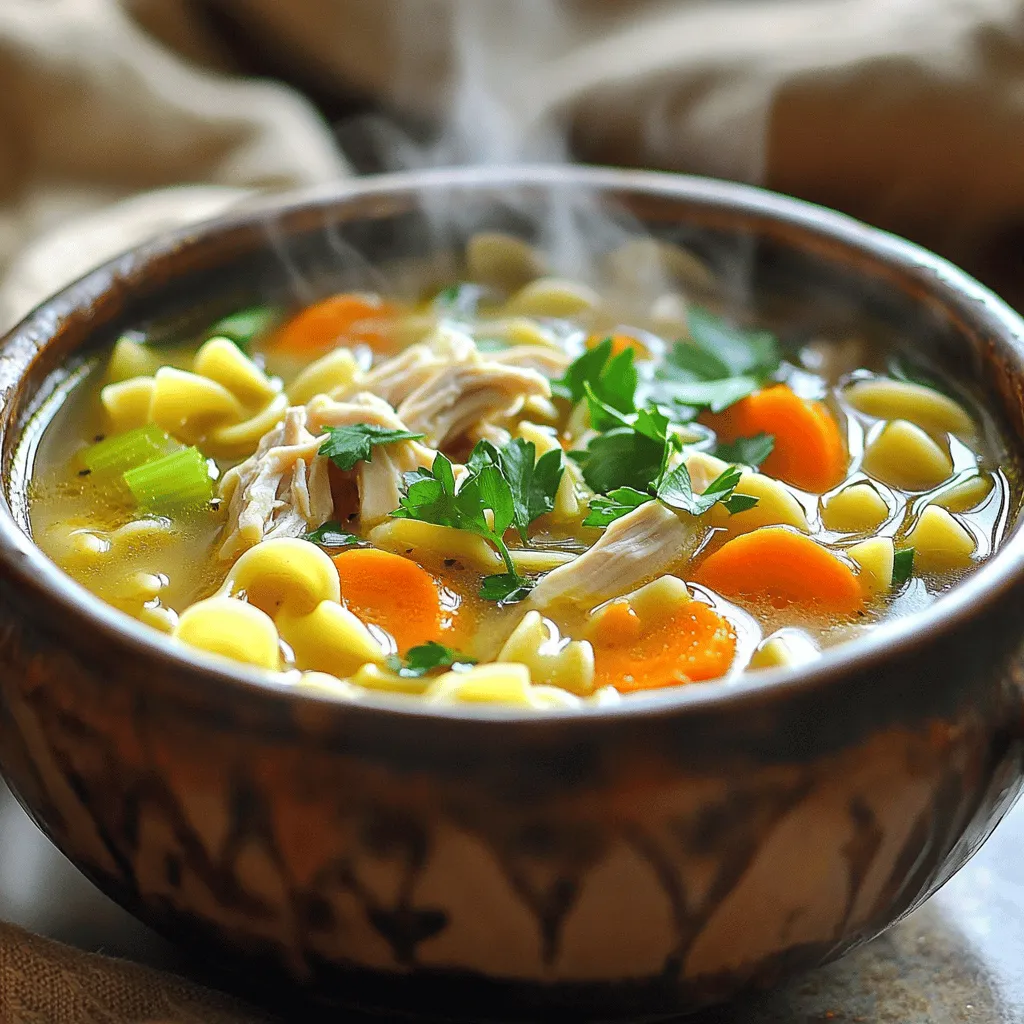
– Serve the soup hot, ladled into bowls. For a lovely touch, garnish with freshly chopped parsley. This will add a burst of color and flavor to your cozy meal!
Tips & Tricks
Flavor Enhancements
To make your soup burst with flavor, consider adding these herbs and spices:
– 1 teaspoon dried thyme
– 1 teaspoon dried oregano
These herbs add depth to your broth. Adjust salt and pepper levels to taste. Start with a pinch of each. You can always add more if needed.
Cooking Techniques
Sauté your vegetables correctly for the best flavor. Heat the olive oil over medium heat. Add the onion, carrots, and celery. Cook for 5-7 minutes until soft. Stir often to prevent burning.
Shredding chicken can be a chore, but it doesn’t have to be! After cooking, let the chicken cool for a minute. Use two forks to pull it apart easily. This method gives you perfect bite-sized pieces.
Presentation Ideas
For a lovely presentation, serve the soup in rustic bowls. Pair it with warm, crusty bread. This combo makes for a cozy meal.
To make your soup visually appealing, sprinkle fresh parsley on top. It adds a pop of green and freshness. Just chop it finely before adding.Enjoy your cooking!

Variations
Protein Alternatives
You can change the protein in your chicken noodle soup to fit your needs.
– Using rotisserie chicken: This is quick and easy. Just shred the chicken and add it to the soup. This saves time and adds great flavor.
– Vegetarian or vegan adaptations: Instead of chicken, use chickpeas or tofu. They both offer protein and texture. Use vegetable broth for the base. This keeps the soup hearty and satisfying.
Noodle Substitutes
Not everyone likes egg noodles. You can switch them out for other options.
– Whole wheat or gluten-free options: Whole wheat noodles add fiber. Gluten-free noodles are great for those with allergies. Both work well in this soup.
– Alternatives to egg noodles: Try rice noodles or even quinoa. They give a different twist and are just as tasty.
Additional Veggies
Want to boost nutrition? Add more veggies!
– Incorporating more vegetables for nutrition: You can add peas, bell peppers, or even zucchini. They add color and flavor.
– Seasonal vegetable suggestions: Use root vegetables in winter, like parsnips or turnips. In summer, add fresh corn or green beans. Seasonal veggies make your soup fresh and vibrant.
Storage Info
Storing Leftovers
To store your leftover soup, let it cool first. Use an airtight container to keep it fresh. This soup lasts in the fridge for about 3 to 4 days. Always check for any signs of spoilage before eating.
Freezing Instructions
You can freeze this soup for longer storage. First, let it cool completely. Then, pour the soup into a freezer-safe container. Leave some space at the top for expansion. To thaw, place it in the fridge overnight. You can also use the microwave for quicker thawing.
Reheating Tips
When reheating, you can use either the microwave or the stove. For the microwave, heat in short bursts and stir often. On the stove, warm it gently over medium heat. Add a splash of broth or water to keep it flavorful and prevent drying out.
FAQs
How can I make Classic Chicken Noodle Soup healthier?
To make this soup healthier, you can change some ingredients. Here are a few ideas:
– Use low-fat chicken: Choose skinless chicken breasts to cut calories.
– Add more veggies: Toss in extra carrots, celery, or even leafy greens.
– Use whole grain noodles: Whole grain noodles offer more fiber than regular noodles.
– Reduce salt: Use low-sodium broth or skip added salt to lower sodium.
For flavor, add fresh herbs like parsley or dill. They boost taste without added salt.
Can I use frozen chicken in this recipe?
Yes, you can use frozen chicken. Here are some tips:
– Thaw first: Thaw chicken in the fridge overnight for best results.
– Cook longer: If using frozen chicken, add extra time when cooking the soup. Ensure the chicken reaches 165°F inside.
– Cut into smaller pieces: This helps it cook evenly and faster.
Using frozen chicken saves time and still gives great flavor.
What can I do with leftover chicken noodle soup?
Leftover soup is a treasure. Here’s how to use it:
– Make a casserole: Mix soup with cooked rice or pasta, top with cheese, and bake.
– Add to a stir-fry: Use soup as a base or sauce in a quick stir-fry.
– Create a sauce: Blend the soup for a creamy sauce over chicken or veggies.
You can also freeze leftovers for later. Just store in airtight containers.
You learned how to make a tasty chicken noodle soup. We covered fresh and pantry ingredients, step-by-step cooking, and tips for great flavor. Remember to play with spices and add veggies to boost nutrition. You can even store or freeze leftovers for later. Making this soup is simple and rewarding. Enjoy your warm bowl of comfort any time!


![Let’s dive into what you need for this flavorful dish. Each ingredient plays a key role in making Cajun Shrimp Alfredo a true delight. - 8 oz fettuccine pasta - 1 lb large shrimp, peeled and deveined - 2 tablespoons Cajun seasoning - 2 tablespoons olive oil - 3 cloves garlic, minced - 1 cup heavy cream - 1 cup freshly grated Parmesan cheese - 1/4 cup fresh parsley, finely chopped - Salt and black pepper to taste - Lemon wedges, for a zesty garnish The fettuccine pasta gives the dish its heartiness. I prefer large shrimp because they soak up flavors well. Cajun seasoning brings the heat and spice, making this dish pop. Olive oil is perfect for sautéing the shrimp, while garlic adds depth. Heavy cream creates that rich and creamy sauce we crave. The Parmesan cheese melts in beautifully, adding a savory note. Fresh parsley adds color and freshness, while salt and black pepper enhance all the flavors. Finally, lemon wedges brighten every bite. Gather these ingredients, and let’s start cooking! For the full recipe, check the details above. Bring a large pot of salted water to a boil. The water should bubble steadily. Add the fettuccine to the pot. Cook the pasta according to the package instructions. Aim for al dente, which means it should be firm but tender. Once cooked, drain the pasta. Reserve about 1/4 cup of the pasta water. This water will help adjust the sauce later. In a medium bowl, toss the peeled and deveined shrimp with Cajun seasoning. Make sure each shrimp gets a good coating. This seasoning gives the shrimp its bold flavor. You want every bite to burst with flavor. Heat olive oil in a large skillet over medium heat. Wait until the oil shimmers before adding the shrimp. Spread the shrimp in a single layer. Cook for 2-3 minutes on each side. Look for the shrimp to turn pink and opaque. This means they are fully cooked. Once done, remove the shrimp from the skillet and keep them warm on a plate. In the same skillet, add minced garlic. Sauté it for about 30 seconds. You want it fragrant but not burnt. Next, pour in the heavy cream. Stir constantly to blend it with the garlic. Bring the mixture to a gentle simmer. Lower the heat to keep it warm without boiling. Gradually whisk in the freshly grated Parmesan cheese. Continue whisking until the cheese melts and the sauce is smooth. If the sauce is too thick, add some of the reserved pasta water. This helps you reach your desired consistency. Add the cooked fettuccine and shrimp back into the skillet. Toss everything together, ensuring the pasta and shrimp are well coated with sauce. Taste and season with salt and black pepper if needed. Remove the skillet from the heat. Stir in the freshly chopped parsley for color and freshness. Plate the Cajun Shrimp Alfredo right away. Garnish with lemon wedges for a zesty finish. This adds a nice pop of flavor and brightness to your dish. For a lovely presentation, serve the pasta in deep bowls. Place shrimp on top and sprinkle with more parsley. Enjoy your flavorful and creamy delight! For the full recipe, check the details above. Seasoning is key to great Cajun Shrimp Alfredo. The right spices bring warmth and depth. I love using Cajun seasoning for its bold taste. It includes paprika, garlic powder, and cayenne pepper. You can adjust the heat to your liking. Fresh ingredients make a big difference too. Use plump shrimp and fresh garlic. This ensures each bite bursts with flavor. One common mistake is overcooking shrimp. Shrimp cooks fast, so watch them closely. They should turn pink and opaque in just a few minutes. If you cook them too long, they’ll become rubbery. Another mistake is the sauce consistency. A sauce that is too thick can overpower the dish. Too thin, and it won't coat the pasta well. Aim for a creamy texture that clings to every strand. If your sauce is too thick, use reserved pasta water. Add it a little at a time until you reach the right consistency. This also helps the sauce stick to the pasta better. If it’s too thin, add a bit more cheese. Grated Parmesan works wonders for thickening. Balancing flavors is crucial too. Taste as you go, and adjust with salt or lemon juice. This brightens the dish and enhances the overall taste. For the Full Recipe, check your favorite cooking site! {{image_4}} You can swap shrimp for other seafood. Scallops or crab meat taste great too. If you prefer meat, use chicken or sausage. Each option offers a unique twist. You can also change the pasta type. Fettuccine is the classic choice, but penne or linguine work well too. Whole wheat or gluten-free pasta is an option for different diets. Just be sure to adjust cooking times. If you want less spice, use less Cajun seasoning. Start with one tablespoon and taste as you go. You can also add a touch of paprika for flavor without heat. For more heat, try adding cayenne pepper or crushed red pepper flakes. A little goes a long way, so add slowly. Adjusting the spice lets you customize the dish to your taste. Adding vegetables can make this dish even better. You can toss in bell peppers, spinach, or broccoli. They add color and nutrients while keeping it tasty. For more protein options, think about adding tofu or chickpeas. These options provide great texture and flavor. Don't hesitate to mix and match to find your favorite version of Cajun Shrimp Alfredo. For the full recipe, click here: [Full Recipe]. To keep your Cajun Shrimp Alfredo fresh, store it in the fridge. Use airtight containers to prevent moisture loss. Make sure the dish cools down before sealing it. This way, you can avoid soggy pasta. I recommend dividing the leftovers into smaller portions. This makes it easier to reheat only what you need. When you are ready to enjoy your leftovers, use the stovetop or microwave for reheating. The stovetop gives you better control over the heat. Heat it in a skillet on low. Stir it often to warm evenly. If it looks too thick, add a splash of milk or cream to loosen it up. The microwave works too, but be cautious. Heat in short bursts. Stir between each burst to avoid hot spots. Yes, you can freeze Cajun Shrimp Alfredo! However, the shrimp may change texture after freezing. To freeze, let the dish cool completely. Then, pack it in a freezer-safe container or bag. Remove as much air as possible to prevent freezer burn. When you are ready to eat, thaw it in the fridge overnight. Reheat as mentioned before to bring back the creamy goodness. For the best taste, try to eat it within three months. For the complete cooking experience, check out the Full Recipe. Cajun Shrimp Alfredo is a creamy pasta dish that blends Italian and Cajun flavors. It features tender shrimp, seasoned with a mix of spices, served in a rich Alfredo sauce. This dish has roots in both Cajun cooking and classic Italian cuisine. The combination of heat and creaminess makes it a favorite for many. Yes, you can use different pasta types! While fettuccine is traditional, you can try linguine, penne, or even spaghetti. Each pasta shape will hold the sauce differently, giving a unique taste experience. Choose your favorite pasta based on texture and how it pairs with the sauce. The spice level of Cajun Shrimp Alfredo largely depends on the Cajun seasoning you use. Cajun seasoning can range from mild to hot. If you prefer less heat, start with a smaller amount of seasoning. You can always add more to suit your taste. This dish should be flavorful without overwhelming your palate. You can prep elements ahead of time. Cook the pasta and shrimp separately, then store them in the fridge. Make the sauce fresh when you're ready to eat. This keeps the pasta from becoming soggy. If you need to reheat, do so gently to maintain its creamy texture. Cajun Shrimp Alfredo pairs well with several side dishes. Consider a simple green salad with a lemon vinaigrette. Garlic bread is also a great choice for scooping up that creamy sauce. For a heartier meal, you can serve it with roasted vegetables or steamed asparagus to add some crunch. This blog post guides you through making Cajun Shrimp Alfredo. You learned about essential ingredients, cooking techniques, and storage tips. I hope the simple steps help you create a tasty meal. Remember, fresh ingredients and proper seasoning boost flavor. Avoid common mistakes like overcooking the shrimp. If you change the ingredients, you still keep the dish delicious. With practice, you’ll master this recipe. Enjoy sharing this meal with friends and family!](https://joymealplan.com/wp-content/uploads/2025/07/5e89eb09-a87e-488e-952d-2e76586b8ac0-768x768.webp)
![To make garlic roasted green beans, you'll need these simple items: - 1 pound fresh green beans, trimmed and rinsed - 4 large cloves garlic, finely minced - 3 tablespoons extra virgin olive oil - 1 teaspoon freshly grated lemon zest - 1 teaspoon balsamic vinegar - ½ teaspoon red pepper flakes (optional for heat) - Sea salt and freshly ground black pepper to taste - 2 tablespoons finely grated Parmesan cheese (optional) I always prefer fresh green beans for this recipe. They taste better and have a nice crunch. Fresh beans roast evenly and soak up the flavors well. If you can’t find fresh ones, frozen beans work too. Just make sure to thaw and drain them first. They may not be as crisp, but they will still taste great. You can change some ingredients if you need to. If you don’t have garlic, try using garlic powder. Instead of lemon zest, you can use orange zest for a different flavor. If you want a different vinegar, try red wine vinegar. For a dairy-free option, skip the Parmesan cheese or use a vegan cheese instead. These swaps keep the dish tasty and fun! To start, gather your ingredients. You will need: - 1 pound fresh green beans, trimmed and rinsed - 4 large cloves garlic, finely minced - 3 tablespoons extra virgin olive oil - 1 teaspoon freshly grated lemon zest - 1 teaspoon balsamic vinegar - ½ teaspoon red pepper flakes (optional for heat) - Sea salt and freshly ground black pepper to taste - 2 tablespoons finely grated Parmesan cheese (optional) First, preheat your oven to 425°F (220°C). This step is key for crispy beans. Next, take a large mixing bowl and add the green beans. Toss in the minced garlic, olive oil, lemon zest, and balsamic vinegar. If you like a little heat, add red pepper flakes. Season with sea salt and black pepper to taste. Mix everything well. You want each bean coated with flavor. Now, it’s time to roast! Spread the green beans on a large baking sheet. Make sure they lie flat in a single layer. This helps them roast evenly. Place the baking sheet in the oven and roast for 15-20 minutes. Halfway through, give the beans a toss. This ensures they cook evenly. You’ll know they’re done when they’re tender but still have a slight crunch. Once out of the oven, if you like, sprinkle grated Parmesan cheese on top. The heat will melt it slightly, making it even better. Transfer the roasted green beans to a nice serving dish. Serve them warm to your family or guests. They pair well with many main dishes. Try them with grilled chicken or fish. You can also serve them as a stand-alone snack. For the full recipe, please see the earlier section. Enjoy your tasty green beans! To boost the taste of garlic roasted green beans, add a squeeze of lemon. Lemon brings brightness and freshness. You can also use fresh herbs like thyme or rosemary. These herbs add depth and aroma. If you love heat, try adding more red pepper flakes. Just be careful not to overdo it! For the best texture, spread the beans on the baking sheet. Make sure they are in a single layer. This helps them roast evenly. Toss them halfway through cooking to ensure all sides get crispy. If you want them extra crispy, leave them in for a few more minutes. Serve your garlic roasted green beans in a nice dish. You can sprinkle extra Parmesan cheese on top for a gourmet look. Adding a few lemon wedges next to the beans can enhance the presentation. It also invites your guests to add more flavor if they wish. For a pop of color, place fresh herbs on top before serving. This will make your meal look and taste amazing! You can find the full recipe for garlic roasted green beans [Full Recipe]. {{image_4}} You can mix in other veggies with garlic roasted green beans. Carrots, bell peppers, and zucchini work well. Just cut them into similar sizes. This way, they all cook evenly. Toss them with the green beans in the same mix for great flavor. You can also try adding cherry tomatoes for a pop of color and sweetness. Add herbs to change the taste of your garlic roasted green beans. Fresh thyme or rosemary adds a lovely aroma. A sprinkle of smoked paprika gives a warm, savory hint. You can also try a dash of cumin for a unique flavor. These twists make your dish exciting and fresh each time. This recipe is already vegetarian. To make it vegan, simply skip the Parmesan cheese. You can also add nutritional yeast for a cheesy flavor without dairy. It’s a great way to keep it creamy and flavorful. Enjoy these garlic roasted green beans as a side dish or main meal. Each variation keeps it fun and tasty! For the full recipe, check out the detailed instructions provided earlier. After enjoying your garlic roasted green beans, you might have leftovers. Cool the beans down first. Then, place them in an airtight container. They stay fresh in the fridge for about 3-4 days. When ready to eat, check for any signs of spoilage. If they look good, you can enjoy them again! If you have more leftovers than you can eat, freezing is a great option. First, let the beans cool completely. Then spread them on a baking sheet in a single layer. Freeze them for about an hour. This step helps the beans stay separate. After freezing, transfer them to a freezer-safe bag. They can last up to 3 months in the freezer. Label the bag with the date so you know when to use them. Reheating garlic roasted green beans is simple. You can use the oven or a microwave. For the oven, preheat it to 350°F (175°C). Spread the beans on a baking sheet and heat for about 10 minutes. If you use a microwave, place the beans in a safe dish. Heat them for 1-2 minutes, stirring halfway. This method keeps them tasty and warm. For extra flavor, add a splash of olive oil or a sprinkle of salt before serving. Enjoy your meal! To make garlic roasted green beans, start by preheating your oven to 425°F (220°C). In a big bowl, mix 1 pound of fresh green beans with 4 minced garlic cloves, 3 tablespoons of olive oil, 1 teaspoon of lemon zest, and 1 teaspoon of balsamic vinegar. If you like spice, add ½ teaspoon of red pepper flakes. Season with sea salt and black pepper. Toss everything until the beans are well coated. Spread the beans on a baking sheet in a single layer. Roast them for 15-20 minutes, tossing halfway. When they are tender and crisp, serve hot. You can find the Full Recipe for more details. Yes, you can prepare garlic roasted green beans ahead of time. You can trim and wash the green beans and mix them with the garlic and oil. Store this mix in the fridge for up to a day. When you’re ready to eat, just roast them as directed. This makes dinner prep easier, and you can enjoy more time with your guests. Garlic roasted green beans pair well with many dishes. You can serve them alongside grilled chicken or fish for a balanced meal. They also complement pasta dishes, like spaghetti or fettuccine. If you want a vegetarian option, try them with quinoa or rice. Their bright flavor adds a nice touch to any plate. This post covered garlic roasted green beans from ingredients to serving ideas. Fresh or frozen beans work well, and you can swap key ingredients easily. Roasting creates a rich flavor, and adding herbs boosts it even more. Don’t forget about storage; knowing how to keep leftovers can help. Remember, you can customize this dish with other veggies or herbs. Enjoy experimenting with flavors! Roasted green beans can fit any meal.](https://joymealplan.com/wp-content/uploads/2025/07/774fbef7-0e10-49a5-abc6-76b985870023-768x768.webp)
![To make Easy Chicken Tikka Masala, gather these key ingredients: - 500g boneless chicken thighs, cut into bite-sized pieces - 1 cup plain yogurt - 2 tablespoons garam masala - 1 tablespoon ground cumin - 1 teaspoon ground coriander - 1 teaspoon paprika - 1 teaspoon turmeric - 1 tablespoon ginger, minced - 3 cloves garlic, minced - 1 onion, finely chopped - 1 can (400g) crushed tomatoes - 1 cup coconut milk - 2 tablespoons vegetable oil - Salt to taste - Fresh cilantro for garnish These ingredients create a rich, creamy sauce that brings the dish to life. The yogurt is key for tender chicken. The spices add depth and warmth, making every bite flavorful. You can customize your Chicken Tikka Masala with these optional ingredients: - Lemon juice for brightness - Green chili for heat - Bell peppers for crunch - Peas for color Adding these extras can change the flavor profile and make it your own. Feel free to mix and match based on your taste. If you have allergies, there are simple swaps you can use: - Use almond or soy yogurt instead of dairy yogurt. - Swap coconut milk for almond milk for a nut-free option. - Replace chicken with tofu or chickpeas for a vegan dish. These substitutions keep the dish delicious while catering to your dietary needs. Enjoy your cooking adventure! For the complete recipe, check out the Full Recipe link. First, grab a large bowl. Mix 1 cup of plain yogurt, 2 tablespoons of garam masala, 1 tablespoon of ground cumin, 1 teaspoon of ground coriander, 1 teaspoon of paprika, 1 teaspoon of turmeric, 1 tablespoon of minced ginger, 3 cloves of minced garlic, and a pinch of salt. Stir well until it’s smooth. Now, add 500g of bite-sized chicken thighs. Make sure each piece is coated well with the marinade. Cover the bowl with plastic wrap. Pop it in the fridge for at least 30 minutes. For the best taste, let it sit overnight. Next, heat 2 tablespoons of vegetable oil in a large skillet over medium-high heat. Once hot, add 1 finely chopped onion. Cook the onion for 5-7 minutes. You want it to turn golden brown and soft. This step adds a sweet flavor. After the onion is ready, add the marinated chicken. Cook it for about 8-10 minutes. Stir it occasionally to brown all sides evenly. Once the chicken is browned, it’s time to add more flavor. Pour in 1 can of crushed tomatoes. Stir gently to mix everything. Bring the mixture to a gentle simmer. Let it simmer for about 10 minutes. Stir it now and then to stop it from sticking. After that, slowly pour in 1 cup of coconut milk. Stir again to combine. Simmer for another 10 minutes. This makes the sauce thick and creamy. Taste and add more salt if needed. Finish by garnishing with fresh cilantro for a pop of color and taste. To get the best flavor in your Chicken Tikka Masala, start with fresh spices. Fresh spices give a robust taste that dried spices lack. Use whole spices when possible, and grind them yourself. This step unleashes their natural oils and aromas. Another key is the yogurt marinade. It adds tenderness and tang. Marinate your chicken for at least 30 minutes, but overnight is best. This waiting time allows the spices to soak in fully. For perfect chicken, cook it in batches. Overcrowding the pan steams the meat instead of browning it. Use medium-high heat to get a nice sear on the chicken. This creates a deep flavor that you want. Once you add the crushed tomatoes and coconut milk, let it simmer gently. This step helps the flavors meld together beautifully. You can make Chicken Tikka Masala ahead of time. Cook it fully, then let it cool. Store it in an airtight container in the fridge for up to three days. Reheat it on low heat, adding a splash of water if needed. This dish also freezes well. Portion it out and freeze it for up to three months. When you're ready, thaw it overnight in the fridge and reheat. For more details, check the Full Recipe. {{image_4}} You can easily make a vegetarian version of Chicken Tikka Masala. Replace the chicken with firm tofu or vegetables like bell peppers and zucchini. Tofu soaks up flavors well. Marinate it the same way as chicken. Cook it in the same sauce for that rich taste. This way, you keep the essence of the dish while making it meat-free. If you enjoy spicy food, add some heat to your Chicken Tikka Masala. You can include chopped green chilies or a pinch of cayenne pepper in the marinade. Adjust the spice level to your liking. Just remember, a little heat goes a long way! You can also serve it with a side of spicy chutney for an extra kick. You can swap chicken for other proteins too. Paneer, a fresh cheese, works great in this dish. Cut the paneer into cubes and marinate it just like the chicken. Cook it in the same way for a rich and creamy meal. Tofu and paneer both add their own unique texture and flavor to the dish. This makes it more exciting and diverse for your taste buds. For the complete recipe, check out the [Full Recipe]. To keep your Chicken Tikka Masala fresh, let it cool down first. Use an airtight container for storage. Place it in the fridge. It will stay good for about three to four days. For best results, store it without the rice or naan. To enjoy your Chicken Tikka Masala again, use the stove or microwave. If using the stove, heat it over low heat. Stir often to prevent sticking. If using the microwave, cover the dish and heat in short bursts. This way, it warms evenly. Always check the temperature to ensure it is hot throughout. You can freeze Chicken Tikka Masala if you want to save some for later. Place it in a freezer-safe container or bag. Make sure to leave some space for expansion. It can stay good for up to three months. When you’re ready to eat, thaw it in the fridge overnight. Reheat it on the stove or microwave, and enjoy this rich flavor again! For the full recipe, check the section above. You should marinate chicken for at least 30 minutes. For the best taste, let it sit overnight. This allows the spices to soak in deeply. The yogurt keeps the chicken tender while adding flavor. Yes, you can use bone-in chicken. It will add more flavor to your dish. Just be aware that it may take longer to cook. Adjust your cooking time to ensure the chicken is fully cooked. Serve Chicken Tikka Masala with fluffy basmati rice or warm naan. Both options soak up the rich sauce well. You can also add a side of cucumber salad for a fresh crunch. For the complete recipe, check out the Full Recipe section. You’ll find all the steps to make this rich, flavorful dish in no time! In this post, we covered the key ingredients for easy Chicken Tikka Masala, from marinade to sauce. I shared tips for perfect flavor and cooking techniques. You can even explore vegetarian options or different proteins like tofu. Storing leftovers properly ensures you enjoy this dish later. Remember, marinating the chicken is key, and you can customize it to your taste. With these steps, you’ll cook a delicious meal that’s sure to impress!](https://joymealplan.com/wp-content/uploads/2025/07/18c11e8b-b17f-4eb1-983f-851954d1111b-768x768.webp)