Classic Deviled Eggs Delightful Party Snack Idea

If you’re looking for the perfect party snack, classic deviled eggs are the answer! They are creamy, tasty, and easy to make. In this article, I’ll share the best ingredients and step-by-step instructions for crafting these delightful bites. You’ll learn tips to avoid common mistakes, how to store leftovers, and fun variations to wow your guests. Get ready to impress with this timeless recipe!
Ingredients
Required Ingredients
– 6 large eggs
– 3 tablespoons high-quality mayonnaise
– 1 teaspoon Dijon mustard
– 1 teaspoon apple cider vinegar
– 1/4 teaspoon smoked paprika (plus extra for garnish)
– Salt and freshly cracked black pepper to taste
For mayonnaise, choose a high-quality brand. A good mayonnaise makes a big difference. You want it creamy and rich, not too oily.
Optional Garnishes
– Fresh chives or parsley, finely chopped
– Smoked paprika for a vibrant finish
– Bacon bits for a smoky crunch
– Capers for a briny burst
Garnishes add color and flavor. Fresh herbs like chives or parsley give a nice pop. Smoked paprika enhances taste and looks great. Bacon bits add a salty, crispy touch. Capers can bring a fun tang. Use any combination to suit your taste!
Step-by-Step Instructions
Preparing the Eggs
To make deviled eggs, start by boiling the eggs. Place six large eggs in a medium saucepan. Fill the pan with cold water, covering the eggs completely. Heat the pan over medium-high heat until the water boils. Once boiling, cover the pan with a lid and remove it from heat. Let the eggs sit for 10-12 minutes. This time is key for the perfect hard-boiled egg.
Next, cool the eggs quickly. Transfer them to an ice bath for five minutes. This step helps stop the cooking process and makes peeling easier. After cooling, gently tap each egg on a hard surface. Peel them under running water to help remove stubborn shell bits.
Making the Filling
Now it’s time to make the filling. Carefully slice each egg in half lengthwise. Scoop out the yolks into a mixing bowl, keeping the whites intact. Mash the yolks with a fork until crumbly. Add three tablespoons of high-quality mayonnaise, one teaspoon of Dijon mustard, one teaspoon of apple cider vinegar, and 1/4 teaspoon of smoked paprika to the bowl. Season with salt and pepper to taste. Mix until smooth and creamy. This smooth texture makes the filling rich and tasty.
Filling the Egg Whites
When filling the egg whites, you can use a spoon or a piping bag. A piping bag gives a nice, neat look. If you don’t have one, a spoon works just fine. Fill each egg white generously with the yolk mixture. Make a nice mound on top for a great look.
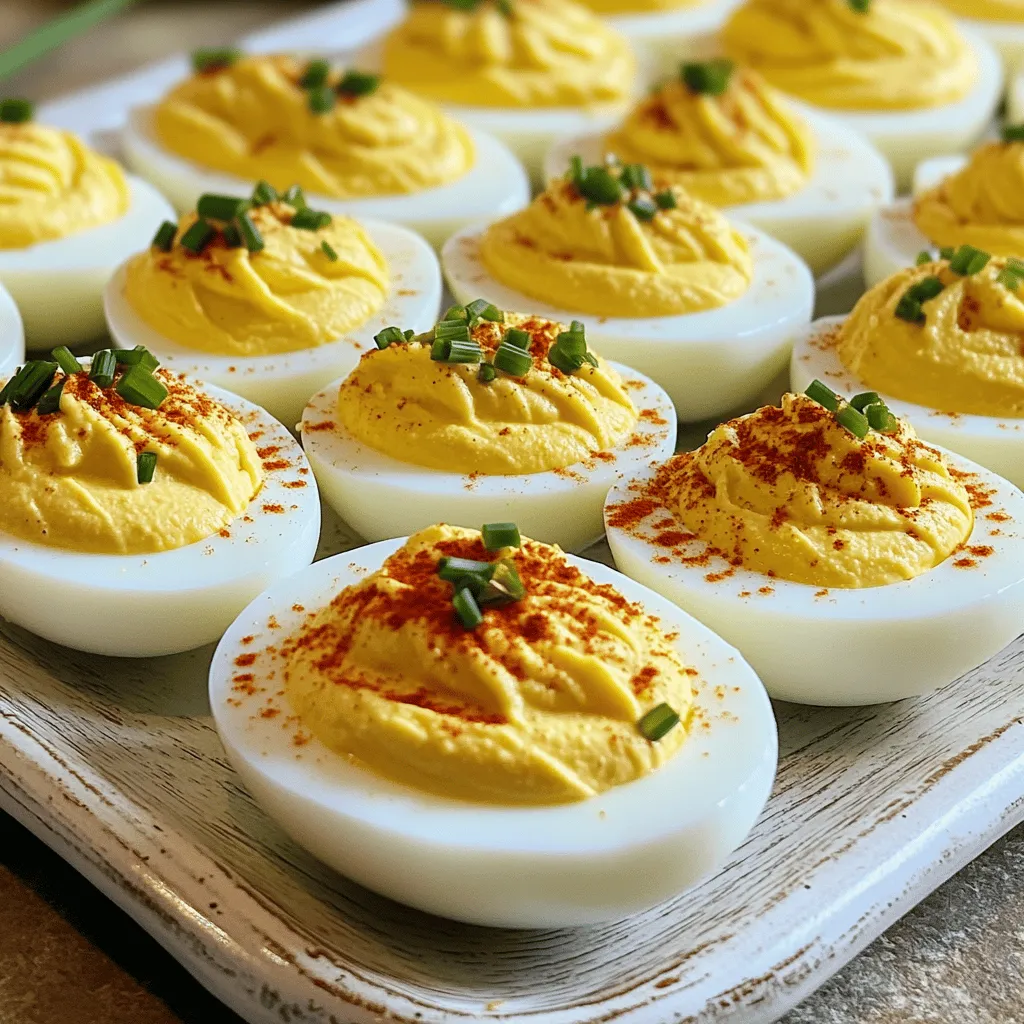
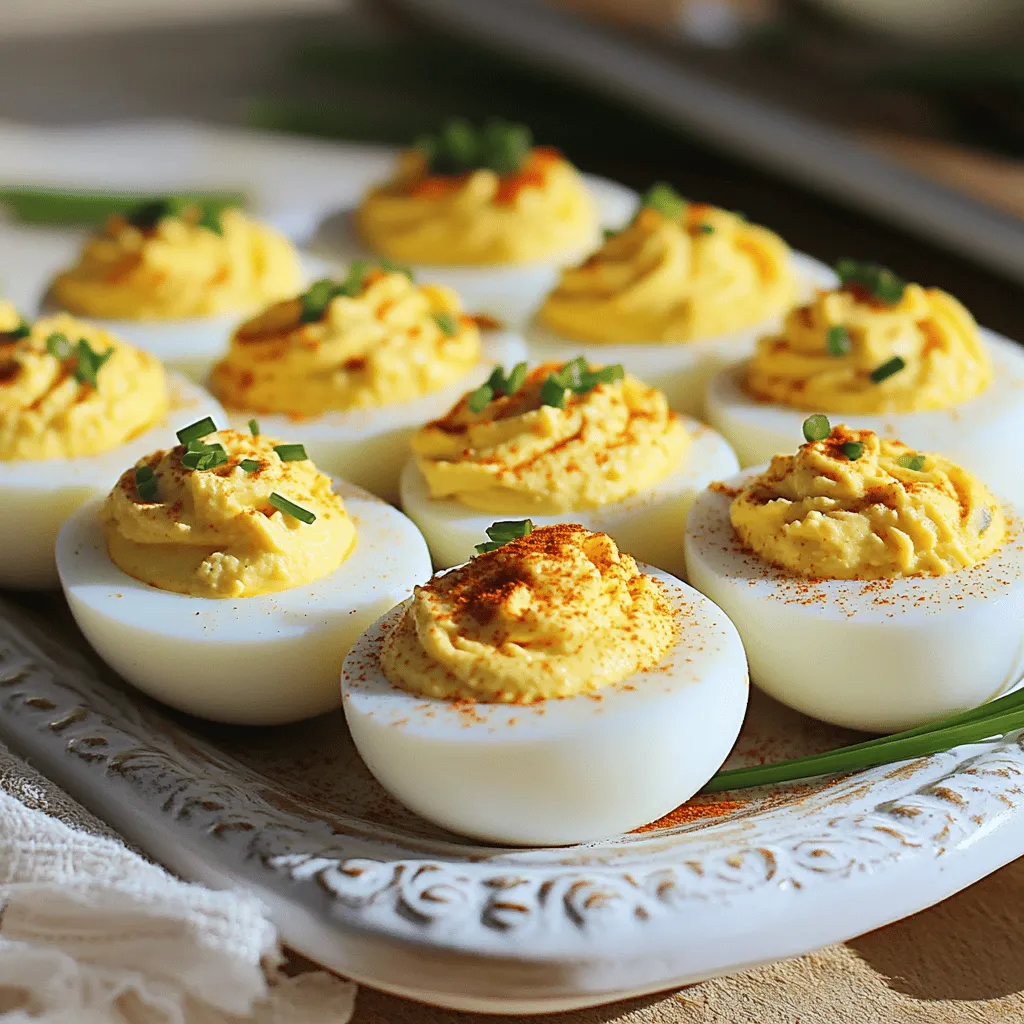
For presentation, arrange the deviled eggs on a beautiful serving platter. You can sprinkle extra smoked paprika for color. Chopped chives or parsley adds a fresh touch. For fun, place a slice of pickled jalapeño on top for extra flavor. Enjoy your delightful party snack!
Tips & Tricks
Common Mistakes to Avoid
Overcooking eggs and its effects
Overcooked eggs lead to a greenish yolk and a rubbery texture. You want a soft, creamy filling, not a tough one. To avoid this, follow the boiling time closely. Use the ice bath right after cooking to stop the heat.
Unbalanced flavors in the filling
If your filling lacks flavor, it will not impress your guests. Balance is key. Too much mayonnaise can make it bland. A dash of vinegar adds zest. Taste your mixture and adjust as needed.
Best Practices for Success
How to achieve a creamy texture
For a smooth filling, use high-quality mayonnaise. Mash the yolks well before mixing. This helps blend the ingredients properly. If your filling feels dry, add a bit more mayonnaise or vinegar for creaminess.
Ensuring easy peeling of eggs
Fresh eggs can be hard to peel. For easier peeling, use older eggs. The shells come off more easily. Also, peel under running water. This helps loosen any stubborn bits stuck to the egg.
Storage Tips
How to store leftover deviled eggs
Store any leftover deviled eggs in a covered container. Keep them in the fridge. This keeps them fresh for a longer time. Avoid stacking them, as this can cause the filling to smudge.
Shelf life and best practices for freshness
Deviled eggs last about 3 to 5 days in the fridge. Check for any signs of spoilage. If they smell off or look strange, it’s best to toss them. Enjoy your deviled eggs while they are fresh for the best taste.

Variations
Flavor Variations
Deviled eggs are a great canvas for flavors. You can stick to classic tastes or mix it up! One popular option is bacon. Just chop crispy bacon and fold it into the yolk mixture. It adds a salty crunch. If you like heat, add a dash of hot sauce or some diced jalapeños.
You can also get creative with unique ingredients. Try adding avocado for a creamy twist. Mash it with the yolks for a smooth texture. Another fun option is curry powder. It gives a warm, spicy taste that surprises your guests. Don’t forget to sprinkle some fresh herbs like dill or cilantro for extra flavor!
Serving Suggestions
Serving deviled eggs can be fun and easy. For casual gatherings, place them on a simple plate. You can also use a fancy platter to impress your guests. If you want to add a twist, serve them on toast. Just spread some cream cheese on the bread and top it with your deviled eggs.
For a fresh option, toss them in salads. They can add protein and flavor to any leafy mix. You can even make a deviled egg salad sandwich. Just chop the eggs and mix them with mayo and a bit of mustard. Serve it on your favorite bread, and you have a tasty lunch!
Storage Info
Proper Storage Techniques
To keep deviled eggs fresh, use airtight containers. Glass or plastic containers work well. Place a paper towel at the bottom to absorb excess moisture. This helps prevent the eggs from getting soggy. If you plan to take them to a party, use a sturdy container. Consider a travel egg carrier designed for this purpose. Make sure the eggs are secure to avoid any mess.
Freezing Instructions
Can you freeze deviled eggs? No, freezing deviled eggs is not a good idea. The texture of the egg whites will change, becoming rubbery. However, you can prepare the filling in advance. Store the yolk mixture in an airtight container in the fridge. It stays fresh for up to two days. When you’re ready, simply fill the egg whites just before serving.
For meal prep, consider making hard-boiled eggs. You can keep them in the fridge for about a week. When you want a quick snack, just slice and fill them. This way, you always have a tasty treat ready to go.
FAQs
How long do deviled eggs last in the fridge?
Deviled eggs last about three to four days in the fridge. They should stay fresh if you keep them in an airtight container. Look for signs of spoilage like a bad smell or changes in color. If they seem off, it’s best to toss them.
Can I make deviled eggs a day ahead?
Yes, you can make deviled eggs a day early. I suggest keeping the filling and the egg whites separate until you serve. This helps keep the eggs from getting soggy. Just fill them right before the party for the best taste.
What is the best way to hard boil eggs?
For perfect hard-boiled eggs, I recommend two methods: stovetop and Instant Pot. On the stovetop, place eggs in a pot, cover with cold water, and bring to a boil. Once boiling, cover and let sit for 10-12 minutes. For the Instant Pot, place eggs on the rack, add a cup of water, and cook on high pressure for 5 minutes. Both methods yield great results.
How to make deviled eggs less rich?
To lighten deviled eggs, swap out some mayonnaise for Greek yogurt. You can also use less mayonnaise overall. Adding a bit of mustard or vinegar can give flavor without added fat. Try incorporating mashed avocado for a creamy texture that’s healthier.
Can I use yogurt instead of mayonnaise?
Yes, you can use yogurt instead of mayonnaise. Greek yogurt adds creaminess with fewer calories. It also boosts protein content. Just keep in mind it will change the flavor slightly, but it can be a tasty twist.
Deviled eggs are a delightful treat. We covered the necessary ingredients, preparation steps, and tips for success. You learned how to avoid common mistakes and explore creative variations. Remember, presentation matters, so get creative with garnishes. Storing these eggs correctly ensures their freshness. Whether you are hosting a party or just enjoying a snack, deviled eggs can shine in many ways. Use this guide to make your next batch tasty and memorable. Happy cooking!


![- 1 pre-made phyllo pastry sheet (about 8-10 sheets) or one ready-made pie crust - 4 medium ripe tomatoes, thinly sliced - 1 cup fresh basil leaves, roughly chopped - 1 cup ricotta cheese - 1 cup shredded mozzarella cheese - 2 tablespoons extra virgin olive oil, plus additional for brushing - 1 teaspoon garlic powder - Salt and freshly cracked black pepper to taste - Optional: Balsamic glaze for drizzling When I create this fresh tomato basil tart, I love to use simple, fresh ingredients. The star is the ripe tomatoes. They bring bright flavor and juicy texture. I choose tomatoes that are firm but not hard. Their color should be vibrant. Basil is another key player. Fresh basil adds a sweet and peppery taste. I prefer to roughly chop it to release its oils. This way, every slice of the tart bursts with flavor. For creaminess, I use ricotta cheese. It adds a rich and smooth layer. I mix it with garlic powder, salt, and pepper. This mix gives a nice seasoning base. Next, mozzarella cheese adds a lovely stretch. It melts beautifully and gives that gooey texture we crave. Together, they make the tart creamy and savory. I also use extra virgin olive oil. It not only adds flavor but helps the crust brown nicely. A drizzle before baking makes a big difference. Lastly, I sometimes add balsamic glaze. It gives a sweet and tangy touch. It’s optional, but I find it elevates the dish. Each ingredient plays a role in making this tart special. When you gather these items, you set the stage for a delightful meal. Check out the [Full Recipe] for a step-by-step guide to bring this tart to life! 1. Preheating the oven Start by preheating your oven to 375°F (190°C). This step is key to getting a nice, crispy crust. 2. Preparing the pastry If using phyllo pastry, layer 4-5 sheets in a tart pan. Brush a thin layer of olive oil between each sheet. This adds flavor and helps create a crunchy texture. If you opt for a pie crust, just place it in the tart pan and crimp the edges for a nice look. 3. Making the ricotta mixture In a mixing bowl, combine ricotta cheese, garlic powder, salt, and pepper. Use a spatula to mix until smooth. This mixture adds creaminess to the tart. 1. Layering tomatoes and cheese Spread the ricotta mixture evenly over the crust. Then, layer the sliced tomatoes on top. Overlap the slices slightly for a pretty design. After the tomatoes, sprinkle shredded mozzarella cheese over them. Finally, add the chopped basil for a fresh taste. 2. Drizzling olive oil Drizzle the remaining olive oil over the top of the tart. This helps the tart brown nicely and boosts flavor. 1. Baking duration and tips Place the tart in your preheated oven. Bake for 25-30 minutes. Look for a golden brown crust and bubbly cheese. This means it’s nearly ready! 2. Cooling period before slicing Once baked, remove the tart from the oven. Let it cool on a wire rack for a few minutes. This cooling time helps set the filling, making slicing easier. Check out the Full Recipe to get all the details you need! For the best results, set your oven to 375°F (190°C). This temperature helps the tart cook evenly and creates a nice, crisp crust. To check for doneness, look for a golden-brown crust and bubbly cheese. The cheese should be slightly browned, adding flavor and texture. If you see these signs, your tart is ready! Garnishing makes your dish pop. Slice the tart into wedges and serve on a rustic wooden board. Add fresh basil leaves on top for a vibrant touch. You can also drizzle balsamic glaze over the tart right before serving. It adds a sweet and tangy flavor that enhances the dish. One mistake is ending up with a soggy crust. To prevent this, always brush the pastry with olive oil or egg wash before adding toppings. Another common issue is uneven cheese melting. Spread the cheese evenly and avoid overloading one side. This ensures every bite is cheesy and delicious. {{image_4}} To make your Fresh Tomato Basil Tart even more exciting, try using different cheeses. Instead of ricotta, you can use goat cheese or feta. Both add a unique tang. For mozzarella, consider using provolone or a sharp cheddar. These swaps change the taste while keeping it delicious. You can also play with herbs and spices. Instead of basil, use fresh oregano or thyme for a new flavor. A pinch of red pepper flakes can add a little heat. Just remember, keep the balance so it doesn't overpower the fresh tomatoes. Seasonal vegetables can enhance your tart. In summer, add zucchini or bell peppers for a colorful twist. In fall, roasted butternut squash works well. These veggies bring new flavors and textures to your dish. Don't shy away from incorporating different flavors. For instance, a sprinkle of smoked paprika gives a lovely depth. You could even add sun-dried tomatoes for a rich, sweet touch. These tweaks keep the tart fresh and exciting all year round. If you need vegan or gluten-free options, it’s easy to adapt. For a vegan tart, swap the cheeses for cashew cream or tofu. These provide creaminess without dairy. Use gluten-free pie crust or phyllo pastry for a gluten-free option. These variations allow everyone to enjoy this dish. You can create a tart that fits any diet without losing flavor. Check out the Full Recipe for more ideas! To keep your fresh tomato basil tart tasty, store leftovers properly. First, let the tart cool completely. Wrap it in plastic wrap or place it in an airtight container. This helps keep flavors and moisture in. If you prefer, you can also use aluminum foil for wrapping. Store it in the fridge for up to three days for the best taste. When ready to enjoy your leftover tart, preheat your oven to 350°F (175°C). Place the sliced tart on a baking sheet for even heating. Bake for about 10-15 minutes until it's warm. This method keeps the crust crisp and the cheese melty. To avoid sogginess, don’t microwave it. Microwaving can make the crust soft and chewy, which isn’t ideal. Enjoy your delicious tart again! To make a tomato basil tart from scratch, you can choose between two crust options. - Homemade crust: 1. Combine flour, butter, and salt in a bowl. 2. Mix until crumbly. 3. Add cold water, one tablespoon at a time, until the dough forms. 4. Roll out the dough and fit it into your tart pan. 5. Chill the crust for about 30 minutes before filling. - Store-bought crust: Use a pre-made phyllo pastry or ready-made pie crust. This saves time and effort. Simply place it in your tart pan and crimp the edges. I often use phyllo for a crisp texture, but a pie crust works great too. Each option gives a unique taste. Yes, you can prepare the tart in advance. Here are some tips: - Make the crust: You can bake the crust a day ahead. Cool it and store it in the fridge. - Prep the filling: You can mix the ricotta with seasonings a day before. Keep it in the fridge until you're ready to assemble. - Assemble and bake: Assemble the tart a few hours before serving. Bake it fresh to enjoy the best flavors. Store leftovers in an airtight container in the fridge. They stay good for 2-3 days. This tart pairs well with various side dishes and drinks. - Complementary side dishes: - A simple green salad with vinaigrette. - Roasted vegetables for added flavor. - Garlic bread for a comforting touch. - Drinks: - A chilled white wine, like Sauvignon Blanc. - Fresh lemonade for a refreshing option. These options enhance your meal and make it even more enjoyable. Check out the Full Recipe for more details on making this dish! You can make a tasty tomato basil tart with simple steps. We covered key ingredients, like fresh tomatoes and phyllo pastry. The baking process helps bring out rich flavors, while our tips keep your crust crispy. I shared several ways to adapt the tart for diets and seasons. Lastly, proper storage keeps leftovers fresh, making them easy to enjoy later. Dive in, try this recipe, and create your own delicious variations. Enjoy the process—it’s all about making a meal you love!](https://joymealplan.com/wp-content/uploads/2025/07/c4443384-77e0-40e2-9fba-17a466e29922-768x768.webp)
![- 1 pound large shrimp, peeled and deveined - 3 tablespoons extra virgin olive oil - Zest of 1 medium-sized lemon - 2 tablespoons freshly squeezed lemon juice - 2 cloves garlic, finely minced - 1 tablespoon fresh parsley, finely chopped - 1 tablespoon fresh dill, finely chopped - 1 teaspoon smoked paprika - Salt and freshly ground black pepper, to taste - 8 wooden skewers (soaked in water for at least 30 minutes) Using fresh ingredients makes a big difference in taste. The shrimp brings a sweet flavor, while lemon adds brightness. Olive oil gives a smooth touch that ties it all together. Fresh herbs like parsley and dill add aroma and depth. Garlic gives a nice kick, enhancing the taste. When you prepare the skewers, ensure your shrimp are spread out. This helps them cook evenly. The smoked paprika adds a hint of warmth that makes every bite special. Salt and pepper are key for balancing flavors. Soaking the wooden skewers prevents them from burning on the grill. For the complete recipe, check out the [Full Recipe]. It guides you step by step to make this dish shine. Enjoy the process and get ready for a tasty meal! In a mixing bowl, combine the following ingredients for a tasty marinade: - 3 tablespoons extra virgin olive oil - Zest of 1 medium-sized lemon - 2 tablespoons freshly squeezed lemon juice - 2 cloves garlic, finely minced - 1 tablespoon fresh parsley, finely chopped - 1 tablespoon fresh dill, finely chopped - 1 teaspoon smoked paprika - Salt and freshly ground black pepper, to taste Whisk these together until they blend well. This mix adds great flavor to the shrimp. Now, add the shrimp to your marinade. Make sure each shrimp is coated in the mix. Cover the bowl and place it in the fridge for 20-30 minutes. This time helps the shrimp soak up all the tasty flavors. While the shrimp marinates, preheat your grill to medium-high heat. If you use a grill pan, heat it on the stovetop until hot. Next, take the soaked wooden skewers and carefully thread the marinated shrimp onto them. Aim for about 4-5 shrimp per skewer. Once ready, place the skewers on the grill. Grill the shrimp for 2-3 minutes on each side. They should turn a lovely pink color and become opaque when they are done. Keep an eye on them; overcooking can make them rubbery. After grilling, remove the skewers and let them rest for a few minutes. This helps the shrimp stay juicy. For the full recipe, be sure to check the detailed instructions. To get the best grilled shrimp, focus on the right cooking time and temperature. Preheat your grill to medium-high heat. This temperature is key for juicy shrimp. Cook the shrimp for 2-3 minutes on each side. They will turn pink and opaque when done. Avoid cooking them too long. Overcooked shrimp get tough and rubbery. Marinating shrimp is a great way to boost flavor. I suggest letting them soak for 20-30 minutes. This time helps the shrimp absorb the tasty herbs and lemon. For even more flavor, try adding a splash of hot sauce or a dash of cayenne pepper to the marinade. This small change can add a nice kick. Serve your Lemon Herb Grilled Shrimp with fresh sides. Grilled vegetables are a perfect match. Try zucchini, bell peppers, or asparagus. A crisp green salad also pairs well. Toss in some avocado or nuts for extra texture. You can also serve the shrimp over rice or quinoa for a filling meal. For a refreshing touch, add lemon wedges and a sprinkle of herbs when serving. {{image_4}} You can change the herbs in this recipe. Instead of parsley and dill, try basil or cilantro. Each herb brings a new taste. Basil gives a sweet flavor, while cilantro adds a fresh one. You can mix and match to find your favorite. Experimenting with herbs makes the dish fun and unique. Don't have a grill? No problem! You can cook shrimp in the oven or on the stovetop. For oven broiling, preheat your broiler. Place the skewers on a baking sheet and broil for about 2-3 minutes per side. If using a stovetop grill pan, heat it over medium-high heat. Cook the shrimp as you would on an outdoor grill. Both methods will give you tasty results. Want to make this dish gluten-free? Simply check your smoked paprika for gluten. It's usually safe, but some brands may add gluten. For a low-carb option, skip any bread sides. Serve the shrimp with fresh veggies or a salad instead. This keeps your meal light and healthy. To keep leftover grilled shrimp fresh, place them in an airtight container. Make sure to cool them down first. Refrigerate them within two hours of cooking. Properly stored, they last for up to three days. If you want to enjoy them later, don’t forget to label the container. When it's time to reheat, don’t use the microwave if you can avoid it. Instead, heat a skillet over medium heat. Add a bit of olive oil to keep shrimp moist. Cook for about 2-3 minutes until warm. You can also reheat them on the grill for extra flavor. Just watch closely so they don’t overcook and become rubbery. Freezing grilled shrimp is a great way to save them for later. First, let them cool completely. Then, place them in a freezer-safe bag. Try to remove as much air as possible to prevent freezer burn. These shrimp can last for up to three months in the freezer. When you’re ready to eat, thaw them in the fridge overnight or use cold water for a quicker method. Shrimp cook quickly. Look for a bright pink color and opaque flesh. The shrimp should curl into a "C" shape. If they curl tightly into an "O," they may be overcooked. To avoid this, cook shrimp for just 2-3 minutes per side on a hot grill. Always check a few pieces to ensure even cooking. Yes, you can use frozen shrimp! Just remember to thaw them first. The best way is to place them in the fridge overnight. If you're in a hurry, run them under cold water for about 10-15 minutes. Once thawed, pat them dry with a paper towel. This helps the marinade stick better. You can use many herbs! Here are some great options: - Basil - Cilantro - Chives - Thyme - Oregano - Tarragon These herbs add unique flavors to your shrimp. Feel free to mix and match to find your favorite blend! For more ideas, check the Full Recipe for a guide on how to experiment with different herbs. In this article, we covered everything you need for Lemon Herb Grilled Shrimp. You learned about key ingredients, flavor enhancers, and step-by-step cooking instructions. We also explored tips to make the shrimp perfect and suggested delicious side dishes. Remember, these shrimp are versatile. You can adjust flavors or try different cooking methods. Enjoy grilling and make this dish your own. Happy cooking!](https://joymealplan.com/wp-content/uploads/2025/07/b27d11be-6f1b-4945-85cc-7eac089af2f5-768x768.webp)
![- 1 ripe mango, diced - 2 ripe avocados, diced - 1 small red onion, finely chopped - 1 sweet red bell pepper, diced - 1 jalapeño, minced - 1/4 cup fresh cilantro, chopped - Juice of 2 limes - 1 tablespoon extra virgin olive oil - Salt and black pepper to taste How to choose the perfect mango Look for a mango that feels slightly soft when you press it. The skin should have a nice golden hue. A ripe mango smells sweet at the stem end. Choosing the best avocados Pick avocados that yield to gentle pressure. The skin should be dark green or black, depending on the variety. Avoid hard or overly mushy avocados. Signs of a fresh jalapeño A fresh jalapeño should be firm and glossy. Look for bright green skin without wrinkles. A fresh pepper has a crisp feel and a spicy aroma. These tips will help you find the best ingredients for your salsa. Fresh produce makes your dish more vibrant and tasty. For the full recipe, check the details above. - Start by washing all your fresh produce. - Dice the ripe mango into small cubes. - Carefully cut the avocados into bite-sized pieces. - Finely chop the red onion for sharp flavor. - Dice the red bell pepper for sweetness. - Mince the jalapeño, adjusting to your heat preference. Next, in a large mixing bowl, combine the diced mango, avocado, chopped onion, red bell pepper, and minced jalapeño. Gently fold in the chopped cilantro, spreading the fresh herb throughout. Squeeze the juice of two fresh limes over the mix, along with a tablespoon of olive oil. This adds richness. Use a spatula to carefully toss the ingredients. Keep the avocado pieces intact to maintain texture. Season the salsa with salt and freshly cracked black pepper, mixing lightly to combine. Resting time is key for great flavor. Let the salsa sit for about 10 minutes at room temperature. This duration allows the ingredients to blend and the flavors to develop. When you let the salsa rest, the lime juice and olive oil soak in. This process enhances the taste and makes every bite burst with flavor. Enjoy this fresh, vibrant dish as a wonderful side or topping. For the full recipe, check out the details above. - How to keep avocados from browning: To stop avocados from turning brown, use lime juice. The acid in lime juice slows oxidation. Squeeze fresh lime juice right after cutting the avocado. Mix it in well to cover all the flesh. You can also store the salsa in an airtight container to keep it fresh longer. - Using lime juice effectively: Lime juice brightens the flavors in your salsa. Use freshly squeezed lime juice rather than bottled juice. It tastes better and adds a nice zing. Aim for about two limes for this recipe. Adjust based on your taste! - Importance of ingredient proportions: Balance is key to great salsa. Use equal parts of mango and avocado for a good mix. Too much onion can overpower the other flavors. Keep the jalapeño mild if you prefer less heat. Taste as you go, and adjust the ingredients to suit your own palate. - Pairing with tortilla chips: Serve your mango avocado salsa with crispy tortilla chips. The crunch of the chips pairs well with the smoothness of the salsa. It makes for a perfect snack or appetizer at parties. - Using as a topping for grilled meats: This salsa works great as a topping for grilled chicken or fish. The sweet and spicy flavors complement the meat beautifully. Just spoon it on right before serving for the best taste. - Incorporating into tacos or burritos: Use this salsa to add freshness to tacos or burritos. It enhances your meal with vibrant flavors. Just add a scoop in your taco or wrap it up in a burrito, and enjoy! For the full recipe, check out the complete method to create this delicious dish. {{image_4}} You can make mango avocado salsa even better with new flavors. Try adding tropical fruits like pineapple or papaya. These fruits bring a sweet twist and a fun texture. You can also mix in fresh herbs like mint or basil. These herbs give a fresh taste that brightens the salsa. Want more heat? You can swap out the jalapeño for a serrano or habanero pepper. These peppers can make your salsa spicy and exciting. Just remember to taste as you go! Making mango avocado salsa fit your diet is easy. If you're vegan, this recipe is already perfect. It has no animal products and is full of healthy fats. If you need a low-sodium option, skip the added salt. The fresh lime juice and other ingredients give plenty of flavor. For those with allergies, check each ingredient. You can always swap out foods that cause issues for you. This salsa is a versatile dish that everyone can enjoy. Try these ideas to make it your own! For the full recipe, check out the [Full Recipe]. To keep your mango avocado salsa fresh, put it in the fridge. Use an airtight container. This helps prevent the salsa from browning. The salsa stays good for about 2 to 3 days in the fridge. If you see browning, it’s best to toss it. Yes, you can freeze mango avocado salsa! However, know that the texture might change. For best results, freeze it without the avocado. This keeps the salsa tasting fresh. When you're ready to use it, transfer it to the fridge for a slow thaw. To freeze, use a freezer-safe container. Leave some space at the top for expansion. You can also use freezer bags. Squeeze out the air before sealing. When thawing, avoid using a microwave. This can make the salsa mushy. Instead, let it sit in the fridge overnight. Once thawed, mix it well before serving. If it seems dry, add a splash of lime juice for extra flavor. Enjoy your mango avocado salsa fresh and flavorful! How long does mango avocado salsa last? Mango avocado salsa lasts about 2 to 3 days in the fridge. To keep it fresh, store it in an airtight container. The avocado may brown, but it will still taste good. Can I make salsa ahead of time? You can make salsa ahead of time. Just prepare it a few hours before serving. This allows the flavors to mix well. If you make it too early, the avocado may brown. What can I substitute for cilantro? If you dislike cilantro, you can use parsley instead. Parsley adds a fresh taste without the strong flavor of cilantro. Green onions or basil are also good options. What are the health benefits of mangoes and avocados? Mangoes are high in vitamins A and C. They support your immune system and promote healthy skin. Avocados contain healthy fats and fiber. They help with digestion and heart health. Is mango avocado salsa good for meal prep? Yes, mango avocado salsa is great for meal prep. It adds flavor to many meals. Use it on tacos, salads, or grilled meats for a fresh twist. Can I use canned ingredients instead of fresh? You can use canned ingredients, but fresh tastes better. Canned mango or avocado may change the texture. If you must use canned, pick options with no added sugar or salt. Mango avocado salsa is fresh, tasty, and easy to make. We covered how to choose ripe ingredients, prepare them, and enhance flavors. Remember to rest your salsa for the best taste. You can adjust it to fit your diet or add new ingredients. Store leftovers properly to enjoy later. This salsa pairs well with many dishes and adds great flavor. Enjoy your cooking and try new flavor combinations!](https://joymealplan.com/wp-content/uploads/2025/07/4f0b2596-afb2-4ef7-a95d-26c50b7bed60-768x768.webp)
