%20(1).png)
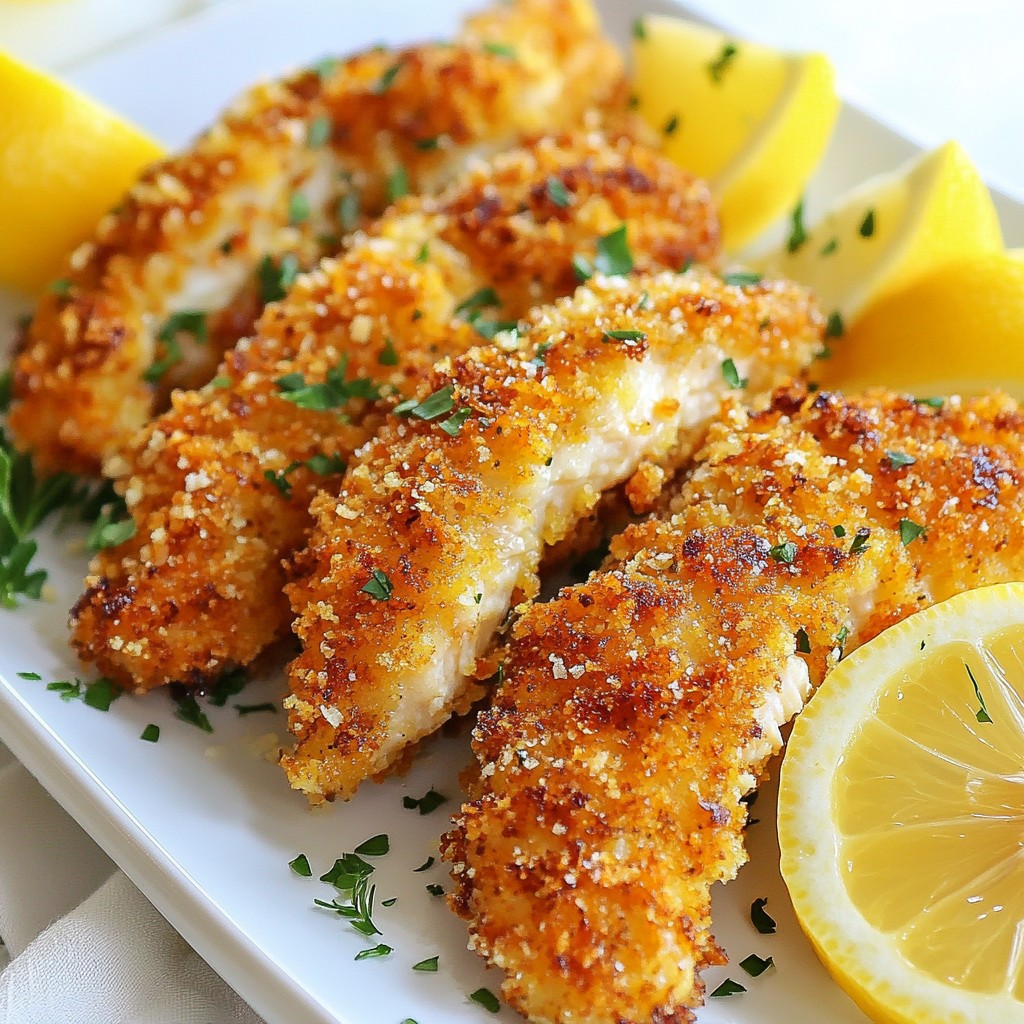
Craving a quick, tasty dinner? Try these crispy Lemon Garlic Chicken Tenders that you can whip up in just 15 minutes! Packed with zesty flavor and a satisfying crunch, this recipe offers a fast and easy meal solution for busy nights. With simple ingredients and step-by-step instructions, you’ll have dinner on the table in no time. Let’s dive into this deliciously fun cooking experience!
Why I Love This Recipe
- Fresh Flavors: The combination of lemon and garlic creates a bright, zesty flavor that elevates the chicken tenders to a whole new level.
- Easy to Make: This recipe involves simple steps and common ingredients, making it accessible for cooks of all skill levels.
- Healthier Option: Baking instead of frying keeps these tenders crispy while reducing the amount of added fat.
- Versatile Dish: These chicken tenders can be served as a main dish, appetizer, or even in a salad, making them perfect for any occasion.
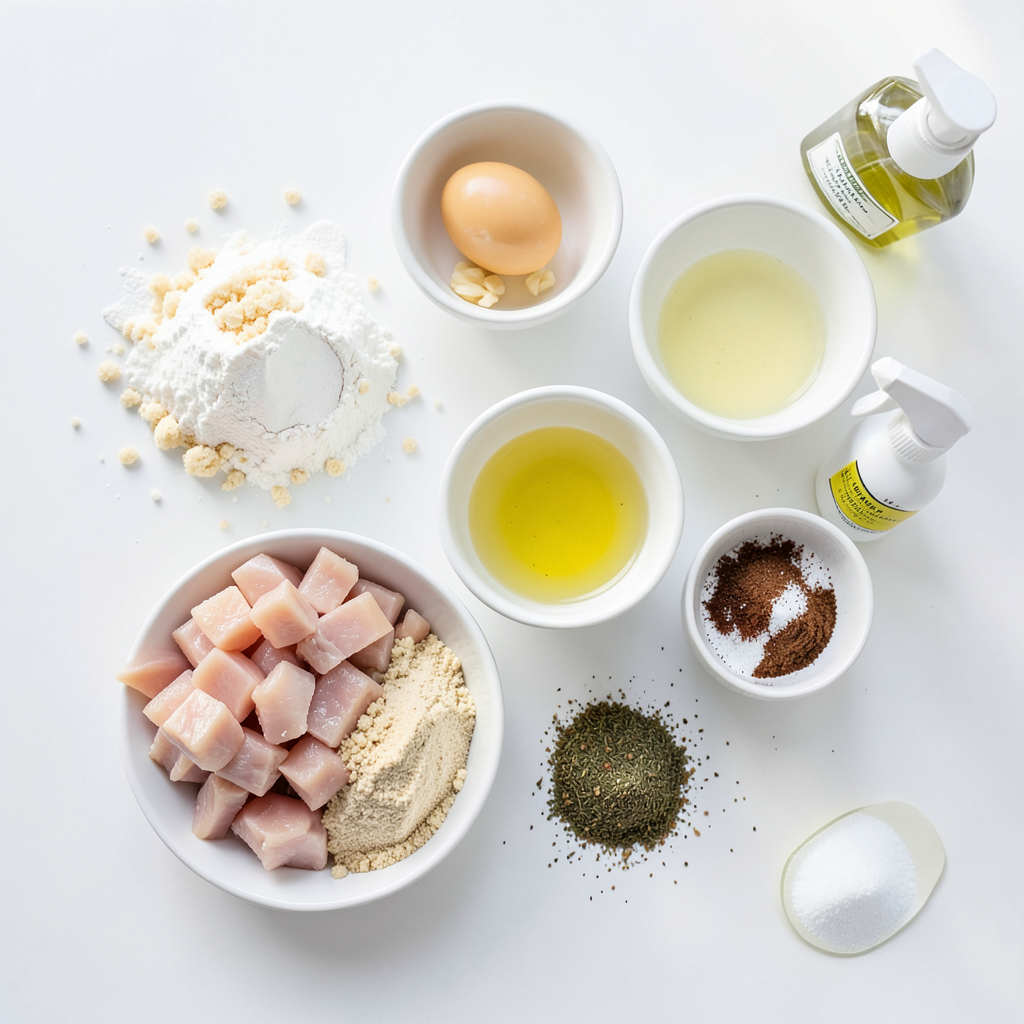
Ingredients
Essential Ingredients
- 1 lb chicken breast, cut into tenders
- 1 cup panko breadcrumbs
- 1/2 cup all-purpose flour
- 2 large eggs
Flavor Enhancers
- 2 tablespoons fresh lemon juice
- 2 cloves garlic, finely minced
- 1 teaspoon garlic powder
- 1 teaspoon dried oregano
Seasonings
- 1 teaspoon onion powder
- 1/2 teaspoon smoked paprika
- Salt and freshly ground black pepper to taste
In this recipe, the chicken breast serves as the main protein. I like using tenders because they cook quickly. Panko breadcrumbs give a great crunch that you can’t beat. All-purpose flour makes the coating stick well. The eggs help bind everything together nicely.
To elevate the flavor, I add fresh lemon juice and minced garlic. These ingredients create a bright, zesty taste. Garlic powder and dried oregano add depth to the flavor. When it comes to seasoning, onion powder and smoked paprika bring warmth and richness. Don’t forget to season with salt and black pepper for balance.
Each of these ingredients plays a key role in making the chicken tenders crispy and tasty. You can mix and match flavors, but I recommend sticking to this list for the best results.
Step-by-Step Instructions
Preparing the Chicken
Start by trimming any excess fat from the chicken tenders. This step helps keep the meat tender and juicy. Next, pat the chicken tenders dry with paper towels. This is key for getting that crispy finish when you cook them.
Dredging Station Setup
Set up three separate bowls for your dredging process. In the first bowl, mix all-purpose flour with a pinch of salt and pepper. This layer adds a nice base flavor. In the second bowl, whisk two eggs with fresh lemon juice and minced garlic. Make sure everything blends well. In the third bowl, mix panko breadcrumbs with garlic powder, onion powder, dried oregano, smoked paprika, and a little salt. Using separate bowls prevents any cross-contamination and keeps your coatings distinct.
Coating the Tenders
Now it’s time to coat the tenders. Take one tender and coat it in the seasoned flour first. Shake off any extra flour. Then dip it into the egg mixture, letting the excess drip off. Finally, roll the tender in the panko breadcrumbs, pressing down gently to ensure even coverage. This three-step process gives your chicken a great texture and flavor.
Baking the Tenders
Preheat your oven to 425°F (220°C). This high heat helps achieve that golden crispiness. Line a baking sheet with parchment paper to prevent sticking. Arrange the coated chicken tenders in a single layer on the sheet. Lightly spray the tops with olive oil. This helps them become crispy. Bake for about 12-15 minutes. Flip them halfway through to ensure they cook evenly. When they are golden brown, they are done!
Tips & Tricks
Achieving Maximum Crispiness
Drying the chicken is key for crispiness. After trimming, use paper towels to pat each tender dry. This step removes moisture, helping the coating stick better. Next, I recommend using olive oil spray. A light spray on top gives the tenders a golden color and a crunchy texture. You don’t need much, just enough to help them crisp up nicely.
Perfecting Cooking Time
Bake the chicken tenders for 12 to 15 minutes at 425°F (220°C). This high heat cooks them quickly while keeping them juicy. Halfway through, flip the tenders for even cooking. You know they are done when they turn golden brown and reach an internal temperature of 165°F (74°C). A meat thermometer helps ensure they are safe to eat.
Serving Suggestions
Dipping sauces can really elevate these chicken tenders. I love pairing them with honey mustard or a zesty ranch. These add extra flavor and fun. For presentation, serve the tenders on a wooden platter. Line it with fresh parsley and add lemon wedges around them. This not only looks great but adds a refreshing touch.
Pro Tips
- Use Fresh Ingredients: For the best flavor, use fresh lemon juice and minced garlic instead of bottled products. Fresh ingredients elevate the dish significantly.
- Achieve Maximum Crispiness: Ensure the chicken tenders are patted dry before coating. This step is crucial for achieving that desired crispy texture when baked.
- Experiment with Spices: Feel free to customize the seasoning in the panko breadcrumbs. Adding a pinch of cayenne pepper or Italian seasoning can give your tenders a unique twist.
- Let Them Rest: After baking, allow the chicken tenders to rest for a few minutes. This helps lock in the juices, keeping them moist and flavorful.
Variations
Flavor Variations
You can spice things up with cayenne pepper. Just add a pinch to your breadcrumb mix. This will give your chicken a nice kick. If you want something creamy, think about cheese. Try adding grated Parmesan to the breadcrumbs. It melts beautifully and adds a rich flavor.
Using Different Proteins
You don’t have to stick to chicken. Turkey tenders work just as well. They are lean and cook fast. For a twist, use fish fillets like cod or tilapia. They will crisp up nicely too. If you prefer vegetarian options, try eggplant or zucchini slices. Just slice them thin and follow the same dredging steps.
Serving with Sides
For a full meal, serve these tenders with fresh vegetable sides. Roasted asparagus or steamed broccoli pair nicely. You could also whip up a simple salad. A mix of greens with lemon vinaigrette complements the tenders well. Add cherry tomatoes and cucumbers for extra color and crunch.
Storage Info
Storing Leftovers
To keep your chicken tenders fresh, cool them first. Place them in an airtight container. This helps keep moisture out. Use a container that seals well. You can store them in the fridge for up to three days. If you want to keep them longer, freeze them. They can last up to three months in the freezer. Just make sure to label the container with the date.
Reheating Tips
When reheating, aim to keep them crispy. The oven is best for this. Preheat your oven to 375°F (190°C). Place the chicken tenders on a baking sheet. Heat them for about 10 minutes. Avoid using the microwave, as it makes them soggy. If you don't have an oven, use a skillet. Heat a little oil in the pan. Cook the tenders for a few minutes on each side until warm. Enjoy them as if they were just made!
FAQs
How can I make these tenders gluten-free?
To make these chicken tenders gluten-free, you can easily swap out a few ingredients. Use gluten-free flour in place of all-purpose flour. You can also choose gluten-free panko breadcrumbs. This way, you can enjoy a crunchy texture without the gluten.
Can I fry these chicken tenders instead of baking?
Yes, you can fry these chicken tenders! To do this, heat oil in a pan over medium-high heat. Coat the tenders as stated, then carefully place them in the hot oil. Fry each side for about 3-4 minutes until golden brown. Make sure to adjust the cooking time based on the thickness of the tenders.
What are some quick side dishes to serve with these tenders?
Pair these tenders with quick side dishes for a complete meal. Here are some ideas:
- Simple green salad: Toss lettuce, tomatoes, and cucumbers with olive oil.
- Steamed veggies: Use broccoli or green beans for a healthy touch.
- Fries: Quick oven-baked fries are always a favorite.
- Coleslaw: A crunchy slaw adds a nice contrast.
These sides will complement the lemon garlic flavor of the tenders perfectly!
This blog post covered how to make crispy, delicious chicken tenders. You learned about essential ingredients, step-by-step instructions, tips for perfect texture, and ways to customize your dish. I shared ideas for storing leftovers and reheating them properly.
Making chicken tenders is easy and fun. You can adjust the flavors to your taste. Enjoy trying new variations and serving them with your favorite sides!