Easy Caprese Pasta Salad Fresh and Flavorful Dish

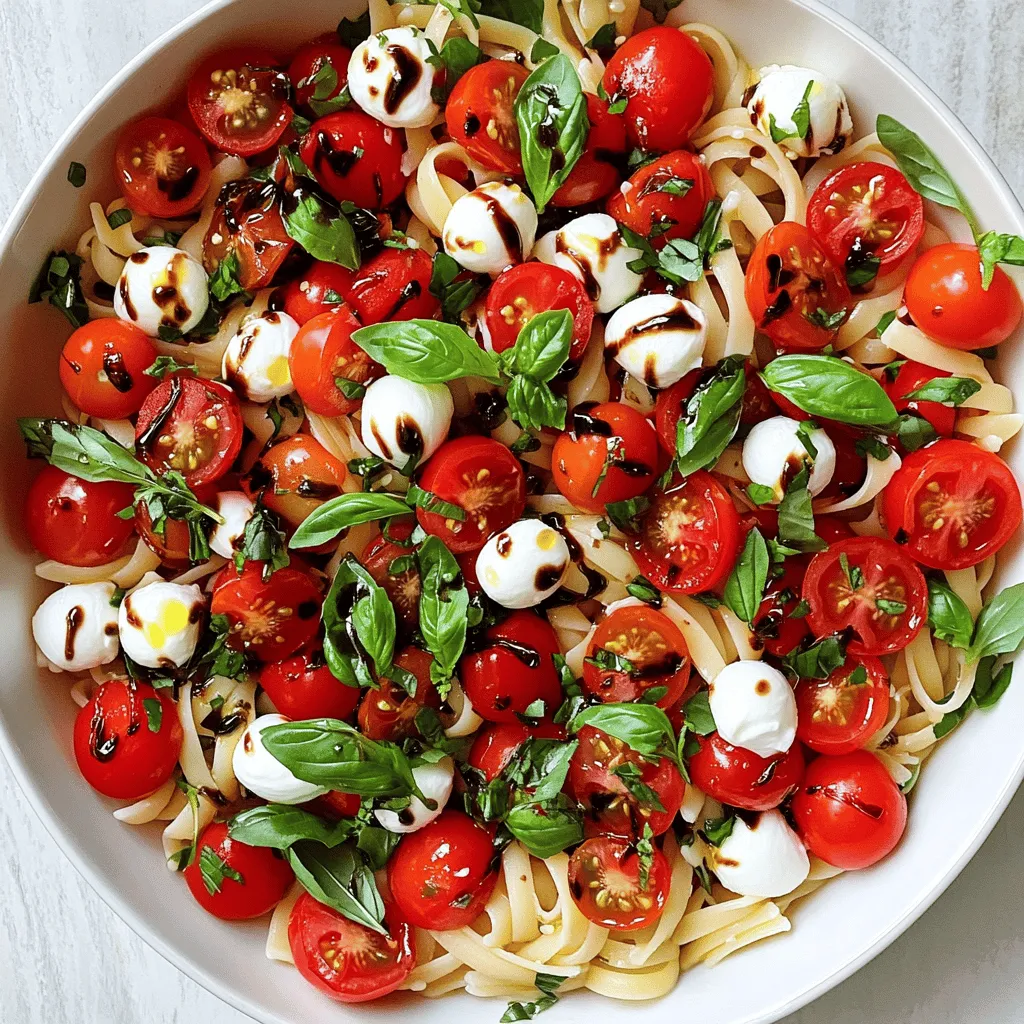
Are you ready to make a dish that bursts with flavor and freshness? I love the Easy Caprese Pasta Salad because it combines juicy tomatoes, creamy mozzarella, and fragrant basil. This dish is simple enough for any cook, yet impresses everyone at the table. Join me as I guide you through the ingredients and steps to create this delicious salad that fits any occasion!
Ingredients
Main Ingredients for Easy Caprese Pasta Salad
– 8 ounces of rotini or penne pasta
– 1 cup of cherry tomatoes, halved
– 1 cup of fresh mozzarella pearls
Additional Ingredients
– 1 cup of fresh basil leaves, roughly torn
– 4 tablespoons of high-quality extra virgin olive oil
– 2 tablespoons of balsamic glaze
Seasoning and Extras
– Fine sea salt and freshly cracked black pepper, to taste
– 1 teaspoon of Italian seasoning (optional)
When I make Easy Caprese Pasta Salad, I focus on fresh and vibrant ingredients. The rotini or penne pasta serves as the base of this dish. Both pasta types hold sauce well, making each bite flavorful.
The cherry tomatoes add a burst of sweetness. Halving them allows their juices to mix with the other ingredients. Fresh mozzarella pearls provide a creamy texture and rich taste. They melt in your mouth and pair well with the tomatoes.
Next, I add fresh basil leaves. Their aroma is uplifting, and they enhance the dish’s flavor. I prefer to tear the leaves roughly. This method releases their oils and adds a rustic touch.
I use high-quality extra virgin olive oil for its rich taste. It coats the pasta and adds depth. Balsamic glaze brings a sweet and tangy element. It ties all the flavors together beautifully.
For seasoning, I use fine sea salt and freshly cracked black pepper. You can adjust these to your liking. If you want an extra kick, add Italian seasoning. Its herbs complement the salad well and enhance the overall taste.
This dish is simple yet full of flavor. The ingredients shine through, making every bite a delight.
Step-by-Step Instructions
Preparing the Pasta
To start, boil a large pot of salted water. Use enough salt to make the water taste like the sea. Once the water is boiling, add 8 ounces of rotini or penne pasta. Cook the pasta until it is al dente. This usually takes about 8 to 10 minutes. Check the pasta a minute or two early to avoid overcooking. After cooking, drain it in a colander. Then rinse the pasta under cold water. This cools it down fast and stops the cooking.
Combining Ingredients
In a large bowl, mix 1 cup of halved cherry tomatoes, 1 cup of fresh mozzarella pearls, and 1 cup of roughly torn fresh basil leaves. This colorful mix is the heart of your salad. Next, carefully fold in the cooled pasta. Be gentle so you do not crush the ingredients. You want everything mixed well but still looking nice.
Dressing the Salad
Drizzle 4 tablespoons of extra virgin olive oil and 2 tablespoons of balsamic glaze over the salad. Season it with fine sea salt and freshly cracked black pepper to taste. If you want, add 1 teaspoon of Italian seasoning for extra flavor. Toss everything gently to combine the flavors. Taste your salad and adjust the seasonings if needed. Let it sit for 10 minutes at room temperature. This time allows the flavors to mix beautifully.
Tips & Tricks
Perfecting the Pasta
To achieve the perfect al dente texture, start with salted boiling water. This adds flavor to the pasta. Cook the pasta according to the package directions, usually 8 to 10 minutes. Check it a minute or two early to avoid overcooking. You want it firm but not hard.
Timing for rinsing pasta is key. Once the pasta is done, drain it in a colander. Rinse it under cold running water right away. This stops the cooking and keeps the pasta from getting mushy. You want that nice bite in every forkful.
Flavor Enhancements
To boost flavor, try adding fresh herbs like oregano or parsley. A pinch of crushed red pepper can add some heat. You can also mix in garlic for a savory kick. These small changes can make a big impact.
For the best balsamic glaze, choose a high-quality brand. A thicker glaze will coat the pasta better. You can also make your own by simmering balsamic vinegar until it reduces. It will become sweet and syrupy, adding depth to your salad.
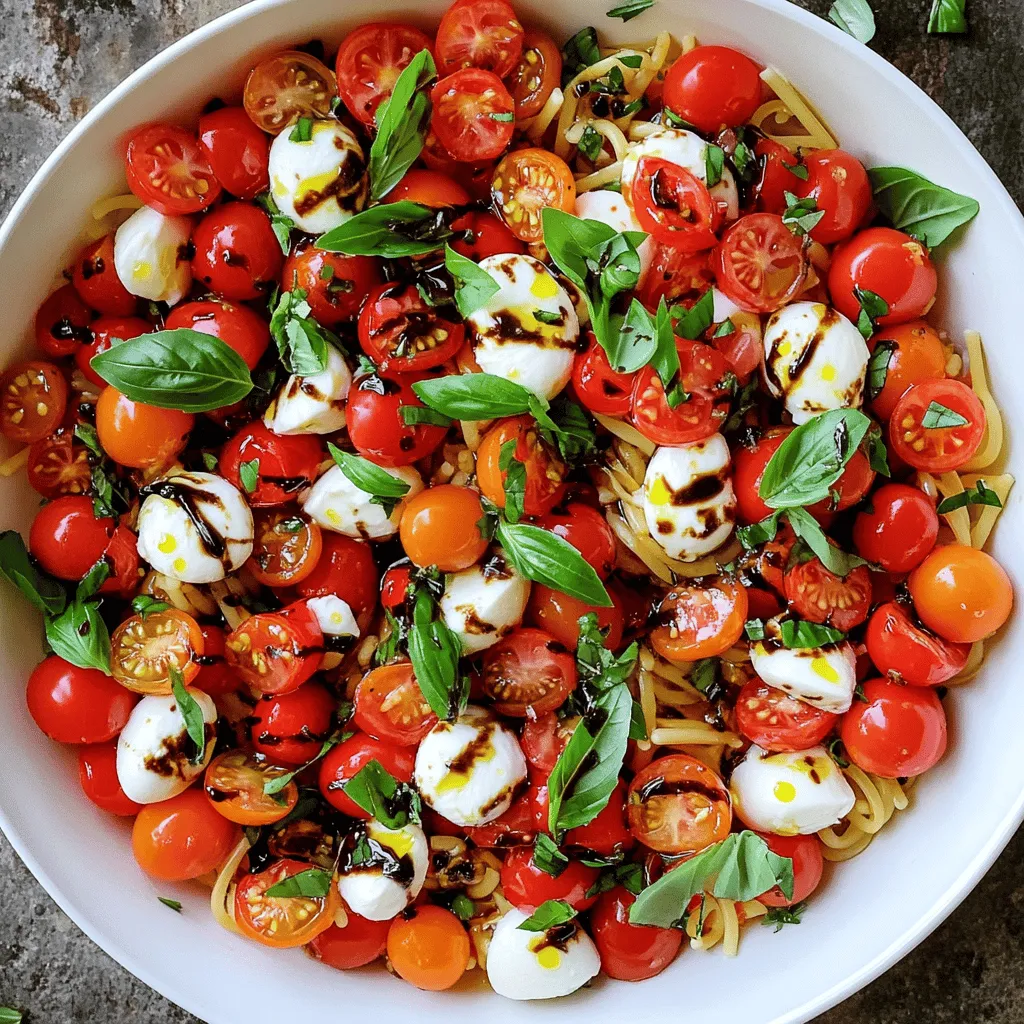
Presentation Ideas
Serving suggestions are important for making your dish stand out. Use a large, bright bowl to show off the colorful pasta. Layer the ingredients for a beautiful display. You can also serve it on a wooden cutting board for a rustic look.
Garnishing techniques can elevate your salad. Add fresh basil leaves on top for a pop of green. Drizzle a little extra balsamic glaze just before serving. This final touch makes your dish not only taste great but look fantastic too.

Variations
Seasonal Additions
You can change your Caprese pasta salad with seasonal veggies. In summer, add fresh zucchini or bell peppers. In fall, try roasted butternut squash or sweet potatoes. Each veggie brings a new taste and color. You can also swap the mozzarella for other cheeses. Try feta for a tangy kick or goat cheese for creaminess. Each cheese will change the flavor in fun ways.
Protein Boost
Want to make your dish heartier? Add grilled chicken or shrimp. Simply season and grill your protein, then slice it up and mix it in. For a vegetarian option, try chickpeas or black beans. They add texture and protein without meat. You can also use tofu for a plant-based boost. Just marinate it, then sauté until golden.
Gluten-Free Options
If you need gluten-free pasta, many brands are out there. Look for brown rice or chickpea pasta for a great texture. When using gluten-free pasta, cook it a bit less to avoid mushiness. You can still enjoy a tasty salad while meeting dietary needs. Adjust the recipe as needed to keep the flavors balanced.
Storage Info
Storing Leftovers
To keep your Easy Caprese Pasta Salad fresh, store it in an airtight container. Glass containers work great as they do not stain or hold odors. You can use plastic containers too, but ensure they seal tightly. If you have leftover dressing, store it separately to keep the salad crisp.
Shelf Life
In the fridge, your salad can last for about three days. After that, it may lose its freshness. Look for signs of spoilage like a sour smell or slimy tomatoes. If you see any mold, it’s best to toss it out.
Reheating Tips
You can enjoy this salad cold or at room temperature. If you prefer it warm, gently heat it in a pan on low heat. Avoid high heat to keep the pasta from becoming mushy. Just warm it enough to take the chill off, and it’s ready to serve. For the best flavor, serve it fresh!
FAQs
What is a Caprese salad?
A Caprese salad is a simple dish from Italy. It features fresh tomatoes, mozzarella cheese, and basil. You layer these ingredients and drizzle them with olive oil. It’s colorful and bright, showcasing the flavors of fresh ingredients. The classic version uses ripe tomatoes, creamy mozzarella, and fragrant basil. Each bite delivers a taste of summer, making it a favorite.
Can I make this salad ahead of time?
Yes, you can make this salad ahead of time! To keep it fresh, prepare the pasta and mix it with the other ingredients just before serving. If you must prep it early, store the salad in the fridge for up to a day. Keep the dressing separate until you are ready to eat. This way, the pasta remains firm and the flavors stay bright.
How do I keep the pasta from sticking together?
To prevent the pasta from sticking, rinse it with cold water right after cooking. This cools the pasta quickly and stops the cooking process. Make sure to use plenty of water when boiling. Stir the pasta occasionally while it cooks. This also helps to keep it from clumping. For an extra tip, toss the cooled pasta with a little olive oil before mixing it with the salad. This will help keep it separated and delicious!
In this blog post, we explored how to make a tasty Caprese pasta salad. We covered the main ingredients, step-by-step instructions, and helpful tips. You learned about variations, storage, and common questions.
This dish is simple and fun to prepare. It’s perfect for gatherings or quick meals. Enjoy the fresh flavors and get creative with your ingredients. With these tips, you can make a delightful salad that everyone will love. Happy cooking!


![- 1 pre-made phyllo pastry sheet (about 8-10 sheets) or one ready-made pie crust - 4 medium ripe tomatoes, thinly sliced - 1 cup fresh basil leaves, roughly chopped - 1 cup ricotta cheese - 1 cup shredded mozzarella cheese - 2 tablespoons extra virgin olive oil, plus additional for brushing - 1 teaspoon garlic powder - Salt and freshly cracked black pepper to taste - Optional: Balsamic glaze for drizzling When I create this fresh tomato basil tart, I love to use simple, fresh ingredients. The star is the ripe tomatoes. They bring bright flavor and juicy texture. I choose tomatoes that are firm but not hard. Their color should be vibrant. Basil is another key player. Fresh basil adds a sweet and peppery taste. I prefer to roughly chop it to release its oils. This way, every slice of the tart bursts with flavor. For creaminess, I use ricotta cheese. It adds a rich and smooth layer. I mix it with garlic powder, salt, and pepper. This mix gives a nice seasoning base. Next, mozzarella cheese adds a lovely stretch. It melts beautifully and gives that gooey texture we crave. Together, they make the tart creamy and savory. I also use extra virgin olive oil. It not only adds flavor but helps the crust brown nicely. A drizzle before baking makes a big difference. Lastly, I sometimes add balsamic glaze. It gives a sweet and tangy touch. It’s optional, but I find it elevates the dish. Each ingredient plays a role in making this tart special. When you gather these items, you set the stage for a delightful meal. Check out the [Full Recipe] for a step-by-step guide to bring this tart to life! 1. Preheating the oven Start by preheating your oven to 375°F (190°C). This step is key to getting a nice, crispy crust. 2. Preparing the pastry If using phyllo pastry, layer 4-5 sheets in a tart pan. Brush a thin layer of olive oil between each sheet. This adds flavor and helps create a crunchy texture. If you opt for a pie crust, just place it in the tart pan and crimp the edges for a nice look. 3. Making the ricotta mixture In a mixing bowl, combine ricotta cheese, garlic powder, salt, and pepper. Use a spatula to mix until smooth. This mixture adds creaminess to the tart. 1. Layering tomatoes and cheese Spread the ricotta mixture evenly over the crust. Then, layer the sliced tomatoes on top. Overlap the slices slightly for a pretty design. After the tomatoes, sprinkle shredded mozzarella cheese over them. Finally, add the chopped basil for a fresh taste. 2. Drizzling olive oil Drizzle the remaining olive oil over the top of the tart. This helps the tart brown nicely and boosts flavor. 1. Baking duration and tips Place the tart in your preheated oven. Bake for 25-30 minutes. Look for a golden brown crust and bubbly cheese. This means it’s nearly ready! 2. Cooling period before slicing Once baked, remove the tart from the oven. Let it cool on a wire rack for a few minutes. This cooling time helps set the filling, making slicing easier. Check out the Full Recipe to get all the details you need! For the best results, set your oven to 375°F (190°C). This temperature helps the tart cook evenly and creates a nice, crisp crust. To check for doneness, look for a golden-brown crust and bubbly cheese. The cheese should be slightly browned, adding flavor and texture. If you see these signs, your tart is ready! Garnishing makes your dish pop. Slice the tart into wedges and serve on a rustic wooden board. Add fresh basil leaves on top for a vibrant touch. You can also drizzle balsamic glaze over the tart right before serving. It adds a sweet and tangy flavor that enhances the dish. One mistake is ending up with a soggy crust. To prevent this, always brush the pastry with olive oil or egg wash before adding toppings. Another common issue is uneven cheese melting. Spread the cheese evenly and avoid overloading one side. This ensures every bite is cheesy and delicious. {{image_4}} To make your Fresh Tomato Basil Tart even more exciting, try using different cheeses. Instead of ricotta, you can use goat cheese or feta. Both add a unique tang. For mozzarella, consider using provolone or a sharp cheddar. These swaps change the taste while keeping it delicious. You can also play with herbs and spices. Instead of basil, use fresh oregano or thyme for a new flavor. A pinch of red pepper flakes can add a little heat. Just remember, keep the balance so it doesn't overpower the fresh tomatoes. Seasonal vegetables can enhance your tart. In summer, add zucchini or bell peppers for a colorful twist. In fall, roasted butternut squash works well. These veggies bring new flavors and textures to your dish. Don't shy away from incorporating different flavors. For instance, a sprinkle of smoked paprika gives a lovely depth. You could even add sun-dried tomatoes for a rich, sweet touch. These tweaks keep the tart fresh and exciting all year round. If you need vegan or gluten-free options, it’s easy to adapt. For a vegan tart, swap the cheeses for cashew cream or tofu. These provide creaminess without dairy. Use gluten-free pie crust or phyllo pastry for a gluten-free option. These variations allow everyone to enjoy this dish. You can create a tart that fits any diet without losing flavor. Check out the Full Recipe for more ideas! To keep your fresh tomato basil tart tasty, store leftovers properly. First, let the tart cool completely. Wrap it in plastic wrap or place it in an airtight container. This helps keep flavors and moisture in. If you prefer, you can also use aluminum foil for wrapping. Store it in the fridge for up to three days for the best taste. When ready to enjoy your leftover tart, preheat your oven to 350°F (175°C). Place the sliced tart on a baking sheet for even heating. Bake for about 10-15 minutes until it's warm. This method keeps the crust crisp and the cheese melty. To avoid sogginess, don’t microwave it. Microwaving can make the crust soft and chewy, which isn’t ideal. Enjoy your delicious tart again! To make a tomato basil tart from scratch, you can choose between two crust options. - Homemade crust: 1. Combine flour, butter, and salt in a bowl. 2. Mix until crumbly. 3. Add cold water, one tablespoon at a time, until the dough forms. 4. Roll out the dough and fit it into your tart pan. 5. Chill the crust for about 30 minutes before filling. - Store-bought crust: Use a pre-made phyllo pastry or ready-made pie crust. This saves time and effort. Simply place it in your tart pan and crimp the edges. I often use phyllo for a crisp texture, but a pie crust works great too. Each option gives a unique taste. Yes, you can prepare the tart in advance. Here are some tips: - Make the crust: You can bake the crust a day ahead. Cool it and store it in the fridge. - Prep the filling: You can mix the ricotta with seasonings a day before. Keep it in the fridge until you're ready to assemble. - Assemble and bake: Assemble the tart a few hours before serving. Bake it fresh to enjoy the best flavors. Store leftovers in an airtight container in the fridge. They stay good for 2-3 days. This tart pairs well with various side dishes and drinks. - Complementary side dishes: - A simple green salad with vinaigrette. - Roasted vegetables for added flavor. - Garlic bread for a comforting touch. - Drinks: - A chilled white wine, like Sauvignon Blanc. - Fresh lemonade for a refreshing option. These options enhance your meal and make it even more enjoyable. Check out the Full Recipe for more details on making this dish! You can make a tasty tomato basil tart with simple steps. We covered key ingredients, like fresh tomatoes and phyllo pastry. The baking process helps bring out rich flavors, while our tips keep your crust crispy. I shared several ways to adapt the tart for diets and seasons. Lastly, proper storage keeps leftovers fresh, making them easy to enjoy later. Dive in, try this recipe, and create your own delicious variations. Enjoy the process—it’s all about making a meal you love!](https://joymealplan.com/wp-content/uploads/2025/07/c4443384-77e0-40e2-9fba-17a466e29922-768x768.webp)
![For this crispy air fryer chicken wings recipe, you'll need: - 2 pounds of chicken wings The key to great flavor comes from these seasoning ingredients: - 1 tablespoon baking powder - 1 teaspoon garlic powder - 1 teaspoon onion powder - 1 teaspoon smoked paprika - 1 teaspoon salt - ½ teaspoon black pepper - ½ teaspoon cayenne pepper (adjust to your spice preference) - 1 tablespoon olive oil These spices create a delicious mix. The baking powder helps the skin get crispy. The garlic and onion powders add nice depth. The smoked paprika brings warmth and color. Salt and pepper enhance all the flavors. If you like heat, add more cayenne! To make your wings even more appealing, consider this optional garnish: - Fresh herbs (such as parsley or cilantro) Fresh herbs add color and a burst of freshness. You can sprinkle them on top right before serving. This small touch makes a big difference in presentation. For the full recipe, check out the entire article! Start with fresh chicken wings. You need about 2 pounds for this recipe. Pat them dry with paper towels. This step helps remove moisture. Less moisture means crispier skin. Make sure to get every wing dry. In a large bowl, mix your seasonings. Use 1 tablespoon of baking powder. Add 1 teaspoon each of garlic powder, onion powder, and smoked paprika. Toss in 1 teaspoon of salt, ½ teaspoon of black pepper, and ½ teaspoon of cayenne pepper. Mix well. This blend gives the wings great flavor. Next, place the chicken wings in the bowl with the seasoning. Drizzle 1 tablespoon of olive oil over them. Toss everything together. Make sure each wing is coated well. Preheat your air fryer to 390°F (200°C) for about 5 minutes. Once it's hot, arrange the wings in a single layer in the basket. If your air fryer is small, cook them in batches. Cook the wings for 25-30 minutes. Halfway through, shake the basket gently. This helps them cook evenly and get crispy. For extra crispiness, raise the temperature to 400°F (204°C) for the last 5 minutes. When done, the wings should be golden brown and crispy. Carefully take them out and let them rest for a few minutes. Enjoy your crispy air fryer chicken wings right away! For the full recipe, check the earlier sections. To make your wings extra crispy, ensure they are very dry before cooking. Pat them dry with paper towels to remove moisture. Adding baking powder helps create a crunchy texture. It raises the pH of the skin, allowing it to brown better. For even more crispiness, increase the air fryer temperature to 400°F for the last five minutes. Cooking time can change based on wing size and air fryer model. For small wings, 25 minutes should be enough. Larger wings may need 30 to 35 minutes. Always check for doneness. The internal temperature should reach 165°F for safe eating. You can adjust cooking times slightly for your personal preference on crispiness. Avoid overcrowding the air fryer basket. This helps air circulate around each wing, ensuring even cooking. If you have many wings, cook them in batches. Shaking the basket halfway through cooking promotes even browning. Always preheat your air fryer for better results. Following these steps will help you get the best crispy wings. For the [Full Recipe], refer to the earlier section. {{image_4}} If you love heat, try making spicy Buffalo wings. Start with the base recipe. Before seasoning, toss the wings in hot sauce. You can use your favorite brand. After cooking, toss the wings in more hot sauce for an extra kick. Serve with blue cheese or ranch dressing. This adds a cool contrast to the spice. For a unique twist, go Asian-inspired. Mix soy sauce, ginger, and garlic into the seasoning. Instead of cayenne, use five-spice powder. This will give your wings a sweet and savory taste. After frying, drizzle with sesame oil and sprinkle sesame seeds. This adds a nice crunch and flavor pop. If you prefer fresh flavors, try this herb and lemon zest infusion. Add fresh herbs like thyme or rosemary to the seasoning mix. Zest one lemon and mix it in for brightness. This will make the wings taste light and refreshing. Serve with a lemon wedge for extra zing. These variations make it easy to switch things up. Enjoy your crispy air fryer chicken wings with these fun flavors! For the complete recipe, check out the Full Recipe section above. You can store leftover crispy air fryer chicken wings in the fridge. Place them in an airtight container. They will stay fresh for up to three days. To keep them crispy, avoid stacking them too high. To reheat, use your air fryer. Set it to 350°F (175°C). Heat the wings for about 5-7 minutes. This method will help retain their crispiness. You can also use a microwave, but they may lose some crunch. You can freeze the wings if you have extra. Place them in a freezer-safe bag or container. They can last for up to three months in the freezer. To thaw, move them to the fridge overnight. Reheat them in the air fryer when ready to enjoy again. For the full recipe, check out the section above! To make air fryer chicken wings extra crispy, start by drying them well. Pat them with paper towels to remove moisture. Next, use baking powder in your seasoning mix. This ingredient helps create that crunchy skin. Air fry them at a high temperature, and remember to shake the basket halfway through. For even more crispiness, raise the temperature in the last few minutes. The best temperature for cooking chicken wings in an air fryer is 390°F (200°C). This heat cooks the wings evenly and helps them become crispy. If you want them super crispy, boost the temperature to 400°F (204°C) for the final few minutes. This method ensures delicious, golden brown wings every time. Yes, you can cook frozen chicken wings in the air fryer. It’s easy and a real time-saver. Just add a few extra minutes to the cooking time. Start by cooking them at 400°F (204°C) for about 30-35 minutes. Shake the basket halfway to ensure even cooking. This method gives you crispy wings straight from the freezer! For the full recipe, check out the previous section. In this blog post, we covered how to make tasty air fryer chicken wings. We discussed ingredients, seasoning, and cooking steps. I shared tips to make your wings extra crispy and how to store them. You can even try different flavors like buffalo or Asian-inspired wings. To wrap up, air frying is a fun, easy way to enjoy wings. Now, get cooking and enjoy your delicious wings!](https://joymealplan.com/wp-content/uploads/2025/06/f7d8b647-e810-4c45-9fe8-50cd60d2e295-768x768.webp)


