Easy Chicken Quesadillas Simple and Delicious Meal

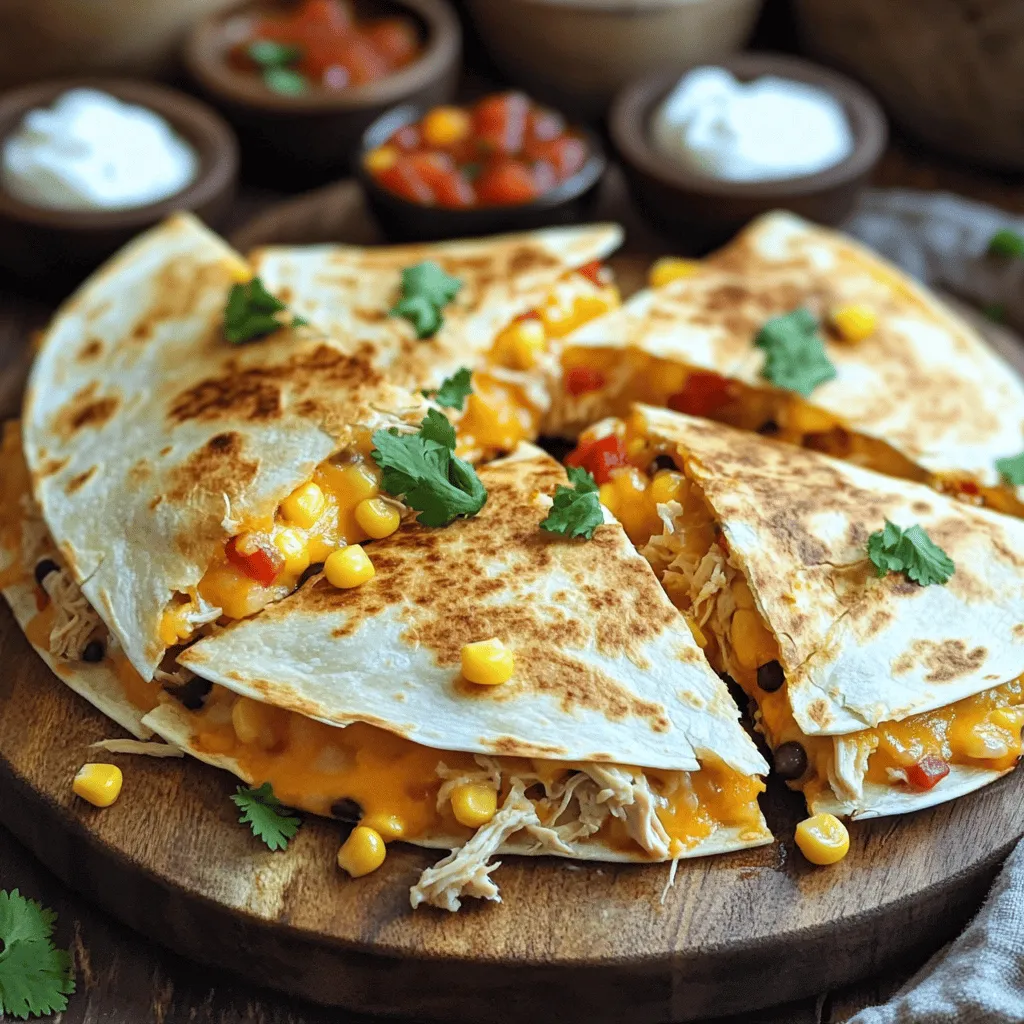
Craving a quick, tasty meal? Look no further! My Easy Chicken Quesadillas recipe is packed with flavor and super simple to make. You’ll find everything you need to whip up this crowd-pleaser in no time. From selecting the right ingredients to cooking tips that make your quesadillas perfectly crispy, I promise you’ll impress your family and friends with minimal effort. Let’s dive into deliciousness!
Ingredients
List of Key Ingredients
For easy chicken quesadillas, gather these main ingredients:
– 2 cups cooked chicken, shredded
– 1 cup shredded cheddar cheese
– 1 cup shredded Monterey Jack cheese
– 1/2 cup corn (canned or frozen)
– 1/2 cup black beans, rinsed and drained
– 1/4 cup red bell pepper, finely diced
– 1/4 cup green onion, chopped
– 1 teaspoon ground cumin
– 1 teaspoon chili powder
– Salt and freshly ground black pepper to taste
– 4 large flour tortillas
– 2 tablespoons olive oil
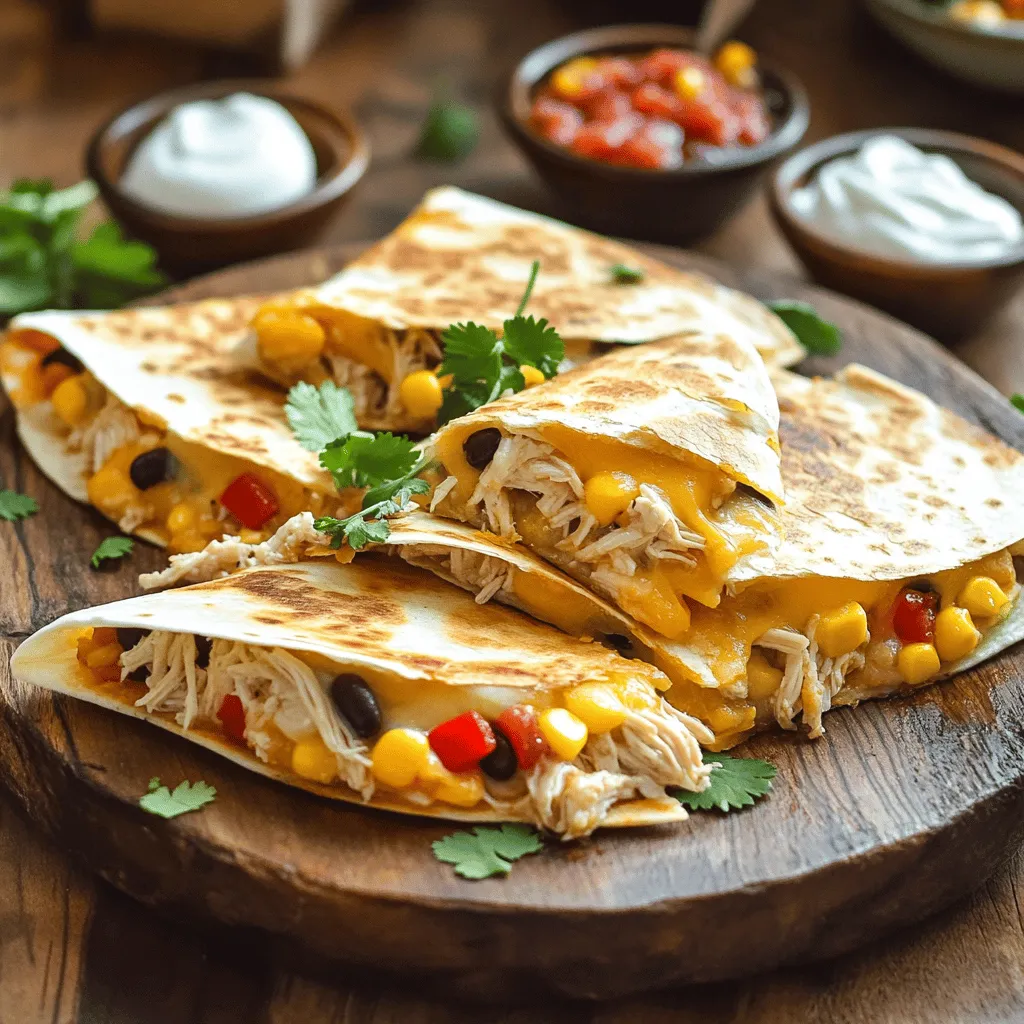
These ingredients come together to create a flavorful mix. The chicken provides protein, while the cheeses add creaminess. The peppers and onions bring color and crunch.
Optional Ingredients for Added Flavor
You can enhance your quesadillas with these optional ingredients:
– Salsa for dipping
– Sour cream for a cool contrast
– Fresh cilantro for garnish
– Jalapeños for heat
Adding salsa or jalapeños can give your dish a kick. Feel free to get creative with your toppings!
Nutritional Information per Serving
Each serving of these chicken quesadillas provides essential nutrients. Here’s a quick overview:
– Calories: ~350
– Protein: 25g
– Carbohydrates: 30g
– Fat: 15g
– Fiber: 5g
This meal is not only delicious but also a good source of protein. Enjoy it as a satisfying lunch or dinner option.
Step-by-Step Instructions
Preparation of Chicken Quesadilla Mixture
First, gather all your ingredients. In a large bowl, mix the shredded chicken, cheddar cheese, Monterey Jack cheese, corn, black beans, diced red bell pepper, and chopped green onion. Make sure everything is well combined. This ensures each bite is packed with flavor. Next, add the ground cumin, chili powder, salt, and pepper. Stir again. This step brings out the best tastes in your mixture.
Cooking the Quesadillas
Heat a large skillet over medium heat. Add 1 tablespoon of olive oil, letting it coat the skillet. Place one tortilla in the skillet. Spread half of the chicken mixture over one half of the tortilla. Fold the other half over, making a half-moon shape. Cook for 3-4 minutes until the bottom is golden brown and the cheese melts. Flip it carefully and cook for another 3-4 minutes. Repeat this with the other tortillas and filling. You can add more olive oil as needed.
Serving Suggestions and Presentation Tips
Once cooked, cut each quesadilla into wedges. Serve them warm on a bright platter. For a special touch, sprinkle chopped cilantro on top. Place small bowls of salsa and sour cream on the side for dipping. This makes your meal look great and taste even better. Enjoy your easy chicken quesadillas with friends or family!
Tips & Tricks
How to Achieve Perfectly Crispy Quesadillas
To get crispy quesadillas, use medium heat. This lets the cheese melt without burning the tortilla. Use enough oil in the pan. Olive oil gives a nice flavor and crispness. Make sure to flip them carefully. A good spatula helps avoid spills. Cook until both sides are golden brown. This takes about 3-4 minutes per side.
Common Mistakes to Avoid
One big mistake is overfilling the quesadilla. If it’s too full, it can fall apart. Also, don’t skimp on the oil. A dry quesadilla won’t get that golden crisp. Avoid cooking on high heat. This can burn the outside before the cheese melts. Lastly, let the quesadilla sit for a minute before cutting. This helps keep the filling in place.
Recommended Cooking Tools
For making quesadillas, a non-stick skillet is best. It helps prevent sticking and makes flipping easy. Use a sharp knife or pizza cutter for slicing. This gives clean cuts for serving. A spatula with a flat edge is great for flipping. Lastly, have a mixing bowl ready for the filling. This keeps your workspace neat and organized.

Variations
Vegetarian Version of Chicken Quesadillas
You can easily make a tasty vegetarian quesadilla. Just swap the chicken for veggies. Use ingredients like mushrooms, zucchini, or spinach. You can add more cheese for extra yum. Consider black beans for protein and fiber. This version keeps the quesadilla filling and satisfying.
Different Cheese Combos to Try
Cheese is key for great quesadillas. You can mix and match cheeses for unique flavors. Try pepper jack for a spicy kick. Feta adds a tangy twist, while mozzarella gives a gooey texture. Mix cheddar with gouda for a smoky taste. Experiment with your favorites to find the perfect blend.
Spicy Additions for Extra Flavor
If you love heat, spice it up! Add jalapeños or red pepper flakes to the filling. You can also try a spicy salsa or hot sauce for dipping. A drizzle of chipotle sauce gives a smoky flavor. Don’t be afraid to adjust the spice to suit your taste. Enjoy the heat!
Storage Info
How to Store Leftover Quesadillas
To store leftover quesadillas, let them cool down first. Once cool, wrap each quesadilla in plastic wrap or aluminum foil. Place them in an airtight container. This keeps them fresh and prevents them from drying out. Store the container in the fridge for up to three days.
Reheating Tips for Best Texture
When you reheat your quesadillas, aim for a crispy texture. You can use a skillet for this. Heat it over medium heat and add a little oil. Place the quesadilla in the skillet and heat for about 2-3 minutes on each side. This method brings back the crunchiness. You can also microwave them, but they may get soft. If you choose the microwave, place a paper towel under the quesadilla to absorb moisture.
Freezing Quesadillas for Later Use
Freezing is a great option if you want to save quesadillas for later. First, wrap each one in plastic wrap. Then, place them in a freezer bag. Remove as much air as possible before sealing. You can freeze them for up to three months. When you want to eat them, thaw in the fridge overnight. Then, reheat in a skillet for the best taste and texture. Enjoy your easy chicken quesadillas anytime!
FAQs
Can I use raw chicken for this recipe?
No, using raw chicken is not safe for this recipe. You need to cook the chicken first. This ensures it reaches a safe temperature. Cooked chicken also mixes better with other ingredients. You can use leftover chicken or rotisserie chicken to save time.
How can I make this recipe gluten-free?
To make this recipe gluten-free, choose gluten-free tortillas. Many stores sell these options now. Make sure to check labels to ensure they are safe. You can still enjoy the same great flavors without gluten.
What sides pair well with Quesadillas?
Here are some tasty sides for your quesadillas:
– Fresh guacamole
– Salsa
– Mexican rice
– Refried beans
– A simple green salad
These sides add flavor and variety to your meal. You can mix and match based on what you like.
You now have a full guide to making chicken quesadillas. We covered key ingredients, cooking steps, and tips for crispiness. Plus, you learned variations to match your taste. With proper storage, you can enjoy leftovers easily.
Cooking doesn’t have to be hard. Stick to these steps, and you’ll impress everyone. Enjoy your tasty quesadillas and make them your own!


![- 6 large eggs - 1 cup fresh spinach, roughly chopped - 1/2 bell pepper, diced - 1/2 cup cherry tomatoes, halved - 1/4 cup red onion, finely minced - 1/2 cup feta cheese, crumbled - Seasonings and oil These ingredients make a tasty breakfast that is also healthy. The eggs provide protein, while the veggies add color and nutrients. You can use any bell pepper you like for a fun twist. You can swap out the spinach for other greens like kale or Swiss chard. Zucchini and mushrooms also work well in this recipe. If feta isn’t your favorite, try cheddar or goat cheese for a different taste. Each muffin has about 100 calories. They offer around 8 grams of protein, 7 grams of fat, and 2 grams of carbs. This makes them a great option for a filling breakfast. If you want the full recipe, check out [Full Recipe]. 1. Preheat your oven to 350°F (175°C). This ensures even cooking. 2. Grease your muffin tin using cooking spray or olive oil. This helps the muffins release easily. 1. In a large bowl, crack the 6 eggs. Whisk them vigorously until mixed well. 2. Fold in the chopped spinach, diced bell pepper, halved cherry tomatoes, and minced red onion. Make sure the veggies spread evenly. 3. Add the crumbled feta cheese for extra flavor. Mix in garlic powder, dried oregano, salt, and black pepper. Stir until everything is well combined. 1. Carefully pour the egg-veggie mix into the muffin tin. Fill each cup about three-quarters full. 2. Place the muffin tin in the oven and bake for 18-20 minutes. Check for doneness by pressing lightly on the tops. They should feel firm and slightly golden. 3. After baking, let the muffins cool in the tin for about 5 minutes. Use a butter knife to run around the edges. This helps them come out easily. Then, transfer them to a wire rack to cool completely. For the full recipe, check the earlier sections. Enjoy these tasty muffins as a quick breakfast! To get the perfect texture in your veggie muffins, cook them until they are just firm. If you bake them too long, they can become dry. Use a toothpick to check doneness. Stick it in the center, and if it comes out clean, they are ready. Do not overfill the muffin cups. Fill them about three-quarters full. This gives the muffins room to rise without spilling over. If you overfill, you will have a messy oven and uneven muffins. To keep your muffins fresh, store them in an airtight container in the fridge. They can last up to a week this way. If you want to keep them longer, consider freezing them. Wrap each muffin in plastic wrap and place them in a freezer bag. They will last for about three months in the freezer. When you want to enjoy a muffin, take it out and reheat it. You can warm it in the microwave for about 30 seconds or until hot. If you prefer a crispy edge, heat it in an oven at 350°F for 10 minutes. These muffins pair well with many toppings. Try them with fresh salsa for a zesty kick. Avocado adds creaminess and healthy fats. For a fun twist, serve them with a dollop of Greek yogurt. For a great presentation, arrange the muffins on a colorful platter. Garnish with freshly chopped herbs like parsley or basil. This adds a nice pop of color and makes the dish more inviting. Enjoy your veggie-packed egg muffins! {{image_4}} You can easily modify these muffins for different diets. For gluten-free options, just use gluten-free flour or a gluten-free muffin mix. This makes them safe for those with gluten sensitivities. If you're looking for a vegan alternative, replace eggs with chickpea flour or a plant-based egg substitute. This keeps the muffins tasty and healthy while meeting vegan needs. Want to add more flavor? Consider spices like cumin or smoked paprika. Fresh herbs like basil or parsley also work well. They can really wake up the taste of the muffins. For creative mix-ins, think about adding cooked bacon or sausage for extra protein. You can also try different cheeses, like cheddar or goat cheese, to change the taste. You can make mini muffins or standard size muffins. Mini muffins are great for snacks or kids. They bake faster, so check them at about 12-15 minutes. For standard muffins, stick to the 18-20 minute baking time. Just keep an eye on them, so they don't overcook. Adjusting the size helps you serve the muffins just how you like them. For the full recipe, you can refer back to the main section. Veggie packed egg muffins are small, baked dishes made with eggs and vegetables. They are light, nutritious, and perfect for breakfast. These muffins are easy to make and customizable. You can add your favorite veggies and cheeses. They provide protein from eggs and fiber from vegetables. This makes them a healthy choice for busy mornings. Veggie muffins last about 4 to 5 days in the fridge. Store them in an airtight container to keep them fresh. Signs of spoilage include a sour smell or mold. If you see either, throw them away. Always check before eating leftovers to ensure safety. Yes, you can freeze veggie packed egg muffins. Allow them to cool completely first. Place them in a freezer-safe bag or container. They can last up to 3 months in the freezer. To thaw, simply place them in the fridge overnight. You can also heat them in the microwave for a quick meal. Veggie packed egg muffins are easy to make and healthy. First, you prep your ingredients. The recipe takes about 10 minutes to prep and 18-20 minutes to cook. You can make 12 muffins in total. 1. Prep the oven: Preheat it to 350°F (175°C). 2. Grease the muffin tin: Use cooking spray or olive oil. 3. Whisk the eggs: Crack 6 large eggs into a bowl. Mix them well. 4. Add veggies: Mix in 1 cup of spinach, 1/2 diced bell pepper, 1/2 cup cherry tomatoes, and 1/4 cup red onion. 5. Season and add cheese: Add 1/2 cup of feta cheese, 1 tsp garlic powder, 1 tsp oregano, and salt and pepper. 6. Fill the muffin tin: Pour the mix into the cups, filling them about three-quarters full. 7. Bake: Put the tin in the oven for 18-20 minutes. Check if they are firm and golden. 8. Cool and serve: Let them cool for 5 minutes before removing them from the tin. These muffins are perfect for a quick breakfast or snack. Enjoy them warm or store them for later. This blog post covered how to make veggie-packed egg muffins. We discussed ingredients, nutritional info, and step-by-step instructions. You learned about tips for perfect muffins and various fun variations. With clear directions, you can create tasty muffins that fit your diet. I hope you feel inspired to try making these muffins. They are good for breakfast, snacks, or meal prep. Enjoy experimenting with flavors and share your results!](https://joymealplan.com/wp-content/uploads/2025/07/ffbefcb5-f112-4a21-bd30-7331a5bc5463-768x768.webp)


![To make tasty honey garlic meatballs, you need: - 1 pound ground beef (or a blend of beef and pork for extra flavor) - 1/2 cup fresh breadcrumbs (homemade or store-bought) - 1/4 cup grated Parmesan cheese (for richness) - 1 large egg (to bind the mixture) - 2 cloves garlic, finely minced (for depth) - 1 tablespoon fresh ginger, finely minced (adds warmth) - 1/4 cup chopped green onions (for freshness) - Salt and black pepper to taste These main ingredients create a rich and flavorful base for the meatballs. The garlic and ginger add a nice zing, while the egg helps hold everything together. The honey garlic sauce is where the magic happens. You’ll need: - 1/2 cup honey (natural sweetness) - 1/4 cup soy sauce (for savory flavor) - 1 tablespoon rice vinegar (adds tang) - 1 teaspoon sesame oil (for nuttiness) - 1 teaspoon cornstarch mixed with 1 tablespoon water (to thicken the sauce) This sauce blends sweet and savory flavors. The honey pairs well with soy sauce, creating a perfect glaze for the meatballs. Feel free to customize your meatballs! Here are some ideas: - Use ground turkey instead of beef for a lighter option. - Add chopped herbs like parsley or cilantro for extra freshness. - Swap in breadcrumbs for crushed crackers if you want a different texture. - For a spicy kick, mix in some red pepper flakes. These tweaks can help you make the recipe your own. Enjoy experimenting with flavors! For the complete recipe, check out the Full Recipe link. To make tasty meatballs, start by gathering your ingredients. In a big bowl, combine: - 1 pound ground beef (or beef and pork mix) - 1/2 cup fresh breadcrumbs - 1/4 cup grated Parmesan cheese - 1 large egg - 2 cloves garlic, finely minced - 1 tablespoon fresh ginger, finely minced - 1/4 cup chopped green onions - Salt and black pepper to taste Use your hands or a spatula to mix these well. Be gentle! Overmixing will make the meatballs tough. You want them soft and tender. Now, it’s time to bake. Preheat your oven to 400°F (200°C). This step helps the meatballs cook evenly. Line a baking sheet with parchment paper. This keeps them from sticking and makes cleaning easy. Next, use clean hands to scoop out the meat mixture. Roll it into small balls, about 1 inch wide. Place them on the baking sheet, leaving space between each one. Bake for 15 to 20 minutes. You’ll know they’re done when they turn golden brown and reach an internal temperature of 165°F. While the meatballs bake, prepare the delicious sauce. In a small saucepan, mix: - 1/2 cup honey - 1/4 cup soy sauce - 1 tablespoon rice vinegar - 1 teaspoon sesame oil Heat this mix over medium heat. Stir it gently until it simmers. In a small bowl, mix 1 teaspoon cornstarch with 1 tablespoon water. Stir this into the sauce to thicken it. Cook for 2-3 more minutes until the sauce is shiny and thick. Once the meatballs are ready, take them out of the oven. Place them in a serving dish. Drizzle the warm honey garlic sauce over them. Garnish with extra chopped green onions for a fresh look. Enjoy every bite! For the full recipe, check out the details above. To make tender meatballs, start by mixing the meat gently. Overmixing makes them tough. Add breadcrumbs and egg for moisture. Let the mixture rest for a few minutes before shaping. This helps flavors blend well. Use clean hands to form the meatballs. Aim for about one inch in size for even cooking. For a rich honey garlic sauce, combine honey and soy sauce in a small pan. Heat it slowly to keep the honey from burning. Adding rice vinegar brings a nice tang. Finally, mix cornstarch with a bit of water to thicken it. Stir this mixture into the sauce until it coats the back of a spoon. This step is key for a glossy finish. These honey garlic meatballs shine on their own. Serve them on a platter with toothpicks. Pair them with rice or noodles for a full meal. Fresh veggies, like steamed broccoli or a crisp salad, add color and crunch. For added flair, drizzle extra sauce over the meatballs and sprinkle sesame seeds. This makes for a lovely presentation. Check the [Full Recipe] for more details! {{image_4}} You can use many meats for honey garlic meatballs. Ground beef is classic, but ground pork adds great flavor. You can even mix beef and pork for a tasty twist. Ground turkey is a leaner choice. It still pairs well with honey garlic sauce. Chicken also works great if you prefer a lighter meat. The key is to choose a meat you love. If you want a meat-free option, try using plant-based ground meat. There are many brands available today. You can also make meatballs with lentils or chickpeas. Just mash them up and mix in the same ingredients. For a fun twist, use quinoa or rice as a base. They both add texture and make the dish hearty. You can add fun flavors to your meatballs. Try mixing in some grated carrots or chopped bell peppers for a veggie boost. Fresh herbs, like cilantro or basil, can give a fresh kick. If you like heat, add red pepper flakes or sriracha to the mix. For an Asian twist, toss in some chopped water chestnuts or sesame seeds. These add crunch and make your meatballs stand out. You can find the full recipe to try these variations. After enjoying your honey garlic meatballs, let them cool down. Place them in an airtight container. They will stay fresh in the fridge for about 3 to 4 days. Make sure to separate layers with parchment paper to avoid sticking. To reheat, use the oven for best results. Preheat it to 350°F (175°C). Place the meatballs on a baking sheet. Heat them for about 10 to 15 minutes. This keeps them juicy and warm. You can also use the microwave, but they might get soggy. If you do use the microwave, cover them with a damp paper towel to keep moisture in. For long-term storage, you can freeze the meatballs. First, let them cool completely. Then, place them on a baking sheet in a single layer. Freeze them for a couple of hours until firm. Once frozen, transfer them to a freezer bag. They can last up to 3 months. When ready to eat, thaw them in the fridge overnight before reheating. These steps will help you enjoy your honey garlic meatballs anytime! Check out the Full Recipe for more cooking tips. Yes, you can use ground turkey instead of beef. Ground turkey makes a lighter meatball. It has less fat, so you may want to add a bit more cheese or breadcrumbs. This keeps the meatballs moist and tasty. The flavor will change slightly, but they will still taste great. To check if your meatballs are done, use a meat thermometer. They need to reach 165°F inside. You can also cut one in half. The inside should be no longer pink. Look for a nice golden brown color on the outside. These signs show that your meatballs are safe to eat. Honey garlic meatballs pair well with many sides. Here are some ideas: - Steamed rice - Roasted vegetables - Noodles - Salad - Mashed potatoes These sides balance the sweet and savory flavors. You can mix and match for a fun meal. For more ideas, check out the Full Recipe for serving suggestions. Honey garlic meatballs are simple and tasty. We covered the main ingredients and how to mix them. You learned step-by-step instructions for baking and making the sauce. I shared tips for tender meatballs and perfect sauce. You can also explore meat options and vegetarian choices. Don’t forget about storing leftovers and reheating them. Try the variations for a new twist. Enjoy cooking, and have fun sharing these delightful bites with friends and family!](https://joymealplan.com/wp-content/uploads/2025/05/91b0df71-a0c5-411f-83a7-9789c0a24c3c-768x768.webp)