%20(1).png)
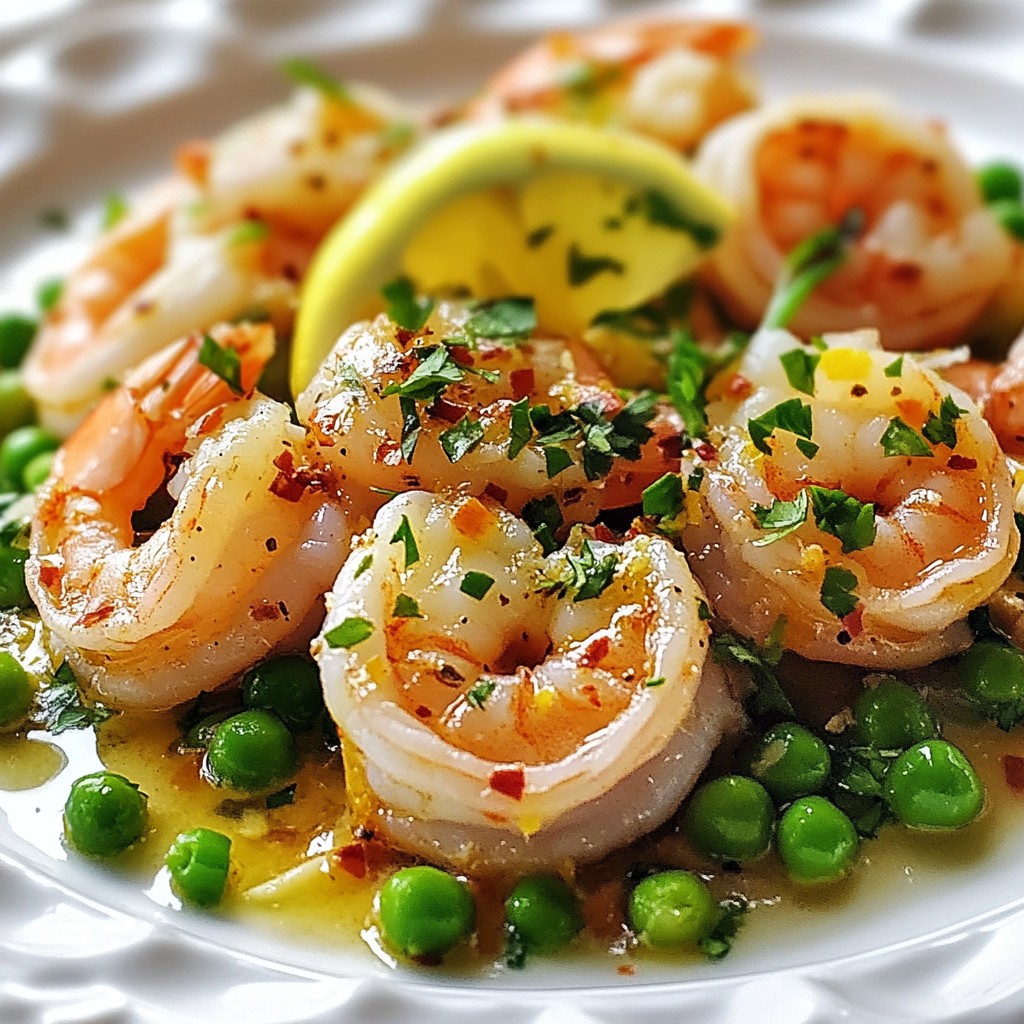
Looking for a quick and tasty dinner? My Easy Meals Garlic Buttered Shrimp & Peas Delight is just what you need! This dish features juicy shrimp, fresh peas, and a rich garlic butter sauce that comes together in minutes. Whether you're a busy parent or just want a simple meal, this recipe will impress you. Let’s dive into how to make an easy yet flavorful dish that everyone will love!
Why I Love This Recipe
- Quick and Easy: This dish comes together in just 20 minutes, making it perfect for busy weeknight dinners.
- Flavorful Garlic Butter Sauce: The combination of garlic, butter, and lemon creates a rich and zesty sauce that elevates the shrimp and peas.
- Healthy and Colorful: With fresh shrimp and vibrant peas, this dish is not only healthy but also visually appealing.
- Customizable: You can easily adjust the spice level or add other vegetables to suit your taste preferences.
Ingredients
Main Ingredients
- 1 lb (450g) raw shrimp
- 2 cups fresh or frozen peas
- 4 tablespoons unsalted butter
- 4 cloves garlic, finely minced
- 1 tablespoon high-quality olive oil
Seasonings and Extras
- 1 teaspoon grated lemon zest
- Juice of 1 fresh lemon
- 1/2 teaspoon crushed red pepper flakes (optional)
- Sea salt and freshly ground black pepper
- Fresh parsley for garnish
The main stars of this dish are the shrimp and peas. I love using raw shrimp that is peeled and deveined. It cooks fast and tastes great. You can use fresh peas or frozen ones. Both work well and save time.
Butter and garlic bring a rich flavor to the shrimp. I recommend using unsalted butter to control the saltiness. The garlic should be finely minced so it cooks evenly.
The olive oil adds a nice touch and helps the butter melt. A hint of lemon zest brightens the dish. Fresh lemon juice adds zing, while red pepper flakes give a little heat.
Finally, don’t forget the sea salt and black pepper. They enhance the flavors. Fresh parsley adds color and freshness when you garnish the dish.
This simple list of ingredients makes a meal that feels special. The flavors work together to create a delightful dish. You will enjoy making and sharing this Garlic Buttered Shrimp & Peas delight!

Step-by-Step Instructions
Prepping the Pan
- Heat 1 tablespoon of high-quality olive oil in a large skillet over medium heat.
- Once the oil shimmers, add 4 tablespoons of unsalted butter. Swirl the pan as it melts. This helps infuse the butter with oil.
- When the butter fully melts, add 4 cloves of finely minced garlic. Optionally, sprinkle in 1/2 teaspoon of crushed red pepper flakes for heat.
- Sauté the garlic for 1-2 minutes. Stir often until it smells fragrant and turns golden. Avoid burning the garlic, as it can taste bitter.
Cooking the Shrimp
- Carefully add 1 pound of raw shrimp to the skillet. Make sure they sit in a single layer.
- Cook the shrimp for 2-3 minutes on each side. They should turn pink and opaque. This color change shows they are cooking well.
Combining Ingredients
- When the shrimp are nearly done, toss in 2 cups of fresh or frozen peas. Stir to mix everything well.
- Cook the mixture for an extra 2-3 minutes. The peas should be tender yet bright green.
- Drizzle in the juice of 1 fresh lemon. Also, sprinkle 1 teaspoon of grated lemon zest for extra flavor.
- Gently toss to coat the shrimp and peas in the garlic butter sauce. Season with sea salt and black pepper to taste.
- Remove the pan from heat. Garnish with fresh chopped parsley for a burst of color and freshness.
Tips & Tricks
Perfecting the Garlic Flavor
To bring out the best in garlic, avoid burning it. Burnt garlic tastes bitter and ruins the dish. Cook it on medium heat and watch it closely. Use fresh garlic, as it has a strong flavor. For a milder taste, try roasted garlic. You can also use garlic powder in a pinch, but fresh is best.
Achieving the Right Shrimp Texture
How can you tell when shrimp are cooked? Look for their color. Cooked shrimp turns pink and opaque. It takes about 2-3 minutes on each side. Be careful not to overcook shrimp. Overcooked shrimp become rubbery and tough. Watch the time, and keep an eye on their color.
Presentation and Serving Suggestions
To make your dish look great, serve it in shallow white bowls. This allows the vibrant colors to shine. Add a lemon wedge on the side for a fresh touch. For extra appeal, sprinkle chopped parsley on top. You can also serve it with rice or pasta for a hearty meal.
Pro Tips
- Freshness Matters: Always use the freshest shrimp you can find for the best flavor and texture. If using frozen shrimp, ensure they are fully thawed before cooking.
- Perfect Garlic: To avoid bitterness, sauté the garlic until it’s just golden and fragrant. Keep a close eye on it to prevent burning.
- Pea Perfection: If using frozen peas, add them directly to the pan without thawing. This helps maintain their vibrant color and texture.
- Garnish Wisely: For added flavor, try garnishing with lemon zest or a sprinkle of chili flakes to complement the dish’s brightness.
Variations
Dietary Modifications
You can make Garlic Buttered Shrimp & Peas gluten-free and dairy-free. To make it gluten-free, just check the butter for any hidden gluten. You can swap the butter with vegan butter or olive oil. For a dairy-free option, use coconut oil instead.
If you follow a certain diet, you can adjust the recipe to fit your needs. For a low-carb option, skip the peas and add more shrimp or use zucchini noodles. This keeps the meal light and fresh.
Flavor Enhancements
To boost the flavor, try adding other vegetables. Bell peppers, spinach, or asparagus work well. You can also add fresh herbs like basil or cilantro for a new twist.
If you like heat, toss in more crushed red pepper flakes or try cayenne pepper. For a citrus kick, add lime juice or zest instead of lemon. Each change can bring a unique taste to your dish.
Serving Suggestions
Garlic Buttered Shrimp & Peas pairs great with many options. Serve it over pasta, rice, or quinoa for a filling meal. The sauce soaks into these grains, making each bite delicious.
You can also enjoy it with simple side dishes. A fresh salad or steamed veggies balance the meal. Garlic bread or crusty rolls can soak up the tasty garlic butter sauce too.
Storage Info
Storing Leftovers
To keep your Garlic Buttered Shrimp & Peas fresh, store leftovers in an airtight container. Place the container in the fridge right after the dish cools. This helps maintain flavor and texture. Your leftovers will last for up to two days in the fridge.
Reheating Instructions
When reheating, avoid overcooking the shrimp. Overcooked shrimp can become rubbery. The best way to reheat is on the stovetop or in the microwave. If using the stovetop, heat on low and stir gently until warmed through. For the microwave, use a lower power setting and heat in short bursts. This keeps the shrimp tender and juicy.
FAQs
How do I make shrimp tender?
To make shrimp tender, avoid overcooking them. Cook shrimp just until they turn pink. This usually takes 2-3 minutes per side. Remove them from heat when they are opaque. You want a soft texture, not rubbery. Always use fresh shrimp for the best results.
Can I use frozen shrimp for this recipe?
Yes, you can use frozen shrimp. First, thaw them in cold water. This usually takes about 15-20 minutes. Pat them dry with a paper towel. This helps the shrimp sear nicely. Frozen shrimp can be just as tasty as fresh shrimp.
What should I serve with Garlic Buttered Shrimp & Peas?
Garlic buttered shrimp pairs well with several sides. Here are some great options:
- Rice or quinoa for a hearty base
- Crusty bread for soaking up the sauce
- A fresh green salad for a light touch
- Steamed or roasted vegetables for color and crunch
Choose what you enjoy most!
This blog post covered how to make Garlic Buttered Shrimp with Peas. We discussed the key ingredients, step-by-step cooking instructions, useful tips, and variations for different diets. You learned how to achieve perfect shrimp texture and enhance flavors with garlic and lemon.
As you cook, remember to adjust seasonings to your liking. Enjoy serving this dish with pasta or a side salad. These choices will make your meal even better. Happy cooking!