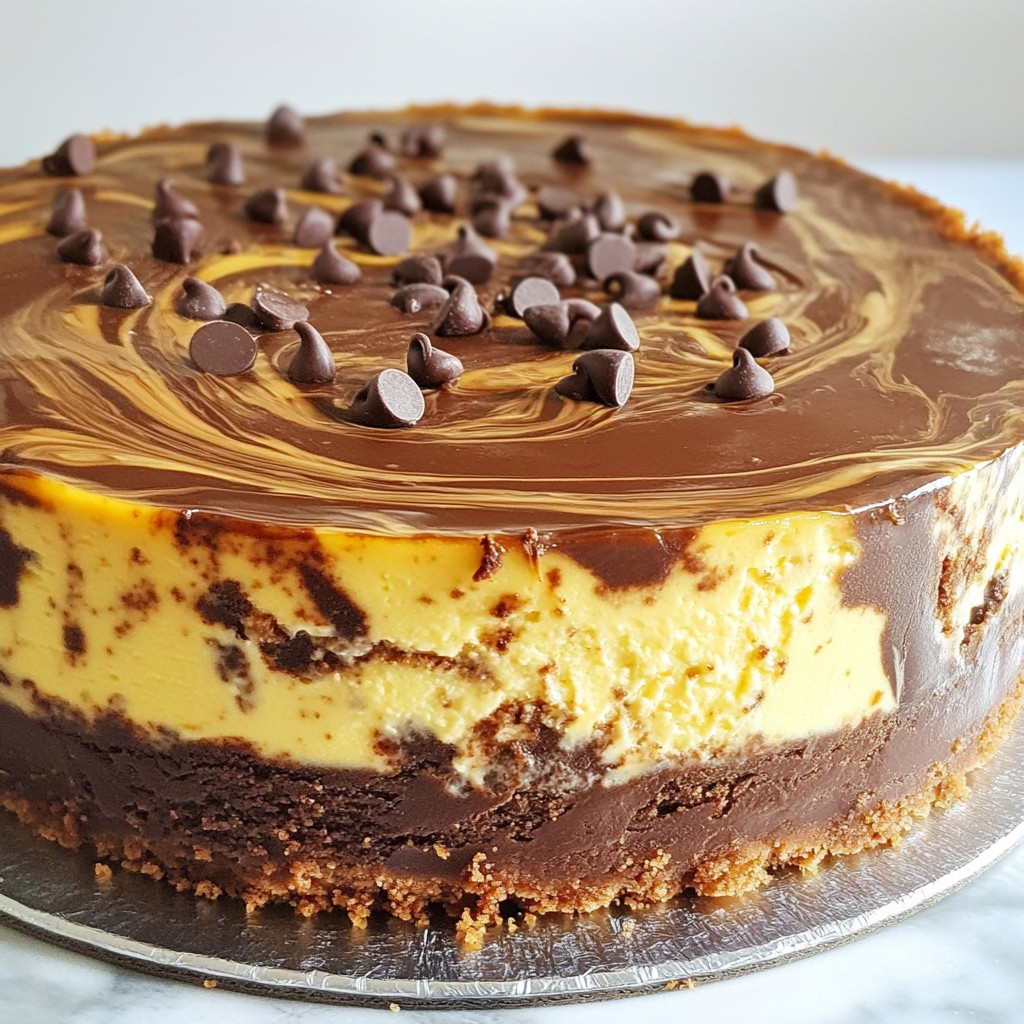
No Bake Lemon Icebox Pie Delicious and Easy Treat

- 1 ½ cups graham cracker crumbs - ⅓ cup granulated sugar - ½ cup unsalted butter, melted - 1 cup sweetened condensed milk - ½ cup freshly squeezed lemon juice - 2 tablespoons lemon zest - 1 cup heavy whipping cream - ¼ cup powdered sugar - Fresh mint leaves for garnish (optional) The ingredients for No Bake Lemon Icebox Pie are simple yet flavorful. You need graham cracker crumbs for the crust, which adds a nice crunch. Sugar sweetens the pie perfectly. The melted butter helps bind the crumbs together. Sweetened condensed milk gives the filling a rich, creamy texture. Fresh lemon juice brightens the pie, while lemon zest enhances the flavor. Heavy whipping cream adds fluffiness, and powdered sugar balances the sweetness. For a touch of color, garnish with mint leaves. Follow the Full Recipe for exact steps. If you don't have graham cracker crumbs, you can use crushed cookies or digestive biscuits. For those avoiding sugar, try using a sugar substitute like stevia or erythritol. If you want a dairy-free pie, coconut cream works well instead of heavy whipping cream. These substitutions keep the pie tasty and fun for everyone! Start by mixing graham cracker crumbs with granulated sugar in a bowl. Next, pour in the melted butter. Stir until the mixture looks like wet sand. This step is key for a tasty crust. Now, take this crumb mixture and press it into a pie pan. Make sure it covers the bottom and sides evenly. Chill the crust in the fridge while you make the filling. In a clean bowl, combine sweetened condensed milk, freshly squeezed lemon juice, and lemon zest. Whisk these together until the mixture thickens a bit. This adds a nice lemony flavor. In another bowl, whip the heavy cream with powdered sugar. Use an electric mixer and whip until you see stiff peaks form. This should take around 3 to 4 minutes. Gently fold the lemon mixture into the whipped cream. Be careful not to deflate the cream; you want it light and airy. Once mixed well, pour this filling into the chilled crust. Spread it evenly across the top. Cover the pie with plastic wrap and chill it in the refrigerator. Let it set for at least 4 hours, or overnight for the best taste. After chilling, you can garnish with fresh mint leaves if you like. Serve the pie cold for a refreshing treat. For the Full Recipe, check the top of the article. To get that perfect creamy texture, fold the lemon mixture into the whipped cream gently. Use a spatula and work from the bottom up. This helps keep the air in the whipped cream. For stiff peaks, I recommend brands like Heavy Whipping Cream from Land O'Lakes or Horizon Organic. They whip up nicely and hold their shape well. For the best results, chill your pie for at least 4 hours. If you can wait overnight, that's even better! This helps the flavors blend and the filling to firm up. To avoid a soggy crust, make sure your crust is set before adding the filling. Chilling the crust helps it stay crisp. When it's time to serve, add a fun touch! Garnish each slice with a sprig of fresh mint and a slice of lemon. This makes it look bright and inviting. You can also top each slice with a dollop of whipped cream or a sprinkle of lemon zest for extra flair. These small details make a big difference! {{image_4}} You can change up the flavor of your No Bake Lemon Icebox Pie easily. Adding berries like blueberries or raspberries creates a tasty twist. Just layer them on top or mix them into the filling. For something different, try using lime or orange juice instead of lemon juice. These citrus combinations add a fun new taste. Pair lime with zest for a zesty pie, or mix orange for a sweeter version. If you need a gluten-free option, use almond flour or gluten-free cookies for the crust. This keeps the pie tasty while meeting dietary needs. For those who prefer vegan treats, replace sweetened condensed milk with coconut cream. You can whip coconut cream to create a light filling. Using maple syrup instead of sugar gives a nice sweetness without animal products. Making mini versions of this pie is a fun idea! Use small tart pans to create individual servings. These mini pies are perfect for parties or gatherings. You can also try different crust types, like chocolate cookie crusts or nut-based crusts. Each option offers a unique flavor and texture. Enjoy the fun of serving these small delights! To keep your No Bake Lemon Icebox Pie fresh, cover it well. Use plastic wrap or a pie lid. This protects the pie from odors in the fridge. Place it in the coldest part of your fridge. Avoid the door where it gets warm. You might wonder, can you freeze no-bake lemon icebox pie? Yes! You can freeze it for later. Wrap it tightly in plastic wrap and foil. This helps prevent freezer burn. When ready to eat, thaw it in the fridge overnight. How long can you store this pie in the fridge? It stays good for about 3 to 4 days. After that, it may lose its fresh taste. Look for signs of spoilage. If you see any mold or a sour smell, toss it out. The filling may separate if it sits too long. Always check before serving. Enjoy your pie at its best with this storage advice. The pie needs to chill for at least 4 hours. For best results, chill it overnight. This time helps the filling set and the flavors blend. A longer chill makes the pie more refreshing and tasty. You can use bottled lemon juice, but fresh is better. Fresh juice has a bright, zesty flavor. Bottled juice may taste dull and less fresh. It can also lack the natural oils found in lemon zest. If your pie is runny, check the filling. It may need more time to chill. You can also try adding more whipped cream to thicken it. If you need to, put it in the freezer for a short time, but watch it closely. Yes, you can make the pie ahead of time. It stays fresh in the fridge for up to 3 days. Just cover it well to keep it from drying out. Making it early lets the flavors develop and makes serving easier. For the full recipe, check out the detailed steps above. You learned all about making a No Bake Lemon Icebox Pie. We covered needed ingredients, step-by-step directions, and tips for success. Remember to use fresh ingredients for the best taste. Don’t skip the chilling time; it helps the pie set properly. Try different flavors or mini versions to mix things up. With the right techniques, you’ll have a tasty dessert everyone will love. Happy baking!

WANT TO SAVE THIS RECIPE?

If you crave a sweet and tangy dessert without the fuss of baking, I’ve got the perfect treat for you: No Bake Lemon Icebox Pie. This easy pie combines creamy flavors with a crisp crust, and it’s ready to impress! Join me as we explore the simple steps and tips to create this delightful dessert. Get ready to chill out with a pie that’s just as refreshing as it is delicious!

Ingredients

List of Required Ingredients

– 1 ½ cups graham cracker crumbs

– ⅓ cup granulated sugar

– ½ cup unsalted butter, melted

– 1 cup sweetened condensed milk

– ½ cup freshly squeezed lemon juice

– 2 tablespoons lemon zest

– 1 cup heavy whipping cream

– ¼ cup powdered sugar

– Fresh mint leaves for garnish (optional)

The ingredients for No Bake Lemon Icebox Pie are simple yet flavorful. You need graham cracker crumbs for the crust, which adds a nice crunch. Sugar sweetens the pie perfectly. The melted butter helps bind the crumbs together. Sweetened condensed milk gives the filling a rich, creamy texture. Fresh lemon juice brightens the pie, while lemon zest enhances the flavor. Heavy whipping cream adds fluffiness, and powdered sugar balances the sweetness. For a touch of color, garnish with mint leaves. Follow the Full Recipe for exact steps.

Ingredient Substitutions

If you don’t have graham cracker crumbs, you can use crushed cookies or digestive biscuits. For those avoiding sugar, try using a sugar substitute like stevia or erythritol. If you want a dairy-free pie, coconut cream works well instead of heavy whipping cream. These substitutions keep the pie tasty and fun for everyone!

Step-by-Step Instructions

Preparing the Crust

Start by mixing graham cracker crumbs with granulated sugar in a bowl. Next, pour in the melted butter. Stir until the mixture looks like wet sand. This step is key for a tasty crust. Now, take this crumb mixture and press it into a pie pan. Make sure it covers the bottom and sides evenly. Chill the crust in the fridge while you make the filling.

Making the Filling

In a clean bowl, combine sweetened condensed milk, freshly squeezed lemon juice, and lemon zest. Whisk these together until the mixture thickens a bit. This adds a nice lemony flavor. In another bowl, whip the heavy cream with powdered sugar. Use an electric mixer and whip until you see stiff peaks form. This should take around 3 to 4 minutes.

Final Assembly

Gently fold the lemon mixture into the whipped cream. Be careful not to deflate the cream; you want it light and airy. Once mixed well, pour this filling into the chilled crust. Spread it evenly across the top. Cover the pie with plastic wrap and chill it in the refrigerator. Let it set for at least 4 hours, or overnight for the best taste. After chilling, you can garnish with fresh mint leaves if you like. Serve the pie cold for a refreshing treat. For the Full Recipe, check the top of the article.

Tips & Tricks

Achieving the Perfect Creamy Texture

To get that perfect creamy texture, fold the lemon mixture into the whipped cream gently. Use a spatula and work from the bottom up. This helps keep the air in the whipped cream. For stiff peaks, I recommend brands like Heavy Whipping Cream from Land O’Lakes or Horizon Organic. They whip up nicely and hold their shape well.

Cooling and Setting Tips

For the best results, chill your pie for at least 4 hours. If you can wait overnight, that’s even better! This helps the flavors blend and the filling to firm up. To avoid a soggy crust, make sure your crust is set before adding the filling. Chilling the crust helps it stay crisp.

Presentation Ideas

When it’s time to serve, add a fun touch! Garnish each slice with a sprig of fresh mint and a slice of lemon. This makes it look bright and inviting. You can also top each slice with a dollop of whipped cream or a sprinkle of lemon zest for extra flair. These small details make a big difference!

Variations

Flavor Twists

You can change up the flavor of your No Bake Lemon Icebox Pie easily. Adding berries like blueberries or raspberries creates a tasty twist. Just layer them on top or mix them into the filling. For something different, try using lime or orange juice instead of lemon juice. These citrus combinations add a fun new taste. Pair lime with zest for a zesty pie, or mix orange for a sweeter version.

Dietary Adjustments

If you need a gluten-free option, use almond flour or gluten-free cookies for the crust. This keeps the pie tasty while meeting dietary needs. For those who prefer vegan treats, replace sweetened condensed milk with coconut cream. You can whip coconut cream to create a light filling. Using maple syrup instead of sugar gives a nice sweetness without animal products.

Mini Pie Versions

Making mini versions of this pie is a fun idea! Use small tart pans to create individual servings. These mini pies are perfect for parties or gatherings. You can also try different crust types, like chocolate cookie crusts or nut-based crusts. Each option offers a unique flavor and texture. Enjoy the fun of serving these small delights!

Storage Info

Best Practices for Storing

To keep your No Bake Lemon Icebox Pie fresh, cover it well. Use plastic wrap or a pie lid. This protects the pie from odors in the fridge. Place it in the coldest part of your fridge. Avoid the door where it gets warm.

You might wonder, can you freeze no-bake lemon icebox pie? Yes! You can freeze it for later. Wrap it tightly in plastic wrap and foil. This helps prevent freezer burn. When ready to eat, thaw it in the fridge overnight.

Shelf Life

How long can you store this pie in the fridge? It stays good for about 3 to 4 days. After that, it may lose its fresh taste.

Look for signs of spoilage. If you see any mold or a sour smell, toss it out. The filling may separate if it sits too long. Always check before serving. Enjoy your pie at its best with this storage advice.

FAQs

How long does No Bake Lemon Icebox Pie need to chill?

The pie needs to chill for at least 4 hours. For best results, chill it overnight. This time helps the filling set and the flavors blend. A longer chill makes the pie more refreshing and tasty.

Can you use bottled lemon juice instead of fresh?

You can use bottled lemon juice, but fresh is better. Fresh juice has a bright, zesty flavor. Bottled juice may taste dull and less fresh. It can also lack the natural oils found in lemon zest.

What should I do if my pie doesn’t set?

If your pie is runny, check the filling. It may need more time to chill. You can also try adding more whipped cream to thicken it. If you need to, put it in the freezer for a short time, but watch it closely.

Can I make the pie ahead of time?

Yes, you can make the pie ahead of time. It stays fresh in the fridge for up to 3 days. Just cover it well to keep it from drying out. Making it early lets the flavors develop and makes serving easier. For the full recipe, check out the detailed steps above.

You learned all about making a No Bake Lemon Icebox Pie. We covered needed ingredients, step-by-step directions, and tips for success. Remember to use fresh ingredients for the best taste. Don’t skip the chilling time; it helps the pie set properly. Try different flavors or mini versions to mix things up. With the right techniques, you’ll have a tasty dessert everyone will love. Happy baking!

- 1 ½ cups graham cracker crumbs - ⅓ cup granulated sugar - ½ cup unsalted butter, melted - 1 cup sweetened condensed milk - ½ cup freshly squeezed lemon juice - 2 tablespoons lemon zest - 1 cup heavy whipping cream - ¼ cup powdered sugar - Fresh mint leaves for garnish (optional) The ingredients for No Bake Lemon Icebox Pie are simple yet flavorful. You need graham cracker crumbs for the crust, which adds a nice crunch. Sugar sweetens the pie perfectly. The melted butter helps bind the crumbs together. Sweetened condensed milk gives the filling a rich, creamy texture. Fresh lemon juice brightens the pie, while lemon zest enhances the flavor. Heavy whipping cream adds fluffiness, and powdered sugar balances the sweetness. For a touch of color, garnish with mint leaves. Follow the Full Recipe for exact steps. If you don't have graham cracker crumbs, you can use crushed cookies or digestive biscuits. For those avoiding sugar, try using a sugar substitute like stevia or erythritol. If you want a dairy-free pie, coconut cream works well instead of heavy whipping cream. These substitutions keep the pie tasty and fun for everyone! Start by mixing graham cracker crumbs with granulated sugar in a bowl. Next, pour in the melted butter. Stir until the mixture looks like wet sand. This step is key for a tasty crust. Now, take this crumb mixture and press it into a pie pan. Make sure it covers the bottom and sides evenly. Chill the crust in the fridge while you make the filling. In a clean bowl, combine sweetened condensed milk, freshly squeezed lemon juice, and lemon zest. Whisk these together until the mixture thickens a bit. This adds a nice lemony flavor. In another bowl, whip the heavy cream with powdered sugar. Use an electric mixer and whip until you see stiff peaks form. This should take around 3 to 4 minutes. Gently fold the lemon mixture into the whipped cream. Be careful not to deflate the cream; you want it light and airy. Once mixed well, pour this filling into the chilled crust. Spread it evenly across the top. Cover the pie with plastic wrap and chill it in the refrigerator. Let it set for at least 4 hours, or overnight for the best taste. After chilling, you can garnish with fresh mint leaves if you like. Serve the pie cold for a refreshing treat. For the Full Recipe, check the top of the article. To get that perfect creamy texture, fold the lemon mixture into the whipped cream gently. Use a spatula and work from the bottom up. This helps keep the air in the whipped cream. For stiff peaks, I recommend brands like Heavy Whipping Cream from Land O'Lakes or Horizon Organic. They whip up nicely and hold their shape well. For the best results, chill your pie for at least 4 hours. If you can wait overnight, that's even better! This helps the flavors blend and the filling to firm up. To avoid a soggy crust, make sure your crust is set before adding the filling. Chilling the crust helps it stay crisp. When it's time to serve, add a fun touch! Garnish each slice with a sprig of fresh mint and a slice of lemon. This makes it look bright and inviting. You can also top each slice with a dollop of whipped cream or a sprinkle of lemon zest for extra flair. These small details make a big difference! {{image_4}} You can change up the flavor of your No Bake Lemon Icebox Pie easily. Adding berries like blueberries or raspberries creates a tasty twist. Just layer them on top or mix them into the filling. For something different, try using lime or orange juice instead of lemon juice. These citrus combinations add a fun new taste. Pair lime with zest for a zesty pie, or mix orange for a sweeter version. If you need a gluten-free option, use almond flour or gluten-free cookies for the crust. This keeps the pie tasty while meeting dietary needs. For those who prefer vegan treats, replace sweetened condensed milk with coconut cream. You can whip coconut cream to create a light filling. Using maple syrup instead of sugar gives a nice sweetness without animal products. Making mini versions of this pie is a fun idea! Use small tart pans to create individual servings. These mini pies are perfect for parties or gatherings. You can also try different crust types, like chocolate cookie crusts or nut-based crusts. Each option offers a unique flavor and texture. Enjoy the fun of serving these small delights! To keep your No Bake Lemon Icebox Pie fresh, cover it well. Use plastic wrap or a pie lid. This protects the pie from odors in the fridge. Place it in the coldest part of your fridge. Avoid the door where it gets warm. You might wonder, can you freeze no-bake lemon icebox pie? Yes! You can freeze it for later. Wrap it tightly in plastic wrap and foil. This helps prevent freezer burn. When ready to eat, thaw it in the fridge overnight. How long can you store this pie in the fridge? It stays good for about 3 to 4 days. After that, it may lose its fresh taste. Look for signs of spoilage. If you see any mold or a sour smell, toss it out. The filling may separate if it sits too long. Always check before serving. Enjoy your pie at its best with this storage advice. The pie needs to chill for at least 4 hours. For best results, chill it overnight. This time helps the filling set and the flavors blend. A longer chill makes the pie more refreshing and tasty. You can use bottled lemon juice, but fresh is better. Fresh juice has a bright, zesty flavor. Bottled juice may taste dull and less fresh. It can also lack the natural oils found in lemon zest. If your pie is runny, check the filling. It may need more time to chill. You can also try adding more whipped cream to thicken it. If you need to, put it in the freezer for a short time, but watch it closely. Yes, you can make the pie ahead of time. It stays fresh in the fridge for up to 3 days. Just cover it well to keep it from drying out. Making it early lets the flavors develop and makes serving easier. For the full recipe, check out the detailed steps above. You learned all about making a No Bake Lemon Icebox Pie. We covered needed ingredients, step-by-step directions, and tips for success. Remember to use fresh ingredients for the best taste. Don’t skip the chilling time; it helps the pie set properly. Try different flavors or mini versions to mix things up. With the right techniques, you’ll have a tasty dessert everyone will love. Happy baking!

No Bake Lemon Icebox Pie

Indulge in the refreshing taste of a Zesty No-Bake Lemon Icebox Pie that’s perfect for any occasion! This easy recipe features a creamy lemon filling and a delightful graham cracker crust, making it a must-try dessert. With just a few simple ingredients, you can whip up this chilled treat in no time. Click through to explore the full recipe and impress your family and friends with this zesty delight!

Ingredients
  

1 ½ cups graham cracker crumbs

⅓ cup granulated sugar

½ cup unsalted butter, melted

1 cup sweetened condensed milk

½ cup freshly squeezed lemon juice (about 2-3 lemons)

2 tablespoons lemon zest (from the same lemons used for juice)

1 cup heavy whipping cream

¼ cup powdered sugar

Fresh mint leaves for garnish (optional)

Instructions
 

Prepare the Crust: In a medium-sized mixing bowl, combine the graham cracker crumbs and granulated sugar. Pour in the melted unsalted butter and mix thoroughly until the crumb mixture achieves a consistency resembling wet sand.

    Form the Crust: Transfer the crumb mixture into a 9-inch pie pan. Use your fingers or the back of a measuring cup to press the mixture evenly across the bottom and up the sides of the pan, creating a firm crust. Place the crust in the refrigerator to chill and set while you prepare the filling.

      Make the Filling: In a separate mixing bowl, whisk together the sweetened condensed milk, freshly squeezed lemon juice, and lemon zest. Continue whisking until the mixture is well combined and starts to thicken slightly.

        Whip the Cream: In a clean mixing bowl, use an electric mixer to whip the heavy cream and powdered sugar on medium-high speed until stiff peaks form. This should take about 3-4 minutes.

          Combine Mixtures: Gently fold the lemon mixture into the whipped cream with a spatula. Be careful to incorporate the mixtures without deflating the whipped cream, ensuring a light and airy filling.

            Fill the Crust: Carefully pour the lemon filling into the prepared graham cracker crust. Use a spatula to spread the filling evenly across the top.

              Chill to Set: Cover the pie with plastic wrap and place it in the refrigerator. Allow it to chill for at least 4 hours, or preferably overnight, to set and enhance the flavors.

                Garnish and Serve: Once the pie has set, remove it from the refrigerator. Optionally, garnish with fresh mint leaves for a pop of color and freshness. Slice into 8 pieces and serve chilled.

                  Prep Time: 15 minutes | Total Time: 4 hours 15 minutes | Servings: 8 slices

                    Presentation Tips: For an elegant touch, serve each slice with a dollop of whipped cream and a sprinkle of additional lemon zest on top.

                      WANT TO SAVE THIS RECIPE?

                      Related Posts