Roasted Red Pepper Hummus Simple and Flavorful Recipe
![To make this tasty roasted red pepper hummus, you need a few key items. Here’s what you’ll need: - 1 can (15 oz) chickpeas, thoroughly rinsed and well-drained - 2 large roasted red peppers, peeled and coarsely chopped - 3 tablespoons creamy tahini - 2 tablespoons extra virgin olive oil, plus more for drizzling - 2 cloves of garlic, finely minced - 1 tablespoon freshly squeezed lemon juice - 1 teaspoon ground cumin for warmth - Salt and freshly cracked black pepper, to taste - Cold water, as required for desired creaminess - Smoked paprika and freshly chopped parsley for an elegant finish Want to kick your hummus up a notch? Consider these fun add-ins: - A pinch of cayenne pepper for heat - Roasted garlic for a sweeter taste - A tablespoon of fresh herbs like basil or cilantro - A splash of balsamic vinegar for tanginess - A bit of feta cheese for creaminess Feel free to mix and match these options. Each one can add a unique twist to your hummus. The ingredients in this hummus are not just tasty; they pack a nutritious punch: - Chickpeas: High in protein and fiber, they help keep you full. - Tahini: Made from sesame seeds, it adds healthy fats and calcium. - Olive Oil: Rich in monounsaturated fats, it supports heart health. - Garlic: Offers immune-boosting properties and can help lower blood pressure. - Red Peppers: Full of vitamins A and C, they promote healthy skin and eyes. Each ingredient works together to create a dish that's not only delicious but also good for you. For the full recipe, check out the detailed cooking guide. Making roasted red pepper hummus is easy and quick. You need a food processor. Gather all your ingredients first. This helps keep things organized. Start by blending everything together until smooth. You can add water for creaminess. 1. Place the rinsed chickpeas, chopped roasted red peppers, tahini, olive oil, minced garlic, lemon juice, and ground cumin into your food processor. 2. Secure the lid tightly. Blend the mix on high speed. Stop to scrape the bowl down. This ensures everything mixes well. 3. If the hummus is too thick, add cold water. Do this one tablespoon at a time. Blend after each addition until you reach the right creaminess. 4. Taste your hummus. Add salt and freshly cracked black pepper to make it better. 5. Transfer the smooth hummus to a serving bowl. Drizzle olive oil on top for extra flavor. 6. Sprinkle smoked paprika and chopped parsley on top for color and flair. To get your hummus just right, focus on the blending time. Blend longer for a smoother texture. If it’s still thick, keep adding cold water slowly. Make sure to taste as you go. Adjust the seasoning to your liking. A little tweak can make a big difference. One big mistake is using dry chickpeas. Always use canned chickpeas for smoothness. Another pitfall is not rinsing the chickpeas. Rinsing helps reduce the canned taste. Avoid over-blending; you want a creamy texture, not a soup. Lastly, be careful with salt. Start with a little and taste as you go. To boost flavor, try adding lemon zest. It adds brightness and fresh taste. You can also mix in roasted garlic for a sweet, rich flavor. For extra heat, toss in a pinch of cayenne pepper. Experiment with herbs like cilantro or basil for unique twists. Each of these can make your hummus stand out. Presentation matters! Serve the hummus in a colorful bowl to catch the eye. Drizzle olive oil on top for a glossy finish. Sprinkle smoked paprika or fresh herbs for color. Pair it with warm pita bread and crunchy veggies. Arrange these on a large platter for a beautiful spread. Explore the [Full Recipe] for more ideas on serving this dish. {{image_4}} Want some heat? Add a kick to your hummus! Use sliced jalapeños or red pepper flakes. Blend them in with your other ingredients for a spicy twist. This adds depth and flavor. You can also drizzle with hot sauce before serving. It’s a perfect match for those who love bold flavors. Herbs can give your hummus a fresh taste. Try adding fresh basil, cilantro, or parsley. You can also mix in other roasted veggies. Think zucchini or eggplant for extra flavor. These additions make your hummus unique and vibrant. They bring in new textures and tastes, making it fun to try different combinations. This hummus is already vegan and gluten-free! You can enjoy it with confidence. It uses chickpeas, tahini, and olive oil, which fit both diets perfectly. If you want to make it even more exciting, serve it with gluten-free crackers or veggie sticks. This way, everyone can enjoy it at any gathering. For the full recipe, check the details mentioned earlier. To keep your hummus fresh, place it in an airtight container. This helps prevent air from drying it out. Make sure to seal the lid tightly. You can also drizzle a thin layer of olive oil on top. This adds flavor and keeps it moist. Store the container in the fridge. It will stay good for about 4 to 5 days. If you want to save hummus for later, freezing is a great option. Start by placing the hummus in a freezer-safe container. Leave some space at the top, as it may expand when frozen. You can also use ice cube trays for small portions. Once frozen, transfer the cubes to a zip-top bag. This method makes it easy to thaw just what you need. Homemade hummus can last up to 3 months in the freezer. Choose containers made of glass or BPA-free plastic. Glass containers are great for keeping flavors intact. They are also easy to clean. If you use plastic, make sure it is strong and safe for freezing. Avoid containers that are too large for small amounts. This helps keep your hummus fresh. For extra care, label your containers with the date. This way, you’ll know when to use them. For the full recipe, check out the Roasted Red Pepper Hummus Delight. Homemade roasted red pepper hummus can last about 5 to 7 days in the fridge. Make sure to store it in an airtight container. This keeps it fresh and tasty. If you notice any changes in smell or color, it's best to toss it out. Yes, you can use jarred roasted red peppers. They save time and add great flavor. Just drain them well before adding to your hummus. This helps keep the hummus from getting too watery. Roasted red pepper hummus pairs well with many foods. Here are some ideas: - Warm pita bread - Fresh vegetable sticks like carrots, cucumbers, and bell peppers - Crackers or tortilla chips - A colorful mezze platter with olives and herbs You can find the full recipe above. Enjoy your tasty hummus! In this post, we explored the key ingredients and step-by-step instructions for roasted red pepper hummus. We covered tips for flavor, common mistakes, and variations. You learned how to store hummus properly and answered your main questions. Remember, this dish is simple yet versatile. Enjoy making your own hummus using fresh ingredients. Try different flavors to find your favorite mix. Happy cooking!](https://joymealplan.com/wp-content/uploads/2025/06/a7fe634f-a62f-44e2-9912-8eb9edd9a507.webp)
Are you ready to spice up your snack game? This Roasted Red Pepper Hummus recipe offers rich flavor and simple steps. With just a few ingredients, you can create a creamy dip that pairs well with veggies, chips, or pita. I’ll guide you on how to make this healthy treat, share tips to enhance the flavor, and explore fun variations. Let’s dive into making hummus that’s sure to impress!
Ingredients
Essential Ingredients for Roasted Red Pepper Hummus
To make this tasty roasted red pepper hummus, you need a few key items. Here’s what you’ll need:
– 1 can (15 oz) chickpeas, thoroughly rinsed and well-drained
– 2 large roasted red peppers, peeled and coarsely chopped
– 3 tablespoons creamy tahini
– 2 tablespoons extra virgin olive oil, plus more for drizzling
– 2 cloves of garlic, finely minced
– 1 tablespoon freshly squeezed lemon juice
– 1 teaspoon ground cumin for warmth
– Salt and freshly cracked black pepper, to taste
– Cold water, as required for desired creaminess
– Smoked paprika and freshly chopped parsley for an elegant finish
Optional Add-ins for Extra Flavor
Want to kick your hummus up a notch? Consider these fun add-ins:
– A pinch of cayenne pepper for heat
– Roasted garlic for a sweeter taste
– A tablespoon of fresh herbs like basil or cilantro
– A splash of balsamic vinegar for tanginess
– A bit of feta cheese for creaminess
Feel free to mix and match these options. Each one can add a unique twist to your hummus.
Nutritional Benefits of Key Ingredients
The ingredients in this hummus are not just tasty; they pack a nutritious punch:
– Chickpeas: High in protein and fiber, they help keep you full.
– Tahini: Made from sesame seeds, it adds healthy fats and calcium.
– Olive Oil: Rich in monounsaturated fats, it supports heart health.
– Garlic: Offers immune-boosting properties and can help lower blood pressure.
– Red Peppers: Full of vitamins A and C, they promote healthy skin and eyes.
Each ingredient works together to create a dish that’s not only delicious but also good for you.
Step-by-Step Instructions
Quick Overview of Preparation
Making roasted red pepper hummus is easy and quick. You need a food processor. Gather all your ingredients first. This helps keep things organized. Start by blending everything together until smooth. You can add water for creaminess.
Detailed Instructions for Making Hummus
1. Place the rinsed chickpeas, chopped roasted red peppers, tahini, olive oil, minced garlic, lemon juice, and ground cumin into your food processor.
2. Secure the lid tightly. Blend the mix on high speed. Stop to scrape the bowl down. This ensures everything mixes well.
3. If the hummus is too thick, add cold water. Do this one tablespoon at a time. Blend after each addition until you reach the right creaminess.
4. Taste your hummus. Add salt and freshly cracked black pepper to make it better.
5. Transfer the smooth hummus to a serving bowl. Drizzle olive oil on top for extra flavor.
6. Sprinkle smoked paprika and chopped parsley on top for color and flair.
Tips for Achieving the Perfect Consistency
To get your hummus just right, focus on the blending time. Blend longer for a smoother texture. If it’s still thick, keep adding cold water slowly. Make sure to taste as you go. Adjust the seasoning to your liking. A little tweak can make a big difference.
Tips & Tricks
Common Mistakes to Avoid
One big mistake is using dry chickpeas. Always use canned chickpeas for smoothness. Another pitfall is not rinsing the chickpeas. Rinsing helps reduce the canned taste. Avoid over-blending; you want a creamy texture, not a soup. Lastly, be careful with salt. Start with a little and taste as you go.
Enhancing Flavor Profiles
To boost flavor, try adding lemon zest. It adds brightness and fresh taste. You can also mix in roasted garlic for a sweet, rich flavor. For extra heat, toss in a pinch of cayenne pepper. Experiment with herbs like cilantro or basil for unique twists. Each of these can make your hummus stand out.
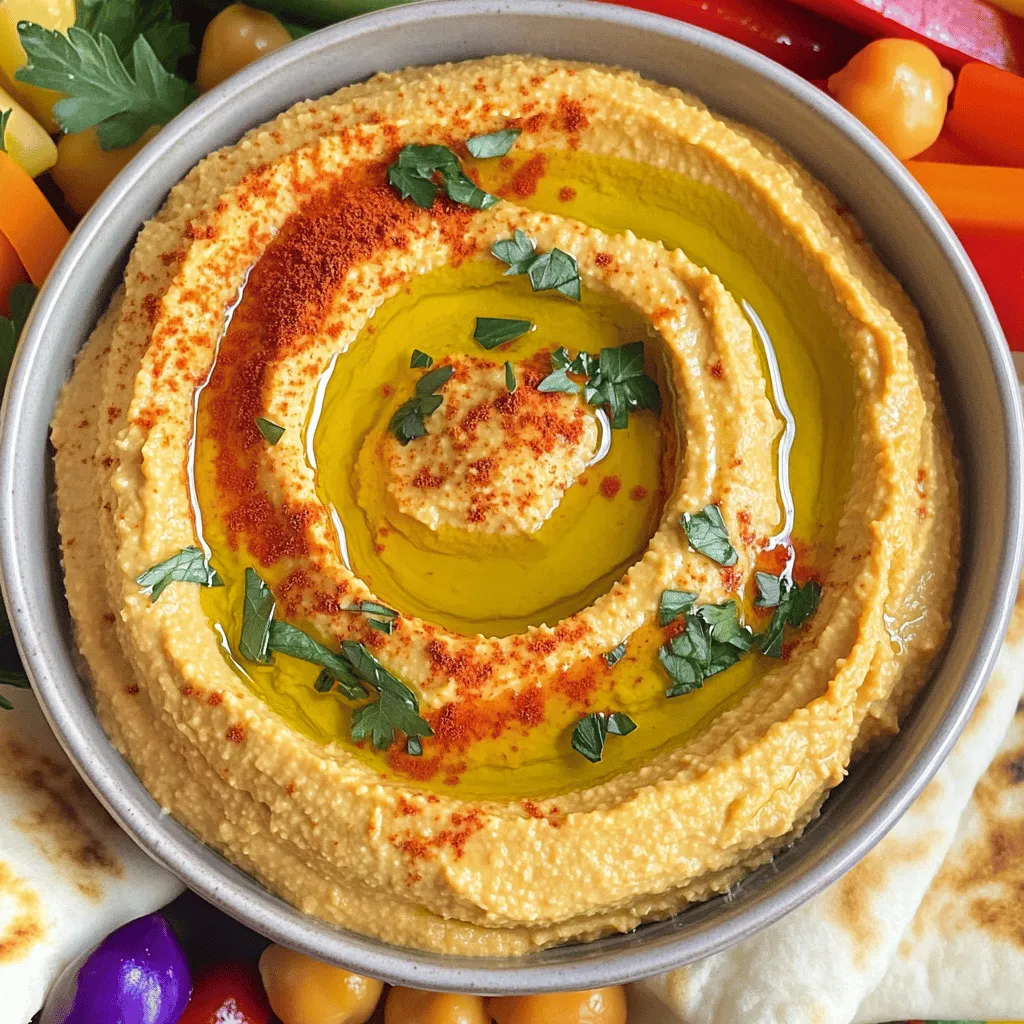
Presentation Ideas for Serving
Presentation matters! Serve the hummus in a colorful bowl to catch the eye. Drizzle olive oil on top for a glossy finish. Sprinkle smoked paprika or fresh herbs for color. Pair it with warm pita bread and crunchy veggies. Arrange these on a large platter for a beautiful spread.

Variations
Spicy Roasted Red Pepper Hummus
Want some heat? Add a kick to your hummus! Use sliced jalapeños or red pepper flakes. Blend them in with your other ingredients for a spicy twist. This adds depth and flavor. You can also drizzle with hot sauce before serving. It’s a perfect match for those who love bold flavors.
Adding Herbs or Other Vegetables
Herbs can give your hummus a fresh taste. Try adding fresh basil, cilantro, or parsley. You can also mix in other roasted veggies. Think zucchini or eggplant for extra flavor. These additions make your hummus unique and vibrant. They bring in new textures and tastes, making it fun to try different combinations.
Vegan and Gluten-Free Options
This hummus is already vegan and gluten-free! You can enjoy it with confidence. It uses chickpeas, tahini, and olive oil, which fit both diets perfectly. If you want to make it even more exciting, serve it with gluten-free crackers or veggie sticks. This way, everyone can enjoy it at any gathering.
Storage Info
How to Store Leftover Hummus
To keep your hummus fresh, place it in an airtight container. This helps prevent air from drying it out. Make sure to seal the lid tightly. You can also drizzle a thin layer of olive oil on top. This adds flavor and keeps it moist. Store the container in the fridge. It will stay good for about 4 to 5 days.
Freezing Instructions for Longer Shelf Life
If you want to save hummus for later, freezing is a great option. Start by placing the hummus in a freezer-safe container. Leave some space at the top, as it may expand when frozen. You can also use ice cube trays for small portions. Once frozen, transfer the cubes to a zip-top bag. This method makes it easy to thaw just what you need. Homemade hummus can last up to 3 months in the freezer.
Best Containers for Storage
Choose containers made of glass or BPA-free plastic. Glass containers are great for keeping flavors intact. They are also easy to clean. If you use plastic, make sure it is strong and safe for freezing. Avoid containers that are too large for small amounts. This helps keep your hummus fresh. For extra care, label your containers with the date. This way, you’ll know when to use them.
FAQs
How long does homemade roasted red pepper hummus last?
Homemade roasted red pepper hummus can last about 5 to 7 days in the fridge. Make sure to store it in an airtight container. This keeps it fresh and tasty. If you notice any changes in smell or color, it’s best to toss it out.
Can I use jarred roasted red peppers?
Yes, you can use jarred roasted red peppers. They save time and add great flavor. Just drain them well before adding to your hummus. This helps keep the hummus from getting too watery.
What can I serve with roasted red pepper hummus?
Roasted red pepper hummus pairs well with many foods.Enjoy your tasty hummus!
In this post, we explored the key ingredients and step-by-step instructions for roasted red pepper hummus. We covered tips for flavor, common mistakes, and variations. You learned how to store hummus properly and answered your main questions.
Remember, this dish is simple yet versatile. Enjoy making your own hummus using fresh ingredients. Try different flavors to find your favorite mix. Happy cooking!
![To make this tasty roasted red pepper hummus, you need a few key items. Here’s what you’ll need: - 1 can (15 oz) chickpeas, thoroughly rinsed and well-drained - 2 large roasted red peppers, peeled and coarsely chopped - 3 tablespoons creamy tahini - 2 tablespoons extra virgin olive oil, plus more for drizzling - 2 cloves of garlic, finely minced - 1 tablespoon freshly squeezed lemon juice - 1 teaspoon ground cumin for warmth - Salt and freshly cracked black pepper, to taste - Cold water, as required for desired creaminess - Smoked paprika and freshly chopped parsley for an elegant finish Want to kick your hummus up a notch? Consider these fun add-ins: - A pinch of cayenne pepper for heat - Roasted garlic for a sweeter taste - A tablespoon of fresh herbs like basil or cilantro - A splash of balsamic vinegar for tanginess - A bit of feta cheese for creaminess Feel free to mix and match these options. Each one can add a unique twist to your hummus. The ingredients in this hummus are not just tasty; they pack a nutritious punch: - Chickpeas: High in protein and fiber, they help keep you full. - Tahini: Made from sesame seeds, it adds healthy fats and calcium. - Olive Oil: Rich in monounsaturated fats, it supports heart health. - Garlic: Offers immune-boosting properties and can help lower blood pressure. - Red Peppers: Full of vitamins A and C, they promote healthy skin and eyes. Each ingredient works together to create a dish that's not only delicious but also good for you. For the full recipe, check out the detailed cooking guide. Making roasted red pepper hummus is easy and quick. You need a food processor. Gather all your ingredients first. This helps keep things organized. Start by blending everything together until smooth. You can add water for creaminess. 1. Place the rinsed chickpeas, chopped roasted red peppers, tahini, olive oil, minced garlic, lemon juice, and ground cumin into your food processor. 2. Secure the lid tightly. Blend the mix on high speed. Stop to scrape the bowl down. This ensures everything mixes well. 3. If the hummus is too thick, add cold water. Do this one tablespoon at a time. Blend after each addition until you reach the right creaminess. 4. Taste your hummus. Add salt and freshly cracked black pepper to make it better. 5. Transfer the smooth hummus to a serving bowl. Drizzle olive oil on top for extra flavor. 6. Sprinkle smoked paprika and chopped parsley on top for color and flair. To get your hummus just right, focus on the blending time. Blend longer for a smoother texture. If it’s still thick, keep adding cold water slowly. Make sure to taste as you go. Adjust the seasoning to your liking. A little tweak can make a big difference. One big mistake is using dry chickpeas. Always use canned chickpeas for smoothness. Another pitfall is not rinsing the chickpeas. Rinsing helps reduce the canned taste. Avoid over-blending; you want a creamy texture, not a soup. Lastly, be careful with salt. Start with a little and taste as you go. To boost flavor, try adding lemon zest. It adds brightness and fresh taste. You can also mix in roasted garlic for a sweet, rich flavor. For extra heat, toss in a pinch of cayenne pepper. Experiment with herbs like cilantro or basil for unique twists. Each of these can make your hummus stand out. Presentation matters! Serve the hummus in a colorful bowl to catch the eye. Drizzle olive oil on top for a glossy finish. Sprinkle smoked paprika or fresh herbs for color. Pair it with warm pita bread and crunchy veggies. Arrange these on a large platter for a beautiful spread. Explore the [Full Recipe] for more ideas on serving this dish. {{image_4}} Want some heat? Add a kick to your hummus! Use sliced jalapeños or red pepper flakes. Blend them in with your other ingredients for a spicy twist. This adds depth and flavor. You can also drizzle with hot sauce before serving. It’s a perfect match for those who love bold flavors. Herbs can give your hummus a fresh taste. Try adding fresh basil, cilantro, or parsley. You can also mix in other roasted veggies. Think zucchini or eggplant for extra flavor. These additions make your hummus unique and vibrant. They bring in new textures and tastes, making it fun to try different combinations. This hummus is already vegan and gluten-free! You can enjoy it with confidence. It uses chickpeas, tahini, and olive oil, which fit both diets perfectly. If you want to make it even more exciting, serve it with gluten-free crackers or veggie sticks. This way, everyone can enjoy it at any gathering. For the full recipe, check the details mentioned earlier. To keep your hummus fresh, place it in an airtight container. This helps prevent air from drying it out. Make sure to seal the lid tightly. You can also drizzle a thin layer of olive oil on top. This adds flavor and keeps it moist. Store the container in the fridge. It will stay good for about 4 to 5 days. If you want to save hummus for later, freezing is a great option. Start by placing the hummus in a freezer-safe container. Leave some space at the top, as it may expand when frozen. You can also use ice cube trays for small portions. Once frozen, transfer the cubes to a zip-top bag. This method makes it easy to thaw just what you need. Homemade hummus can last up to 3 months in the freezer. Choose containers made of glass or BPA-free plastic. Glass containers are great for keeping flavors intact. They are also easy to clean. If you use plastic, make sure it is strong and safe for freezing. Avoid containers that are too large for small amounts. This helps keep your hummus fresh. For extra care, label your containers with the date. This way, you’ll know when to use them. For the full recipe, check out the Roasted Red Pepper Hummus Delight. Homemade roasted red pepper hummus can last about 5 to 7 days in the fridge. Make sure to store it in an airtight container. This keeps it fresh and tasty. If you notice any changes in smell or color, it's best to toss it out. Yes, you can use jarred roasted red peppers. They save time and add great flavor. Just drain them well before adding to your hummus. This helps keep the hummus from getting too watery. Roasted red pepper hummus pairs well with many foods. Here are some ideas: - Warm pita bread - Fresh vegetable sticks like carrots, cucumbers, and bell peppers - Crackers or tortilla chips - A colorful mezze platter with olives and herbs You can find the full recipe above. Enjoy your tasty hummus! In this post, we explored the key ingredients and step-by-step instructions for roasted red pepper hummus. We covered tips for flavor, common mistakes, and variations. You learned how to store hummus properly and answered your main questions. Remember, this dish is simple yet versatile. Enjoy making your own hummus using fresh ingredients. Try different flavors to find your favorite mix. Happy cooking!](https://joymealplan.com/wp-content/uploads/2025/06/a7fe634f-a62f-44e2-9912-8eb9edd9a507-300x300.webp)

![This Mediterranean chickpea salad is fresh and easy. You can make it in just 15 minutes. It’s perfect for a quick lunch or a side dish. You can find the full recipe at the bottom. Here are the ingredients you will need: - 1 can (15 oz) chickpeas, drained and rinsed - 1 cup cherry tomatoes, halved - 1 cucumber, diced into bite-sized pieces - 1/2 red onion, finely chopped - 1/3 cup Kalamata olives, pitted and sliced - 1/4 cup feta cheese, crumbled - 2 tablespoons fresh parsley, chopped - 2 tablespoons extra virgin olive oil - 2 tablespoons fresh lemon juice - 1 teaspoon dried oregano - Salt and freshly ground black pepper to taste When you pick your ingredients, look for bright colors and firm textures. For tomatoes, choose ones that feel heavy for their size. A ripe cucumber should be smooth and firm. When selecting red onion, avoid any that have soft spots. For olives, pick a jar that looks full and well-sealed. Fresh herbs should smell fragrant and look vibrant. Always choose extra virgin olive oil for the best flavor. Finally, opt for feta that is creamy and not too dry. First, grab a large mixing bowl. Add the drained and rinsed chickpeas to the bowl. Next, toss in the halved cherry tomatoes and diced cucumber. Chop the red onion finely and add that too. Finally, include the sliced Kalamata olives. Gently mix everything to blend well. Now, it’s time for cheese and herbs. Sprinkle the crumbled feta cheese over the chickpea mix. Then, add the chopped fresh parsley. This will give the salad a nice pop of color and flavor. In a small bowl, whisk together the extra virgin olive oil and fresh lemon juice. Add the dried oregano, salt, and freshly ground black pepper. Mix until everything is well combined. This dressing will bring the salad to life. Pour the dressing over the chickpea mixture. Use a spatula or large spoon to toss gently. Make sure all the ingredients are well coated with the dressing. This step helps every bite taste amazing. Take a moment to taste your salad. If it needs more flavor, add more salt, pepper, or lemon juice. Adjust the seasoning until it suits your taste. This is your salad, so make it yours! Cover the bowl with plastic wrap or a lid. Place the salad in the fridge for at least 30 minutes. Chilling allows the flavors to meld beautifully. This step is key for a refreshing salad. Once chilled, it’s time to serve. You can serve it straight from the fridge or at room temperature. For a special touch, garnish with more crumbled feta and parsley. This adds a nice finish and makes it look inviting. For the full recipe, check out the [Full Recipe] section. When making Mediterranean Chickpea Salad, always use fresh ingredients. Fresh herbs and ripe tomatoes make a big difference. Rinse your chickpeas well to remove any canning liquid. This helps improve flavor and texture. Cut your vegetables into similar sizes for even bites. It makes the salad look nice and taste better. You can prepare this salad a day in advance. Just follow the recipe and chill it in the fridge. The flavors will blend well overnight. If you make it ahead, wait to add the feta and parsley until right before serving. This keeps them fresh and tasty. Serve this salad as a light lunch or as a side dish. It pairs nicely with grilled chicken or fish. You can also serve it with pita bread or hummus for a fun twist. For extra crunch, add some toasted nuts or seeds on top. Feel free to experiment with your favorite ingredients! Check out the Full Recipe for more ideas. {{image_4}} You can change some ingredients if you want. For example, swap feta cheese for avocado. This adds creaminess and healthy fats. If you don’t like olives, try capers instead. They bring a nice tangy flavor. You can also use any fresh herbs you like, such as mint or cilantro. This salad fits many diets. It’s already vegan if you skip the feta cheese. For low-carb eaters, reduce chickpeas and add more veggies. You can make it gluten-free by using only safe ingredients. This salad is hearty, making it perfect for those on a plant-based diet. You can change the salad with the seasons. In spring, add fresh peas or asparagus. In summer, include bell peppers or zucchini. In fall, roasted squash adds warmth. In winter, use kale for a hearty twist. You can mix and match as you like for a fresh vibe each time. Using the Full Recipe, you can create a delightful dish that fits any season or diet. Store any leftover Mediterranean Chickpea Salad in an airtight container. This keeps it fresh. Place the container in the fridge. The cold air helps maintain flavor and texture. While I don’t recommend freezing this salad, you can freeze the chickpeas. Drain and rinse them first. Place them in a freezer-safe bag. Squeeze out the air before sealing. They can last up to three months in the freezer. The salad lasts about three days in the fridge. After that, the veggies may get soggy. To keep it fresh longer, store the dressing separately. Combine it right before serving. This keeps all the flavors bright and tasty. For more details on preparing the dish, refer to the Full Recipe. Yes, you can use dried chickpeas. Just soak them overnight. Cook them until tender. This method takes longer but adds great flavor. This salad pairs well with grilled chicken or fish. You can also serve it with pita bread or quinoa. It makes a tasty side dish or a light main meal. The salad can stay fresh in the fridge for about three days. Keep it in a sealed container. The flavors will deepen as it sits. Absolutely! Just skip the feta cheese. You can replace it with vegan cheese or leave it out. The salad still tastes great without it. Yes, this Mediterranean Chickpea Salad is gluten-free. All the ingredients are safe for a gluten-free diet. Enjoy it without worry! This blog post covers how to make a delicious Mediterranean Chickpea Salad. We started with key ingredients and then went through step-by-step instructions. You learned valuable tips for prep and how to store leftovers. Variations allow for personal taste and dietary needs. In conclusion, with simple steps and fresh ingredients, you can create a tasty dish. Enjoying this salad can be fun and healthy. Experiment with it to make it your own!](https://joymealplan.com/wp-content/uploads/2025/05/7c349552-9bfa-4234-aaf2-b24410fd6834-768x768.webp)


![To make crispy baked sweet potato fries, you need simple ingredients. Here is the list: - 2 large sweet potatoes - 2 tablespoons olive oil - 1 teaspoon smoked paprika - 1 teaspoon garlic powder - 1 teaspoon onion powder - ½ teaspoon salt - ½ teaspoon black pepper - ½ teaspoon cayenne pepper (optional) - Fresh parsley for garnish These ingredients work together to create a tasty snack. Sweet potatoes give a sweet, earthy flavor. Olive oil helps them crisp up in the oven. The spices add depth and warmth. You can easily find these ingredients at your local store. For the full recipe, follow the steps to bring this dish to life. - Preheat oven to 425°F (220°C) - Line a baking sheet with parchment paper Start by preheating your oven. This helps cook the fries evenly. While the oven heats, line a baking sheet with parchment paper. This keeps the fries from sticking and makes cleanup easy. - Peel and slice sweet potatoes into fries Next, take your sweet potatoes and peel them. Use a sharp vegetable peeler for this task. After peeling, slice the sweet potatoes into long, thin shapes. Try to keep the fries the same size. This ensures they cook at the same rate. - Mix olive oil and spices for the marinade - Coat the sliced sweet potatoes evenly In a large bowl, mix olive oil with spices. Use smoked paprika, garlic powder, onion powder, salt, black pepper, and cayenne pepper if you like heat. Stir well until everything blends. Add your sliced sweet potatoes to the bowl. Toss them gently to coat each fry with the marinade. This will add great flavor. - Spread fries in a single layer on the baking sheet - Bake for 20 minutes, flip, and bake an additional 10-15 minutes Now, spread the fries on the baking sheet. Make sure they are in a single layer. This spacing is key for crispiness. Place the sheet in the oven and bake for 20 minutes. After that, use a spatula to flip the fries over. Bake them for another 10-15 minutes until golden brown. Keep an eye on them to avoid burning. To make the crispiest sweet potato fries, slice the potatoes evenly. Uniform thickness helps them cook at the same rate. Aim for about 1/4 inch thick pieces. This way, each fry will be golden and crunchy. When you place the fries on the baking sheet, give them space. Avoid overcrowding the pan. If they touch, they will steam instead of crisp up. Use two baking sheets if needed. Adding extra seasonings can boost the taste of your fries. Try adding cumin for a warm flavor or a pinch of cinnamon for sweetness. You can also use ranch seasoning for a tasty twist. If you want a healthier option, swap olive oil for cooking spray. This will cut down on calories without losing flavor. You can also bake the fries without oil for a lighter snack. Get fun with your presentation! Serve the fries in a mason jar or a colorful cone. This makes your snack look special and inviting. Dipping sauces also add a lot to the experience. Honey mustard is a perfect match, giving a sweet and tangy taste. Spicy mayo adds a nice kick. You can even mix ketchup with a bit of hot sauce for a fun dip. For the full recipe, check out the section above and enjoy making these crispy baked sweet potato fries! {{image_4}} You can change up your sweet potato fries by adding different seasonings. For a sweet twist, try cinnamon and sugar. This mix gives a fun, dessert-like flavor. If you like heat, add spicy jalapeño or chili powder. These spices will give your fries a nice kick. Experimenting with seasonings makes each batch unique! You can cook sweet potato fries in different ways to change the flavor. An air fryer is a great choice if you want extra crispy fries. Just follow the same steps as baking but adjust the time to about 15-20 minutes. For a smoky flavor, try grilling them. Grill until they are tender and have nice marks from the grill. If you're concerned about diets, there are easy swaps. Sweet potato fries are naturally gluten-free, so you can enjoy them without worry. For vegan-friendly fries, just use olive oil and the seasonings in the recipe. There’s no need for animal products here. Both variations taste amazing and fit many diets. For more ideas, check out the [Full Recipe]. To keep your leftover sweet potato fries fresh, store them in an airtight container. Place them in the fridge. They will last for about 3 days. When you want to eat them again, reheating is key. To get that crispy texture back, use the oven. Set it to 400°F (200°C). Spread the fries on a baking sheet and heat for about 10 minutes. This method keeps them crunchy and tasty. If you want to freeze uncooked fries, follow these steps. Start by slicing the sweet potatoes as you normally would. Next, spread the fries out on a baking sheet in a single layer. Freeze them for about 1 hour. Once they are frozen, transfer them to a zip-top bag. Remove as much air as you can before sealing. They can stay fresh in the freezer for up to 3 months. When you’re ready to cook the frozen fries, there’s an easy way to reheat them. Preheat the oven to 425°F (220°C). Spread the frozen fries on a baking sheet without thawing them first. Bake for 25 to 30 minutes, flipping halfway through. This method ensures they will come out crisp and delicious. Enjoy your crispy baked sweet potato fries! For the complete recipe, check out the Full Recipe. To make crispy baked sweet potato fries, start with dry sweet potatoes. Cut them into even pieces. This helps them cook evenly. Coat the fries well with olive oil and spices. Spread them out on the baking sheet. Don’t let them touch! Bake at 425°F (220°C) for 20 minutes. Flip them halfway to crisp all sides. This method lets air flow around the fries, which helps them get crispy. Yes, you can use other potatoes like russet or Yukon gold. These types will give you a different taste and texture. Russet potatoes are starchy and can get very crispy. Yukon golds are creamy and have a rich flavor. Just remember to cut them the same size for even cooking. Experimenting with different potatoes can be fun and tasty. Sweet potato fries go great with many sauces. Honey mustard is a popular choice. It pairs well with the sweet flavor of the fries. Spicy mayo adds a nice kick. You can mix mayo with sriracha for heat. BBQ sauce also works well and adds a smoky touch. Try different sauces to find your favorite! You learned how to make tasty sweet potato fries from scratch. We covered key ingredients, step-by-step baking, and tips for crispiness. I shared flavor options and ways to store leftovers. Sweet potatoes offer many cooking choices, like air frying or grilling. For a fun twist, try unique seasonings or fun serving styles. Now, it’s time to enjoy your delicious fries. With these steps and ideas, you can make this dish over and over again. Happy cooking!](https://joymealplan.com/wp-content/uploads/2025/06/857bf62a-4e6d-451e-97e4-2a68efd4a71b-768x768.webp)

