
Are you ready to create a rich and creamy delight with minimal effort? This Simple Squash Soup is your new go-to recipe. It combines warming squash flavors with easy steps, perfect for any skill level. You’ll find tips, variations, and storage info to ensure your soup is delicious. Whether cozying up on a chilly evening or impressing guests, this soup has you covered. Let’s dive into the details!
Ingredients
Complete list of ingredients for Simple Squash Soup
To make a rich and creamy squash soup, gather these simple ingredients:
– 1 medium butternut squash, peeled and diced into 1-inch cubes
– 1 small onion, finely chopped
– 2 cloves garlic, minced
– 4 cups vegetable broth (low-sodium recommended)
– 1 can (14 oz) coconut milk (full-fat for creaminess)
– 1 teaspoon fresh sage, finely chopped (or ½ teaspoon dried sage)
– 2 tablespoons extra virgin olive oil
– Salt and freshly ground black pepper to taste
– Pumpkin seeds for garnish (optional, toasted for extra flavor)
Substitutions for common ingredients
You can easily swap some ingredients for others based on what you have. Here are some ideas:
– Butternut squash: Use pumpkin or acorn squash instead. Both work well.
– Vegetable broth: Chicken broth can be a good substitute if you are not vegetarian.
– Coconut milk: Heavy cream or cashew cream may replace coconut milk for a different taste.
– Fresh sage: Thyme or rosemary can add a nice twist to your soup.
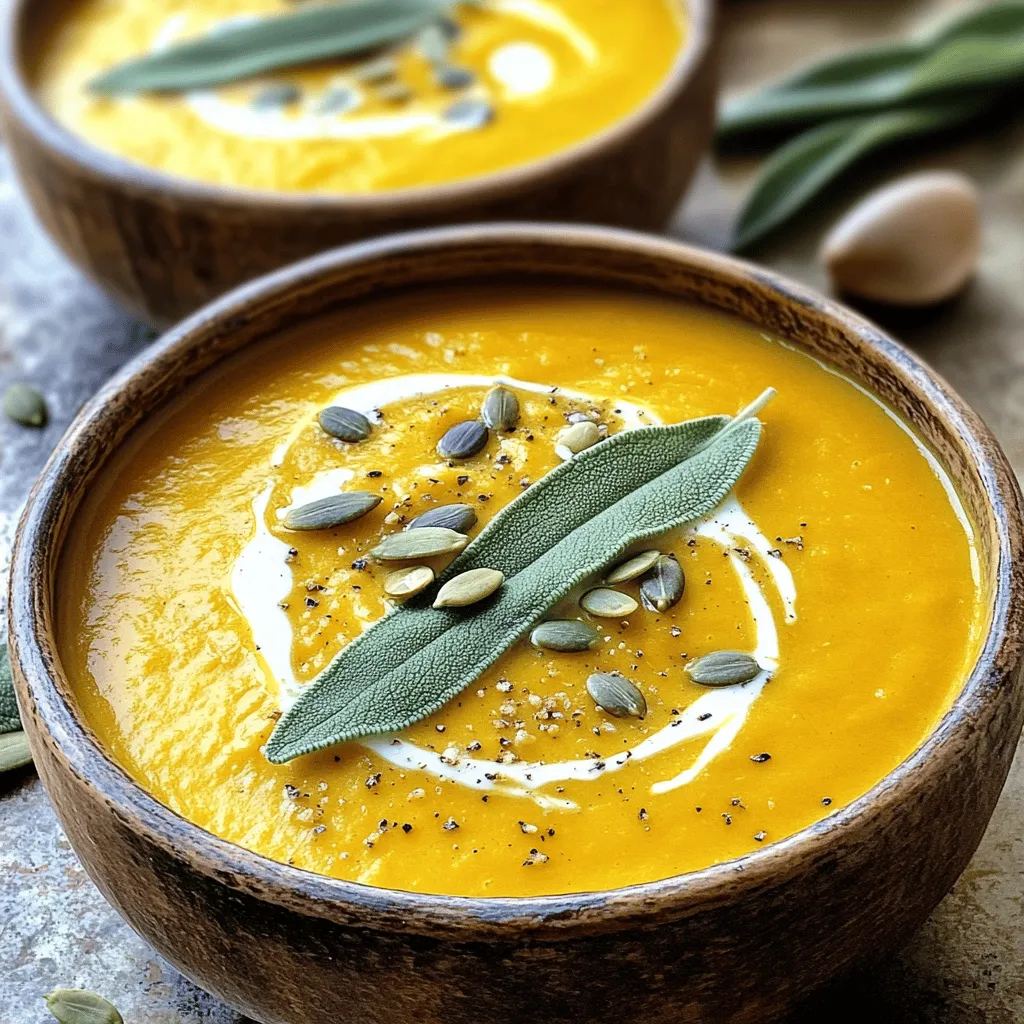
Optional garnishes to enhance presentation
Garnishes can elevate your soup and make it look fancy. Try these options:
– Toasted pumpkin seeds: They add crunch and a nice nutty flavor.
– Swirl of coconut milk: Add a swirl on top for a beautiful look.
– Fresh herbs: A sprig of sage or cilantro can freshen up the dish.
– Croutons: For a bit of texture, sprinkle homemade or store-bought croutons on top.
These simple touches will give your soup a lovely finish.
Step-by-Step Instructions
Detailed instructions on how to make Simple Squash Soup
To make this simple squash soup, follow these steps:
1. Heat 2 tablespoons of olive oil in a large pot over medium heat. Let it shimmer.
2. Add a small, chopped onion. Cook for about 5 minutes until soft. Stir often.
3. Toss in 2 minced garlic cloves and 1 teaspoon of fresh sage. Cook for 1 minute.
4. Next, add 1 medium butternut squash cut into cubes. Pour in 4 cups of vegetable broth.
5. Bring this mix to a boil, then lower the heat. Let it simmer for 15-20 minutes.
6. Use an immersion blender to blend the soup until smooth. If using a regular blender, do this in batches.
7. Stir in 1 can of coconut milk. Let it simmer for 5 more minutes to mix the flavors.
8. Season with salt and pepper to taste. If you want a thinner soup, add more broth.
Cooking times and temperature guidelines
– Prep Time: 10 minutes
– Cook Time: 25 minutes
– Total Time: 35 minutes
– Temperature: Keep the heat on medium for sautéing, then low for simmering.
Tips for using a blender vs. immersion blender
Using an immersion blender is easy and cuts down on dishes. You blend right in the pot. Just be careful not to splash hot soup. If you use a regular blender, work in small batches. Let the soup cool a bit before blending. This helps avoid a hot mess. Always return the blended soup to the pot to keep it warm.
Tips & Tricks
Best practices for chopping and preparing squash
Start by choosing a firm, fresh squash. Look for smooth skin without dark spots. Use a sharp knife for safety and ease. Cut the squash in half, scoop out the seeds, and peel it. Use a sturdy cutting board to prevent slips. Dice the squash into small cubes, about one inch each. This size helps the squash cook evenly.
How to ensure your soup is creamy and rich
To achieve a creamy texture, use full-fat coconut milk. It adds richness without dairy. Blend the soup until it’s completely smooth. An immersion blender is great for this. If you use a regular blender, do it in small batches. This method avoids spills and ensures a silky finish. Taste your soup before serving. Adjust the seasoning with salt and pepper as needed.
Temperature adjustments for perfect texture
Cook your soup on medium heat until it simmers. This temperature allows the flavors to combine well. If your soup is too thick, add a little vegetable broth. If it’s too thin, let it simmer longer to reduce. Always check the texture before serving. You want it to be smooth and comforting, perfect for a chilly day.
Variations
Suggestions for adding different flavors or ingredients
You can easily change the flavor of your squash soup. Try adding spices like nutmeg or cinnamon. These warm flavors bring a nice twist. You can also mix in some chopped apples for sweetness. If you want a kick, add a pinch of cayenne pepper. For a fresh taste, stir in some lemon juice right before serving.
Ways to make it vegan or gluten-free
Making this soup vegan is simple. Just use vegetable broth and coconut milk, which are both plant-based. For a gluten-free version, ensure your broth is gluten-free. Most vegetable broths are safe, but check the label. Using fresh herbs instead of dried can add a burst of flavor while keeping it gluten-free.
Creative garnishing ideas to spice things up
Garnishing can elevate your soup’s look and taste. Try drizzling a little extra coconut milk on top for creaminess. Toasted pumpkin seeds add a nice crunch and flavor. You might also consider fresh herbs like cilantro or parsley for color and freshness. A sprinkle of chili flakes can add a pop of color and a hint of heat. Enjoy your creative touch!
Storage Info
How to properly store Simple Squash Soup
To keep your Simple Squash Soup fresh, store it in an airtight container. Let the soup cool to room temperature before sealing it. Place it in the fridge for up to five days. If you want to keep it longer, consider freezing.
Freezing instructions for long-term storage
For long-term storage, you can freeze the soup. Use freezer-safe containers or bags. Leave some space at the top for expansion. Your soup can last up to three months in the freezer. To thaw, move it to the fridge overnight before reheating.
Reheating tips to maintain flavor and texture
When you want to enjoy your soup again, gently reheat it on the stove. Heat it over low to medium heat, stirring often. If the soup seems thick, add a splash of vegetable broth or coconut milk. This helps revive its creamy texture and rich flavor. Enjoy your bowl of warmth!
FAQs
What type of squash is best for soup?
Butternut squash shines in soup. It has a sweet flavor and creamy texture. You can also use acorn or kabocha squash. Both offer a nice taste too. Each type adds its own unique flavor. I love butternut for its smoothness and sweetness.
Can I make Simple Squash Soup ahead of time?
Yes, you can make this soup ahead. It tastes even better the next day! Store it in an airtight container. Keep it in the fridge for up to three days. If you want to save it longer, freeze it. Just thaw it overnight before reheating.
How can I adjust the thickness of my soup?
You can change the thickness with ease. For a thicker soup, blend it longer. If it’s too thick, add more vegetable broth. Stir it in slowly until you reach the right texture. I often add broth little by little to get it just right.
You learned how to make a tasty Simple Squash Soup. We covered ingredients, steps, and tips. I shared ways to store and reheat your soup, too. You can try different flavors and make it vegan or gluten-free.
In conclusion, making squash soup is easy and fun. With these tips, you can create a dish that warms your soul. Enjoy experimenting and sharing your delicious results!


