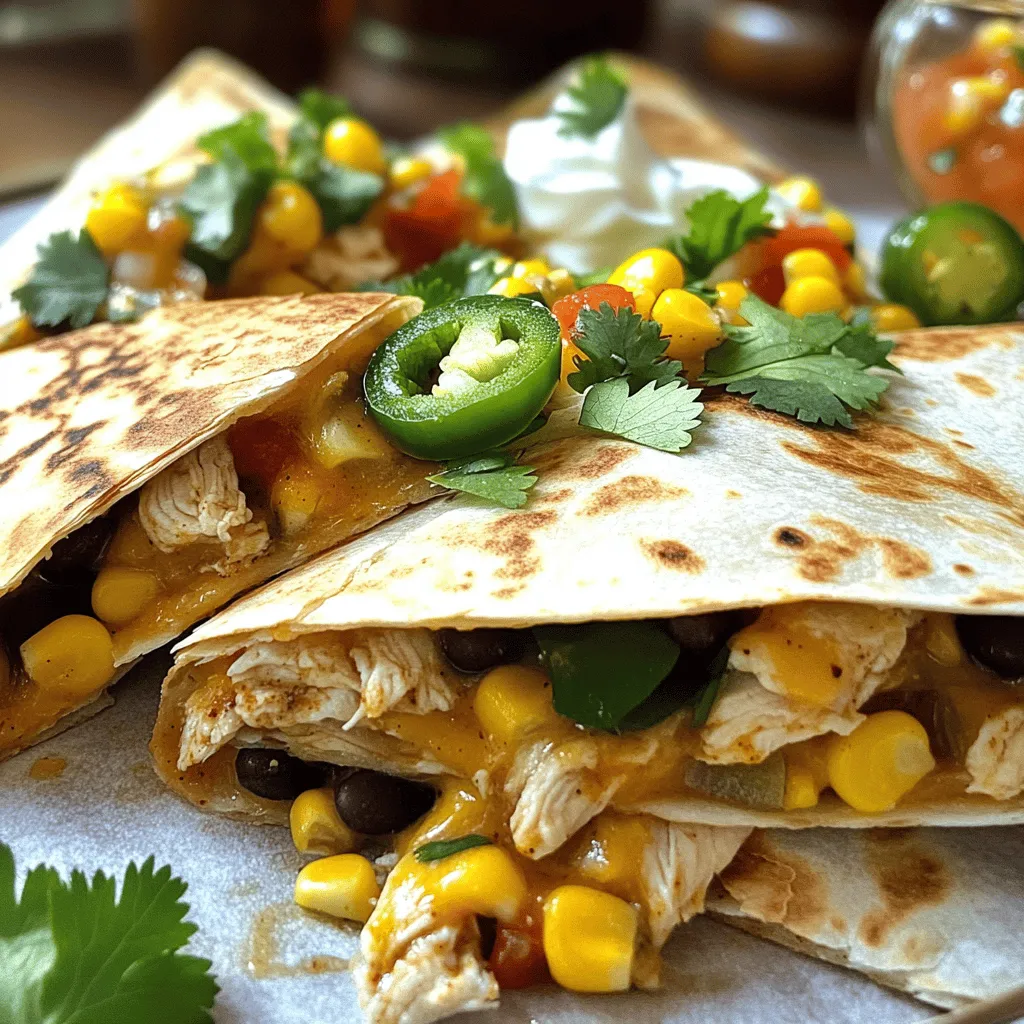
Are you ready to spice up your dinner routine? These Spicy Chicken Quesadillas are bursting with flavor and are super easy to make. With tender chicken, fresh veggies, and melted cheese sandwiched between golden tortillas, this dish will have everyone asking for seconds. Whether you crave heat or crave comfort, these quesadillas satisfy all your taste buds. Let’s dive into the delicious details and transform your mealtime!
Ingredients
Main Ingredients
– 2 large chicken breasts, diced into bite-sized pieces
– 1 tablespoon olive oil
– 1 teaspoon taco seasoning
– 1 teaspoon smoked paprika
Additional Ingredients
– 1 jalapeño, finely chopped
– 1 cup corn kernels
– 1 cup black beans
Cheese and Tortillas
– 1 cup shredded cheddar cheese
– 1 cup shredded Monterey Jack cheese
– 4 large flour tortillas
Seasoning and Garnish
– Salt and pepper, to taste
– 1/4 cup fresh cilantro, chopped
– Sour cream and salsa, for serving
When I cook spicy chicken quesadillas, I focus on fresh and simple ingredients. The chicken breasts are the star here. I like to cut them into small pieces for quick cooking. This way, they soak up all the flavors from spices like taco seasoning and smoked paprika.
Next, I add a jalapeño for heat, but you can remove the seeds for less spice. Corn and black beans add sweetness and texture. Together, they create a colorful filling.
Cheese is crucial for that melty goodness. I mix cheddar and Monterey Jack for a creamy blend. Don’t forget the large flour tortillas; they wrap everything up nicely.
Finally, I season with salt and pepper. Fresh cilantro is my go-to garnish. It brightens the dish. I serve these quesadillas with sour cream and salsa. These additions bring out the best flavors.
Step-by-Step Instructions
Cooking the Chicken
– Heat olive oil in a large skillet.
– Add diced chicken and season with taco seasoning and smoked paprika.
– Cook until chicken is thoroughly cooked, about 7-10 minutes.
In this step, make sure the skillet is hot enough. You want the chicken to sizzle when it hits the pan. The taco seasoning adds a great flavor. Smoked paprika gives a nice smoky touch. Stir the chicken often. This helps it cook evenly. You’ll know it’s ready when there’s no pink left.
Adding Vegetables
– Stir in chopped jalapeño, corn, and black beans.
– Cook for an additional 2-3 minutes.
Now, it’s time to boost the flavor. Adding jalapeños brings some heat. If you want it milder, remove the seeds. The corn adds sweetness, while black beans give protein. Mix everything well. Let them cook together for a few minutes. This melds the flavors nicely.
Assembling Quesadillas
– Place flour tortilla in a skillet and sprinkle with cheese.
– Add chicken and vegetable mixture and fold.
– Cook until golden brown on both sides.
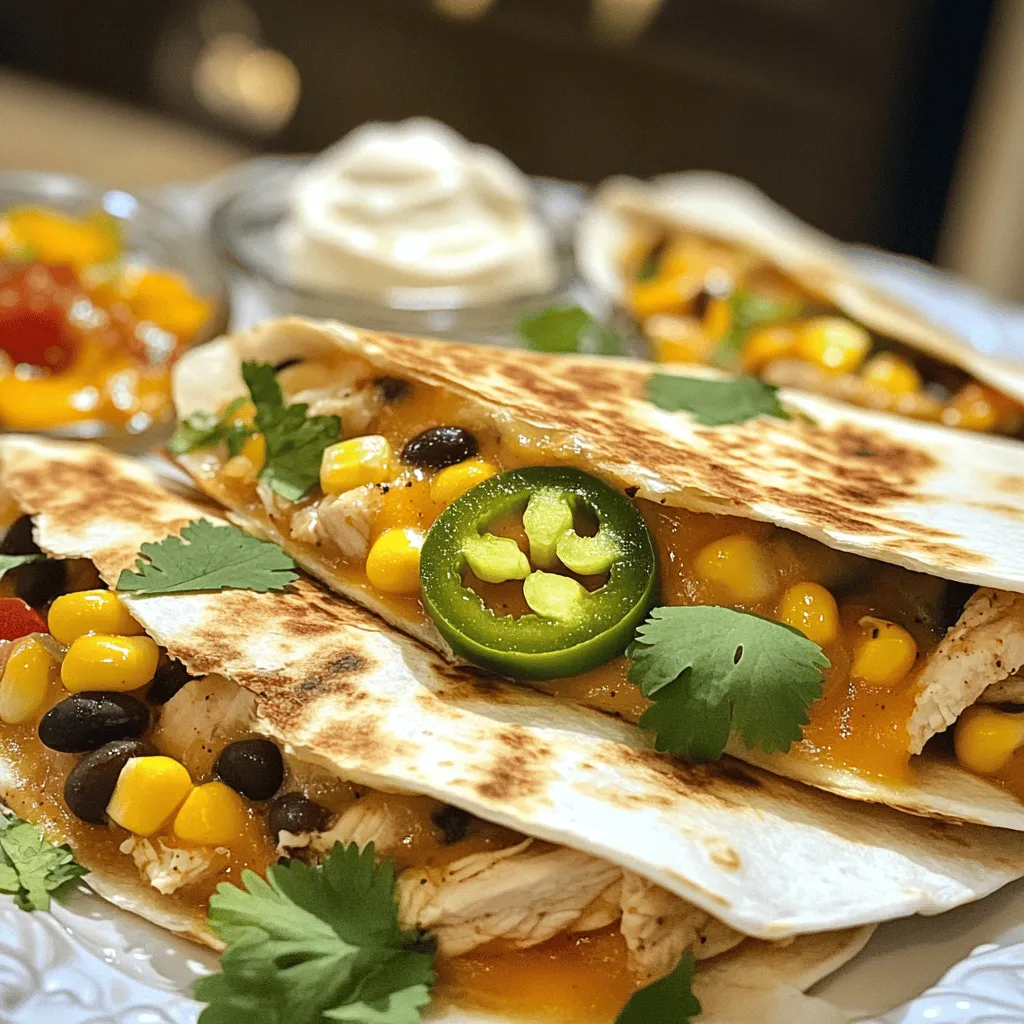
Grab a large skillet again. Place one tortilla in it and sprinkle half the cheese on top. Next, scoop some of the chicken and vegetable mix onto one half. Fold the tortilla over. This creates a pocket of goodness! Cook until the bottom is golden brown. Flip it carefully. Both sides should be crispy and brown.
Finishing Touches
– Slice quesadillas into wedges.
– Garnish with cilantro and serve with sour cream and salsa.
Once cooked, take the quesadilla out. Let it cool for a minute. Then, slice it into wedges. This makes dipping easy. Sprinkle fresh cilantro on top for a burst of flavor. Serve with sour cream and salsa on the side. These add a creamy and tangy element to your dish.
Tips & Tricks
Cooking Tips
– Ensure chicken is thoroughly cooked to avoid any raw texture.
– Use a non-stick skillet for easier flipping.
When cooking chicken, make sure it reaches an internal temperature of 165°F. This keeps it safe and tasty. I often check by cutting a piece in half to see if it’s no longer pink. A non-stick skillet helps prevent the quesadillas from sticking. This way, flipping them becomes a breeze.
Flavor Enhancements
– Experiment with different cheeses for added flavor.
– Adjust jalapeño amount based on spice preference.
Trying different cheeses can change the whole dish. You might love a mix of pepper jack and cheddar for a spicy kick! If you like it mild, reduce the jalapeño. On the other hand, if you crave heat, toss in more. Every bite should be just right for you.
Serving Suggestions
– Pair with Mexican rice or a fresh salad.
– Serve with lime wedges for a citrusy twist.
I love serving these quesadillas with Mexican rice. It adds a nice touch and makes the meal more filling. A fresh salad with crunchy veggies offers a great contrast. Don’t forget lime wedges! A squeeze of lime adds a bright flavor that complements the spices perfectly.
Variations
Vegetarian Option
You can make spicy chicken quesadillas vegetarian by swapping chicken for grilled vegetables or tofu. Try using bell peppers, zucchini, or mushrooms. These veggies will soak up the spices and add great taste. Tofu gives a nice texture and protein. Just make sure to season them well with taco seasoning.
Other Meats
If you prefer other meats, use beef or shrimp instead of chicken. Both will bring their own unique flavors. For beef, consider using ground beef or steak strips. For shrimp, use peeled and deveined shrimp. Explore different marinades for varied flavors. A spicy marinade can add excitement to your filling!
Cheese Variations
Cheese is key in quesadillas. You can try pepper jack cheese for some extra heat. Its creamy texture matches well with the spicy filling. Goat cheese is another option for a creamy twist. It melts nicely and adds a tangy flavor. Mixing different cheeses can create a rich, delicious taste!
Storage Info
Refrigeration
Store any leftover quesadillas in an airtight container. They will last in the fridge for up to 3 days. This way, you can enjoy them again and save time on cooking.
Freezing
You can freeze uncooked quesadillas for later use. Just prepare them as you normally would, but do not cook them. Wrap each quesadilla tightly in plastic wrap. Cooked quesadillas can also be frozen for up to one month. This is a great way to have a quick meal ready.
Reheating Instructions
To reheat, use a skillet for the best texture. Heat the skillet over medium heat and add the quesadilla. Cook until heated through and crispy. If you need a quick option, a microwave works too. Just place the quesadilla on a plate, cover it with a paper towel, and heat for about 30 seconds to 1 minute. Enjoy your tasty meal!
FAQs
How do I make spicy chicken quesadillas without using chicken?
You can use beans or grilled vegetables as a filling. Black beans work well. They add protein and fiber. Grilled peppers or zucchini also give a great taste. This option is tasty and healthy.
What can I serve with spicy chicken quesadillas?
Common sides include guacamole, rice, or a fresh salsa. Guacamole adds creaminess. Rice provides a nice base. Fresh salsa gives a tangy kick. These sides make your meal complete and fun.
Can I use corn tortillas instead of flour?
Yes, corn tortillas can be used, but they may require more care while cooking. They can break easily, so handle them gently. Warm them first to soften. This will help with folding and cooking.
How to make the quesadillas even spicier?
Add sliced jalapeños or chopped habaneros to the filling. These peppers boost the heat level. You can also use spicy cheese like pepper jack. This adds flavor and spice all at once.
This blog post discussed how to make delicious spicy chicken quesadillas. We started with the main and additional ingredients, like chicken, jalapeños, corn, and beans. Next, I detailed a step-by-step cooking guide, from preparing the chicken to serving the filled quesadillas. I also shared helpful tips, variations, and storage methods to enhance your experience.
Make these quesadillas your own by trying new ingredients. Enjoy the process and share them with friends!


