Craving a cozy bowl of comfort? Look no further! My Vegan Mac and Cheese brings all the warmth and creamy texture you desire without any dairy. This dish combines simple, high-quality ingredients to create a delicious meal that you can customize however you like. Whether you’re vegan or just looking for a tasty twist on a classic, you’ll find everything you need right here to whip up this dish at home! Let’s dive in!
Ingredients
Detailed Ingredients List
For a tasty Vegan Mac and Cheese, you need core ingredients that bring flavor and creaminess. Here’s what you’ll need:
– 2 cups elbow macaroni
– 1 cup raw cashews (soaked for 2 hours and drained)
– 1 cup unsweetened almond milk
– 1/4 cup nutritional yeast
– 2 tablespoons fresh lemon juice
– 1 teaspoon garlic powder
– 1 teaspoon onion powder
– 1 teaspoon smoked paprika
– Salt and pepper, to taste
– 1 tablespoon extra virgin olive oil
– 1/2 cup breadcrumbs (optional, for topping)
– Fresh parsley, finely chopped (for garnish)
These ingredients create a rich and creamy sauce that coats the pasta perfectly.
You can also customize your dish with optional ingredients. For example, add in some sautéed veggies like spinach or mushrooms. Try adding different spices like cayenne for heat or Italian herbs for a twist. The options are endless!
Using high-quality ingredients makes a big difference in taste. Fresh cashews and good almond milk help create a smooth sauce. Nutritional yeast gives that cheesy flavor, while fresh lemon juice adds a nice tang. Always choose fresh herbs for the best flavor.
Step-by-Step Instructions
Cooking the Pasta
To make the best vegan mac and cheese, I recommend using elbow macaroni. This pasta shape holds the creamy sauce well. Start by bringing a big pot of salted water to a boil. Once it’s boiling, add the elbow macaroni. Cook it according to the package instructions. You want to aim for that perfect al dente texture. This means the pasta should be soft but still firm when you bite it. After cooking, drain the pasta and set it aside in a large mixing bowl.
Blending the Cheese Sauce
For the cheese sauce, you will need a high-speed blender. This tool is key for making the sauce smooth and creamy. In your blender, add the soaked and drained cashews, almond milk, nutritional yeast, fresh lemon juice, garlic powder, onion powder, smoked paprika, and a pinch of salt and pepper. Blend everything on high. Keep blending until it looks smooth. If the sauce is too thick, add more almond milk, a tablespoon at a time, until it’s just right.
Combining and Baking (Optional)
Once your pasta and cheese sauce are ready, it’s time to combine them. Pour the creamy cheese sauce over the cooked macaroni in your bowl. Stir gently to coat each piece of pasta. This creates a delightful creamy mixture. If you like a crunchy top, you can bake it. Preheat your oven to 350°F (175°C). Transfer the mac and cheese to a greased baking dish. In a small bowl, mix breadcrumbs with olive oil. Sprinkle this mixture on top of the mac and cheese. Bake it for 20 minutes or until the top is golden brown and crispy.
Tips & Tricks
Achieving Creaminess
To get that creamy texture in vegan mac and cheese, soaking cashews is key. Soak them for at least 2 hours in water. This softens them, making blending easier. After soaking, drain the cashews and add them to your blender. If your sauce is too thick, you can thin it by adding more almond milk. Do this slowly, one tablespoon at a time, until you reach the right creaminess.
Flavor Enhancements
Adding spices and flavors makes your dish pop. Consider using smoked paprika or garlic powder for a richer taste. Nutritional yeast adds a cheesy flavor without dairy. You can also mix in veggies like spinach or mushrooms for added nutrition. For protein, try adding cooked lentils or chickpeas. These not only boost health but also add texture.
Presentation Ideas
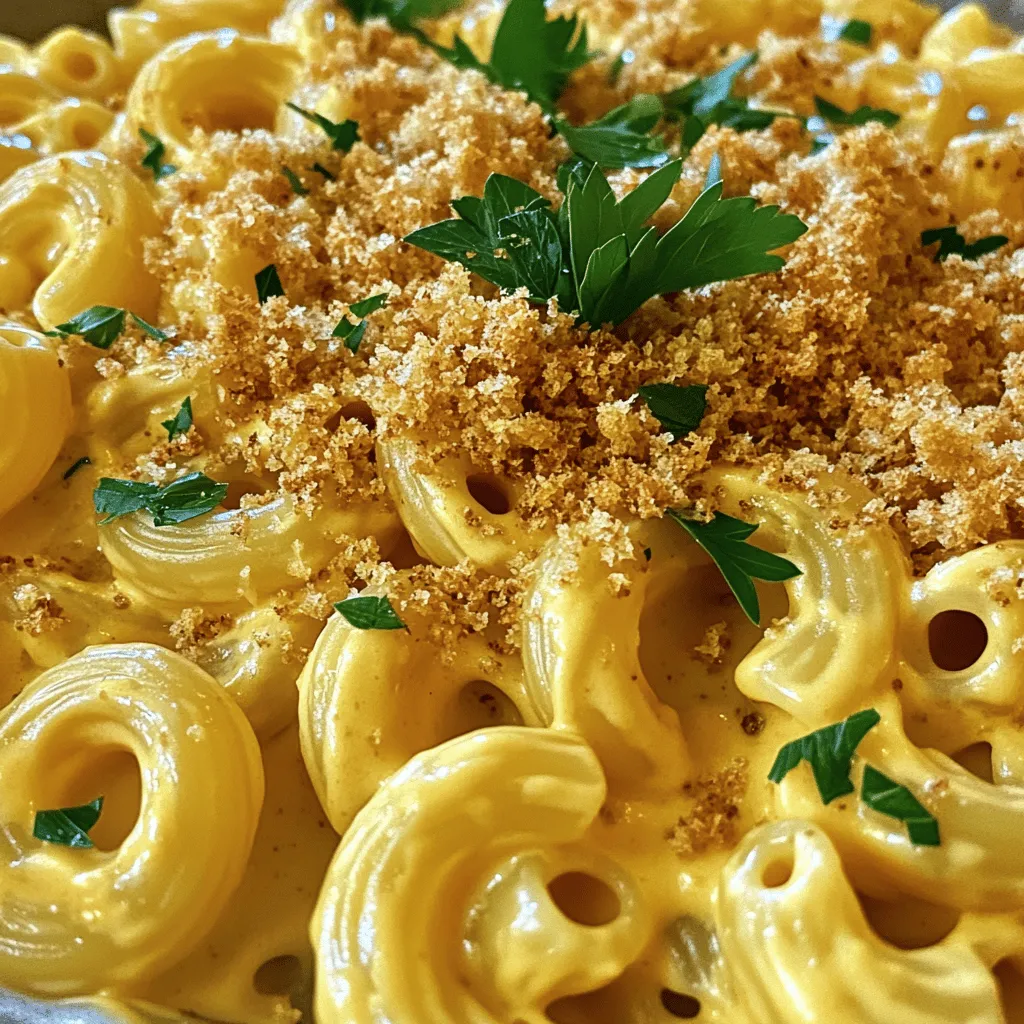
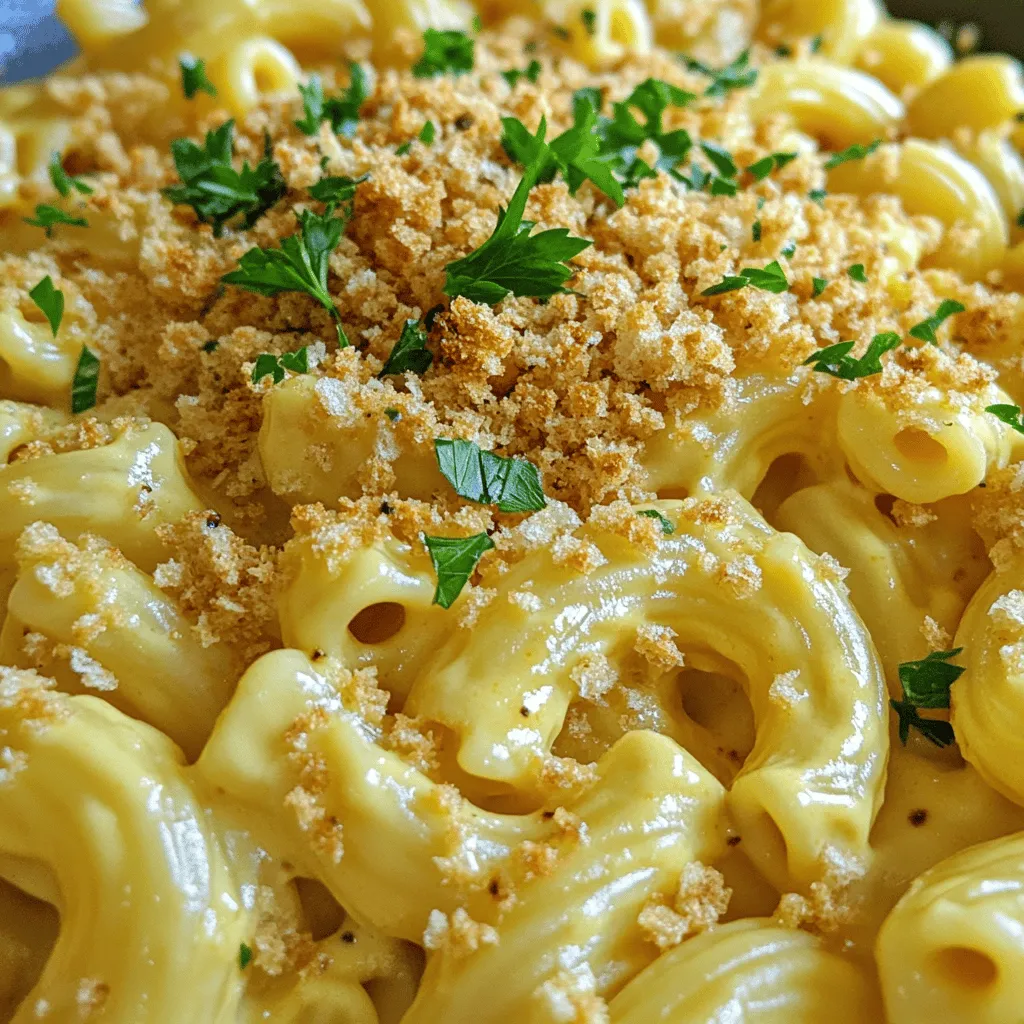
For a beautiful presentation, serve the mac and cheese in individual bowls. This makes each serving feel special. You can garnish with fresh parsley for a pop of color. A sprinkle of paprika on top adds both flavor and visual appeal. If you bake it, the golden crust will impress your guests even more. For an extra crunch, add breadcrumbs mixed with olive oil before baking. This adds texture and makes the dish even more inviting.
Variations
Gluten-Free Option
For a gluten-free vegan mac and cheese, choose gluten-free pasta. Rice, corn, or quinoa pasta work well. These options keep the dish tasty and safe for those with gluten issues. When making the cheese sauce, use the same ingredients. Just ensure any added spices or sauces are gluten-free.
Different Flavor Profiles
You can change the flavors in your vegan mac and cheese easily. Adding herbs like basil or thyme can brighten the dish. For a spicy kick, try adding cayenne pepper or red pepper flakes. If you want a buffalo flavor, mix in some hot sauce. For a smoky taste, consider adding liquid smoke. You can also create a pepper jack flavor by mixing in jalapeños or pepper jack-style vegan cheese.
Creamy vs. Baked
Creamy stovetop mac and cheese is quick and easy. It stays soft and smooth. Simply combine the pasta and cheese sauce on the stove. Stir until warm, then serve.
Baked mac and cheese has a crunchy top. To achieve this, bake it in the oven. After mixing, pour the mac and cheese into a dish. Top with breadcrumbs mixed with olive oil. Bake it at 350°F for about 20 minutes. This gives you a delicious golden crust. Both styles are tasty, so you can choose based on your mood.
Storage Info
Refrigerating Leftovers
To keep your vegan mac and cheese fresh, store it in an airtight container. This will help prevent any odors from mixing with the dish. It’s best to cool the mac and cheese before sealing it. In the fridge, it lasts about 3 to 5 days. Always check for any signs of spoilage before eating.
Freezing Tips
You can freeze vegan mac and cheese for later. First, let it cool completely. Then, place it in a freezer-safe container or bag. Make sure to remove as much air as possible. When you’re ready to enjoy it, thaw it overnight in the fridge. Reheating might change the texture a bit, but it will still taste great.
Reheating Instructions
To reheat, use the stove or microwave. If using the stove, add a splash of almond milk to keep it creamy. Heat it slowly over low heat, stirring often. In the microwave, heat in short bursts, stirring in between. This helps maintain its creaminess. For best results, avoid overheating, as it can dry out the dish. Enjoy your creamy comfort food delight!
FAQs
How can I make Vegan Mac and Cheese healthier?
To make Vegan Mac and Cheese healthier, consider these tips:
– Use whole grain pasta: This adds fiber and nutrients.
– Swap cashews for silken tofu: Tofu is lower in calories and still creamy.
– Reduce nutritional yeast: Use less to cut down on calories.
– Add veggies: Mix in spinach, broccoli, or peas for more vitamins.
– Cut down on oil: Use less olive oil or skip it entirely.
These small changes can make a big difference in nutrition while keeping the taste delicious.
Can I make it without cashews?
Yes, you can make Vegan Mac and Cheese without cashews. Here are some great alternatives:
– Silken tofu: This gives a smooth texture and adds protein.
– Sunflower seeds: Soak them for a creamy sauce.
– Avocado: Blend ripe avocado for a rich, creamy flavor.
– Almonds: Use soaked almonds for a nutty taste.
These options keep the dish creamy and tasty without cashews.
What can I add for extra protein?
To boost protein in your Vegan Mac and Cheese, try these options:
– Chickpeas: Mix in canned or cooked chickpeas for a hearty addition.
– Lentils: Cooked lentils add protein and texture.
– Edamame: Toss in shelled edamame for a fun twist.
– Tofu: Add cubes of baked tofu for protein and a chewy bite.
These ingredients help you enjoy a filling meal while increasing protein content.
How long can I store Vegan Mac and Cheese in the fridge?
You can store Vegan Mac and Cheese in the fridge for about 3 to 5 days. Here are some tips for safety:
– Use an airtight container: This keeps the dish fresh and prevents odors.
– Check for changes: Look for any off smells or textures before eating.
– Reheat properly: Warm it in the microwave or on the stove until hot.
Following these tips helps you keep your Vegan Mac and Cheese safe and tasty for a few days.
This blog post covered all you need for great Vegan Mac and Cheese. We explored key ingredients, cooking steps, and tips for creaminess and flavor. You also learned about variations, storage, and answers to common questions.
As you create this dish, remember that quality ingredients make a big difference. Make it your own with fun twists and enjoy every bite of this classic dish, guilt-free.


