Slow Cooker Turkey Chili Flavorful and Easy Recipe
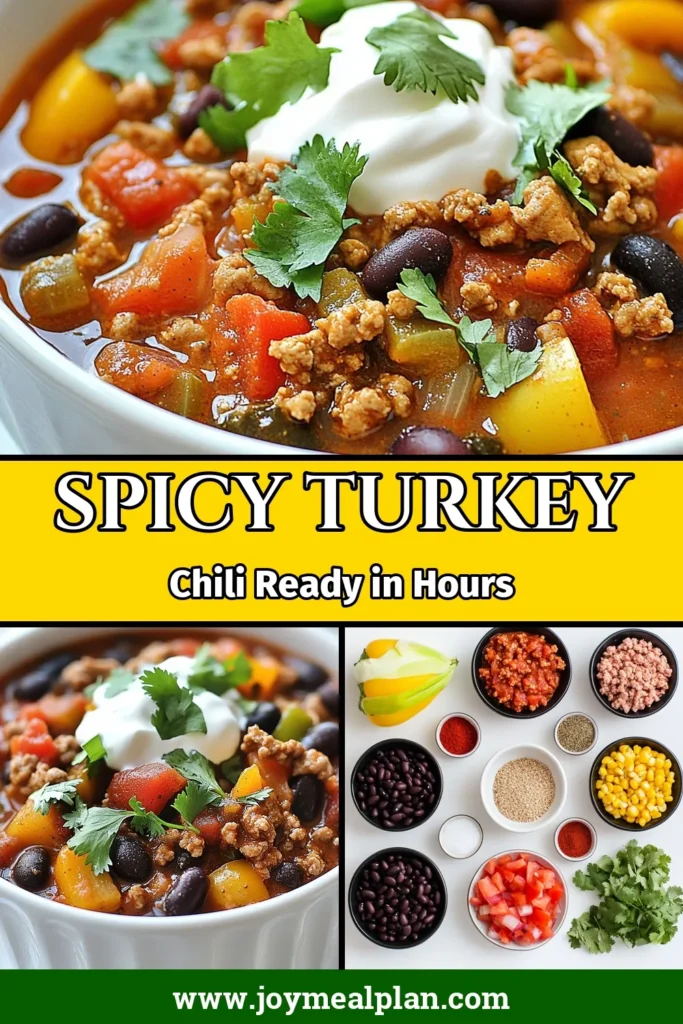
Looking for an easy and tasty meal? My Slow Cooker Turkey Chili recipe is just what you need! Packed with lean turkey, beans, and vibrant veggies, this dish is perfect for busy days. With just a few spices, you can create a comforting bowl that warms your soul. Stick around to learn the simple steps and tips that will make you a chili expert!
Why I Love This Recipe
- Healthy and Wholesome: This turkey chili is packed with lean protein and plenty of beans and vegetables, making it a nutritious option for any meal.
- Easy to Prepare: With just a few simple steps and a slow cooker, this recipe allows for a hands-off cooking experience, perfect for busy days.
- Flavorful and Satisfying: The blend of spices and ingredients creates a rich and hearty chili that is sure to warm you up and satisfy your cravings.
- Customizable: You can easily adjust the heat level and add your favorite toppings, making this chili adaptable to any taste preference.
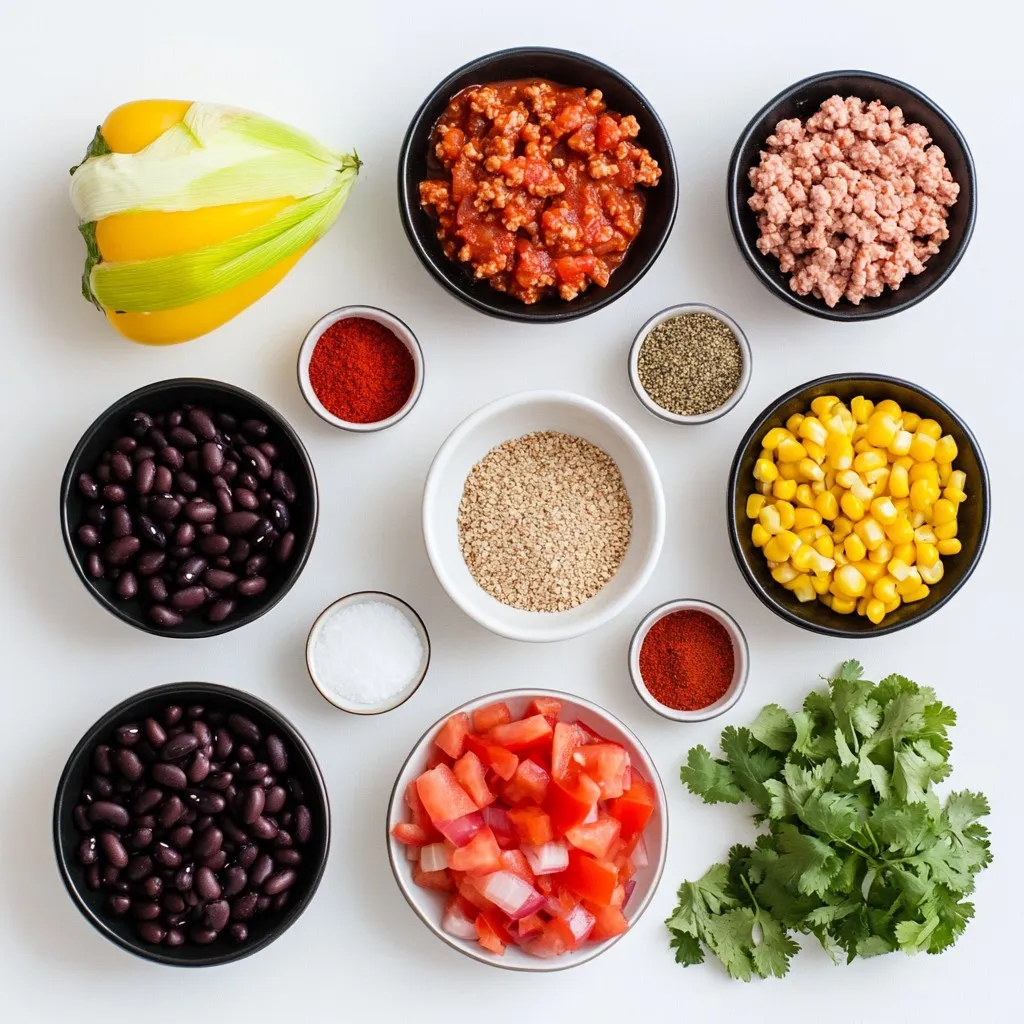
Ingredients
Main Ingredients
– 1 pound ground turkey
– 1 medium onion, finely chopped
– 2 cloves garlic, minced
– 1 bell pepper of your choice, diced
– 1 can (15 oz) black beans, drained and rinsed
– 1 can (15 oz) kidney beans, drained and rinsed
– 1 can (28 oz) crushed tomatoes
– 2 tablespoons tomato paste
– 1 cup corn (fresh, frozen, or canned)
In this recipe, ground turkey is the star. It keeps the chili lean and healthy. The beans add protein and fiber, making the dish filling. I love using black and kidney beans, as they give a nice texture.
The vegetables bring freshness. I always use onion, garlic, and bell pepper. They form a solid base for flavor. The crushed tomatoes and tomato paste add richness and depth.
Spices and Seasonings
– 2 tablespoons chili powder
– 1 teaspoon ground cumin
– 1 teaspoon smoked paprika
– 1/2 teaspoon cayenne pepper (adjust according to your heat preference)
– Salt and pepper to taste
For spices, chili powder is a must; it gives that classic chili flavor. Cumin adds warmth and earthiness. Smoked paprika gives a subtle smokiness, which I adore. You can adjust cayenne for heat. I like mine spicy, so I often add more.
Optional Toppings
– Sour cream
– Shredded cheese
– Diced green onions
– Fresh cilantro for garnish
Toppings make a big difference! Sour cream adds creaminess. Shredded cheese offers richness. Diced green onions add crunch and freshness. I always finish with fresh cilantro for a burst of color and flavor.
Step-by-Step Instructions
Preparing the Vegetables
– Heat 1 tablespoon of olive oil in a skillet over medium heat.
– Add 1 medium onion, finely chopped, and 1 diced bell pepper.
– Sauté these for about 5 minutes until soft.
– Stir in 2 cloves of minced garlic and cook for 1 more minute.
Cooking the Turkey
– In the same skillet, add 1 pound of ground turkey.
– Cook it over medium heat, breaking it apart with a spoon.
– Brown the turkey well until it is fully cooked.
– Once done, combine it with the sautéed vegetables in the slow cooker.
Combining Ingredients in the Slow Cooker
– Add 1 can of drained black beans and 1 can of drained kidney beans.
– Pour in 1 can of crushed tomatoes and 2 tablespoons of tomato paste.
– Sprinkle in 2 tablespoons of chili powder, 1 teaspoon of ground cumin, and 1 teaspoon of smoked paprika.
– Add 1/2 teaspoon of cayenne pepper and 1 cup of corn.
– Stir the mixture gently until all the ingredients blend well.
– Season to taste with salt and pepper.
Cooking Time
– Cover the slow cooker with its lid.
– Cook on low for 6-8 hours or on high for 3-4 hours.
– Check the chili’s doneness by tasting it.
– The flavors should meld beautifully together when ready.
Tips & Tricks
Perfecting Your Turkey Chili
To get the best flavor in your turkey chili, you can adjust the heat with cayenne pepper. Start with a half teaspoon. If you like more heat, add a little more. Always taste and adjust to your liking.
Balancing flavors is key. Use salt and pepper to enhance the taste of your chili. Stir in a little salt, then taste. Add more if needed. Do this after cooking. It helps to bring out all the flavors.
Making it Ahead
Cooking times can vary based on your slow cooker. For low heat, go for 6 to 8 hours. On high heat, 3 to 4 hours works well. Check your chili around the end of the cooking time.
Reheating chili is easy. You can use the microwave or stovetop. If using the stovetop, add a splash of water. This helps keep it moist. Heat gently to avoid burning.
Serving Suggestions
Cornbread or rice pairs wonderfully with turkey chili. Both add texture and soak up flavor. Serve a piece of cornbread on the side or a scoop of rice.
To enjoy leftovers creatively, make chili nachos. Spread tortilla chips on a plate. Top with warmed chili, cheese, and your favorite toppings. You can also make chili stuffed peppers. Cut bell peppers in half and fill them with chili. Bake until the peppers are tender.
Pro Tips
- Adjust the Spice Level: If you prefer a milder chili, reduce or omit the cayenne pepper. You can always add hot sauce at the table for those who like it spicy.
- Make it Ahead: Chili flavors deepen over time, so make it a day ahead and reheat it for the best taste. It also freezes well for future meals!
- Add Extra Veggies: Feel free to incorporate additional vegetables like zucchini or mushrooms for more texture and nutrition.
- Garnish Creatively: Experiment with garnishes like avocado slices, jalapeños, or crushed tortilla chips for added crunch and flavor.
Variations
Healthier Alternatives
You can make this turkey chili even healthier. Try using ground chicken instead of turkey. This option is leaner and still very tasty. You could also go for a plant-based meat. This makes the dish vegetarian or vegan. If you want to cut carbs, skip the beans. Use more veggies instead, like zucchini or mushrooms. This keeps the chili full of flavor without added carbs.
Flavor Enhancements
To make your chili more exciting, add extra vegetables. Chopped zucchini or diced carrots work great. These veggies add sweetness and texture. You can also change up the beans. Try using pinto beans or chickpeas for a new twist. Each type of bean brings its own unique flavor. Mixing beans is a fun way to enhance your dish.
International Twists
You can take your chili on a trip around the world. Add jalapeños for a Mexican flair. They bring heat and a nice crunch. Corn is another great addition for sweetness and color. For an Italian twist, add dried herbs like oregano and basil. These will give your chili a warm, rich taste. Mixing these flavors keeps your meals fresh and fun.
Storage Info
Refrigeration Tips
How long does turkey chili last in the fridge? Turkey chili stays fresh for up to four days. Store it in an airtight container to keep it tasty.
What are the best storage containers for optimal freshness? Glass containers with tight lids are great. They help keep moisture in and prevent spills. You can also use plastic containers, but ensure they are food-safe and BPA-free.
Freezing Tips
What are proper freezing techniques? Let the chili cool down before you freeze it. Portion it into smaller containers for easy thawing later. Leave some space at the top of the container. This allows for expansion as it freezes.
What is the recommended duration for frozen storage? You can keep turkey chili in the freezer for up to three months. For best taste, eat it sooner rather than later.
Reheating Instructions
What are the best methods for reheating? The microwave works well for quick reheating. You can also use the stovetop. Just heat it gently over low heat, stirring often.
How can you avoid mushiness in reheated chili? To keep the texture nice, do not overheat. Stir in a little fresh corn or diced bell pepper when reheating. This adds a nice crunch and flavor.
FAQs
Can I make this turkey chili in advance?
Yes, you can make this turkey chili ahead of time. It actually tastes better after resting. Here are some best practices for meal prep:
– Prepare the chili and let it cool completely.
– Store it in an airtight container in the fridge.
– It will last for up to five days.
– You can also freeze portions for later. Just make sure to thaw it overnight in the fridge before reheating.
What can I substitute for ground turkey?
If you need a different option for ground turkey, there are many great alternatives. Here are some ideas:
– Ground chicken works well and has a similar taste.
– For a beef flavor, use ground beef or bison.
– If you want a meat-free option, try lentils or chickpeas.
– Crumbled tempeh also makes a hearty substitute.
How can I make this recipe vegetarian or vegan?
To create a vegetarian or vegan chili, you can easily swap out the meat. Try these substitutions:
– Use lentils or black beans instead of ground turkey.
– Add diced mushrooms for a hearty texture.
– Replace any broth with vegetable broth for flavor.
– Skip the sour cream and cheese for vegan toppings. Use avocado or cashew cream instead.
Is this turkey chili gluten-free?
Yes, this turkey chili can be gluten-free! Just follow these tips:
– Use canned beans that are labeled gluten-free.
– Check the tomato paste and crushed tomatoes for any added gluten.
– Seasonings should be gluten-free as well. Most spices are safe, but always check labels.
This way, everyone can enjoy a warm bowl of chili!
This blog detailed a tasty turkey chili recipe, showing you how to make it from scratch. You learned about the important ingredients, spices, and toppings to enhance flavor. I shared step-by-step instructions for cooking and tips to perfect your dish. We also explored variations and storage options to make this recipe your own.
Now, you can whip up delicious turkey chili that suits your taste and needs. Enjoy the cooking journey and the fantastic meals ahea

Savory Spicy Slow Cooker Turkey Chili
Ingredients
- 1 pound ground turkey
- 1 medium onion, finely chopped
- 2 cloves garlic, minced
- 1 bell pepper diced
- 1 can black beans, drained and rinsed
- 1 can kidney beans, drained and rinsed
- 1 can crushed tomatoes
- 2 tablespoons tomato paste
- 2 tablespoons chili powder
- 1 teaspoon ground cumin
- 1 teaspoon smoked paprika
- 0.5 teaspoon cayenne pepper
- to taste salt and pepper
- 1 cup corn
- 1 tablespoon olive oil
- as needed fresh cilantro, chopped
- as needed optional toppings: sour cream, shredded cheese, diced green onions
Instructions
- Heat the olive oil in a skillet over medium heat. Add the finely chopped onion and diced bell pepper. Sauté for about 5 minutes until the vegetables are softened. Stir in the minced garlic and cook for an additional minute until fragrant.
- Carefully transfer the sautéed onion, bell pepper, and garlic mixture to the slow cooker. In the same skillet, add the ground turkey. Cook it over medium heat, breaking it apart with a spoon, until the meat is thoroughly browned and cooked through. Once done, add the turkey to the slow cooker as well.
- Into the slow cooker, add the drained black beans, kidney beans, crushed tomatoes, and tomato paste. Then, sprinkle in the chili powder, cumin, smoked paprika, cayenne pepper, and corn. Stir the mixture gently until all the ingredients are well combined.
- Season the chili with salt and pepper to taste, ensuring the flavors are balanced.
- Cover the slow cooker with its lid and cook on low for 6-8 hours or on high for 3-4 hours, allowing the chili to heat through and the flavors to meld beautifully together.
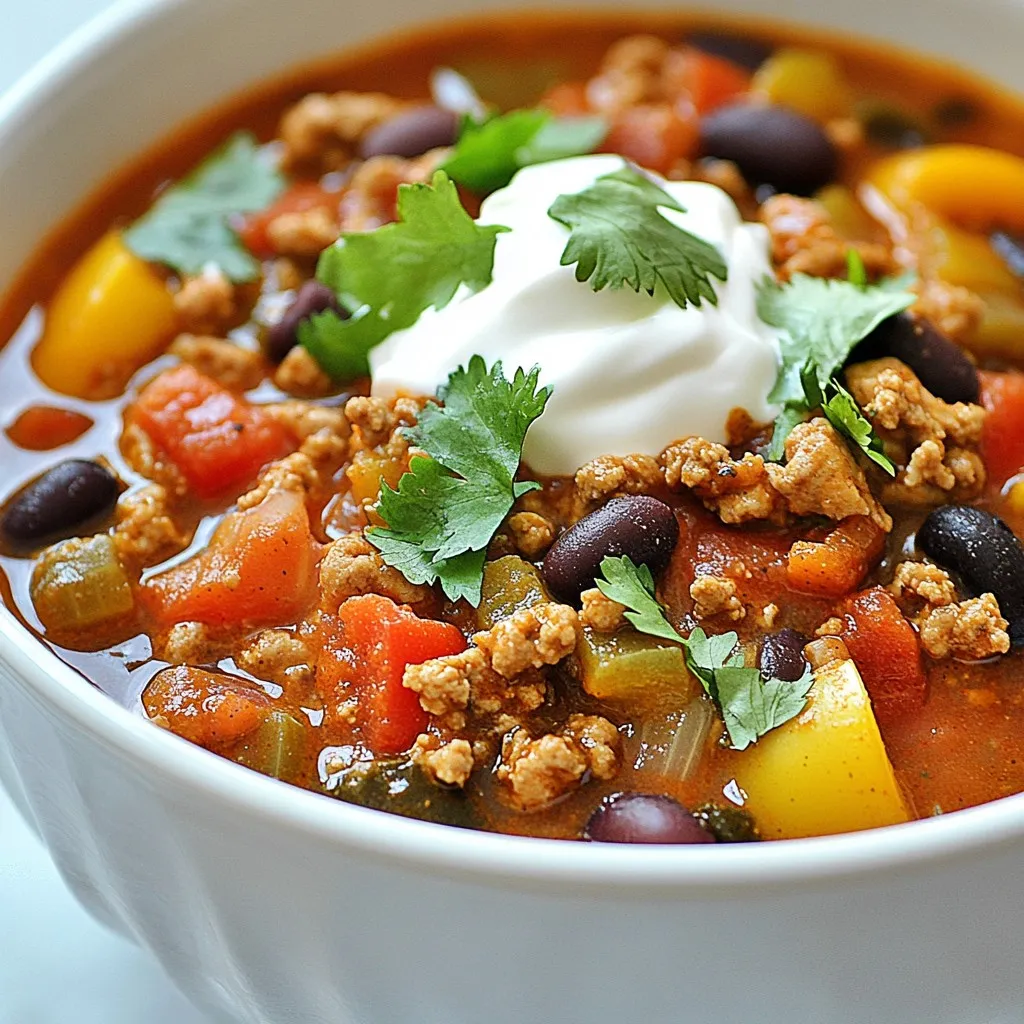
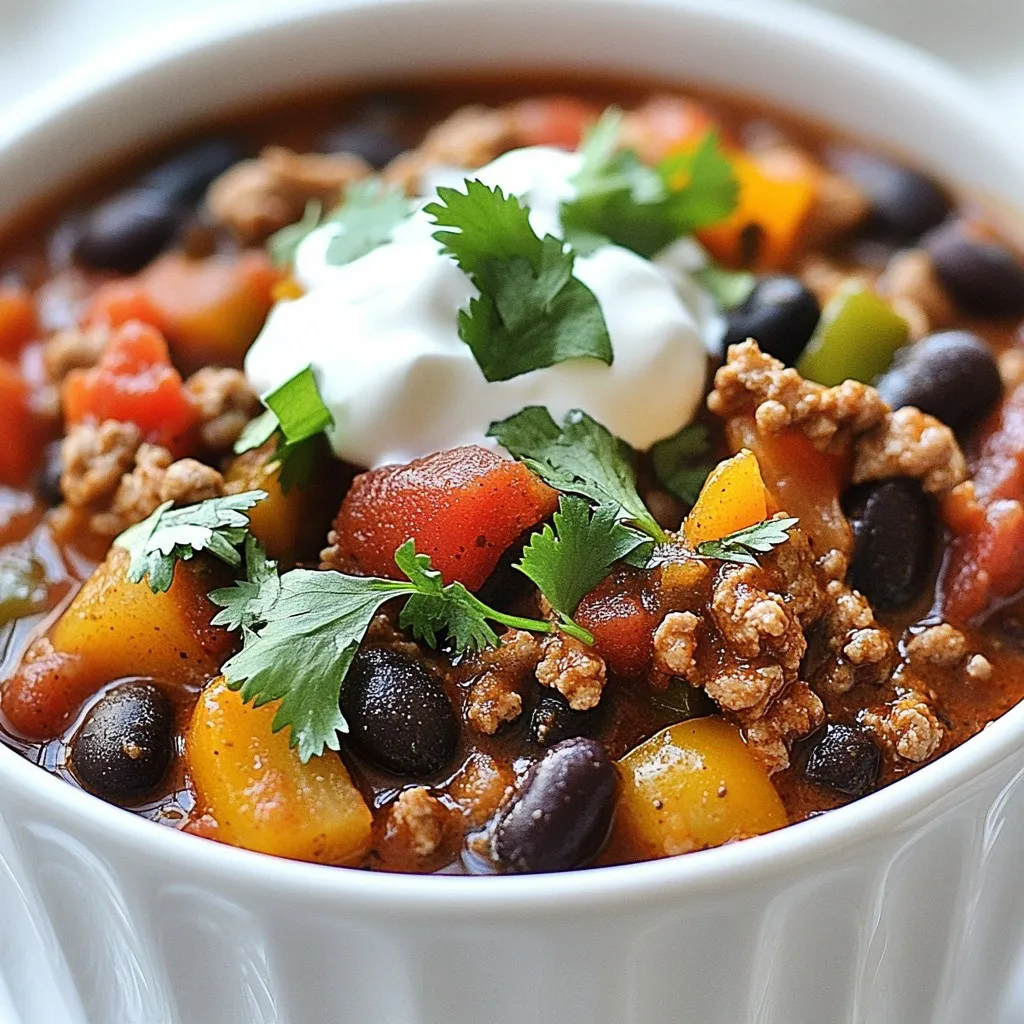
- Once cooked, ladle the chili into bowls and garnish with fresh chopped cilantro. Serve hot with your choice of optional toppings such as a dollop of sour cream, a sprinkle of shredded cheese, and diced green onions for extra flavor.
![To make Easy Chicken Shawarma, gather these items: - 500g boneless, skinless chicken thighs - 2 tablespoons extra virgin olive oil - 3 cloves garlic, finely minced - 1 tablespoon ground cumin - 1 tablespoon ground coriander - 1 tablespoon smoked paprika - 1 teaspoon ground turmeric - 1 teaspoon ground cinnamon - 1 teaspoon sea salt - ½ teaspoon freshly ground black pepper - Juice of 1 large lemon - 4 soft pita breads - Fresh parsley, finely chopped, for garnish - Tomato, cucumber, and red onion, thinly sliced, for serving - Creamy yogurt or rich tahini sauce, for drizzling This list covers all you need for vibrant flavors. You can swap chicken thighs for chicken breasts if you prefer leaner meat. If you're short on spices, try a ready-made shawarma mix for ease. To prepare this dish, you'll need: - A medium mixing bowl for the marinade - A whisk to blend the ingredients - A grill or large skillet for cooking - A meat thermometer to check doneness - Storage containers for leftovers Using a meat thermometer ensures you cook the chicken to 75°C (165°F). This keeps it juicy and safe to eat. Store any leftovers in airtight containers for up to three days. Enjoy your flavorful meal, and don't forget to check the [Full Recipe] for all the steps! To start, we need to make a tasty marinade. Take a medium mixing bowl and combine these ingredients: - 2 tablespoons extra virgin olive oil - 3 cloves garlic, finely minced - 1 tablespoon ground cumin - 1 tablespoon ground coriander - 1 tablespoon smoked paprika - 1 teaspoon ground turmeric - 1 teaspoon ground cinnamon - 1 teaspoon sea salt - ½ teaspoon freshly ground black pepper - Juice of 1 large lemon Whisk these together until mixed well. This mix makes your chicken full of flavor. Next, add the 500g boneless, skinless chicken thighs. Make sure every piece is coated in the marinade. Cover the bowl tightly with plastic wrap. For the best taste, let it sit in the fridge for at least 1 hour. If you can, leave it overnight for even better flavor. When you are ready to cook, preheat your grill or a large skillet on medium-high heat. You want it nice and hot. Take the marinated chicken out of the fridge. Let it sit at room temperature for about 10 minutes. This helps it cook evenly. Place the chicken on the hot grill or skillet. Cook for about 6-8 minutes on each side. You want the chicken to have a nice char and be fully cooked. Check that the internal temperature reaches 75°C (165°F). Once cooked, let the chicken rest for 5 minutes. Then slice it into thin strips. This gives you a tender texture. Now, it’s time to fill our pitas. Take your warm pita bread and place a good amount of sliced chicken inside. For extra crunch and color, add some fresh toppings: - Fresh parsley, finely chopped - Tomato, thinly sliced - Cucumber, thinly sliced - Red onion, thinly sliced Finish your shawarma with a drizzle of creamy yogurt or zesty tahini sauce. Wrap the pita up tight, and it's ready to eat! Enjoy your homemade shawarma delight! For a complete guide, check out the Full Recipe. To achieve the best char marks on your chicken, start with a hot grill or skillet. Make sure the grill is preheated to medium-high heat. Cook the chicken without moving it too much. Let it sit for about 6 to 8 minutes on each side. This allows those crispy, golden marks to form. Resting the chicken before slicing is also key. Once you take the chicken off the heat, let it rest for 5 minutes. This helps the juices stay inside the meat. When you slice it, the chicken will be tender and juicy. Pair your chicken shawarma with tasty side dishes. A fresh tabbouleh salad makes a great choice. You can also serve hummus or baba ganoush for dipping. These flavors complement the shawarma well. For drinks, a chilled lemonade or mint tea works nicely. These drinks balance the spices and add a refreshing touch. Want to spice things up? Try adding a pinch of cayenne pepper to the marinade. This will give your chicken an extra kick. You can also drizzle some sriracha or harissa sauce over the finished shawarma for added heat. If you prefer milder flavors, simply reduce the spices. Use less cumin or paprika in the marinade. This way, you can adjust the taste to suit your preferences. For more variety, try adding fresh herbs like mint or dill for a burst of freshness. For the full recipe, check the section above. {{image_4}} You can easily make this dish plant-based. Use chickpeas or tofu instead of chicken. For chickpeas, drain and rinse one can. Toss them with the same marinade. If you choose tofu, press it to remove water and cut it into cubes. Marinate the tofu just like the chicken. For a veggie-loaded option, try grilled vegetables. Zucchini, bell peppers, and mushrooms work great. Slice them into strips and marinate them. Grill until they are tender and slightly charred. If you do not have a grill, don’t worry! You can use an Instant Pot. Cook the marinated chicken on high pressure for about 8 minutes. This keeps the chicken juicy. You can also use an oven. Preheat it to 200°C (400°F). Place the chicken on a baking sheet and roast for 20-25 minutes. Check that the chicken reaches 75°C (165°F) inside. Another great choice is the slow cooker. Add the marinated chicken and cook on low for 6-8 hours. This makes the chicken very tender and flavorful. To make your shawarma extra special, try new toppings. Feta cheese adds a nice salty flavor. Pickled vegetables can give a tangy crunch. You can also experiment with sauces. A spicy harissa or cool tzatziki can change the flavor. Consider regional spices too. Try za'atar for a herby taste or sumac for tartness. Each spice can make your shawarma unique. For the full recipe, check out Shawarma Delight: Easy Chicken Edition. To keep your chicken shawarma fresh, store it properly. Place the leftover chicken in an airtight container. This will help maintain its flavor and moisture. For the best taste, eat leftovers within three days. If you have assembled pitas, store the chicken and veggies separately. This keeps the pita from getting soggy. You can keep the sliced chicken in the fridge for three days, too. When it's time to enjoy your leftovers, reheating is key. Use a skillet or oven to heat the chicken. This method helps keep the chicken juicy. Avoid using a microwave, as it can dry out the meat. Heat the chicken over medium heat for about five minutes. Stir it gently to keep it moist. If the chicken seems dry, add a splash of water or broth. You can freeze leftover chicken shawarma for later. Place the cooled chicken in a freezer-safe container. Make sure to remove excess air to prevent freezer burn. It can last up to three months in the freezer. When you're ready to eat, thaw the chicken in the fridge overnight. Reheat it on the stove for the best texture. You can enjoy that delicious flavor anytime! Chicken shawarma is a popular dish from the Middle East. It has roots in the Levant region. Traditionally, cooks stack marinated meat on a vertical spit. They cook it slowly, letting the juices flow down. The meat is then shaved off in thin strips. The spices in shawarma are what make it special. Common spices include cumin, coriander, and paprika. These give the chicken a warm, rich flavor. Shawarma is often served in pita bread with fresh veggies and sauce. Yes, you can prep chicken shawarma in advance. Marinate the chicken the night before. This helps the flavors mix well. When you are ready to cook, take it out of the fridge. Cook it fresh for the best taste. You can also slice the cooked chicken and store it. Place it in an airtight container in the fridge. It will last for about 3 days. Just reheat it when you are ready to eat. If you want to change things up, try these alternatives to pita bread: - Flatbreads - Tortillas - Naan bread - Lettuce wraps for a low-carb option These options work well with the chicken and veggies. You can also serve shawarma over rice or in a bowl with salad. To make a gluten-free chicken shawarma, choose gluten-free pita or flatbreads. Look for brands that clearly state they are gluten-free. You can also use lettuce as a wrap. Always check the spice blend for gluten. Some pre-made spices might contain gluten. Make your own mix using cumin, paprika, and other safe spices. The best sauces for chicken shawarma include: - Creamy yogurt sauce - Rich tahini sauce Yogurt sauce is smooth and tangy. It cools down the spices. Tahini sauce is nutty and flavorful. Both add a wonderful touch to your shawarma. Drizzle them on top or serve them on the side for dipping. For the full recipe, check out Shawarma Delight: Easy Chicken Edition. In this guide, we explored how to make Easy Chicken Shawarma from start to finish. We covered essential ingredients, tools, marinating techniques, cooking methods, and clever tips for serving and storing leftovers. You can easily customize this dish for various tastes and dietary needs, ensuring everyone enjoys it. With a little practice, you’ll master the art of shawarma. Get ready to impress your family and friends with your new skills in the kitchen!](https://joymealplan.com/wp-content/uploads/2025/07/dcd86bca-5250-4056-852d-a4436d844aa2-768x768.webp)