
BBQ Chicken Flatbread Pizza Easy and Flavorful Meal

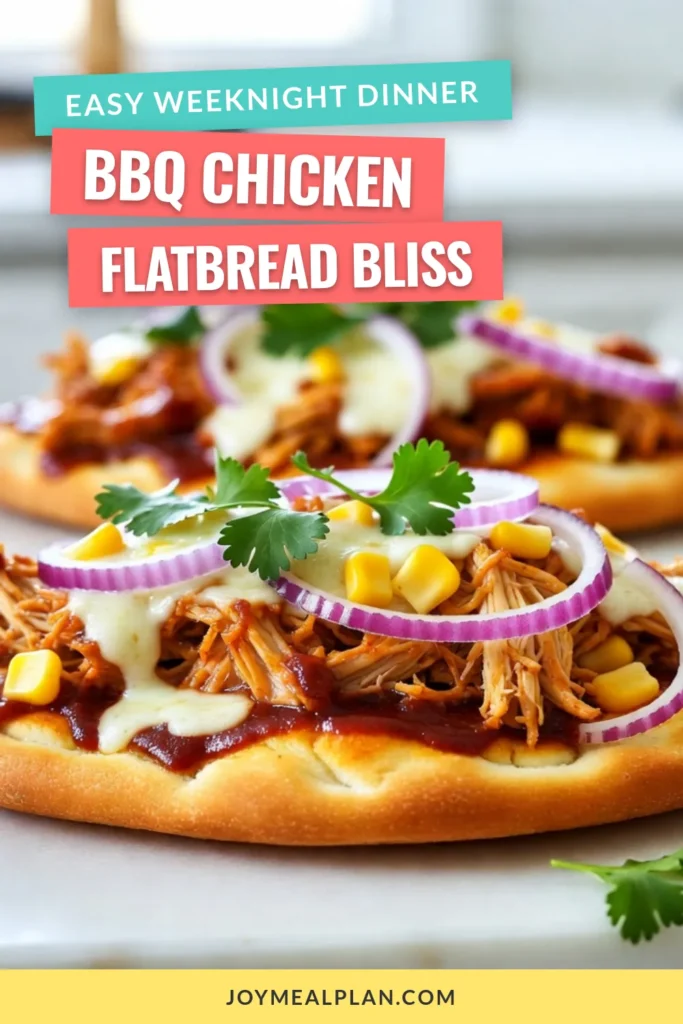
Are you ready to dive into a meal that’s quick, easy, and bursting with flavor? BBQ Chicken Flatbread Pizza is the perfect dish for busy nights or fun gatherings. With just a few simple ingredients and straightforward steps, you can create a tasty pizza that will impress family and friends alike. Let’s get cooking and transform your kitchen into a mini pizzeria today!
Why I Love This Recipe
- Quick and Easy: This recipe can be whipped up in just 20 minutes, making it perfect for busy weeknights!
- Flavor Explosion: The combination of BBQ sauce and mozzarella creates a mouthwatering blend of sweet, smoky, and savory flavors.
- Customizable: Feel free to add your favorite toppings, like jalapeños or bell peppers, to make it your own!
- Fun to Share: These flatbreads are great for sharing at gatherings and parties, making them a crowd-pleaser!
Ingredients
List of Required Ingredients
– Large flatbreads
– Cooked shredded chicken
– BBQ sauce
– Shredded mozzarella cheese
– Red onion
– Corn
– Fresh cilantro
– Olive oil
– Salt and pepper
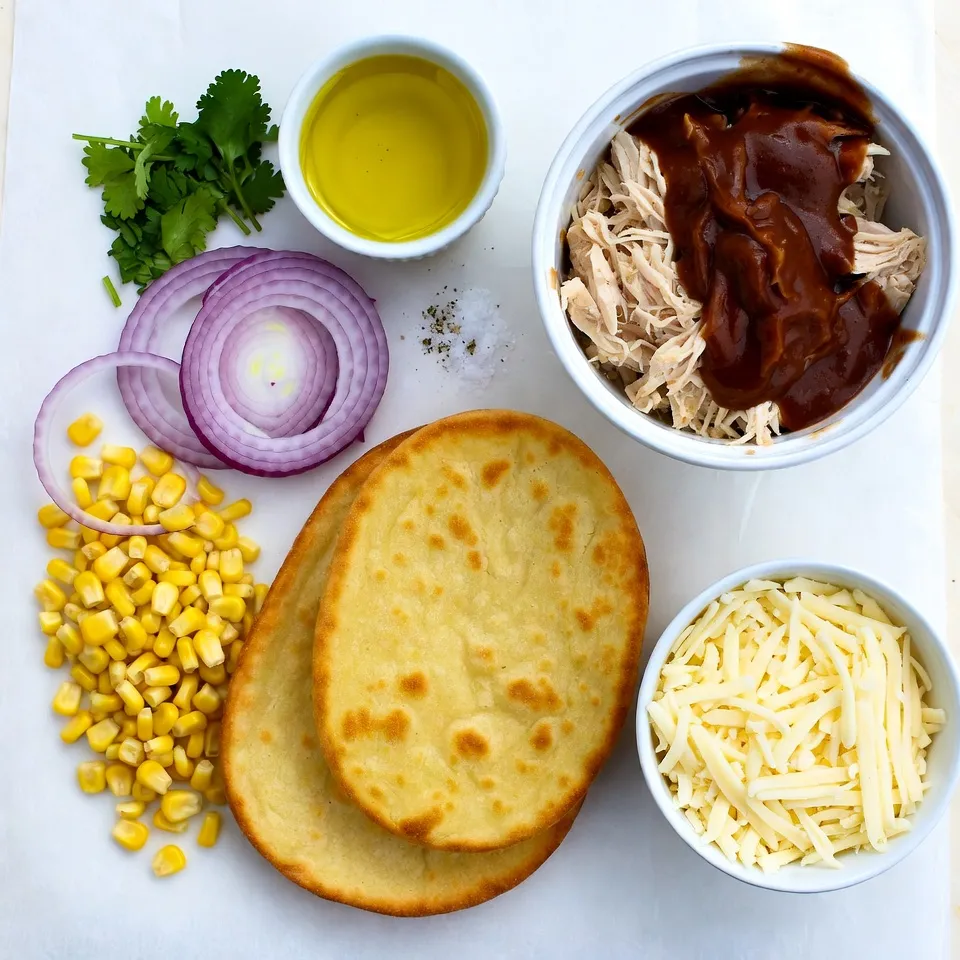
When crafting BBQ chicken flatbread pizza, you want to gather all the right ingredients. Start with large flatbreads as your base. These will hold all the delicious toppings. Next, use cooked shredded chicken, which you can get from a rotisserie chicken or cook yourself. BBQ sauce adds that smoky, sweet flavor we all love.
Shredded mozzarella cheese is key for that gooey texture. Red onion brings a nice bite, while corn adds sweetness. Fresh cilantro gives a pop of color and freshness. Don’t forget olive oil to brush on the flatbreads. Finally, season with salt and pepper to bring out all the flavors.
Dietary Considerations
– Gluten-free flatbread options
– Dairy-free cheese alternatives
– Adjusting for spicy preferences
If you need gluten-free options, look for gluten-free flatbreads at your store. Many brands make tasty choices. For those avoiding dairy, try dairy-free cheese instead. Brands like Daiya or Violife offer great alternatives.
If you like spice, add some jalapeños or hot sauce to the BBQ chicken mixture. You can adjust the toppings to fit your taste. This pizza is flexible, so feel free to make it your own!
Step-by-Step Instructions
Prepping the Oven and Ingredients
First, preheat your oven to 400°F (200°C). This helps cook the flatbread just right. In a mixing bowl, combine 1 cup of cooked, shredded chicken with 1/2 cup of BBQ sauce. Mix well so the chicken is fully coated.
Assembling the Flatbread Pizza
Next, take 2 large flatbreads. Lightly brush them with 1 tablespoon of olive oil. This adds flavor and helps them crisp up. Evenly spread the BBQ chicken mixture on each flatbread. Leave some space at the edges for a nice crust.
Now, sprinkle on 1 cup of shredded mozzarella cheese. This gives your pizza that melty goodness. Add 1/2 cup of thinly sliced red onion and 1/2 cup of drained corn on top. These toppings add great crunch and flavor. Season with salt and pepper to taste.
Baking Instructions
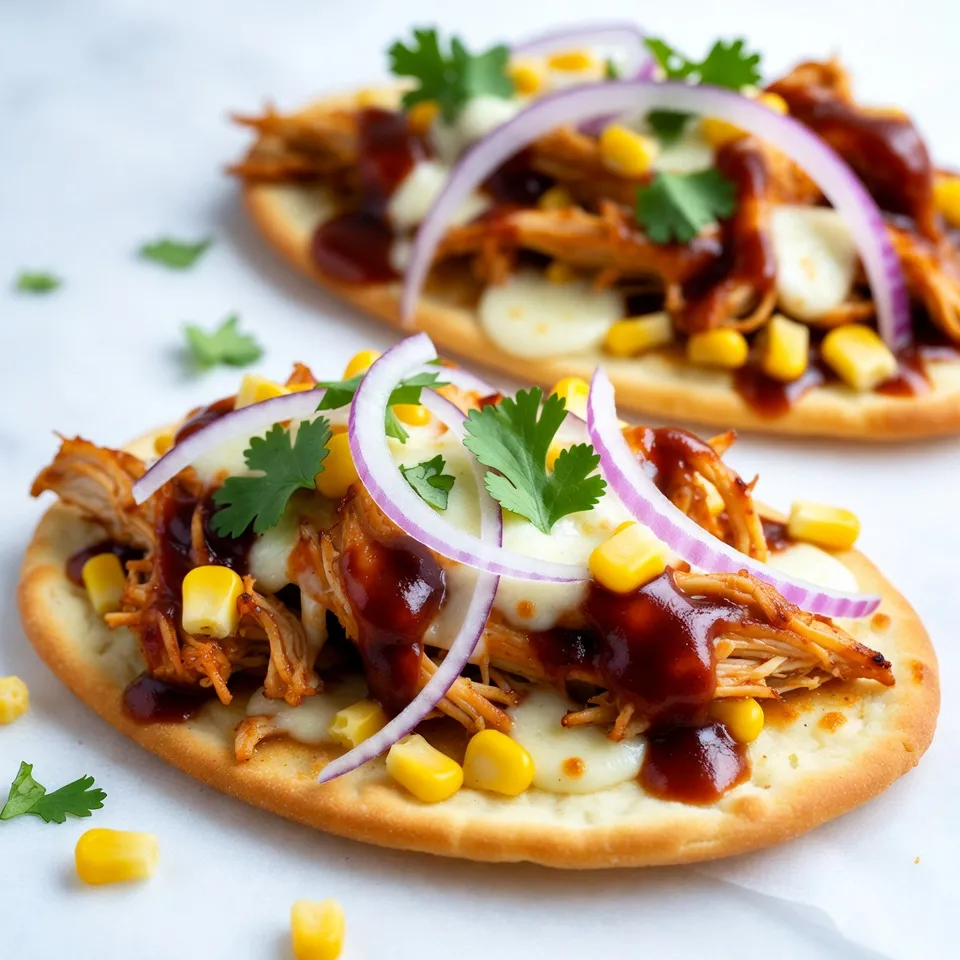
Place the flatbreads directly on the oven rack or on a baking sheet. Bake for about 10-12 minutes. Look for the cheese to bubble and the edges to turn golden brown. When done, take them out and sprinkle 1/4 cup of chopped fresh cilantro on top for extra flavor.
Slice the flatbreads into pieces and enjoy your BBQ chicken flatbread pizza warm!
Tips & Tricks
Achieving Perfect Crispiness
To get that perfect crunch, always use olive oil. It helps your flatbreads crisp up nicely. Brush a thin layer on each flatbread before baking.
You can bake the flatbreads directly on the oven rack for better airflow. This method lets heat reach all sides. If you prefer, you can use a baking sheet, but this may make them less crispy.
Flavor Enhancements
For a richer taste, try using smoked BBQ sauce. This adds a nice depth of flavor to your pizza. You can also play with toppings. Extra vegetables like bell peppers or jalapeños can add more taste and fun textures. They make every bite more exciting.
Tools to Use
Choose a sturdy baking sheet for even heat. Look for one that is not too thin, as it can warp. For slicing your flatbreads, a sharp knife works best. It cuts cleanly through the cheese, making serving easy.
Pro Tips
- Use Grilled Chicken: For an extra smoky flavor, consider using grilled chicken instead of plain cooked chicken. It enhances the overall taste of the pizza.
- Experiment with Cheese: Try mixing different types of cheese like cheddar or gouda with mozzarella for a unique flavor profile.
- Customize Your Toppings: Feel free to add other toppings like jalapeños or bell peppers for additional flavor and texture.
- Serve Hot: For the best experience, serve the flatbreads immediately after baking while the cheese is still melty and the crust is crispy.
Variations
Topping Suggestions
You can make your BBQ chicken flatbread pizza even better with fun toppings. Here are some ideas:
– Bell Peppers: Sliced bell peppers add sweetness and color.
– Jalapeños: For a spicy kick, add sliced jalapeños.
– Cheddar Cheese: Swap mozzarella for sharp cheddar for a bold taste.
– Feta Cheese: Crumbled feta gives a salty, creamy touch.
These toppings will change the flavor and make each bite exciting.
Protein Alternatives
If you’re not in the mood for chicken, no problem! You can switch it up:
– Pulled Pork: Use BBQ pulled pork instead of chicken for a smoky flavor.
– Tofu: For a plant-based option, try BBQ tofu. Marinate it in BBQ sauce and grill before adding.
These options keep the meal fun and fresh.
Global Flavors
You can also explore different flavors with your flatbread pizza:
– Mexican-Inspired: Add black beans, corn, and avocado for a tasty twist.
– Mediterranean Flavor: Use olives, artichokes, and feta cheese for a vibrant taste.
These variations allow you to enjoy BBQ chicken flatbread pizza in new ways.
Storage Info
Storing Leftovers
To keep your BBQ chicken flatbread pizza fresh, store it correctly. First, let the pizza cool to room temperature. Then, wrap each flatbread tightly in plastic wrap. You can also place them in an airtight container. This helps to keep moisture out and flavors in.
– Refrigeration: Store leftovers in the fridge for up to three days. This keeps them safe and tasty.
– Freezing: If you want to save some for later, freeze them. Wrap each flatbread in foil before placing it in a freezer bag. This way, they can last for up to three months.
Reheating Instructions
When you are ready to enjoy your leftovers, reheating is key to keeping them delicious. Here are the best methods:
– Oven: Preheat your oven to 350°F (175°C). Place the flatbread directly on the rack for about 10 minutes. This method helps the crust stay crispy.
– Microwave: If you’re in a hurry, use the microwave. Place the flatbread on a microwave-safe plate. Heat it for 1-2 minutes. To keep the crust crispy, place a cup of water in the microwave with it.
Here are some tips to ensure your pizza stays crisp:
– Avoid covering the pizza while reheating. This will keep moisture away.
– If using a microwave, check every 30 seconds to prevent overcooking.
Following these steps will make sure your BBQ chicken flatbread pizza tastes just as good as the first time!
FAQs
How can I make BBQ Chicken Flatbread Pizza gluten-free?
To make BBQ chicken flatbread pizza gluten-free, choose gluten-free flatbreads. Many stores offer these options. You can also make your own using gluten-free flour. Just follow a simple recipe online. Ensure that all other ingredients, like BBQ sauce, are also gluten-free. Always check labels to confirm.
What can I substitute for shredded chicken?
If you need a substitute for shredded chicken, try using canned chickpeas. Just drain and mash them a bit. Another option is pulled pork for a different flavor. You can also use tofu for a vegetarian choice. Simply cube it and toss with BBQ sauce before using.
Can I prepare this pizza in advance?
Yes, you can prepare BBQ chicken flatbread pizza in advance. You can assemble the flatbreads and store them in the fridge for a few hours. Just add toppings right before baking. This keeps everything fresh. You can also freeze the assembled flatbreads. Just wrap them well and store them in a freezer bag.
Is it possible to make this recipe in an air fryer?
Yes, you can make BBQ chicken flatbread pizza in an air fryer. Preheat the air fryer to 375°F (190°C). Assemble the flatbreads as usual. Cook them for about 8-10 minutes. Check for a golden crust and bubbly cheese. Adjust time as needed based on your air fryer model.
To sum up, you can make a tasty BBQ chicken flatbread pizza with easy steps. We covered ingredients, like flatbreads, chicken, BBQ sauce, and cheese. You learned how to bake it until crispy and delicious. I also shared tips for different flavors and storing leftovers. Remember, you can adjust ingredients for your needs. Experiment with toppings and proteins for new tastes. Now, enjoy fresh, homemade pizza tim

BBQ Chicken Flatbread Pizza Delight
Ingredients
- 2 large flatbreads
- 1 cup cooked chicken, shredded
- 1/2 cup BBQ sauce
- 1 cup shredded mozzarella cheese
- 1/2 cup red onion, thinly sliced
- 1/2 cup corn, drained
- 1/4 cup fresh cilantro, chopped
- 1 tablespoon olive oil
- to taste salt and pepper
Instructions
- Begin by preheating your oven to 400°F (200°C) to create a perfect baking environment for your pizza.
- In a mixing bowl, combine the shredded chicken with the BBQ sauce. Stir well to ensure every piece of chicken is generously coated with the tangy sauce.
- Lightly brush a thin layer of olive oil over each flatbread. This will help them achieve a delightful crispiness when baked.
- Evenly distribute the BBQ chicken mixture over each flatbread, making sure to leave a small border around the edges for a crust.
- Generously sprinkle the shredded mozzarella cheese on top of the BBQ chicken for that gooey, melty texture we all love.
- Next, evenly scatter the thinly sliced red onion and the corn across the flatbreads. This will add a wonderful crunch and a hint of sweetness to each bite.
- Season the assembled pizzas with salt and pepper to your liking, enhancing all the wonderful flavors.
- Carefully place the flatbreads directly on the oven rack or on a baking sheet. Bake them for about 10-12 minutes, or until the cheese is beautifully bubbly and the edges turn a golden brown.
- Once they are perfectly baked, remove the flatbreads from the oven and sprinkle the fresh cilantro over the top for a burst of color and flavor.
- Slice the flatbreads into portioned pieces using a sharp knife and serve them warm to enjoy the melty cheese and smoky BBQ flavors.

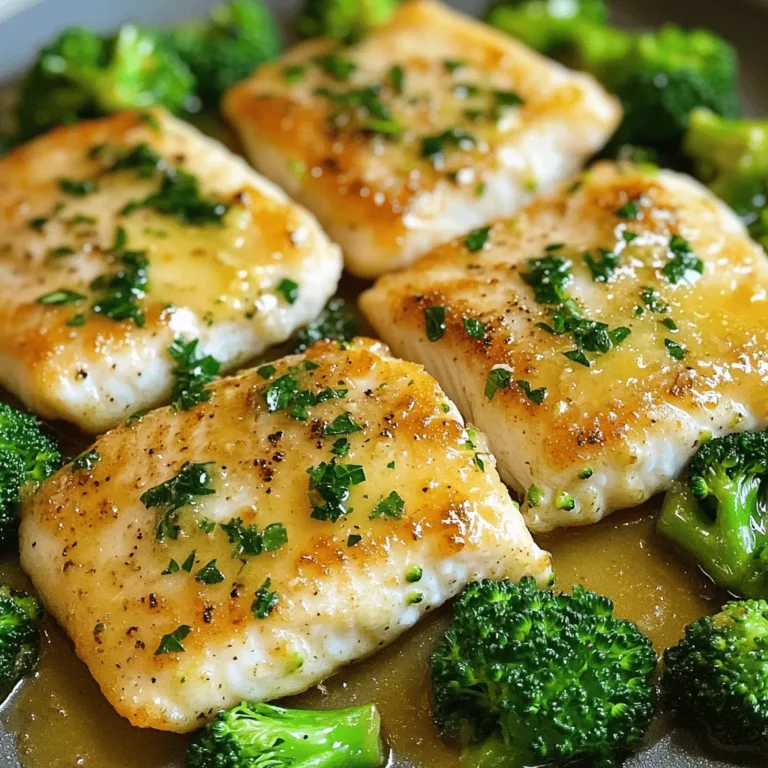
![To make the Homemade Crunchwrap Supreme, gather these items: - 1 lb ground turkey or beef - 1 packet of taco seasoning - 1 cup black beans, drained and rinsed - 1 cup corn kernels (fresh or frozen) - 1 cup shredded cheddar cheese - 1 cup lettuce, finely shredded - 1 large tomato, diced - ½ cup sour cream - 4 large flour tortillas - 4 small tostada shells - 1 tablespoon olive oil - Salsa for serving Each Crunchwrap has around 500 calories. It includes protein from the meat and beans. The cheese adds calcium but also fat. Fresh veggies bring fiber and vitamins. If you want to cut calories, use less cheese or sour cream. This recipe feeds four, perfect for a family meal or a fun gathering. You can swap ground turkey for chicken or even tofu for a veggie option. Use black beans or pinto beans based on your taste. For cheese, try pepper jack for some heat. If you need a gluten-free option, use corn tortillas instead of flour. You can also replace sour cream with Greek yogurt for a healthier twist. Enjoy making it your own! Making a Homemade Crunchwrap Supreme is fun and easy. You start by cooking the meat. Then, you mix it with beans, corn, and cheese. Next, you assemble the wrap with layers of toppings. Finally, you cook the wrap until it’s crispy and golden. 1. Brown the Meat: Heat 1 tablespoon of olive oil in a skillet. Add 1 lb of ground turkey or beef. Cook it for 5-7 minutes until it’s browned. 2. Season the Meat: Drain any extra grease. Add 1 packet of taco seasoning. If needed, splash in some water. Cook for another 2-3 minutes. 3. Combine Ingredients: In a bowl, mix the seasoned meat with 1 cup of black beans, 1 cup of corn, and half of 1 cup of shredded cheese. Stir well. 4. Prepare the Tortilla: Lay out 1 large flour tortilla on a flat surface. 5. Assemble the Crunchwrap: Spoon the meat and bean mix into the center. Leave about 2 inches of space from the edges. 6. Add Tostada and Toppings: Place 1 small tostada shell on top of the mixture. Spread ½ cup of sour cream over the tostada. Add 1 cup of shredded lettuce, 1 diced tomato, and the rest of the cheese. 7. Fold the Crunchwrap: Fold the edges of the tortilla over the filling. Make pleats around the edge until it’s all enclosed. 8. Cook the Crunchwrap: Heat a non-stick skillet on medium heat. Place the crunchwrap seam-side down. Cook for 2-3 minutes until golden, then flip it and cook for another 2-3 minutes. 9. Serve: Cut each crunchwrap in half. Serve warm with salsa on the side. While I can't show pictures, I recommend you take photos of each step. It can help you track your progress. You can also find great visual aids in the [Full Recipe]. They can guide you through the cooking process with ease! To get that perfect crunchwrap texture, you want a good balance. Start with a large flour tortilla. This gives you room to fold. Use a small tostada shell inside. This will add a nice crunch. When you cook it, make sure your skillet is hot. A hot skillet helps create a nice, crispy outside. Flip it gently to avoid spills. Let it brown evenly on both sides for the best result. Flavorful meat is key to a great crunchwrap. I like to use ground turkey or beef. Sauté it in olive oil until browned. After that, add taco seasoning. This is where the magic happens. Follow the packet instructions for best results. If the meat seems dry, add a splash of water. This helps the seasonings stick and blend. Mix in black beans and corn for added taste and texture. Making ahead can save you time. You can prepare the meat mixture a day before. Just store it in an airtight container. When you are ready, assemble your crunchwraps. This way, you can enjoy a fresh meal with less work. You can also freeze the assembled crunchwraps. Just make sure to wrap them well. When you are ready to eat, heat them up in the skillet. This keeps them nice and crispy. For more details, check the Full Recipe. {{image_4}} You can easily make a tasty veggie crunchwrap. Just replace the meat with veggies. Use a mix of black beans, corn, and diced peppers. You can add mushrooms for a nice texture. To keep it creamy, use extra sour cream or a plant-based option. This way, you get all the flavor without meat! Want to spice things up? Add some jalapeños to the filling. You can use fresh slices or pickled ones. If you like heat, toss in some hot sauce or pepper flakes. A dash of chipotle seasoning in the meat gives a smoky kick. This adds a new level of flavor! Don’t stick to just one topping. Try different sauces like guacamole or zesty salsa. You can also add sliced olives or diced onions for crunch. Consider using different cheeses, like pepper jack, for extra flavor. Mix and match to create your perfect crunchwrap. For the full recipe, check out the Ultimate Crunchwrap Supreme. To keep your leftover Crunchwrap Supreme fresh, wrap it tightly in plastic wrap or foil. Place it in an airtight container. This way, it stays safe from air and moisture. Store it in the fridge for up to three days. To enjoy it later, make sure you don’t leave it out too long. Reheating your Crunchwrap is easy. Start by taking it out of the fridge. Place it in a skillet over medium heat. Cover it with a lid. Heat for about 3-4 minutes on each side. This method keeps it crispy. You can also use the microwave if you're in a hurry. Just place it on a microwave-safe plate. Heat it for about 1-2 minutes until warm. If you want to save your Crunchwrap for later, freezing is a great option. Wrap each Crunchwrap in plastic wrap, then in foil. This helps protect it from freezer burn. You can freeze them for up to three months. When you’re ready to eat, let it thaw in the fridge overnight. Then, reheat it as described above. Enjoy your homemade Crunchwrap Supreme whenever you crave it! For the full recipe, check out the Ultimate Crunchwrap Supreme . To make your Crunchwrap Supreme gluten-free, use gluten-free tortillas. You can find them at most grocery stores. Make sure the taco seasoning is also gluten-free. Check the label to be sure. All other ingredients in this recipe are naturally gluten-free. The best way to reheat a crunchwrap is to use a skillet. Heat it over medium heat for about 2-3 minutes on each side. This keeps the crunchwrap crispy. You can also use an oven at 350°F. Bake it for about 10 minutes. This method warms it through without making it soggy. Yes, you can customize your crunchwrap for any diet. For a vegetarian option, skip the meat and add more beans or veggies. You can also switch the cheese for a dairy-free kind. If you like spice, add jalapeños or hot sauce. This recipe is flexible and allows for many tasty changes. Try different flavors to find what you love most. For the full recipe, refer to the Ultimate Crunchwrap Supreme. In this post, I covered how to make a Crunchwrap Supreme from start to finish. We discussed key ingredients, cooking steps, and storage tips. I shared tricks for the perfect texture and flavorful meat. You have options for vegetarian and spicy versions, plus ways to adjust for your taste. With these insights, you can now make this fun and tasty meal. Enjoy your Crunchwrap adventure!](https://joymealplan.com/wp-content/uploads/2025/06/9254d856-97cc-48f7-bdd4-96eee0233a6c-768x768.webp)
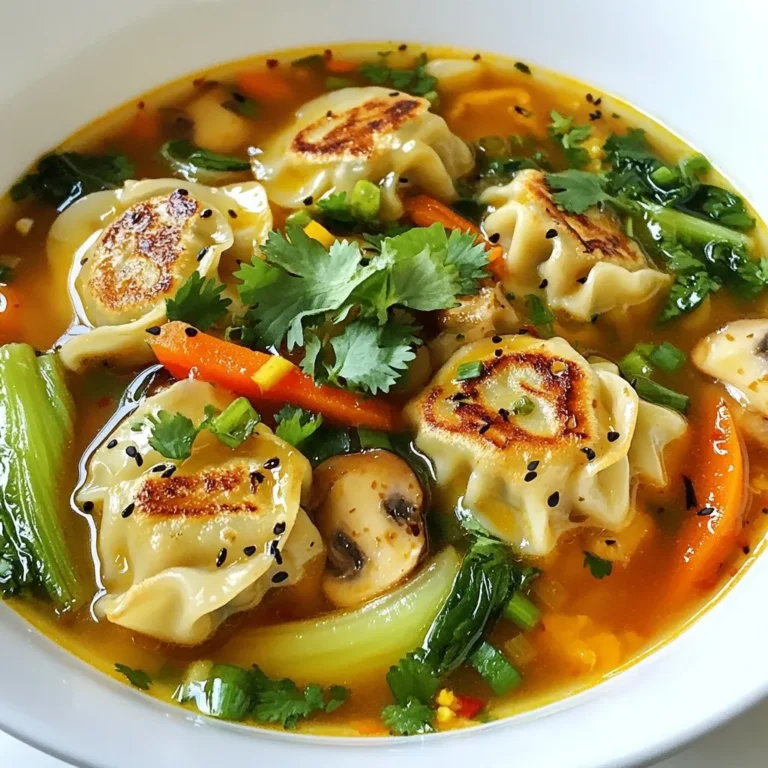
![To make easy chicken noodle soup, gather these simple ingredients: - 1 tablespoon olive oil - 1 medium onion, finely chopped - 2 carrots, peeled and sliced into thin rounds - 2 celery stalks, diced into small pieces - 3 cloves of garlic, minced - 1 pound boneless, skinless chicken breasts - 6 cups chicken broth (homemade or low-sodium) - 1 teaspoon dried thyme - 1 bay leaf - 8 ounces egg noodles - 1 cup frozen peas - Salt and freshly ground black pepper to taste - Fresh parsley, chopped (for garnish) These ingredients work together to create a warm, hearty dish. The chicken adds protein, while the veggies give great flavor. The egg noodles soak up the broth, making each bite comforting. I always choose low-sodium broth for control over salt. Using fresh parsley at the end makes the dish pop with color. For the full recipe, you can check out the detailed steps to bring this soup to life. Sautéing Aromatics Start by heating 1 tablespoon of olive oil in a large stockpot over medium heat. Once the oil is hot, add the finely chopped onion, sliced carrots, and diced celery. Sauté these for about 5-7 minutes. You want them to become tender and smell great. Next, add 3 cloves of minced garlic and sauté for another 1-2 minutes. Stir it constantly to avoid burning the garlic. Cooking the Chicken Now, it’s time for the star of the show: the chicken. Carefully place 1 pound of boneless, skinless chicken breasts into the pot. Pour in 6 cups of chicken broth, then add 1 teaspoon of dried thyme and 1 bay leaf. Bring this mixture to a boil. Once it’s boiling, reduce the heat to low. Let it simmer for about 15-20 minutes. The chicken should reach an internal temperature of 165°F (75°C). Shredding the Chicken After cooking, carefully remove the chicken from the pot using tongs or a slotted spoon. Shred the chicken into bite-sized pieces using two forks. Once shredded, return the chicken to the pot to soak up all the flavors. Adding Noodles and Peas Next, stir in 8 ounces of egg noodles and 1 cup of frozen peas. Cook the soup for an additional 7-10 minutes. The noodles should be al dente and tender, ready to enjoy. Seasoning the Soup Taste your soup! Season it with salt and freshly ground black pepper, adjusting to your liking. Don’t forget to remove the bay leaf before serving. Tips for Serving Serve the soup hot in bowls. For a nice touch, sprinkle some freshly chopped parsley on top. This adds color and a burst of flavor. Enjoy this comforting bowl of easy chicken noodle soup! For complete details, check out the Full Recipe. Choosing the Right Broth Use homemade broth for the best flavor. If you don’t have time, low-sodium store-bought broth works too. It keeps the soup light and lets other flavors shine through. How to Properly Shred Chicken After cooking the chicken, let it cool slightly. Use two forks to pull the chicken apart. This keeps it moist and tender. You can also use your hands if you prefer. Ensuring Perfect Noodles Cook the noodles separately if you want them to stay firm. Overcooked noodles can turn mushy in the soup. If you add them straight to the pot, just keep an eye on the cooking time. Adding Fresh Herbs and Spices Fresh herbs like parsley or thyme brighten the soup. You can also add a squeeze of lemon juice for a touch of zest. Experiment with flavors to find your perfect mix. Substituting Ingredients Feel free to swap out chicken for turkey or use veggie broth for a vegetarian version. You can also add other veggies like spinach or corn for extra nutrition. Slow Cooker/Instant Pot Options For a slow cooker, add all the ingredients and cook on low for 6-8 hours. In an Instant Pot, cook on high pressure for 15 minutes, then shred the chicken. Both methods make great soup with less effort. For the complete recipe, check out the [Full Recipe]. {{image_4}} - Switching to Whole Wheat Noodles Whole wheat noodles add more fiber. They make the soup heartier. Plus, they keep you full longer. - Using Low-Sodium Ingredients Low-sodium chicken broth helps control salt intake. It is great for those watching their sodium levels. You still keep all the flavor without the extra salt. - Adding Spinach or Kale Spinach or kale boosts nutrition. They add vitamins and minerals. Toss them in just before serving for a fresh taste. - Mexican Chicken Noodle Soup Add cumin and lime juice for a twist. Include black beans and corn for extra texture. This gives your soup a bright, zesty flavor. - Creamy Chicken Noodle Soup Stir in some heavy cream or coconut milk. This makes the soup rich and smooth. It feels like a warm hug in a bowl. - Spicy Chicken Noodle Soup Use red pepper flakes or jalapeños to spice things up. This adds a kick that warms you from the inside. Perfect for chilly days or when you need a little heat. For detailed steps on how to make your soup, check the Full Recipe. Store your easy chicken noodle soup in an airtight container. This keeps it fresh and tasty. Let the soup cool down before sealing it. You can keep it in the fridge for up to four days. Just remember to reheat it well before serving. If you notice any off smell or change in color, it’s best to discard it. To freeze your soup, use freezer-safe containers. Leave some space at the top, as the soup will expand. It can last up to three months in the freezer. When you’re ready to eat it, let it thaw overnight in the fridge. Reheat the soup on the stove over low heat. Stir it often to keep it warm and to avoid burning. You can also use a microwave. Just heat it in short bursts and stir in between. This keeps the soup delicious and helps it warm evenly. For the best taste, add fresh herbs or a squeeze of lemon after reheating. For the full recipe, visit the link provided. Can I use rotisserie chicken? Yes, rotisserie chicken works great! It saves time and adds rich flavor. Just shred it and add it to your soup near the end of cooking. How do I make chicken noodle soup thicker? To thicken your soup, try adding more noodles or use a cornstarch slurry. Mix equal parts cornstarch and cold water, then stir it in while the soup simmers. Can I substitute egg noodles with another type? Absolutely! You can use any pasta you like. Just adjust the cooking time based on the type of pasta you choose. Is chicken noodle soup healthy? Yes, chicken noodle soup is healthy. It offers protein from the chicken and nutrients from the veggies. Plus, it can soothe a cold! What are the calories in easy chicken noodle soup? A serving has about 250-300 calories, depending on your ingredients. It’s a light meal that fills you up. What to serve with chicken noodle soup? I love pairing it with crusty bread or a fresh salad. Both add texture and flavor to your meal. How long does it take to make chicken noodle soup? It takes about 40 minutes from start to finish. This includes prep time and cooking time, so it’s quick and easy. Can I double the recipe? Yes, you can double the recipe! Just make sure your pot is big enough. Adjust cooking time if needed, but it should stay about the same. For the full recipe, check out the detailed instructions above! This blog post covered how to make a tasty chicken noodle soup. I shared the ingredients you need, step-by-step instructions, and useful tips. Plus, you learned about healthy and flavorful variations and storage options. Remember, chicken noodle soup can be easy and fun to make. With a few tweaks, you can personalize it to fit your taste. Enjoy making this comforting dish for yourself and others!](https://joymealplan.com/wp-content/uploads/2025/06/a8abc01f-2283-4b1e-aacb-1aa29c0460c5-768x768.webp)