Crispy Air Fryer Brussels Sprouts Savory Delight Recipe
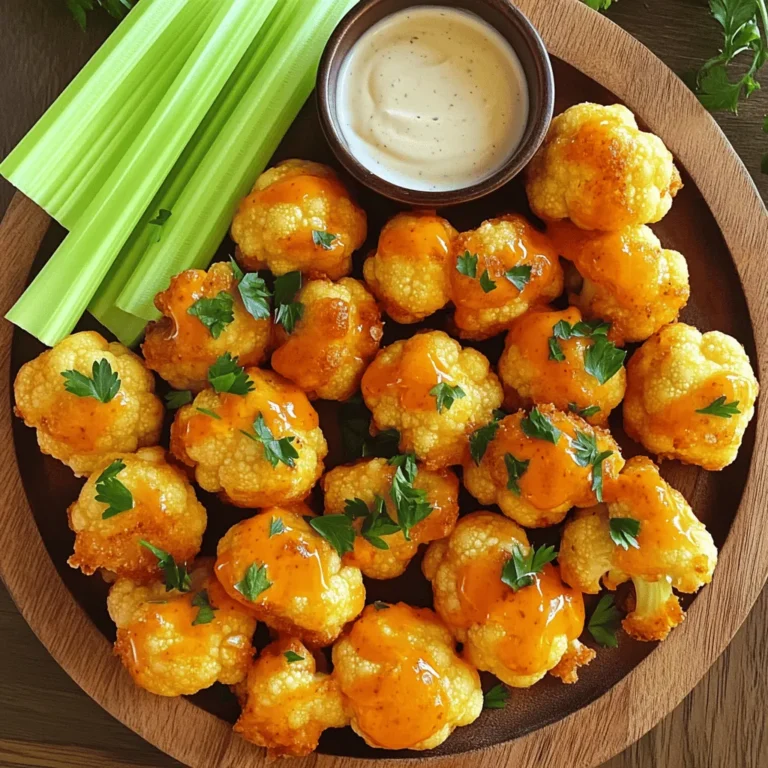
Ready to transform your meals with a tasty side dish? Crispy Air Fryer Brussels Sprouts are a game-changer! You’ll love how easy and quick this savory delight recipe is. Just a few fresh ingredients and seasonings create a crispy, flavorful dish. Perfect for dinner parties or snacking straight from the basket. Let’s dive into this quick recipe and serve up a plate of deliciousness!
Ingredients
Main Ingredients
– 1 lb Brussels sprouts, trimmed and halved
– 2 tablespoons extra virgin olive oil
Seasonings
– 1 teaspoon garlic powder
– 1 teaspoon onion powder
– 1/2 teaspoon smoked paprika
– Sea salt and freshly cracked black pepper, to taste
Optional Ingredients
– 2 tablespoons freshly grated Parmesan cheese
– 1 tablespoon balsamic glaze
When cooking crispy air fryer Brussels sprouts, the right ingredients make all the difference. First, choose fresh Brussels sprouts. Look for bright green ones with no yellow or brown leaves. This ensures great flavor and texture.
The extra virgin olive oil is key for crispiness. It helps the sprouts turn golden brown. You can also use avocado oil for a different taste. The seasonings add depth to the flavor. Garlic powder gives a savory kick. Onion powder adds a hint of sweetness. Smoked paprika brings a warm, smoky taste. Don’t forget to add sea salt and freshly cracked black pepper. They balance the flavors perfectly.
For those who love cheese, grated Parmesan is a great touch. It melts beautifully and adds a rich flavor. If you want to make it fancy, drizzle balsamic glaze before serving. It adds a sweet and tangy finish.Each ingredient plays a role in making your Brussels sprouts a tasty delight. Enjoy the process of selecting and preparing these ingredients!
Step-by-Step Instructions
Preparing the Air Fryer
Preheat your air fryer to 375°F (190°C). This step is key for great results. A hot air fryer ensures the Brussels sprouts cook evenly and become crispy.
Mixing Ingredients
In a large bowl, add the halved Brussels sprouts. Pour in 2 tablespoons of extra virgin olive oil. Then, add 1 teaspoon garlic powder, 1 teaspoon onion powder, and 1/2 teaspoon smoked paprika. Finally, sprinkle sea salt and freshly cracked black pepper to taste. Toss everything together until the Brussels sprouts are fully coated. This mix gives them a delicious flavor.
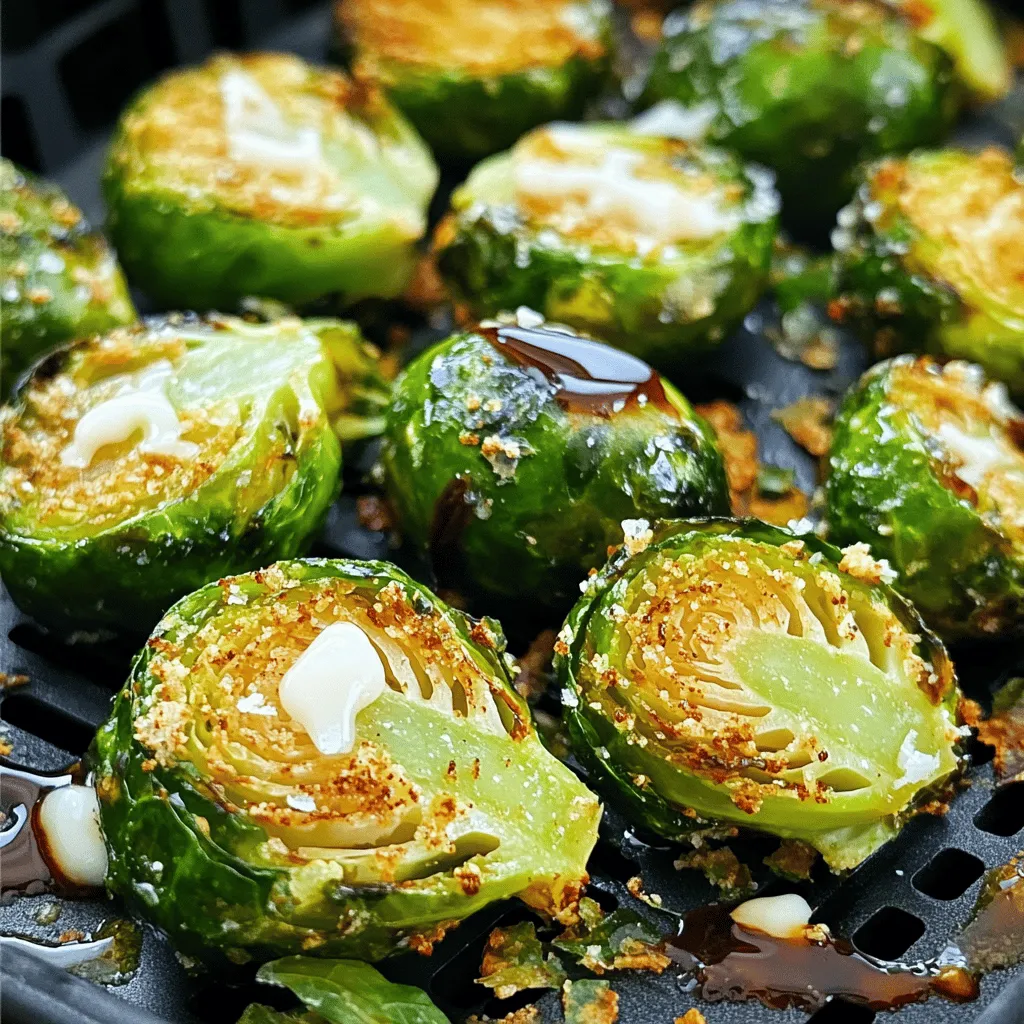
Air Frying Process
Carefully arrange the seasoned Brussels sprouts in the air fryer basket. Make sure they are in a single layer. This helps them cook well and become crispy. Cook for 15-20 minutes. Halfway through cooking, shake the basket gently. This will help them cook evenly. The sprouts should turn golden brown and crispy. If you want cheese, sprinkle 2 tablespoons of grated Parmesan over them in the last 2 minutes of cooking. This makes the dish even tastier. After cooking, remove the Brussels sprouts and drizzle with 1 tablespoon of balsamic glaze if you like. Enjoy your crispy air fryer Brussels sprouts!
Tips & Tricks
Achieving Optimal Crispiness
To get the best crunch, avoid overcrowding the basket. If you fit too many sprouts, they will steam instead of fry. Spread them out in a single layer. This allows hot air to circulate. Shake the basket halfway through cooking. This step helps them cook evenly and ensures every side gets crisped.
Enhancing Flavor
To boost flavor, try adding spices like red pepper flakes or Italian herbs. Fresh herbs like thyme or rosemary work great, too. Remember that fresh seasonings have a stronger taste than dried ones. If using dried herbs, use less to avoid overpowering the dish.
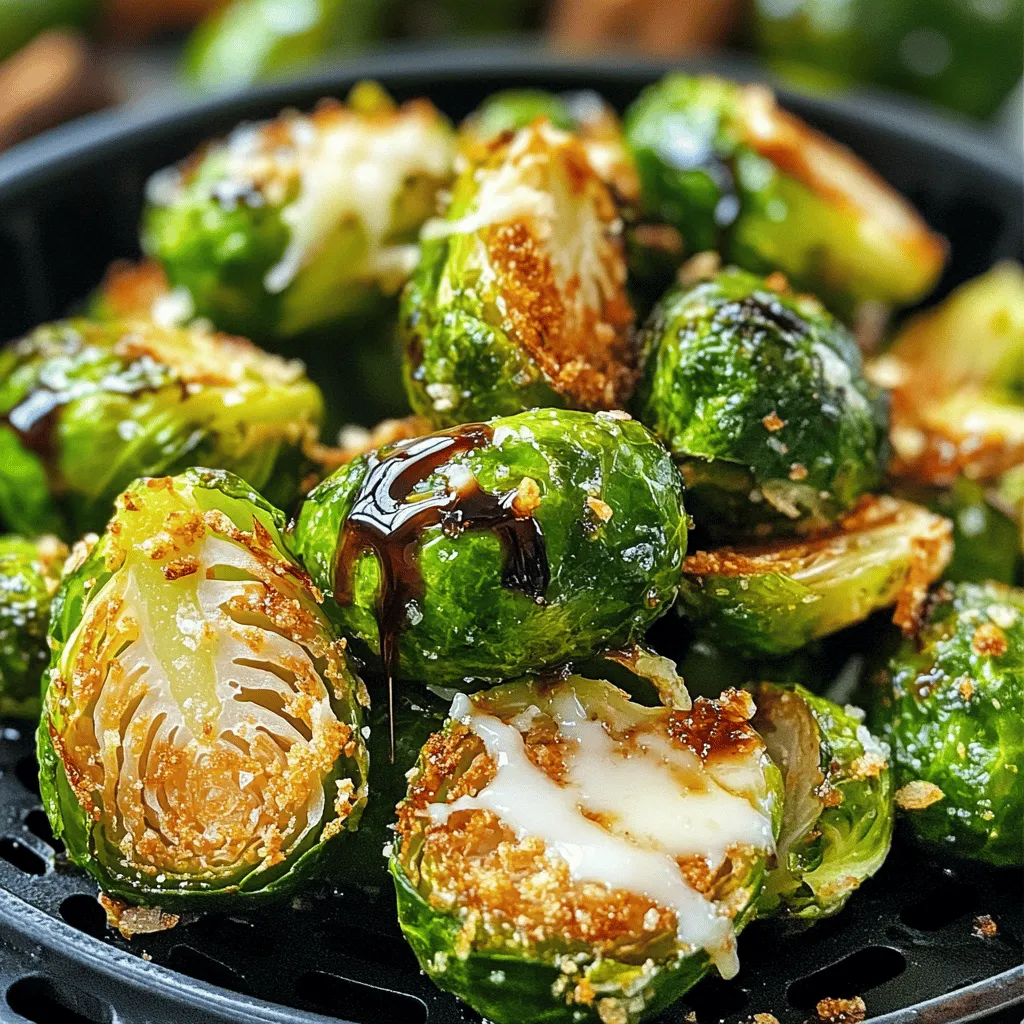
Presentation Tips
Serve your Brussels sprouts in a stylish dish for a great look. A sprinkle of extra cheese adds a nice touch. Drizzle some balsamic glaze on top for color and flavor. This makes the dish pop and elevates your meal.
Variations
Flavor Infusions
You can change the taste of your crispy Brussels sprouts easily. For a spicy kick, add red pepper flakes to the mix. This will make them zingy and exciting. If you prefer a sweet side, try drizzling maple syrup before cooking. It adds a lovely contrast to the savory flavor.
Cheese Alternatives
Not everyone loves cheese, and that’s okay! If you want to skip it, leave out the Parmesan. You can also use vegan cheese if you’re looking for a dairy-free option. It will still make your Brussels sprouts taste great while keeping them plant-based.
Dietary Adjustments
Need to eat gluten-free? This recipe is naturally gluten-free, so enjoy without worry. For those on a low-carb diet, just skip the maple syrup and cheese. You can savor the pure taste of Brussels sprouts while sticking to your dietary goals.
Storage Info
How to Store Leftovers
To keep your crispy Brussels sprouts fresh, first let them cool. Place them in an airtight container. This helps prevent moisture and keeps them crispy. Store the container in the fridge. Make sure to eat them within a few days for the best taste.
Reheating Options
To reheat and keep your Brussels sprouts crispy, use the air fryer again. Preheat it to 350°F (175°C). Spread the sprouts in a single layer in the basket. Heat for about 5-7 minutes. This method revives their crunch and flavor. You can also use a skillet on medium heat, but watch closely to avoid burning.
Shelf Life
Crispy Brussels sprouts last about 3 to 4 days in the fridge. Ensure they stay in an airtight container. If you notice any off-smells or textures, it’s best to toss them out. Always trust your senses; they will guide you well!
FAQs
How long do Brussels sprouts take to cook in an air fryer?
Brussels sprouts cook in about 15 to 20 minutes in an air fryer. This time gives them a crispy texture. I recommend checking them halfway. Shake the basket to help them cook evenly. They should turn golden brown and crispy. If they need more time, add a few extra minutes.
Can I use frozen Brussels sprouts for this recipe?
Yes, you can use frozen Brussels sprouts. However, they may not get as crispy as fresh ones. If using frozen, thaw them first and pat them dry. This helps remove excess moisture. You might also need to cook them longer. Check for the same golden brown color to know they are done.
What can I serve with crispy Brussels sprouts?
Crispy Brussels sprouts pair well with many main dishes. You can serve them with roasted chicken or grilled salmon. They also make a great side for pasta dishes. If you’re looking for a snack, try them with a dip. A garlic aioli or ranch dressing works great!
This blog post shows you how to make crispy Brussels sprouts in an air fryer. We covered the key ingredients, cooking steps, and useful tips to ensure great results. You learned about flavor variations and how to store leftovers too.
Now, you can enjoy tasty, healthy Brussels sprouts anytime. With this guide, it’s easy to impress your friends and family. Try different seasonings or pairings for new flavors. Cooking can be fun, especially with a dish that’s this simple and delicious!


![- 1 pound large shrimp, peeled and deveined - 3 tablespoons extra virgin olive oil - Zest of 1 medium-sized lemon - 2 tablespoons freshly squeezed lemon juice - 2 cloves garlic, finely minced - 1 tablespoon fresh parsley, finely chopped - 1 tablespoon fresh dill, finely chopped - 1 teaspoon smoked paprika - Salt and freshly ground black pepper, to taste - 8 wooden skewers (soaked in water for at least 30 minutes) Using fresh ingredients makes a big difference in taste. The shrimp brings a sweet flavor, while lemon adds brightness. Olive oil gives a smooth touch that ties it all together. Fresh herbs like parsley and dill add aroma and depth. Garlic gives a nice kick, enhancing the taste. When you prepare the skewers, ensure your shrimp are spread out. This helps them cook evenly. The smoked paprika adds a hint of warmth that makes every bite special. Salt and pepper are key for balancing flavors. Soaking the wooden skewers prevents them from burning on the grill. For the complete recipe, check out the [Full Recipe]. It guides you step by step to make this dish shine. Enjoy the process and get ready for a tasty meal! In a mixing bowl, combine the following ingredients for a tasty marinade: - 3 tablespoons extra virgin olive oil - Zest of 1 medium-sized lemon - 2 tablespoons freshly squeezed lemon juice - 2 cloves garlic, finely minced - 1 tablespoon fresh parsley, finely chopped - 1 tablespoon fresh dill, finely chopped - 1 teaspoon smoked paprika - Salt and freshly ground black pepper, to taste Whisk these together until they blend well. This mix adds great flavor to the shrimp. Now, add the shrimp to your marinade. Make sure each shrimp is coated in the mix. Cover the bowl and place it in the fridge for 20-30 minutes. This time helps the shrimp soak up all the tasty flavors. While the shrimp marinates, preheat your grill to medium-high heat. If you use a grill pan, heat it on the stovetop until hot. Next, take the soaked wooden skewers and carefully thread the marinated shrimp onto them. Aim for about 4-5 shrimp per skewer. Once ready, place the skewers on the grill. Grill the shrimp for 2-3 minutes on each side. They should turn a lovely pink color and become opaque when they are done. Keep an eye on them; overcooking can make them rubbery. After grilling, remove the skewers and let them rest for a few minutes. This helps the shrimp stay juicy. For the full recipe, be sure to check the detailed instructions. To get the best grilled shrimp, focus on the right cooking time and temperature. Preheat your grill to medium-high heat. This temperature is key for juicy shrimp. Cook the shrimp for 2-3 minutes on each side. They will turn pink and opaque when done. Avoid cooking them too long. Overcooked shrimp get tough and rubbery. Marinating shrimp is a great way to boost flavor. I suggest letting them soak for 20-30 minutes. This time helps the shrimp absorb the tasty herbs and lemon. For even more flavor, try adding a splash of hot sauce or a dash of cayenne pepper to the marinade. This small change can add a nice kick. Serve your Lemon Herb Grilled Shrimp with fresh sides. Grilled vegetables are a perfect match. Try zucchini, bell peppers, or asparagus. A crisp green salad also pairs well. Toss in some avocado or nuts for extra texture. You can also serve the shrimp over rice or quinoa for a filling meal. For a refreshing touch, add lemon wedges and a sprinkle of herbs when serving. {{image_4}} You can change the herbs in this recipe. Instead of parsley and dill, try basil or cilantro. Each herb brings a new taste. Basil gives a sweet flavor, while cilantro adds a fresh one. You can mix and match to find your favorite. Experimenting with herbs makes the dish fun and unique. Don't have a grill? No problem! You can cook shrimp in the oven or on the stovetop. For oven broiling, preheat your broiler. Place the skewers on a baking sheet and broil for about 2-3 minutes per side. If using a stovetop grill pan, heat it over medium-high heat. Cook the shrimp as you would on an outdoor grill. Both methods will give you tasty results. Want to make this dish gluten-free? Simply check your smoked paprika for gluten. It's usually safe, but some brands may add gluten. For a low-carb option, skip any bread sides. Serve the shrimp with fresh veggies or a salad instead. This keeps your meal light and healthy. To keep leftover grilled shrimp fresh, place them in an airtight container. Make sure to cool them down first. Refrigerate them within two hours of cooking. Properly stored, they last for up to three days. If you want to enjoy them later, don’t forget to label the container. When it's time to reheat, don’t use the microwave if you can avoid it. Instead, heat a skillet over medium heat. Add a bit of olive oil to keep shrimp moist. Cook for about 2-3 minutes until warm. You can also reheat them on the grill for extra flavor. Just watch closely so they don’t overcook and become rubbery. Freezing grilled shrimp is a great way to save them for later. First, let them cool completely. Then, place them in a freezer-safe bag. Try to remove as much air as possible to prevent freezer burn. These shrimp can last for up to three months in the freezer. When you’re ready to eat, thaw them in the fridge overnight or use cold water for a quicker method. Shrimp cook quickly. Look for a bright pink color and opaque flesh. The shrimp should curl into a "C" shape. If they curl tightly into an "O," they may be overcooked. To avoid this, cook shrimp for just 2-3 minutes per side on a hot grill. Always check a few pieces to ensure even cooking. Yes, you can use frozen shrimp! Just remember to thaw them first. The best way is to place them in the fridge overnight. If you're in a hurry, run them under cold water for about 10-15 minutes. Once thawed, pat them dry with a paper towel. This helps the marinade stick better. You can use many herbs! Here are some great options: - Basil - Cilantro - Chives - Thyme - Oregano - Tarragon These herbs add unique flavors to your shrimp. Feel free to mix and match to find your favorite blend! For more ideas, check the Full Recipe for a guide on how to experiment with different herbs. In this article, we covered everything you need for Lemon Herb Grilled Shrimp. You learned about key ingredients, flavor enhancers, and step-by-step cooking instructions. We also explored tips to make the shrimp perfect and suggested delicious side dishes. Remember, these shrimp are versatile. You can adjust flavors or try different cooking methods. Enjoy grilling and make this dish your own. Happy cooking!](https://joymealplan.com/wp-content/uploads/2025/07/b27d11be-6f1b-4945-85cc-7eac089af2f5-768x768.webp)