Vegan Chocolate Mousse Rich and Creamy Indulgence
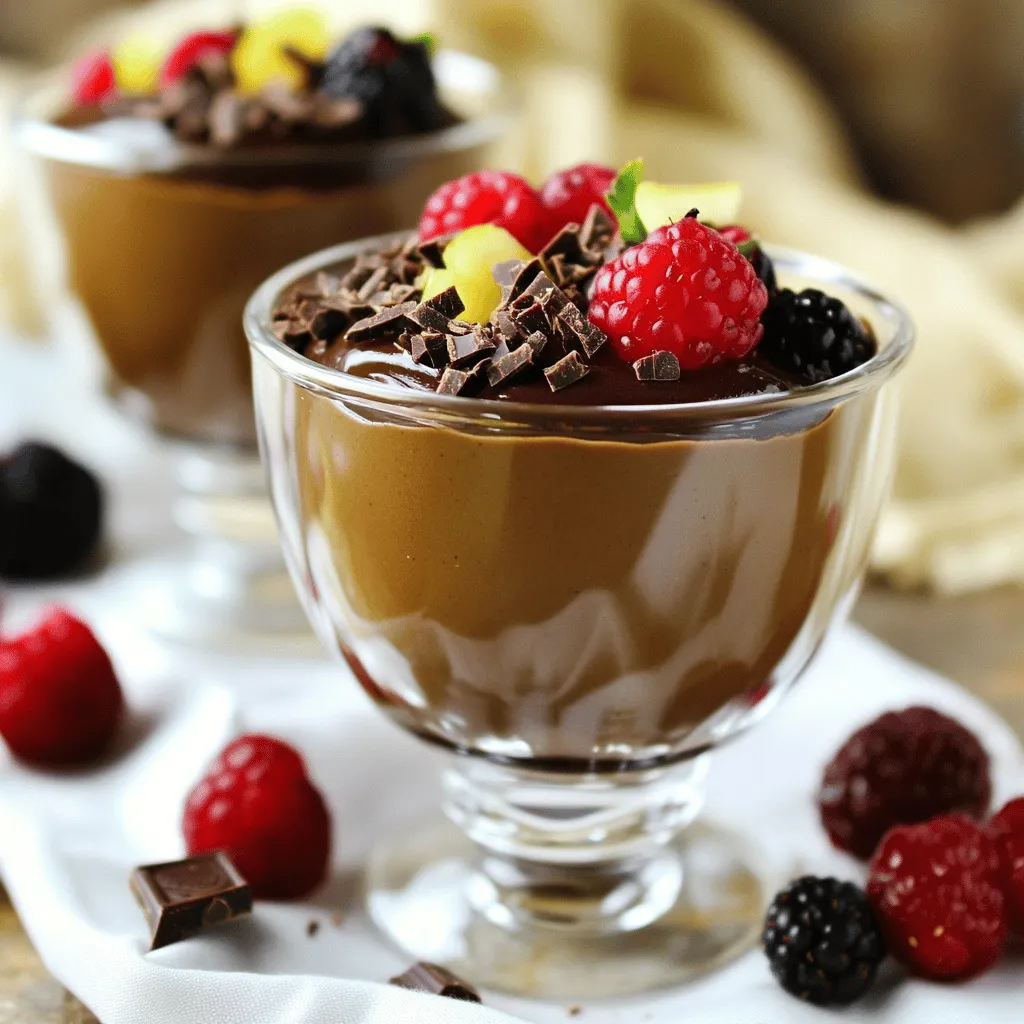
Indulge guilt-free with my Vegan Chocolate Mousse! Rich, creamy, and full of flavor, this treat delights your sweet tooth while keeping things plant-based. With just a few simple ingredients like silken tofu and dairy-free chocolate chips, you’ll create a dessert that impresses everyone. Ready to learn how to whip up this easy and decadent mousse? Let’s dive in and enjoy every velvety bite together!
Ingredients
Main Ingredients
– 1 cup silken tofu
– 1 cup dark dairy-free chocolate chips
– 1/4 cup pure maple syrup
– 1 teaspoon pure vanilla extract
– 1/4 teaspoon sea salt
The main ingredients create the base for a rich and creamy mousse. I use silken tofu for its smooth texture. It blends well and adds a protein boost. Dark dairy-free chocolate chips provide deep chocolate flavor. Pure maple syrup adds natural sweetness, and vanilla extract enhances the taste. A pinch of sea salt rounds out the flavors beautifully.
Garnishing Ingredients
– Fresh berries (raspberries, strawberries, or blueberries)
– Shaved dark chocolate
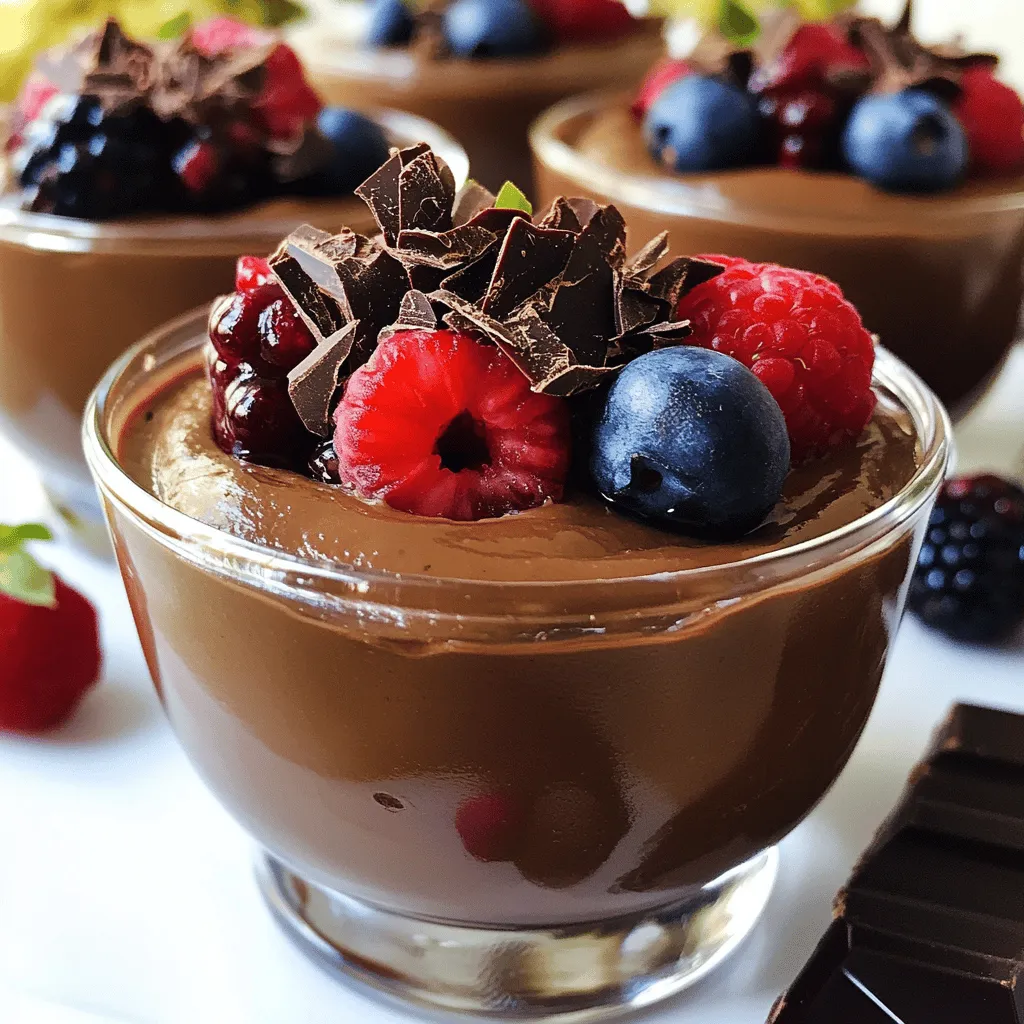
Garnishing ingredients make this mousse visually appealing and add fresh flavors. Fresh berries offer a bright contrast to the rich chocolate. Shaved dark chocolate adds an elegant touch. These toppings not only look great but also enhance the taste. They turn a simple dessert into a gourmet experience.
Step-by-Step Instructions
Prepare the Chocolate
Double Boiler Method
To melt the chocolate, use a double boiler. Fill a pot with water and bring it to a simmer. Place a heatproof bowl on top, making sure it does not touch the water. Add the dark chocolate chips to the bowl. Stir often until the chocolate is completely melted and smooth.
Microwave Method
For a quicker option, use the microwave. Put the chocolate chips in a microwave-safe bowl. Heat them in 30-second bursts, stirring each time. Stop when the chocolate is fully melted and smooth.
Blend the Mousse
Combine the Ingredients
Next, add the melted chocolate to your blender. Include the drained silken tofu, maple syrup, vanilla extract, and sea salt.
Achieve the Perfect Texture
Secure the lid and blend on high. Stop to scrape down the sides. Blend until you get a rich, creamy texture with no lumps. It should feel velvety and indulgent.
Taste and Adjust
Sweetness Adjustment Tips
After blending, taste your mousse. If you want it sweeter, add a little more maple syrup. Blend again briefly to mix in the extra sweetness.
Portion and Chill
Serving Methods
Carefully spoon the mousse into individual bowls. Use a spatula to smooth the tops. This makes them look nice and tidy.
Importance of Chilling
Now, place the bowls in the fridge. Let them chill for at least 30 minutes. Chilling helps the mousse firm up, enhancing the flavors and texture.
Tips & Tricks
Achieving the Right Texture
To get that perfect texture in your vegan chocolate mousse, blending is key. Use a high-speed blender for the best results. This tool helps mix the ingredients smoothly. Here are some tips:
– Blend slowly at first: Start on a low setting to combine the ingredients. Gradually increase the speed to avoid splatters.
– Scrape the sides: Pause while blending to scrape down the sides. This ensures all ingredients mix well. The goal is a smooth, creamy texture without lumps.
Common pitfalls to avoid include over-blending, which can make the mousse too airy. Also, under-blending can leave chunks of tofu. Both can ruin the experience of eating this treat.
Sweetness Preferences
Sweetness is personal. I often use maple syrup in this recipe, but you can change it up. If you prefer a different flavor, try agave nectar or date syrup. Both work well for sweetness.
To adjust the sweetness, taste the mousse after blending. If it needs more sweetness, add a bit more maple syrup. Blend it in briefly to mix. You can also add cocoa powder for a richer chocolate flavor. Just remember to blend well to keep that smooth texture.Enjoy creating your mousse!
Variations
Flavor Enhancements
You can make your vegan chocolate mousse even more exciting with some simple additions.
– Adding espresso or coffee: A touch of espresso powder or brewed coffee gives the mousse a deeper flavor. It enhances the chocolate and adds a rich, bold note. Just mix in one teaspoon of espresso powder when you blend your ingredients. If you prefer brewed coffee, use two tablespoons.
– Infusing with citrus zest: A bit of zest can brighten the mousse. Try adding zest from an orange or lemon. This adds a fresh twist. Just one teaspoon of zest can make a big difference. Mix it in with the other ingredients for a lovely flavor boost.
Serving Suggestions
How you serve your mousse can make it even more special.
– Alternative toppings and pairings: Fresh berries are classic, but you can try other toppings too. Chopped nuts or coconut whipped cream add nice textures. You might also drizzle some extra melted chocolate on top for a sweet touch.
– Creative serving vessels: Presentation matters! Use small jars, cups, or even shot glasses. They look cute and let each guest enjoy their own portion. You can also layer the mousse with fruit or granola in a clear glass for a fun visual treat.
Storage Info
Refrigeration
To store any extra mousse, place it in an airtight container. This keeps it fresh and tasty. Make sure to cover the container well to avoid any odors from the fridge. The mousse can last up to five days in the fridge. Enjoy it as an easy dessert or a quick snack.
Freezing
If you want to save the mousse for later, you can freeze it. Scoop the mousse into a freezer-safe container, leaving some space at the top. This allows for expansion as it freezes. Seal the lid tightly. The mousse can stay frozen for about two months.
When you’re ready to eat it, take the mousse out and place it in the fridge overnight to thaw. If you need it faster, you can thaw it at room temperature for about an hour. Just remember to stir it gently before serving to get back that creamy texture.
FAQs
What can I substitute for silken tofu?
You can use mashed avocado or coconut cream. Both options give a creamy texture. They also help keep the mousse rich and smooth. If you need a nut-free option, avocado is best. Coconut cream adds a nice flavor, but it can be a bit heavier.
Is this mousse nut-free?
Yes, this mousse is nut-free. It uses silken tofu and dairy-free chocolate. This makes it safe for those with nut allergies. Always check labels on chocolate to ensure it’s nut-free, just in case.
How long does the mousse last in the fridge?
The mousse can last about four to five days in the fridge. Store it in an airtight container to keep it fresh. If you see any change in smell or texture, it’s best to toss it.
Can I make this ahead of time?
Yes, you can make this mousse ahead of time. It’s perfect for parties or special meals. Just make sure to chill it for at least 30 minutes before serving.
Is it possible to make this recipe without a blender?
You can make the mousse without a blender, but it’s more work. You can use a whisk or a fork to mix the ingredients. It will take longer to get a smooth texture this way. If you choose this method, ensure the chocolate is cool before mixing.
This blog post covered how to make a tasty chocolate mousse using simple ingredients, like silken tofu and dark dairy-free chocolate chips. You learned step-by-step instructions to prepare and blend the mousse, plus tips for achieving the best texture. We explored flavor variations and how to store leftovers.
In the end, this dessert is easy to make and fun to customize. Enjoy creating it your way!
. Start by preheating the air fryer to 350°F (175°C). This step helps your donuts cook evenly. It only takes a few minutes, so don’t skip this part! In a mixing bowl, combine the dry ingredients. You’ll need: - 1 cup all-purpose flour - 1/2 cup granulated sugar - 1 1/2 teaspoons baking powder - 1/4 teaspoon salt - 1/2 teaspoon ground cinnamon - 1/4 teaspoon ground nutmeg (optional) Whisk these ingredients together until there are no lumps left. This ensures a smooth donut texture. Next, grab another bowl to mix the wet ingredients. You’ll need: - 1/2 cup milk - 1 large egg - 2 tablespoons unsalted butter, melted - 1 teaspoon vanilla extract Whisk these until the mixture is smooth. This adds flavor and moisture to your donuts. Now, slowly add the wet mixture to the dry ingredients. Stir gently until a soft dough starts to form. Be careful not to overmix. A delicate touch gives your donuts their light texture. Lightly flour your countertop. Roll the dough out to about 1/2 inch thick. Use a donut cutter or two round cutters to cut out the donuts. If you have dough scraps, reroll them to make more donuts. Place the shaped donuts in the air fryer basket. Make sure you don’t overcrowd them. Cook for 5-6 minutes until they turn golden brown. Flip them halfway through for even cooking. While your donuts cook, mix the cinnamon sugar in a shallow dish. Combine: - 1/4 cup granulated sugar - 1 tablespoon ground cinnamon This will give your donuts that sweet and spicy touch. Once the donuts are done, take them out of the air fryer. While they are still warm, roll each donut in the cinnamon sugar mixture. Make sure they are coated on all sides for a tasty finish. Let the coated donuts cool for a few minutes on a wire rack. This helps them set. Serve them warm or at room temperature. They are perfect for sharing or enjoying with a cup of coffee! For the full recipe, check out the details above. To make great donuts, the dough must be soft but not sticky. After mixing, it should feel smooth. If it’s too wet, add a little more flour. If it’s too dry, add a splash of milk. Remember, don’t overmix! This keeps the donuts light and fluffy. Use a donut cutter or two different-sized round cutters. Press straight down without twisting. Twisting can seal the edges and stop the donuts from rising. If you don’t have a cutter, use a glass for the larger circle. A small bottle cap works for the center hole. Preheat your air fryer to 350°F (175°C). Cook the donuts for 5-6 minutes. Flip them halfway to ensure they brown evenly. Keep an eye on them! Every air fryer cooks a bit differently, so check for a golden color. For a lovely look, serve your donuts on a pretty plate. Dust them with extra cinnamon for a nice touch. You can also put some cinnamon sugar in a small bowl for dipping. This makes it fun and tasty for everyone! Enjoy your homemade treats! {{image_4}} You can make chocolate glazed donuts with this base recipe. After cooking the donuts, melt some chocolate chips in a bowl. Dip each warm donut into the melted chocolate. Let excess chocolate drip off before placing them on a wire rack. You can add sprinkles on top for some fun color and texture. This adds a rich flavor that pairs well with the cinnamon sugar. To create pumpkin spice donuts, swap out some of the milk with pumpkin puree. Add a tablespoon of pumpkin pie spice to the dry ingredients. This gives the donuts a warm, fall flavor. The result is a moist donut that is perfect for autumn. Serve them fresh with a light dusting of cinnamon sugar. If you need nut-free donuts, just ensure all your ingredients are nut-free. Use regular all-purpose flour, which is safe for most people. For gluten-free donuts, you can use a gluten-free flour blend. Make sure the blend has xanthan gum to help with texture. This way, everyone can enjoy these tasty treats without worry. For more ideas, check out the Full Recipe. To keep your donuts fresh, place them in an airtight container. They can stay at room temperature for up to two days. For longer storage, refrigerate them. Just remember, cold donuts can lose some of their charm. If you want to save some donuts for later, freezing is a great option. Wrap each donut in plastic wrap and place them in a freezer-safe bag. They can last for up to three months in the freezer. Label the bag with the date so you know when to enjoy them! When you’re ready to enjoy your frozen donuts, take them out of the freezer. Let them thaw in the fridge overnight. You can warm them in the air fryer at 350°F for about 3 to 5 minutes. This will make them soft and tasty again, just like fresh! For more details, check the Full Recipe. Yes, you can use self-rising flour. Just skip the baking powder and salt. Self-rising flour has these ingredients already mixed in. Your donuts will still taste great! You can use unsweetened applesauce or mashed banana. About 1/4 cup works well as a replacement for one egg. This keeps your donuts moist and adds a bit of sweetness. To make the donuts healthier, you can reduce the sugar. Try using a sugar alternative like stevia or monk fruit. You can also add more whole grains by using whole wheat flour. It’s an easy swap! Yes, you can bake them! Just preheat your oven to 350°F (175°C). Place the donuts on a baking sheet and bake for about 10-12 minutes. They will not be as crispy, but they’ll still be tasty! These donuts stay fresh for about two days at room temperature. If you want them to last longer, store them in an airtight container in the fridge. You can also freeze them for up to three months. Just reheat when you're ready to enjoy! For the full recipe, check the details in the previous sections! This blog post covers everything you need to make air fryer donuts. We discussed the ingredients, step-by-step instructions, helpful tips, and fun variations. Remember to store your donuts well for freshness, and feel free to try different flavors. Donut-making can be simple and fun. I hope you enjoy making these tasty treats! Now go ahead and create your delicious batch!](https://joymealplan.com/wp-content/uploads/2025/07/9fe56699-c2ee-4d7f-b420-cb85b6682c39-768x768.webp)