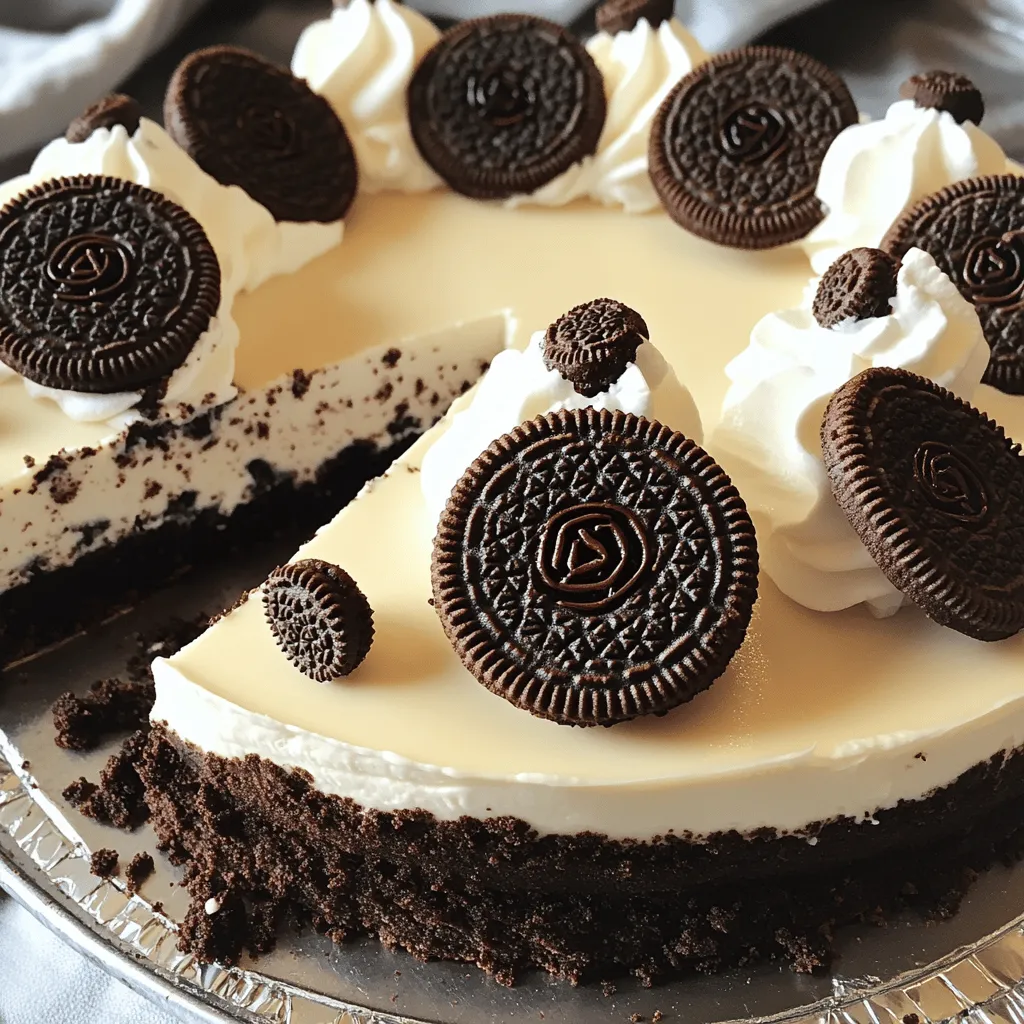
No-Bake Oreo Cheesecake Easy and Delicious Dessert
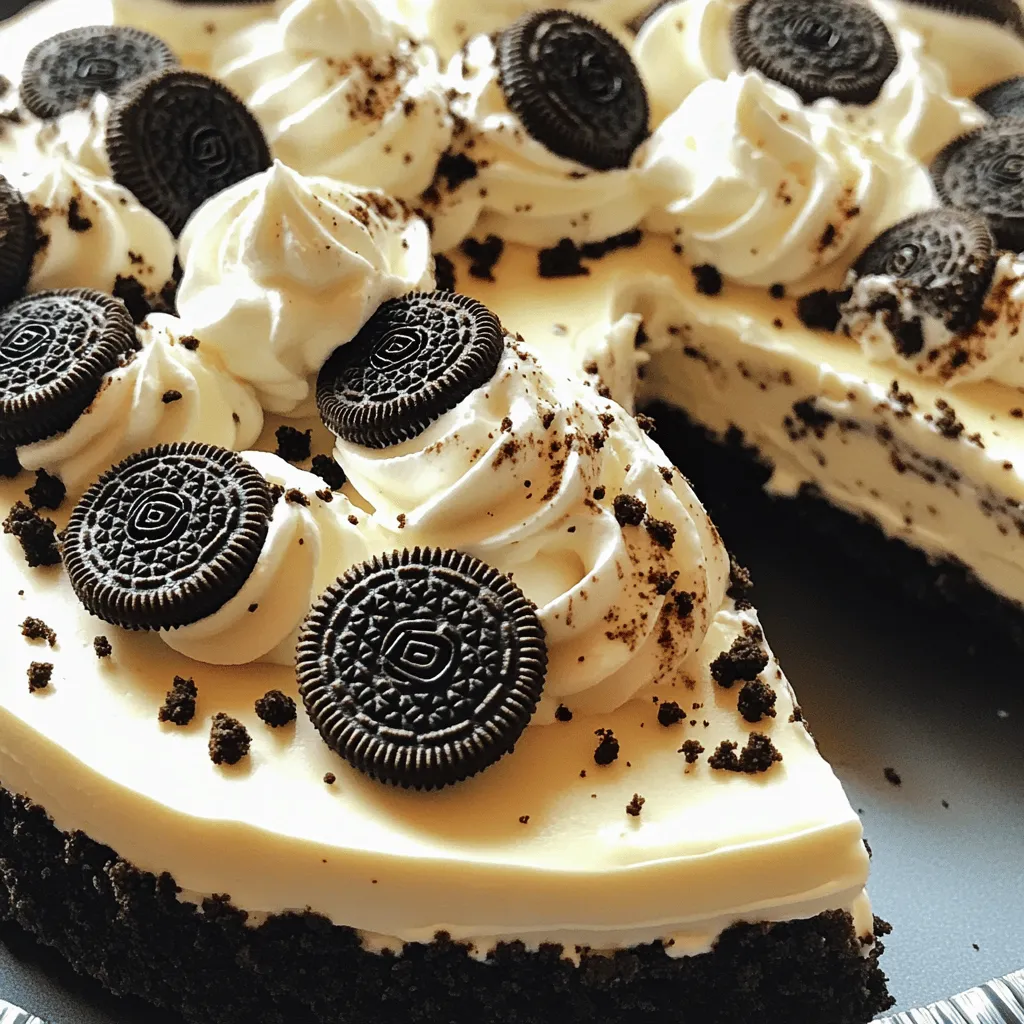
Looking for a simple yet delicious dessert? You’ll love this No-Bake Oreo Cheesecake! With just a few easy steps, you can whip up a creamy and tasty treat that everyone will enjoy. Skip the oven and dive straight into soft layers of Oreo goodness. In this post, I’ll share a step-by-step guide, ingredient tips, and some fun variations. Let’s get started on your new favorite dessert!
Ingredients
Complete list of ingredients
To make a tasty No-Bake Oreo Cheesecake, gather these items:
– 24 Oreo cookies (plus extra for garnish)
– 1/4 cup unsalted butter, melted
– 16 oz cream cheese, softened
– 1/2 cup granulated sugar
– 1 teaspoon vanilla extract
– 1 1/2 cups whipped cream (or Cool Whip)
– 1/2 cup sour cream
– 1/4 cup cocoa powder (optional)
Ingredient substitutions
If you want dairy-free options, try using non-dairy cream cheese and coconut whipped cream. For gluten-free Oreos, look for brands that specify gluten-free on the package. This way, everyone can enjoy the cheesecake.
Tips for selecting quality ingredients
When picking cream cheese, check for freshness. It should be smooth and not grainy. Choose a whipping cream that is high in fat. This helps give your cheesecake a rich taste and creamy texture.
Step-by-Step Instructions
Preparing the crust
To start, take 24 Oreo cookies and place them in a food processor. Crush them into fine crumbs. This should take about a minute. Once you have your crumbs, pour in 1/4 cup of melted butter. Pulse the mixture again until it looks like damp sand.
Next, grab a 9-inch springform pan. Transfer the crust mixture into the pan. Use your fingers or the bottom of a glass to press the crumbs down firmly. Make sure you create an even layer across the bottom. Now, place the pan in the fridge to chill while you work on the filling.
Making the cheesecake filling
For the filling, take 16 ounces of softened cream cheese and put it in a large bowl. Use an electric mixer and beat it for about 2 to 3 minutes. You want it to be creamy and fluffy. This step is key for a smooth texture.
Next, add in 1/2 cup of granulated sugar and 1 teaspoon of vanilla extract. Mix until everything combines well and is smooth. This part sets the sweet and rich flavor of your cheesecake.
Assembling the cheesecake
Now, it’s time to fold in some whipped cream. Measure out 1 1/2 cups of whipped cream and gently add it to the cream cheese mixture. Use a spatula to fold it in carefully. This keeps the mixture light and airy.
For extra Oreo goodness, take 4-5 more Oreos. Crush them coarsely and fold them into the mixture. This will add a nice texture. Once everything is combined, pour the filling over the chilled crust. Smooth the top with a spatula.
Chilling and serving
Cover the springform pan with plastic wrap or aluminum foil. Place it in the fridge for at least 4 hours. If you can wait overnight, that’s even better! This chilling time helps the cheesecake set properly.
When it’s time to serve, remove the sides of the springform pan carefully. You can garnish the top with extra crushed Oreos for a pretty touch. Slice the cheesecake into wedges. Each slice looks and tastes amazing!
Tips & Tricks
Achieving the perfect texture
To get the best texture, use room temperature ingredients. Cold cream cheese can make your filling lumpy. Leave it out for 30 minutes before mixing. This helps blend everything smoothly.
To know when your cheesecake is set, look for a slight jiggle in the center. It should not be runny. After chilling, the edges will firm up while the center stays a bit soft. This is the perfect time to take it out.
Creative serving suggestions
When serving, presentation matters. Top each slice with whipped cream for a pretty look. Add a mini Oreo on top for fun. Drizzle chocolate syrup around the plate to make it fancy.
You can also pair this cheesecake with fruits like strawberries or raspberries. These add fresh flavor and color. A scoop of vanilla ice cream makes a great side as well.
Troubleshooting common issues
If your cheesecake cracks, don’t worry. This can happen during cooling. To fix this, let it chill slowly. Avoid sudden temperature changes.
For a smoother filling, mix well but do not overbeat. Overmixing can add air, leading to cracks. Make sure to fold in the whipped cream gently. This keeps it light and fluffy, giving you that perfect cheesecake.
Variations
Different flavor combinations
You can have fun with different flavors for your no-bake Oreo cheesecake. Here are two tasty ideas:
– Chocolate Oreo cheesecake: Add cocoa powder to the filling. This boosts the chocolate flavor and makes it richer. You can also mix in some melted chocolate for an extra treat.
– Mint Oreo cheesecake: Use mint Oreos instead of regular ones. This gives your cheesecake a refreshing twist. Add a few drops of peppermint extract for an extra minty taste.
Dietary variations
If you have dietary needs, you can still enjoy this dessert. Here are some options:
– Vegan no-bake Oreo cheesecake: Use vegan cream cheese and coconut whipped cream. Replace Oreos with vegan cookies. This way, you keep the creamy texture and great taste.
– Sugar-free dessert options: Choose sugar-free Oreos and sugar substitutes like stevia or erythritol. This option is great for those watching their sugar intake.
Using other cookie types
You can also use different cookies if you want. Here’s how:
– Substituting with other cookies: Try using chocolate chip cookies, graham crackers, or even peanut butter cookies. Each option gives a unique taste and texture.
– Pros and cons of using alternatives: Substituting cookies can change the flavor. Some may crumble more, while others can add a nice crunch. Make sure to choose cookies that blend well with the cheesecake filling.
This recipe allows for many creative twists.
Storage Information
Best practices for storage
To keep your no-bake Oreo cheesecake fresh, store it in the fridge. Use an airtight container to prevent it from absorbing other flavors. If you want to keep it longer, cover it tightly with plastic wrap.
– Leftovers: Place any leftover cheesecake in a container. Make sure the lid fits snugly.
– Recommended containers: A glass or plastic container with a good seal works best.
Freezing tips
You can freeze your no-bake cheesecake for later enjoyment. This dessert freezes well, but it’s best to freeze it whole.
– How to freeze: Wrap the cheesecake in plastic wrap. Then, place it in a freezer-safe container or bag.
– Thawing instructions: When you’re ready to eat it, take it out of the freezer. Move it to the fridge to thaw overnight. This helps keep the texture nice and creamy.
Shelf life of ingredients used
Knowing how long your ingredients last helps you stay safe. Cream cheese and whipped cream have different shelf lives.
– Durability: Cream cheese can last about 2 weeks in the fridge. Whipped cream lasts about a week once opened.
– Cheesecake freshness: Your no-bake Oreo cheesecake stays fresh for about 5 days in the fridge. Enjoy it within that time for the best taste!
FAQs
Can I use reduced-fat cream cheese?
Yes, you can use reduced-fat cream cheese in this recipe. It makes the cheesecake lighter. However, the texture may not be as rich. Reduced-fat cream cheese can make the filling a bit softer. If you want a firmer cheesecake, stick with full-fat cream cheese.
How long can I leave the cheesecake in the fridge?
You can keep the cheesecake in the fridge for up to five days. Make sure to cover it well. This helps prevent it from absorbing other smells. If you notice it getting watery, that’s normal, just gently pat it dry before serving.
Can I make this recipe ahead of time?
Absolutely! You can make this cheesecake a day or two ahead of your event. Just be sure to let it chill for at least four hours. This gives it time to set. Planning ahead helps reduce stress on the big day.
Is it necessary to use a springform pan?
No, it’s not necessary to use a springform pan. You can use a regular cake pan instead. Just line the bottom with parchment paper. This makes removal easier. If you use a regular pan, chill it longer for best results.
What can I substitute for whipped cream?
If you don’t have whipped cream, you can use Greek yogurt. It adds a nice tang. Another option is to use Cool Whip. For a dairy-free choice, try coconut whipped cream. Just make sure it’s stable enough for the cheesecake.
This blog post detailed how to make a delicious no-bake Oreo cheesecake. We covered every step, from choosing top-notch ingredients to making your crust and filling. Remember to use room-temperature items for the best texture. You can also try fun variations, like mint or vegan options. Store leftovers properly to enjoy them later. Following these tips will help you create a cheesecake that impresses everyone. Enjoy your baking journey, and let creativity lead the way!

![To make my chocolate chip banana bread, gather these key ingredients: - 3 ripe bananas, thoroughly mashed - 1/3 cup coconut oil, melted until liquid - 1 teaspoon pure vanilla extract - 1 teaspoon baking soda - A pinch of salt - 3/4 cup packed brown sugar - 1 large egg, beaten until frothy - 1 cup all-purpose flour, sifted - 1/2 cup chocolate chips (choose dark or semi-sweet based on preference) These ingredients work together to create a moist and delicious loaf. The ripe bananas add natural sweetness and moisture. Coconut oil gives a rich flavor, while brown sugar enhances the sweetness. For even more flavor, consider adding these optional ingredients: - 1/4 cup chopped walnuts (for added crunch) - 1/4 teaspoon ground cinnamon (to add warmth and depth) Chopped walnuts bring a nice texture. Ground cinnamon gives the bread a warm, inviting taste. When choosing chocolate chips, here are my top picks: - Dark chocolate chips: They add a rich, bold flavor. - Semi-sweet chocolate chips: They strike a perfect balance of sweet and rich. - Milk chocolate chips: They create a sweeter taste for those who love chocolate. Each type of chocolate brings its own twist to the bread. You can mix and match for a unique flavor experience. For the best results, go with high-quality chocolate chips. They will melt beautifully, adding gooey pockets of chocolate in every bite. For the complete recipe, check out the Full Recipe. Start by gathering your ingredients. You will need three ripe bananas, coconut oil, vanilla extract, baking soda, salt, brown sugar, an egg, flour, chocolate chips, walnuts, and cinnamon. Preheat your oven to 350°F (175°C). Grease a 9x5 inch loaf pan with oil or butter. This helps the bread come out easily after baking. In a large bowl, mash the ripe bananas until smooth. Add the melted coconut oil to the bananas. Mix well until it looks creamy. Next, stir in the vanilla extract and the beaten egg. Ensure everything is combined nicely. Sprinkle the baking soda and salt over the mixture, blending them in thoroughly. Gradually mix in the brown sugar until it is fully combined. Then, gently fold in the sifted flour until just mixed. Avoid overmixing. Lastly, add the chocolate chips and walnuts, if you choose to use them. Add a bit of cinnamon, and give a light stir. Pour the batter into your prepared loaf pan. Use a spatula to smooth the top. Place the pan in your preheated oven. Bake for 55 to 65 minutes. To check if it's done, insert a toothpick into the center. It should come out clean or with a few moist crumbs. Once baked, let your bread cool in the pan for about 10 minutes. Then, move it to a wire rack to cool completely. Enjoy the sweet aroma and the delight of your chocolate chip banana bread! To get the best texture, make sure you use very ripe bananas. The riper the banana, the sweeter and moister your bread will be. Mash them until they are smooth, with no lumps. This helps the bread rise well and stay soft. When mixing, fold in the flour gently. Overmixing can make your bread dense and tough. You want it light and fluffy. Bake it until the top is golden brown and a toothpick comes out clean. One common mistake is using unripe bananas. They won’t give you the sweet flavor you want. Another mistake is overmixing the batter. This can lead to tough bread. Also, be careful with your oven temperature. If it's too hot, the outside may burn before the inside cooks. Make sure to check the bread a few minutes before the time is up. Lastly, don’t skip the cooling step! Letting it cool helps set the bread for easier slicing. The best way to mash bananas is with a fork or a potato masher. Start by breaking them into smaller pieces in a bowl. Then, press down firmly to create a smooth mixture. If you want to save time, you can use a food processor. Just pulse the ripe bananas until smooth. You can mash them right in the peel if they are very ripe. Just cut a slit in the skin and squeeze the banana out into your bowl. This method is quick and keeps your hands clean! For the full recipe, check out the [Full Recipe]. {{image_4}} You can make a gluten-free version of chocolate chip banana bread. Use almond flour or coconut flour instead of all-purpose flour. These options keep the bread moist and tasty. You may need to adjust the amount. Start with 3/4 cup of almond flour or 1/2 cup of coconut flour. Add 1/4 teaspoon of xanthan gum to help with texture. For a vegan twist, swap the egg for flaxseed meal. Mix 1 tablespoon of flaxseed with 2.5 tablespoons of water. Let it sit for five minutes to thicken. Replace coconut oil with a plant-based butter or applesauce. This change keeps the bread rich and moist. Use dairy-free chocolate chips to complete this yummy recipe. You can personalize your banana bread by adding nuts or fruits. Walnuts add a nice crunch. Pecans also work well for a sweeter taste. Dried fruits like raisins or cranberries give a chewy texture. You can even mix in some berries for extra flavor. Just remember to keep the total amount of mix-ins to about 1 cup. This rule helps your bread bake evenly. For the full recipe, check out the Choco-Banana Delight Bread section. To store leftover banana bread, let it cool completely. Then, wrap it in plastic wrap or aluminum foil. This helps keep the bread moist. You can also place it in an airtight container. Store it on your kitchen counter for up to three days. If you want to keep it longer, consider freezing it. Freezing banana bread is a great way to save it for later. First, slice the bread if you want easy portions. Wrap each slice tightly in plastic wrap. Then place the wrapped slices in a freezer-safe bag. Label the bag with the date. You can freeze the bread for up to three months. When you want to eat it, just thaw it in the fridge overnight. The best containers for storing banana bread are airtight ones. Glass or plastic containers work well. They keep out air and moisture. If you use foil or plastic wrap, ensure it is tight. This keeps the bread fresh and soft. Avoid metal containers, as they can alter the taste. For the best results, store it in a cool, dry place. Yes, you can use frozen bananas. Just thaw them first. Once thawed, drain any excess liquid. Mash them well before adding to your mix. They will still give your bread that sweet banana flavor. Plus, they make the bread extra moist! To make the bread more chocolatey, use more chocolate chips. Add an extra half cup to your mix. You could also sprinkle some on top before baking. For a richer taste, use dark chocolate chips. They bring a deep flavor that pairs well with bananas. If you don’t have coconut oil, you can use other oils. Vegetable oil or canola oil work well. You can also use melted butter for a richer taste. Just keep the same amount as in the recipe. Each option gives a slightly different flavor but will still keep your bread moist. This blog post covered how to make delicious chocolate chip banana bread. We explored key ingredients, step-by-step baking instructions, and tips to improve your bread. I also shared variations for gluten-free and vegan options. Lastly, we discussed proper storage to keep your bread fresh. Making great banana bread is easy with these tips. You can customize it and enjoy it any time. Happy baking!](https://joymealplan.com/wp-content/uploads/2025/06/4218a26b-5328-488e-b65f-2aec80576d34-768x768.webp)
![- 1 cup rolled oats - 2 ripe bananas - 1 cup almond milk - 1 teaspoon baking powder - 1 teaspoon vanilla extract - 1 tablespoon honey or maple syrup (optional) - 1/2 teaspoon ground cinnamon - Pinch of salt - Coconut oil or cooking spray for greasing Using rolled oats is key. They give your pancakes a hearty texture. Bananas add natural sweetness and moisture. Almond milk keeps it light and dairy-free. If you want sweetness, use honey or maple syrup. A touch of cinnamon gives warmth and flavor. Coconut oil or cooking spray is important to keep the pancakes from sticking. Choose either based on your preference. This recipe is simple. You can find the full recipe above to guide you through the steps. Enjoy making these delicious pancakes! Start by blending 1 cup of rolled oats. You want to blend them until they are fine and powdery. This oat flour acts as the main ingredient. Next, add 2 ripe bananas that you have mashed well. Then, pour in 1 cup of almond milk. This mix gives your pancakes a nice texture. Now it’s time to make the batter. Add 1 teaspoon of baking powder, 1 teaspoon of vanilla extract, and 1 tablespoon of honey or maple syrup if you want them sweeter. Don’t forget to add 1/2 teaspoon of ground cinnamon and a pinch of salt. Blend everything together until it is smooth and uniform. The batter should look nice and creamy. Let the batter rest for about 5-10 minutes. This helps it thicken. While the batter rests, heat a skillet over medium heat. Grease it with coconut oil or cooking spray to prevent sticking. Once hot, pour about 1/4 cup of batter for each pancake. Cook until bubbles form on top, which takes about 2-3 minutes. Then, flip them over. Cook for another 2-3 minutes until they are golden brown. Repeat this with the rest of the batter. You can find the full recipe [here]. To get the best texture, let the batter rest for 5-10 minutes. This helps it thicken. A thicker batter makes fluffier pancakes. Adjust the heat on your skillet. Cook on medium heat to avoid burning. If the pan is too hot, the outside cooks fast while the inside stays raw. You can change the sweetness. Instead of honey, try maple syrup or agave. Each will give a unique taste. For more flavor, think about adding spices. Nutmeg and ginger are great choices. They add warmth and depth. A pinch of each can really enhance the pancakes. For a beautiful plate, stack your pancakes high. Top them with fresh banana slices. A drizzle of honey or syrup makes them shine. You can also sprinkle crunchy nuts on top. For a creamy touch, serve with Greek yogurt. It adds richness and pairs well with the pancakes. {{image_4}} You can easily make these pancakes gluten-free. Use certified gluten-free oats. This ensures you avoid cross-contamination. Many brands offer oats that fit this need. If you are lactose intolerant, try almond milk or coconut milk. Both options work great in this recipe. They add a nice creaminess without the dairy. Want to add more fun to your pancakes? Toss in some chocolate chips or nuts. They give a sweet crunch that’s hard to resist. You can also use walnuts or pecans for added texture. You might like to incorporate fruit purees too. Applesauce or pumpkin puree can boost flavor and moisture. Vanilla or almond extract can add depth to the taste. Meal prep is easy with these pancakes. You can make a big batch and freeze extras. Just stack them with parchment paper between each pancake. This keeps them from sticking together. These pancakes pair well with yogurt or fresh fruit. A dollop of Greek yogurt adds protein. Fresh berries or banana slices on top make a lovely presentation. For the full recipe, check it out above. Enjoy your delicious and healthy banana oat pancakes! To keep your pancakes fresh, store them properly. If you have leftover pancakes, place them in an airtight container. You can refrigerate them for up to three days. This keeps them soft and tasty. For longer storage, freeze your pancakes. Lay them flat on a baking sheet. Once they freeze, transfer them to a freezer bag. This way, they won't stick together. You can freeze them for up to three months. When you're ready to enjoy your pancakes again, reheating is simple. The best way is to use a toaster or a skillet. If you choose a skillet, heat it on low. Add a tiny bit of coconut oil or spray. Place the pancakes in the skillet for about one minute on each side. This keeps them warm and fluffy. If you're in a hurry, you can use the microwave. Heat the pancakes for about 20-30 seconds. But be careful, as this may make them a bit chewy. For the best taste, always try to reheat them gently. Enjoy your Healthy Banana Oat Pancakes! For the full recipe, check out the details above. Yes, you can use quick oats. Quick oats are thinner and cook faster. This can affect the texture of your pancakes. Rolled oats give a heartier feel. If you use quick oats, your pancakes may be softer. You might also need less liquid since quick oats absorb liquid differently. Experiment and see what you like best. To make these pancakes vegan, swap out the milk and honey. Use almond milk or any plant-based milk. For sweetness, try maple syrup instead of honey. You can skip the egg, as this recipe is already egg-free. These changes keep the pancakes tasty and plant-based. If the batter is too thick, add a bit more milk to loosen it. Start with one tablespoon at a time. Blend it again after each addition. This helps keep the flavor strong while adjusting the texture. A good batter should pour easily, but not be runny. These pancakes last about 3 to 5 days in the fridge. Keep them in an airtight container to stay fresh. You can reheat them in the microwave or on a skillet. Just make sure they are heated through for the best taste. Yes, you can make the batter ahead of time. Store it in the fridge for up to 24 hours. If you wait longer, the oats may absorb too much liquid. Just add a little milk before cooking to get the right consistency. This makes breakfast quick and easy! For the full recipe, check out the detailed guide. To make these healthy banana oat pancakes, start by blending the rolled oats until they turn into a fine flour. Then mix in the mashed bananas and almond milk. This creates a smooth batter. It is important to let the batter rest for 5-10 minutes. This helps thicken the batter and improves texture. Here are some key points to remember for successful pancakes: - Always blend the oats until fine for the best texture. - Use ripe bananas for natural sweetness. - Let the batter rest; it makes a big difference. - Grease your skillet well to prevent sticking. - Cook until bubbles form, then flip carefully. These tips will help you create pancakes that are light, fluffy, and full of flavor. Enjoy making them! You learned about making delicious pancakes with simple, healthy ingredients. We covered the essential items, step-by-step cooking instructions, and helpful tips. We also explored variations to fit diets and preferences. Lastly, we discussed how to store leftovers and answered common questions. With these insights, you can create tasty pancakes that everyone will enjoy. Get cooking and delight your family or friends with these easy-to-make treats!](https://joymealplan.com/wp-content/uploads/2025/07/586e6978-884d-467f-992a-f783d71f0243-768x768.webp)