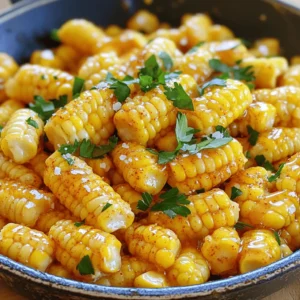
Honey Butter Skillet Corn Quick and Flavorful Recipe

Want to impress your family with a delicious side dish? This Honey Butter Skillet Corn recipe is quick, easy, and packed with flavor. With just a few simple ingredients, you’ll create a sweet and savory treat that everyone will love. Follow along as I guide you through step-by-step instructions, tips, and tasty variations. Get ready to elevate your meals with this delightful corn dish that shines on any table!
Ingredients
Fresh Corn Kernels
You need fresh corn for the best flavor. Use about 4 cups of corn kernels. This is roughly 6 to 8 ears of corn. Choose sweet corn for a nice taste. Shuck the corn and cut off the kernels carefully.
Butter and Honey
Next, you’ll need 1/4 cup of unsalted butter. This helps to make the corn rich and creamy. You also want 1/4 cup of honey. Honey adds a sweet touch that pairs well with the corn.
Seasoning and Garnishing Ingredients
Season your dish with 1 teaspoon of sea salt. This enhances the flavors. Add 1/2 teaspoon of freshly ground black pepper for a little kick. If you like smokiness, include 1/4 teaspoon of smoked paprika. For a bright finish, chop 2 tablespoons of fresh parsley. This adds color and freshness to your corn.
Step-by-Step Instructions
Preparing the Corn
Start by shucking the corn. Remove the green husks and silk from the ears. Use a sharp knife to cut the kernels off the cob. You need about 4 cups of fresh corn. Set the kernels aside. Fresh corn has the best taste and sweetness.
Melting the Butter
Grab a large skillet and add 1/4 cup of unsalted butter. Place the skillet on medium heat. Watch the butter as it melts. You want it to bubble gently. The aroma will fill your kitchen, making you hungry.
Cooking the Corn and Adding Honey
Once the butter has melted, add the corn kernels to the skillet. Stir the corn so it gets coated in the butter. Cook it for about 5 to 7 minutes. Stir occasionally for even cooking.
After that, drizzle 1/4 cup of honey over the corn. Sprinkle in 1 teaspoon of sea salt, 1/2 teaspoon of black pepper, and 1/4 teaspoon of smoked paprika if you like a smoky taste. Stir until every kernel is covered in the honey-butter mix.
Cook the corn for another 3 to 5 minutes. This helps the natural sugars caramelize. The corn will turn golden and taste sweet. When it’s tender and caramelized, remove it from the heat. Taste and adjust the seasoning if needed.
Finally, transfer the corn to a serving dish. Garnish with chopped parsley for a fresh touch. This makes the dish look great and adds flavor. Enjoy your Honey Butter Skillet Corn!
Tips & Tricks
Achieving the Perfect Caramelization
To get that sweet, rich flavor, watch the corn closely as it cooks. You want the natural sugars to caramelize. Cook it over medium heat. This helps the corn brown nicely. Stir gently but often, so it cooks evenly. You’ll know it’s ready when it turns a golden color. If you see some kernels slightly charred, that’s perfect! It adds a nice depth of flavor.
Adjusting Seasoning to Taste
Taste your corn before serving. If you want more sweetness, add more honey. For extra flavor, sprinkle in more salt or black pepper. You can also try adding a pinch of smoked paprika for a smoky touch. Remember, everyone’s taste is different. Adjust to what you love the most!
Presentation Ideas for Serving
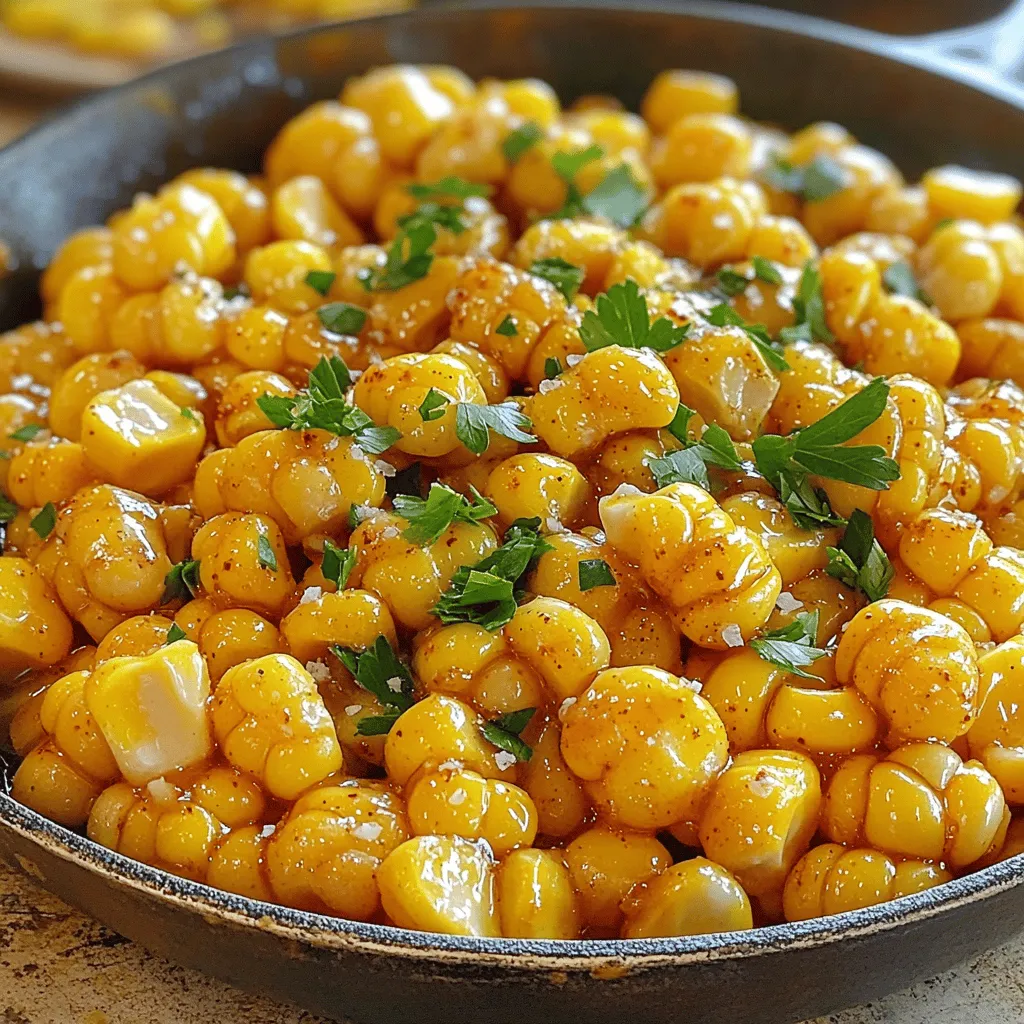
Serve your Honey Butter Skillet Corn in a cast-iron skillet for a rustic look. It keeps the corn warm and looks great on the table. Alternatively, use a white bowl to highlight the bright yellow color. Don’t forget to garnish with freshly chopped parsley! It adds color and freshness that makes the dish pop. A sprinkle of extra parsley on top can make it even more appealing.

Variations
Using Frozen Corn
You can make this dish with frozen corn. Just skip the shucking part. Use about 4 cups of frozen corn. Add it directly to the hot skillet. Cook it for 7-10 minutes. Frozen corn will be just as sweet and tasty.
Dairy-Free Alternatives
If you want a dairy-free version, use coconut oil instead of butter. It gives a nice flavor. You can also try vegan butter. Both options work well in this recipe. Just measure the same amount as the regular butter.
Adding Spices for Different Flavors
Want to spice things up? Try adding a pinch of cayenne pepper for heat. A teaspoon of garlic powder can also boost the taste. For a fresh twist, mix in lime juice before serving. These simple changes will make your corn dish unique and fun!
Storage Info
Storing Leftovers
After you enjoy your Honey Butter Skillet Corn, store any leftovers in an airtight container. Keep the corn in the fridge. It will stay fresh for about 3 to 4 days. Make sure it cools down before you seal it up. This way, it won’t create steam inside the container.
Reheating Tips
When you are ready to eat the leftovers, reheating is easy. You can use the stove or microwave. On the stove, heat a skillet on medium-low. Add a splash of water or a bit of butter to help it warm evenly. Stir often to prevent sticking. If using a microwave, place the corn in a bowl. Cover it loosely to avoid splatters. Heat for 1 to 2 minutes, stirring halfway through.
Freezing for Future Use
If you want to save some for later, freezing is a great option. First, let the corn cool completely. Next, place it in a freezer-safe bag or container. Remember to remove as much air as possible before sealing. Honey Butter Skillet Corn can last up to 3 months in the freezer. When you’re ready to eat it, thaw it in the fridge overnight before reheating.
FAQs
How long does Honey Butter Skillet Corn last in the fridge?
Honey Butter Skillet Corn stays fresh in the fridge for about 3 to 5 days. Store it in an airtight container to keep it tasty. Before you eat it again, check for any changes in smell or color. If it looks good, reheat it gently on the stove or in the microwave.
Can I use canned corn for this recipe?
Yes, you can use canned corn, but it may change the taste. Canned corn is softer and usually has added salt. Drain and rinse the corn before using it for the best flavor. Add it to the skillet for about 3 to 5 minutes, just enough to warm it through. This way, you still get that sweet and buttery taste.
What are some suggested side dishes to serve with Honey Butter Skillet Corn?
Honey Butter Skillet Corn pairs well with many dishes. Here are some ideas:
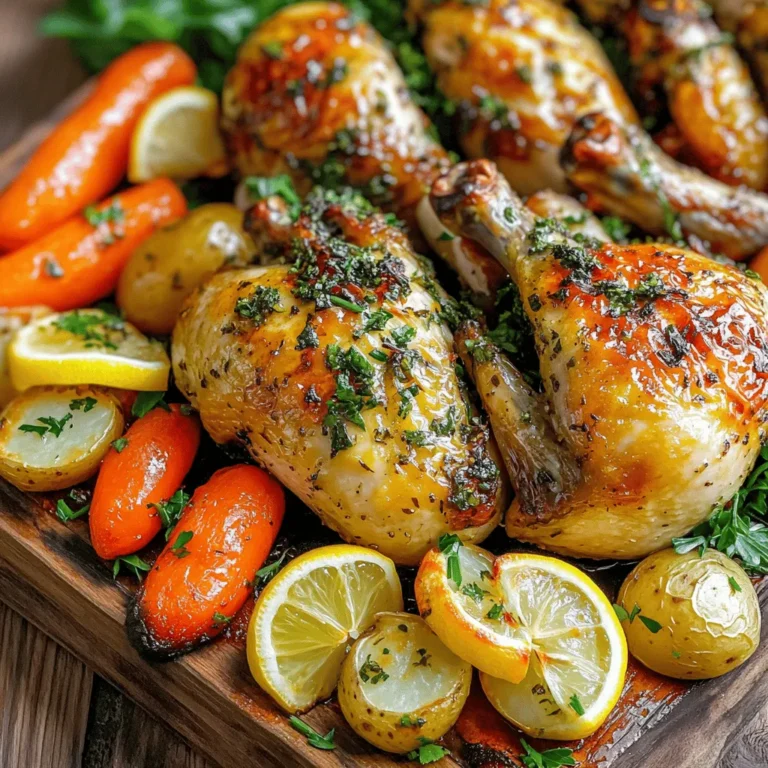
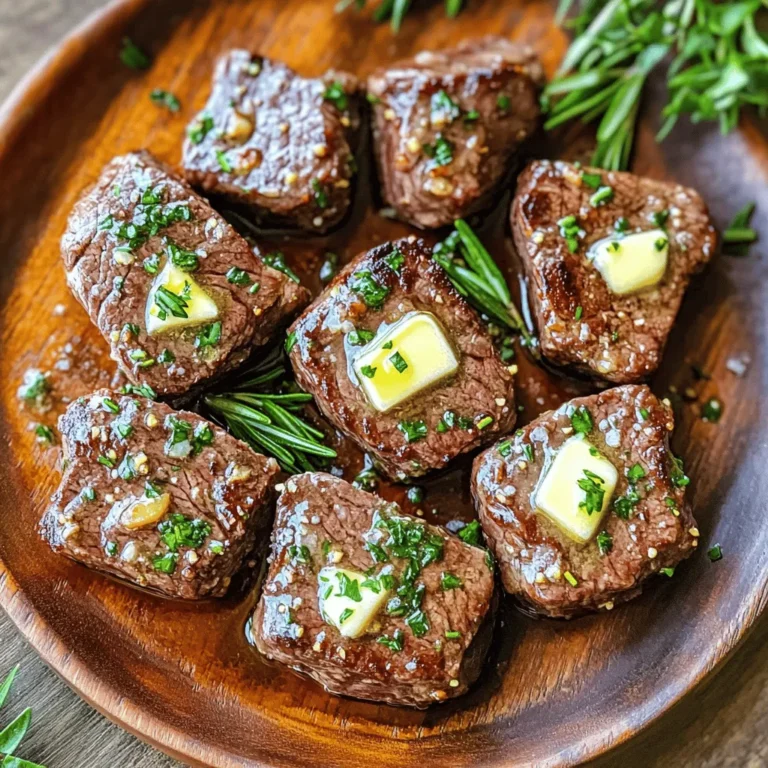
– Grilled chicken or steak for a hearty meal.
– Tacos or fajitas for a fun twist.
– A fresh green salad to balance the flavors.
– Mashed potatoes for a comforting side.
– Barbecue ribs for a tasty summer feast.
These sides will make your meal even more special!
Honey Butter Skillet Corn is easy and fun to make. We covered the best ingredients like fresh corn, sweet butter, and honey. The steps to prepare and cook the dish help make it tasty. I shared tips for perfect caramelization and fun serving ideas. Variations let you use frozen corn or add your favorite spices.
Store leftovers well and reheat them easily. This dish pairs nicely with many sides. Now you can enjoy a sweet and savory treat!


![- 1 pound baby carrots (or 4 medium-sized regular carrots, sliced into uniform sticks or rounds) - 2 tablespoons unsalted butter - 3 tablespoons pure maple syrup - 1 tablespoon packed brown sugar - 1 teaspoon ground cinnamon - Salt and freshly cracked black pepper to taste - Fresh parsley, finely chopped, for garnish Each serving of maple glazed carrots has about 120 calories. You get roughly 30 grams of carbohydrates, with 15 grams of sugar. The dish has 4 grams of fat and 3 grams of fiber. These sweet carrots pack lots of flavor without too many calories, making them a great side. You might want to switch up ingredients for different diets. For a vegan option, use plant-based butter. If you want to lower sugar, try agave syrup or honey. Each choice can change the taste, but they all work well. To start, wash your carrots well. If you have baby carrots, just rinse them under cold water. For regular carrots, peel them first. Slice them into uniform sticks or rounds. This helps them cook evenly. Aim for pieces about the same size. This step is key for a great dish. Now, let’s cook! Heat a large skillet over medium heat. Add the unsalted butter and let it melt completely. Swirl the pan gently to coat the bottom. Once the butter is bubbly, add your prepared carrots. Sauté them for about 5 minutes. Stir occasionally to get even cooking. You want the carrots to start softening but not fully cooked yet. Next, sprinkle brown sugar and ground cinnamon over the carrots. Mix everything well so each carrot gets coated. This adds a sweet and warm flavor. Now, drizzle the pure maple syrup over the carrots. Cook for another 5-7 minutes, stirring often. This allows the glaze to thicken and the carrots to become tender. When your carrots are tender, season them with salt and black pepper to taste. Give everything one last gentle toss to combine. Carefully remove the skillet from the heat. Transfer the glazed carrots to a serving dish. Make sure to drizzle any leftover syrup from the skillet over the top. To add a finishing touch, garnish with finely chopped fresh parsley. This not only adds color but also a fresh taste. Serve your sweet maple glazed carrots warm. They look great on the plate and taste even better. You can find the complete recipe in the [Full Recipe]. To enhance the sweetness and aroma of your maple glazed carrots, always use pure maple syrup. This syrup has a rich taste that makes your dish shine. Combine it with a bit of brown sugar and cinnamon. This mix adds depth and warmth to the carrots. You can also try adding a pinch of nutmeg for extra flavor. This small tweak can make a big difference. For best results, use a large, heavy skillet. A cast-iron or non-stick pan works well. These types of pans heat evenly and help the carrots cook perfectly. If you have a sauté pan with high sides, that’s great too. This design keeps the glaze in the pan and helps it thicken faster. Maple glazed carrots pair well with many meals. They are a perfect side for roasted chicken or pork. You can also serve them with grilled fish for a fresh taste. If you want a vegetarian option, try them with quinoa or lentils. They add a sweet touch that balances savory dishes. For a festive look, serve them alongside other colorful veggies. For the full recipe, check out the Sweet Maple Glazed Carrots recipe above! {{image_4}} You can make your maple glazed carrots even better by adding other veggies. Try using baby potatoes, parsnips, or sweet potatoes. Cut them into similar sizes as the carrots for even cooking. This mix adds more color and flavor to your dish. When you add more vegetables, adjust the cooking time to ensure everything cooks well. Want to change the flavor? You can add herbs or spices to make your dish unique. Try adding fresh thyme or rosemary for an earthy taste. A pinch of nutmeg can also give a warm hint. If you like heat, sprinkle in some red pepper flakes. Mix and match these additions to find what you enjoy most. If you want to try different sweeteners, you have options! Honey works well and gives a floral note. Brown sugar adds a deeper flavor. Agave syrup is also a great choice for a lighter sweetness. Each sweetener will change the taste, so feel free to experiment with what you have on hand. For the full recipe, check the earlier section. To keep your maple glazed carrots fresh, store them in an airtight container. This helps prevent moisture loss and keeps them tasty. Place the cooled carrots in the container and seal tightly. You can keep them in the fridge for up to four days. If you want to enjoy them later, consider the next steps. When you are ready to eat the leftovers, you want to reheat them gently. The best way is to use a skillet. Heat the skillet over low heat. Add a splash of water or broth to help steam the carrots. Stir them often until they are warmed through. This method helps keep the carrots soft and the glaze flavorful. Avoid using a microwave, as it can make them mushy. If you want to store your maple glazed carrots for a long time, freezing is a good option. First, let them cool completely. Then, place the carrots in a freezer-safe bag or container. Remove as much air as possible to prevent freezer burn. They can last up to three months in the freezer. To use them, thaw in the fridge overnight before reheating. To make maple glazed carrots vegan, swap the butter for a plant-based oil or vegan butter. You can use coconut oil for a hint of tropical flavor. This keeps the dish rich and tasty while staying true to vegan standards. Remember to check the maple syrup as well; most brands are naturally vegan. Yes, you can use frozen carrots. They are convenient and can save time. However, frozen carrots may have a different texture than fresh ones. Thaw them first and drain excess water. Sauté them for a bit longer to ensure they cook through. Fresh carrots bring more crunch and flavor, but frozen can still work well in a pinch. To ensure your glazed carrots are tender, cook them over medium heat. Start with 5 minutes of sautéing before adding the glaze. After adding the maple syrup, cook for another 5-7 minutes. Stir often to coat them evenly. The key is to keep an eye on them and test for tenderness with a fork. Aim for a soft texture without losing their shape. This post covered how to make delicious maple glazed carrots. We discussed the key ingredients and their nutritional value. You learned tips for cooking and how to enhance flavors. I also shared ideas for variations and how to store your leftovers properly. Making these carrots is easy and fun. With simple swaps, you can adjust for dietary needs. Enjoy this dish as a side or experiment with different flavors. Happy cooking!](https://joymealplan.com/wp-content/uploads/2025/06/e145556d-f1e0-4204-89d9-54022a16ffd1-768x768.webp)


![To make oven-baked chicken fajitas, you will need: - 1 lb boneless, skinless chicken breasts, sliced into thin strips - 1 red bell pepper, sliced into thin strips - 1 yellow bell pepper, sliced into thin strips - 1 medium onion, sliced into thin wedges - 3 tablespoons extra virgin olive oil - 2 teaspoons chili powder - 1 teaspoon ground cumin - 1 teaspoon smoked paprika - 1 teaspoon garlic powder - 1 teaspoon onion powder - Salt and freshly ground black pepper to taste - 8 small flour or corn tortillas These ingredients come together to create a burst of flavors. The chicken brings protein, while the peppers and onion add color and crunch. Seasonings like chili powder and cumin enhance the taste, making every bite exciting. You can elevate your fajitas with these optional toppings: - Sour cream - Guacamole - Freshly chopped cilantro - Lime wedges These toppings add creaminess, freshness, and zest. Feel free to mix and match based on your preference. Here are the tools you need to prepare your fajitas: - Large baking sheet - Parchment paper - Mixing bowl - Spatula or your hands for mixing - Knife and cutting board Using these tools makes the cooking process smooth. The baking sheet helps in even cooking, while the mixing bowl keeps things clean. If you follow the [Full Recipe], you will have a delicious meal ready in no time! To start, gather your ingredients. You will need: - 1 lb boneless, skinless chicken breasts, sliced into thin strips - 1 red bell pepper, sliced into thin strips - 1 yellow bell pepper, sliced into thin strips - 1 medium onion, sliced into thin wedges - 3 tablespoons extra virgin olive oil - 2 teaspoons chili powder - 1 teaspoon ground cumin - 1 teaspoon smoked paprika - 1 teaspoon garlic powder - 1 teaspoon onion powder - Salt and freshly ground black pepper to taste - 8 small flour or corn tortillas - Optional toppings: sour cream, guacamole, freshly chopped cilantro, lime wedges Begin by preheating your oven to 400°F (200°C). Line a large baking sheet with parchment paper. This helps with easy cleanup. In a big mixing bowl, combine all the sliced chicken and veggies. Drizzle the olive oil over them. Add the spices: chili powder, cumin, smoked paprika, garlic powder, onion powder, salt, and pepper. Now, mix everything well. Use your hands or a spatula to toss the chicken and veggies. Make sure every piece gets coated in oil and spices. This step is key for flavor. Spread the chicken and veggies evenly on the prepared baking sheet. Ensure there’s space between pieces for even cooking. Bake in the oven for 25 to 30 minutes. Halfway through, stir the mixture. Check that the chicken reaches an internal temperature of 165°F (75°C). The veggies should be tender and slightly caramelized. After baking, let the mixture rest for a few minutes. While it rests, warm your tortillas. You can microwave them wrapped in a damp paper towel or heat them in a skillet. To serve, place a generous scoop of the chicken and veggie mix in each tortilla. Add sour cream, guacamole, and cilantro. A squeeze of lime juice adds a nice touch! Enjoy this easy yet delicious meal. For the complete process, refer to the Full Recipe. To get juicy chicken, use thin strips. Thin pieces cook faster and stay tender. Always check the internal temperature. It should reach 165°F (75°C) for safety. If you have time, marinate the chicken in spices and olive oil for a few hours. This adds flavor and keeps it moist. Cut the vegetables into uniform sizes. This helps them cook evenly. Use a large baking sheet. Spread the veggies out to avoid steaming. Stir them halfway through baking. This promotes even browning and caramelization. Aim for a tender texture with some charred edges for extra flavor. Warm the tortillas before serving. You can use a microwave or a skillet. For the microwave, wrap them in a damp paper towel. Heat them in short bursts for a soft finish. If using a skillet, heat on medium until they become pliable. This makes them easier to fold and fill. For the full recipe, check the section earlier in the article. {{image_4}} You can switch chicken for shrimp or tofu. Shrimp cooks fast and adds a sweet taste. Just adjust the cooking time to around 15-20 minutes. Tofu is great for a plant-based meal. Use firm tofu for the best texture. Press it to remove excess water. Then, cut it into strips and season like chicken. Feel free to mix in other veggies. You can add zucchini, mushrooms, or even corn. Each veggie brings its own flavor and texture. Try using fresh jalapeños for a spicy kick. You can also use frozen veggies if fresh ones aren’t available. Just ensure they are thawed and well-drained before mixing. Get creative with your spices! You can try taco seasoning for a different taste. Or, mix in some lime zest for brightness. If you like heat, add cayenne pepper or chipotle powder. Experimenting with these flavors makes each meal unique. Don't be afraid to try unusual combinations. This is your chance to explore new tastes. Check out the Full Recipe for more ways to spice things up! After enjoying your oven-baked chicken fajitas, you may have some leftovers. To store them well, let the fajitas cool down to room temperature. Then, place them in an airtight container. This keeps the flavors fresh and prevents sogginess. You can store them in the fridge for up to three days. If you want to keep them longer, consider freezing. When you are ready to eat your leftovers, reheating them properly is key. For the best results, use an oven. Preheat your oven to 350°F (175°C). Spread the fajitas on a baking sheet and cover them with foil. Heat for about 10 to 15 minutes, or until warmed through. This method keeps the chicken juicy and the veggies crisp. You can also use a microwave, but this may make the tortillas soft. If you want to save your fajitas for later, freezing is easy. First, make sure they are completely cool. Then, place your fajitas in a freezer-safe bag or container. Remove as much air as possible before sealing. Label the bag with the date. You can freeze them for up to three months. When ready to enjoy, thaw the fajitas in the fridge overnight before reheating. This way, they taste just as good as when you first made them. For the full recipe, check out the earlier sections. To make your oven-baked chicken fajitas healthier, you can swap some ingredients. Use skinless chicken thighs instead of breast for more flavor. Add more veggies like zucchini or mushrooms for extra fiber. You can also replace olive oil with cooking spray to cut calories. Use whole grain tortillas rather than white flour ones. This change boosts fiber and nutrients. Finally, skip the sour cream or use a low-fat version. Yes, you can prepare fajitas ahead of time. Just season the chicken and veggies the night before. Store them in the fridge in a sealed container. This helps the flavors blend nicely. Bake them when you are ready to eat. If you want to save time, you can also cook the fajitas fully. Store the cooked fajitas in the fridge for up to three days. Reheat them in the oven for best results. The best tortillas for fajitas depend on your taste. Flour tortillas are soft and easy to fold. They are a classic choice. Corn tortillas have a nice flavor and are gluten-free. They can be a bit more fragile but pair well with fajitas. You can also try whole wheat tortillas for a healthier option. Choose the type you enjoy most, and your fajitas will shine. Check out the full recipe for more tips! In this article, we explored how to make delicious oven-baked chicken fajitas. We covered the main ingredients, cooking steps, and helpful tips for perfect results. You also learned about fun variations to customize your dish and smart ways to store leftovers. Now, you can enjoy tasty fajitas at home. Get creative with your toppings and enjoy sharing this meal with friends and family. The key is to have fun and make it your own. Happy cooking!](https://joymealplan.com/wp-content/uploads/2025/06/95795fac-5c59-44b7-b221-1c1b2c95851f-768x768.webp)