Air Fryer Sweet Potato Wedges With Chipotle Dip Delight
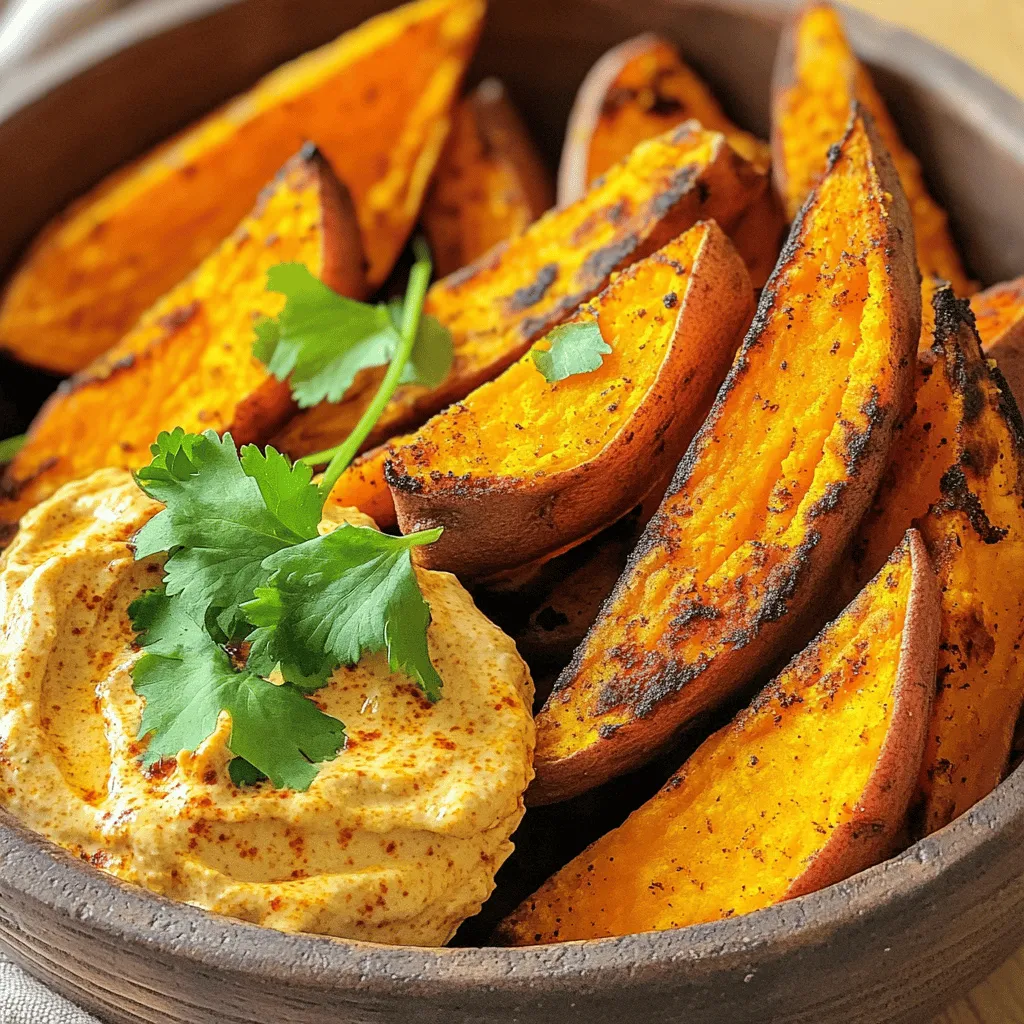
Craving a tasty and healthy snack? You’re in the right place! In this post, I’ll show you how to make Air Fryer Sweet Potato Wedges with a zesty Chipotle Dip. These crispy wedges are easy to whip up and packed with flavor. Plus, the creamy dip takes it to the next level. Let’s dive into the ingredients and get cooking together! Your new favorite snack is just minutes away!
Ingredients
Sweet Potato Wedges
– 2 large sweet potatoes, washed and cut into wedges
– 2 tablespoons extra virgin olive oil
– 1 teaspoon smoked paprika
– 1 teaspoon garlic powder
– 1/2 teaspoon chili powder
– Salt and freshly ground black pepper to taste
– Handful of fresh cilantro, finely chopped (for garnish)
Chipotle Dip
– 1/2 cup Greek yogurt (plain, unsweetened)
– 2 tablespoons mayonnaise
– 1 tablespoon chipotle peppers in adobo sauce
– 1 teaspoon fresh lime juice
– Salt to taste
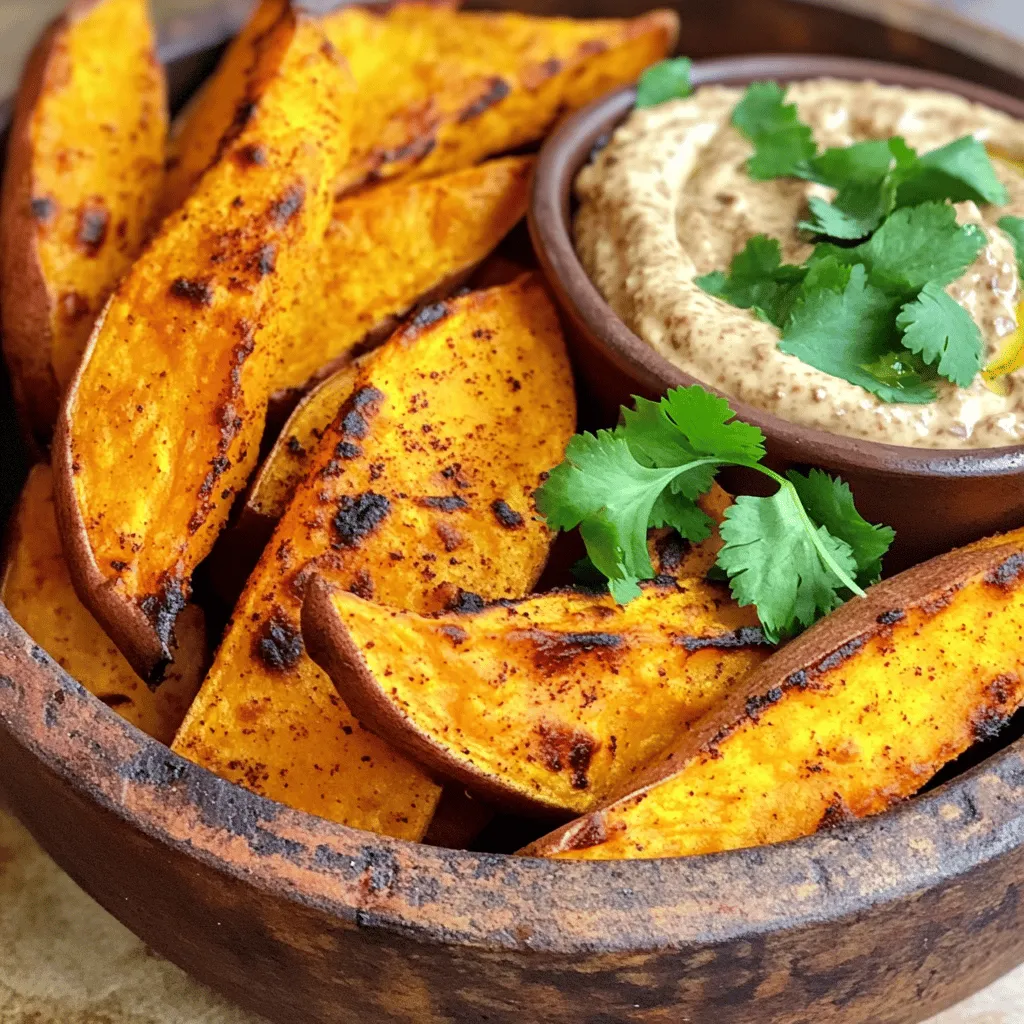
Sweet potato wedges are a great snack or side dish. They are crunchy outside and soft inside. The spice mix makes them special. I use smoked paprika for a nice flavor. Garlic powder adds depth. A hint of chili powder gives it some heat. With salt and pepper, the taste is just right.
To make the chipotle dip, I use Greek yogurt. It gives a creamy base. Mayonnaise adds a rich texture. Chipotle peppers give a smoky kick. Lime juice brightens the dip. Adjust the salt to your taste. This dip pairs perfectly with the sweet potato wedges. It makes every bite even better.
Garnish the wedges with fresh cilantro. It adds color and a fresh taste. Enjoy this tasty dish at any time!
Step-by-Step Instructions
Preheating the Air Fryer
First, preheat your air fryer. Set it to 400°F (200°C) for 5 minutes. This step helps your wedges get crispy.
Preparing the Sweet Potato Wedges
Next, take 2 large sweet potatoes. Wash them well and cut them into wedges. In a large bowl, add the sweet potato wedges. Pour in 2 tablespoons of olive oil. Then, sprinkle in 1 teaspoon of smoked paprika, 1 teaspoon of garlic powder, and 1/2 teaspoon of chili powder. Add salt and black pepper to taste. Toss everything well until each wedge is coated with the oil and spices.
Cooking in the Air Fryer
Now, place the seasoned wedges in the air fryer basket. Make sure they are in a single layer. If your air fryer is small, cook them in batches. Cook for 15 to 20 minutes. Halfway through, shake the basket to help them cook evenly. They should be crispy outside and soft inside.
Making the Chipotle Dip
While your wedges cook, let’s make the chipotle dip. In a small bowl, whisk together 1/2 cup of Greek yogurt and 2 tablespoons of mayonnaise. Add 1 tablespoon of chipotle peppers in adobo sauce and 1 teaspoon of fresh lime juice. Mix until smooth and creamy. Taste it and add salt if needed. You can add more chipotle for extra heat.
Serving
Once the sweet potato wedges are done, take them out of the air fryer. Let them cool for a couple of minutes. This helps them get even crispier. Serve the hot wedges garnished with a handful of chopped cilantro. Place the chipotle dip on the side for dipping. Enjoy your delicious snack!
Tips & Tricks
Achieving Crispiness
To make your sweet potato wedges super crispy, follow these steps:
– Preheat your air fryer: Always preheat to 400°F (200°C) for five minutes. This helps cook them evenly.
– Cut evenly: Make sure all wedges are the same size. This helps them cook at the same rate.
– Use enough oil: Toss the wedges in two tablespoons of extra virgin olive oil. This helps with crispiness.
– Don’t overcrowd the basket: Place the wedges in a single layer. Air needs to flow around them for a nice crunch.
Spicing to Taste
You can adjust the spice levels based on what you like:
– Chili powder: Start with half a teaspoon. Add more for extra heat if you want.
– Chipotle dip: Use more chipotle peppers in the dip for a bolder flavor. Taste as you go to find your perfect mix.
– Experiment: Try other spices like cumin or cayenne pepper. Find what spices you enjoy the most.
Cooking in Batches
If you want to make a lot of sweet potato wedges, consider these tips:
– Work in groups: Cook smaller batches for the best results. This prevents sogginess.
– Keep them warm: While cooking more, place finished wedges in an oven set at low heat. This keeps them warm and crispy.
– Adjust cooking time: Depending on the size of your batches, check for doneness. You may need to cook a bit longer for larger amounts.
Variations
Alternative Seasonings
You can change the spices to make your sweet potato wedges unique. Try using:
– Cumin for a warm, earthy flavor.
– Oregano for a hint of Mediterranean taste.
– Cayenne pepper for extra heat.
– Rosemary for a fragrant touch.
Mix and match these seasonings based on what you like. This lets you enjoy different flavors each time you make them.
Healthier Chipotle Dip Options
If you want a lighter dip, there are easy swaps. Consider using:
– Low-fat Greek yogurt instead of regular yogurt.
– Plain hummus for a creamy, healthy option.
– Avocado instead of mayonnaise for richness without the calories.
These changes keep the dip tasty while making it a bit healthier. You can still enjoy that spicy kick without the guilt.
Sweet Potato Alternatives
Sweet potatoes are great, but other root veggies work too. You can use:
– Butternut squash for a sweet flavor.
– Parsnips for a nutty taste.
– Carrots for a crunchy bite.
These options give you variety and keep your meals interesting. Plus, they still cook well in the air fryer!
Storage Info
Storing Leftover Wedges
Store leftover sweet potato wedges in an airtight container. Place them in the fridge. They stay fresh for about 3 to 5 days. For longer storage, freeze the wedges. Use a freezer-safe bag or container. They can last up to 2 months in the freezer. When ready to eat, make sure to label and date your container. This helps you keep track of their freshness.
Reheating Techniques
To reheat sweet potato wedges, use the air fryer again. Preheat it to 400°F (200°C). Place the wedges in the basket in a single layer. Reheat for about 5 to 8 minutes. This keeps them crispy. You can also use an oven. Preheat to 400°F (200°C) and bake for 10 to 15 minutes. Flip them halfway through for even crispness. Avoid using the microwave, as it can make them soggy.
FAQs
Can I make these sweet potato wedges without an air fryer?
Yes, you can! Use your oven instead. Preheat it to 425°F (220°C). Toss the sweet potato wedges with oil and spices as usual. Spread them on a baking sheet in a single layer. Bake for 25-30 minutes. Flip them halfway through for even cooking. You’ll still enjoy crispy and tasty wedges!
What can I serve with sweet potato wedges?
Sweet potato wedges pair well with many dishes. Try them with grilled chicken for a hearty meal. They also go great with burgers. For a snack, serve them with a fresh salad. Add guacamole or salsa for extra flavor. Enjoy them with a cold drink on the side!
How do I know when the sweet potato wedges are done?
Look for a golden-brown color. The edges should be crispy, and the inside should feel soft when pierced. If you want them crispier, cook a few more minutes. Just keep an eye on them so they don’t burn. Trust your senses for the perfect finish!
This blog post covered tasty sweet potato wedges and a creamy chipotle dip. We explored how to prepare, cook, and serve them. I shared tips for crispiness and spice, plus variations and storage. Remember, you can change the seasoning to fit your taste. Use different dips or veggies to keep it fresh. Whether you enjoy them as a snack or a side, these wedges are fun and easy. Try making them today, and enjoy a delicious treat!

![- Tortilla chips - Black beans - Corn kernels - Cherry tomatoes - Avocado - Cheddar cheese (or dairy-free alternative) - Pickled jalapeños - Red onion - Fresh cilantro - Olive oil - Ground cumin - Smoked paprika - Salt and pepper - Optional toppings: Sour cream or Greek yogurt, lime wedges To make loaded veggie nachos, gather fresh and flavorful ingredients. I love using crispy tortilla chips as the base. They hold all the toppings without getting soggy. Black beans add protein and texture. Rinsing and draining them keeps the flavors bright. Corn kernels bring sweetness and crunch. I often use fresh corn when it’s in season, but canned works well too. Next, halved cherry tomatoes burst with flavor. Diced avocado brings creaminess. I prefer ripe avocados for the best taste. Cheddar cheese is a must for gooey goodness. You can use a dairy-free version if needed. Pickled jalapeños give a nice kick, so add as many as you like. Red onion adds a sharp taste and crunch. Fresh cilantro brings brightness. I love the fresh herb flavor it adds. For the dressing, use olive oil, ground cumin, and smoked paprika. They bring warmth and depth. Lastly, don’t forget salt and pepper to enhance all the flavors. You can serve these nachos with optional toppings like sour cream or Greek yogurt. Lime wedges add a zesty finish. For the full recipe, check out the Ultimate Loaded Veggie Nachos. Start by preheating your oven to 350°F (175°C). This temperature helps the cheese melt just right. While the oven warms up, grab a mixing bowl for the veggies. Combine 1 cup of black beans, 1 cup of corn, 1 cup of halved cherry tomatoes, 1 ripe diced avocado, and 1/4 cup of chopped red onion. Drizzle 1 tablespoon of olive oil over this mix. Sprinkle in 1 teaspoon of ground cumin, 1 teaspoon of smoked paprika, and add salt and pepper to taste. Gently toss to blend the flavors. Now take a large baking sheet. Spread an even layer of tortilla chips across it. Make sure they are not crowded. This helps the chips stay crisp. Next, generously spoon the veggie mixture over the chips. Try to cover as many chips as you can. This way, each bite is packed with flavor. Sprinkle 1 cup of shredded cheddar cheese evenly over the veggie-covered chips. If you like spice, add pickled jalapeños on top. Place the baking sheet in your preheated oven. Bake for about 10 to 15 minutes. Watch closely until the cheese is melted and bubbly, but not burnt. Once baked, carefully take the nachos out of the oven. Garnish with 1/4 cup of freshly chopped cilantro. Serve them with lime wedges on the side. For a creamy touch, add sour cream or Greek yogurt. These extra touches make every bite a treat. Serve them on a large platter or in bowls. Enjoy this savory delight with friends or family! For the full recipe, check the detailed instructions above. Choose the right cheese for your nachos. I love using cheddar, but you can try Monterey Jack or a dairy-free alternative. These cheeses melt well and add rich flavor. For the best texture, shred your cheese fresh from the block. Pre-shredded cheese often has anti-clumping agents that can affect melting. When baking, keep an eye on the nachos. You want the cheese to bubble and slightly brown, which usually takes 10 to 15 minutes at 350°F. To kick up the flavor, think about adding spices. A pinch of chili powder or a dash of hot sauce can do wonders. If you enjoy tang, drizzle some lime juice over the nachos before serving. Fresh herbs like cilantro or green onions can also brighten the dish. Chopped jalapeños, fresh or pickled, add heat and flavor. Experiment with different combinations to find your favorite mix. I often serve nachos on a large platter, letting everyone dig in. For individual servings, use small bowls. This makes for a fun, personal touch. Pair your nachos with drinks like soda, beer, or a margarita for a complete experience. Dips like guacamole or salsa work great on the side too. They add extra flavor and keep the meal exciting. Remember to keep lime wedges handy for a fresh burst of flavor. For the complete recipe, check out the [Full Recipe]. {{image_4}} You can easily make loaded veggie nachos vegan. First, swap the cheddar cheese for a dairy-free cheese. Look for brands made from nuts or soy. These options melt well and taste great. For extra vegan toppings, try using cashew cream instead of sour cream. You can also add sliced black olives, diced bell peppers, or fresh spinach. These ingredients boost flavor and nutrients. To make gluten-free nachos, choose tortilla chips marked gluten-free. Many brands offer this option. Always check the label to ensure safety. You can also use other bases like baked sweet potatoes or zucchini slices. These alternatives add a unique twist and keep things healthy. Get creative with your toppings! You can add other veggies like mushrooms, bell peppers, or even roasted zucchini. For proteins, consider topping with lentils, chickpeas, or tofu. Specialty toppings can add unique flavors. Try fresh herbs like basil or mint, or drizzle with hot sauce for a kick. You can also scatter some pomegranate seeds for a sweet touch. After enjoying your loaded veggie nachos, store any leftovers properly. This helps maintain their taste and texture. Start by letting the nachos cool down. Place them in an airtight container. If you have extra toppings, like sour cream or avocado, store those separately. Use a small bowl or a bag to keep them fresh. Refrigerate the container within two hours. The nachos will stay good for about three days. To reheat your nachos, use the oven for best results. Preheat it to 350°F (175°C). Spread the nachos on a baking sheet in a single layer. Heat them for about 10 minutes. This helps revive their crunch. If you’re in a hurry, the microwave works too. Use a microwave-safe plate and heat for 30 seconds at a time. Keep an eye on them to avoid sogginess. Enjoy your nachos as if they were just made! Making homemade tortilla chips is easy and fun! Start with corn tortillas. Cut each tortilla into six triangles. Heat oil in a pan over medium heat. When the oil is hot, add a few triangles. Fry them until they turn golden brown. Remove them and place them on paper towels to drain excess oil. Sprinkle with salt while they are hot. Enjoy your fresh chips with loaded veggie nachos! Yes, you can prepare some parts in advance. You can chop the veggies and mix them a few hours before cooking. Store the veggie mixture in the fridge. However, I recommend adding the chips and cheese just before baking. This keeps the chips crispy and delicious! You can get creative with toppings! Try adding: - Sliced black olives - Diced bell peppers - Sliced radishes - Fresh spinach - Grilled chicken or beef - Different types of cheese like pepper jack or feta These options add fun flavors and textures to your nachos. Freezing nachos is tricky. I do not recommend freezing fully assembled nachos. The chips become soggy when thawed. However, you can freeze the veggie mixture and cheese separately. When you’re ready to eat, simply bake fresh chips and top them with the thawed mixture. It’s a great way to enjoy nachos anytime! For the full recipe, check out the Ultimate Loaded Veggie Nachos. In this blog post, I covered how to make delicious nachos, highlighting key ingredients and simple steps. You learned about assembling layers and baking for the best results. I shared tips for perfect cheese melting, flavor boosts, and customizable options to fit your needs. Don't forget storage advice and reheating methods to enjoy leftovers. Nachos are easy to make and adapt, so get creative and enjoy! Your nacho journey starts here, and I hope you relish every bite.](https://joymealplan.com/wp-content/uploads/2025/06/0185d0b5-b46a-4930-af15-477191a5be30-768x768.webp)