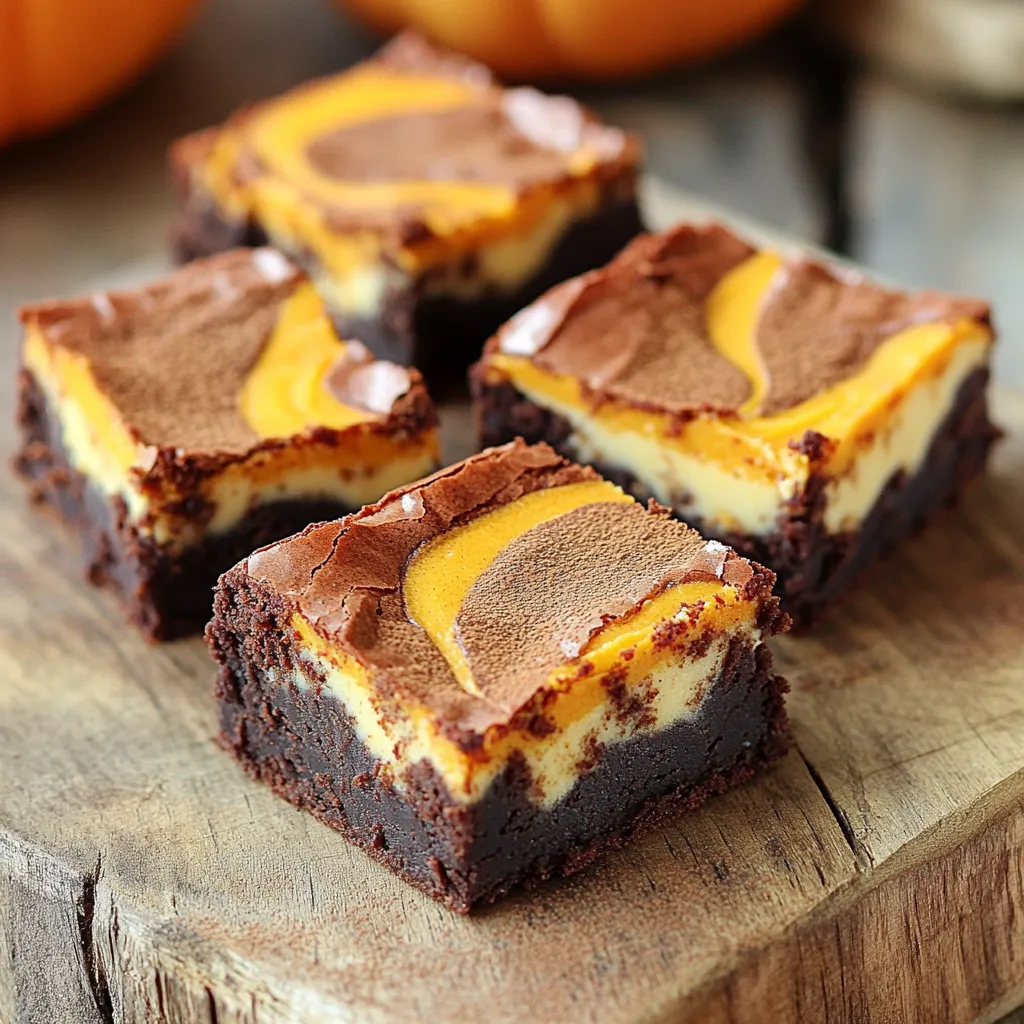
Pumpkin Cheesecake Swirl Brownies Irresistible Delight

Get ready for a treat that combines the creamy goodness of cheesecake with the cozy flavors of fall! These Pumpkin Cheesecake Swirl Brownies are not just a dessert; they’re an experience. Whether you adore pumpkin spice or crave rich chocolate, this recipe is sure to delight your taste buds. Join me as we mix, bake, and swirl our way to a deliciously irresistible dessert you won’t want to miss!
Ingredients
List of Ingredients
– 1 cup unsalted butter
– 8 oz dark chocolate, chopped
– 1 cup granulated sugar
– 1/2 cup packed brown sugar
– 4 large eggs
– 1 teaspoon vanilla extract
– 1 cup all-purpose flour
– 1/2 cup unsweetened cocoa powder
– 1/4 teaspoon salt
– 1/2 teaspoon baking powder
– 1 cup pumpkin puree
– 8 oz cream cheese, softened
– 1/4 cup powdered sugar
– 1 teaspoon pumpkin pie spice
– 1 teaspoon ground cinnamon
Gather these ingredients before you start. The butter and chocolate melt together to give a rich base. The sugars add sweetness and moisture. Eggs help bind everything, while the flour and cocoa create that classic brownie texture.
The addition of pumpkin puree and cream cheese makes this dessert special. Pumpkin adds flavor and moisture. The cream cheese gives a creamy swirl that balances the brownie base.
Spices like pumpkin pie spice and cinnamon give warmth. These flavors work well with chocolate and pumpkin.
Make sure to use unsalted butter for better control of the saltiness. Use high-quality dark chocolate for the best taste. You can also choose low-fat cream cheese for a lighter option.
With these ingredients, you are set to create a sweet treat that combines rich brownie flavor with creamy pumpkin goodness.
Step-by-Step Instructions
Preparation Steps
1. Preheat your oven to 350°F (175°C).
2. Prepare a 9×13 inch baking pan. Grease it and line it with parchment paper.
3. In a medium saucepan, melt 1 cup of unsalted butter and 8 oz of chopped dark chocolate over low heat. Stir until smooth. Remove from heat and let cool slightly.
4. In a large bowl, combine 1 cup of granulated sugar, 1/2 cup of packed brown sugar, 4 large eggs, and 1 teaspoon of vanilla extract. Whisk until smooth.
Mixing Brownie Batter
1. Slowly pour the warm chocolate mixture into the sugar-egg mixture. Stir to combine.
2. In another bowl, sift together 1 cup of all-purpose flour, 1/2 cup of unsweetened cocoa powder, 1/4 teaspoon of salt, and 1/2 teaspoon of baking powder.
3. Gently fold the dry ingredients into the wet mixture. Mix until no flour streaks remain.
Making Pumpkin Cheesecake Swirl
1. In a separate bowl, beat 8 oz of softened cream cheese with 1/4 cup of powdered sugar, 1 teaspoon of pumpkin pie spice, and 1 teaspoon of ground cinnamon until smooth.
2. Fold in 1 cup of pumpkin puree until well combined.
3. Pour half of the brownie batter into the prepared pan. Spread it evenly.
4. Spoon dollops of the pumpkin mixture over the brownie layer.
5. Add spoonfuls of the remaining brownie batter on top of the pumpkin layer.
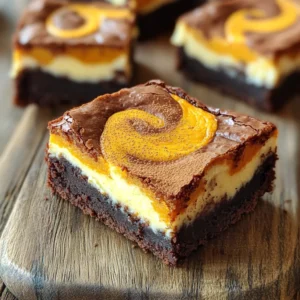
6. Use a knife or skewer to gently swirl the two mixtures together. Create a marbled effect without fully blending.
Baking Instructions
1. Place the pan in the preheated oven. Bake for 30 to 35 minutes.
2. Check for doneness by inserting a toothpick into the center. It should come out with a few moist crumbs, but not wet batter.
3. Once baked, let the brownies cool in the pan for at least 20 minutes. Use the parchment paper to lift them out. Slice into squares for serving.
Tips & Tricks
Perfecting the Recipe
To make these brownies great, avoid overmixing the batter. Overmixing can lead to tough brownies. Mix just until you no longer see dry flour. This will keep your brownies soft and chewy.
Use the right baking pan for best results. A 9×13 inch pan works well, but you can use a glass or metal pan. Glass pans give a nice, even bake. If you use a metal pan, check for doneness a bit earlier.
Presentation Ideas
When serving, a dollop of whipped cream adds a nice touch. You can also add a scoop of vanilla ice cream for extra delight. A light sprinkle of cinnamon on top makes them look festive.
Store any leftovers in an airtight container. They will stay fresh for about three days at room temperature. If you want to keep them longer, refrigerate them. Just let them come to room temperature before serving again.
Troubleshooting Common Issues
If your brownies turn out too dense, it could be due to too much mixing. To fix this, be gentle when you fold in the dry ingredients.
If your brownies are too cakey, check your baking time. They may have baked too long. A toothpick should come out with a few moist crumbs, not clean. Next time, try reducing the bake time by a few minutes.
Variations
Flavor Combinations
You can make these brownies even more exciting. Try adding nuts or chocolate chips. Nuts like walnuts or pecans add a nice crunch. Chocolate chips give a sweet surprise in every bite. You can also play with spices like nutmeg. A little nutmeg can enhance the pumpkin flavor. Remember, a small amount goes a long way!
Healthier Alternatives
Want to make a lighter version? Use low-fat cream cheese instead of regular cream cheese. It still tastes good but cuts down on calories. You can also swap sweeteners for healthier options. Use honey or maple syrup instead of sugar. This change keeps the brownies sweet while being a bit better for you.
Seasonal Swaps
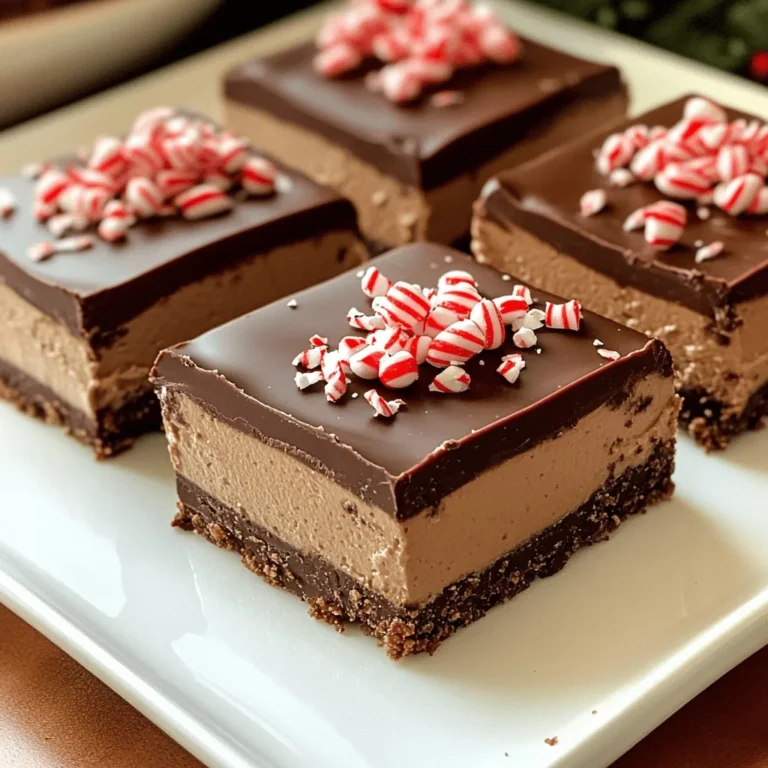
Get creative with your ingredients! You can use other purees for different flavors. Try sweet potato or butternut squash for a fun twist. Adjust spices for different holidays too. For Christmas, add some peppermint extract. It makes the brownies festive and unique. Enjoy changing these brownies all year round!
Storage Info
How to Store Brownies
To keep your brownies fresh, store them properly. The best way is to wrap them tightly in plastic wrap. Then, place them in an airtight container. This keeps them moist and tasty.
If you want to store brownies in the fridge, place them in an airtight container. They can stay fresh for up to a week. Just remember to let them cool completely first. This keeps the texture right.
For long-term storage, you can freeze brownies. Cut them into squares and wrap each piece in plastic wrap. Then, place them in a freezer bag. They can last for up to three months. When you’re ready to eat them, let them thaw in the fridge overnight.
Shelf Life
At room temperature, these brownies last about three to four days. They stay soft and delicious if stored well.
Watch for signs of spoilage. If you see mold or if they smell sour, it’s best to toss them. Dryness can also mean they are past their prime. If they feel hard or crumbly, they may no longer taste good. Always check before you enjoy!
FAQs
Can I make these brownies ahead of time?
Yes, you can make these brownies ahead. Bake them and let them cool. Once cool, wrap them in plastic wrap. Place them in the fridge for up to three days. You can also freeze brownies for up to three months. Just remember to cut them into squares first.
How do I know when the brownies are done baking?
To check if your brownies are done, insert a toothpick in the center. If it comes out with a few moist crumbs, they are ready. If it has wet batter, let them bake a bit longer. Keep an eye on them to avoid overbaking.
What can I substitute for pumpkin puree in this recipe?
If you lack pumpkin puree, use applesauce or mashed bananas. These will add moisture and sweetness. You can also try butternut squash puree for a similar flavor. Each option will give a unique twist to your brownies.
Are these brownies gluten-free?
These brownies are not gluten-free due to all-purpose flour. For a gluten-free option, replace all-purpose flour with almond flour or a gluten-free flour blend. This swap will still give you a delicious treat without gluten.
Can I add frosting on top of these brownies?
You can definitely add frosting if you want extra sweetness. A light cream cheese frosting pairs well with the flavors. Just make sure the brownies are cool before you spread the frosting. This way, it won’t melt or slide off.
These brownies blend rich chocolate and pumpkin for a unique treat. We discussed the ingredients, preparation steps, and baking tips. I shared ways to perfect the recipe and suggested fun variations. Storing and serving ideas help keep these brownies fresh. Remember, baking is an art. Enjoy experimenting with flavors and textures. You can create your perfect brownie while making lasting memories in the kitchen. Dive in and create your own delightful version!
![For my Lemon Poppy Seed Zucchini Muffins, I use these ingredients: - 1 cup grated zucchini (squeeze out excess moisture) - 1 cup all-purpose flour - 1/2 cup whole wheat flour - 1/4 cup poppy seeds - 1 teaspoon baking powder - 1/2 teaspoon baking soda - 1/2 teaspoon salt - 1/2 teaspoon ground cinnamon - 1/2 cup granulated sugar - 1/4 cup brown sugar, packed - 2 large eggs - 1/2 cup vegetable oil - 1/4 cup plain Greek yogurt - Zest of 1 lemon (about 1 tablespoon) - 2 tablespoons fresh lemon juice Using fresh zucchini is key. It keeps your muffins moist. Fresh lemon juice and zest add bright flavors. These ingredients work together to create a light and fluffy treat. If you have dietary needs, you can substitute some ingredients: - For gluten-free muffins, replace all-purpose flour with a gluten-free blend. - Use almond milk or coconut milk in place of Greek yogurt for a dairy-free option. - You can swap the granulated sugar with coconut sugar for a lower glycemic option. To enhance flavor, consider adding: - 1/2 cup chopped nuts, like walnuts or pecans. - 1/2 cup chocolate chips for a sweet twist. - A pinch of nutmeg or ginger for a warm spice note. Feel free to experiment! These small changes can lead to new and exciting flavors in your muffins. For the complete recipe, check out the [Full Recipe]. 1. Preheat your oven to 350°F (175°C). This step is key for even baking. 2. Prepare a muffin tin by lining it with paper liners or lightly greasing it with cooking spray. I like to use liners for easy removal and cleanup. 3. Mix the dry ingredients in a medium bowl. Combine all-purpose flour, whole wheat flour, poppy seeds, baking powder, baking soda, salt, and ground cinnamon. Whisk until well blended. This helps mix the leavening agents evenly. 4. In a large bowl, blend the granulated sugar and brown sugar. Add the lemon zest and whisk until mixed. This adds a bright flavor to your muffins. 5. Add the eggs one at a time, whisking well after each. This helps create a smooth, fluffy batter. Then, pour in the vegetable oil, Greek yogurt, and lemon juice. Mix until smooth. 1. Carefully fold the dry ingredients into the wet mixture. Stir gently until just combined. Avoid overmixing to keep your muffins tender. 2. Fold in the grated zucchini. Make sure it is evenly distributed without overworking the batter. The zucchini adds moisture and flavor. 1. Divide the batter evenly among the muffin cups. Fill each cup about two-thirds full. This allows space for the muffins to rise. 2. Bake in the preheated oven for 18-22 minutes. Check for doneness by inserting a toothpick into the center. If it comes out clean, your muffins are ready. 3. Let the muffins cool in the tin for about 5 minutes. Then, transfer them to a wire rack to cool completely. This helps them maintain their shape and texture. For the complete recipe, check the [Full Recipe]. Enjoy the delightful taste of lemon poppy seed zucchini muffins! To make moist lemon poppy seed zucchini muffins, focus on a few key techniques: - Squeeze the Zucchini: Grate your zucchini, then squeeze out the excess moisture. This step prevents the batter from becoming too wet. - Measure Accurately: Use measuring cups for both dry and wet ingredients. This helps your muffins rise and stay light. When you measure, remember that even small variations can change the texture. Accurate measurements make a big difference in your results. Avoid these common missteps to keep your muffins light and fluffy: - Overmixing: When you combine the dry and wet ingredients, mix gently. Overmixing can lead to tough muffins. - Filling Too Full: Fill the muffin cups about two-thirds full. If you fill them too high, they might sink in the middle. By following these tips, you can make sure your lemon poppy seed zucchini muffins turn out perfectly every time. For the complete recipe, check out the [Full Recipe]. {{image_4}} You can make lemon poppy seed zucchini muffins even more exciting by adding spices. Try mixing in 1/2 teaspoon of nutmeg or 1/2 teaspoon of ginger for a warm twist. These spices add depth and enhance the citrus flavor. Fruits can also change the taste of your muffins. You might consider adding 1/2 cup of blueberries or 1/2 cup of cranberries. These fruits will bring a burst of sweetness and tartness. Just fold them into the batter gently to keep the muffins fluffy. If you want to make vegan lemon poppy seed zucchini muffins, it's easy. Substitute the eggs with 1/2 cup of unsweetened applesauce or 1/4 cup of ground flaxseed mixed with 1/2 cup of water. Both options work well for binding the ingredients. For those wanting lower sugar options, you can use 1/4 cup of honey or 1/4 cup of maple syrup instead of granulated sugar. If you need a sugar-free version, try a sugar substitute that measures like sugar. These variations help you enjoy the muffins while fitting your dietary needs. You can still delight in the great taste of lemon poppy seed zucchini muffins. For the full recipe, check out the details provided earlier. To keep your lemon poppy seed zucchini muffins fresh, store them in an airtight container at room temperature. If you add a paper towel inside, it helps absorb moisture. This method keeps the muffins soft and tasty. When stored this way, they can last for about 2 to 3 days. After that, they may start to dry out or lose their flavor. If you want to save muffins for later, freezing is a great option. Allow the muffins to cool completely, then wrap each muffin tightly in plastic wrap. Place them in a freezer-safe bag or container. They can stay fresh in the freezer for up to 3 months. When you’re ready to eat a muffin, take it out of the freezer. Let it thaw in the fridge overnight or at room temperature for a few hours. For the best taste, reheat them in the oven at 350°F for about 10 minutes. You can also use the microwave for about 20-30 seconds. This warms them up and brings back their soft texture. Enjoy your muffins just like the day you baked them! To make lemon poppy seed zucchini muffins, start by prepping your oven and muffin tin. 1. Preheat your oven to 350°F (175°C). 2. Grate 1 cup of zucchini and squeeze out extra moisture. 3. In one bowl, mix 1 cup all-purpose flour, 1/2 cup whole wheat flour, 1/4 cup poppy seeds, 1 teaspoon baking powder, 1/2 teaspoon baking soda, 1/2 teaspoon salt, and 1/2 teaspoon ground cinnamon. 4. In another bowl, combine 1/2 cup granulated sugar, 1/4 cup brown sugar, and the zest of 1 lemon. 5. Add 2 large eggs, followed by 1/2 cup vegetable oil, 1/4 cup Greek yogurt, and 2 tablespoons of lemon juice. 6. Mix until smooth. Fold in the dry ingredients, then add the zucchini. 7. Fill muffin cups two-thirds full. Bake for 18-22 minutes. This quick overview gives you all the steps needed to create delicious muffins. Check the Full Recipe for more details. Yes, you can freeze these muffins. Here’s how: - Let the muffins cool completely after baking. - Place them in an airtight container or a freezer bag. - Label the bag with the date and type of muffin. - Store in the freezer for up to 3 months. When ready to eat, thaw them in the fridge overnight or on the counter for a few hours. You can warm them in the oven for a fresh-baked taste. Dense muffins can happen for a few reasons: - Overmixing the batter can create too much gluten. - Not using enough leavening agents like baking powder or baking soda can also lead to density. - Using too much zucchini without squeezing out moisture may add extra weight. To prevent dense muffins, mix the batter gently and ensure you measure ingredients correctly. Following these tips will help you achieve light and fluffy muffins. In summary, we covered how to make Lemon Poppy Seed Zucchini Muffins. You learned about the key ingredients and possible substitutions for dietary needs. I shared step-by-step instructions, tips to perfect your muffins, and various flavor options. Remember, measuring accurately and not overmixing are key for success. These muffins can be stored well, either short-term or long-term, for your convenience. With a bit of practice, you can enjoy delicious muffins tailored to your taste preferences. Happy baking!](https://joymealplan.com/wp-content/uploads/2025/07/b4c3b954-0106-4660-8231-7250b8c7a63e-768x768.webp)
![This cinnamon roll casserole is simple and fun. It combines cinnamon rolls, eggs, and milk. You can whip it up in just 10 minutes. This dish is great for breakfast or brunch. You can serve it warm and drizzled with icing. - 1 can (16 oz) refrigerated cinnamon rolls - 6 large eggs - 1 cup milk - 1/2 cup packed brown sugar - 1 teaspoon vanilla extract - 1 teaspoon ground cinnamon - 1/4 teaspoon salt - 1/2 cup chopped pecans or walnuts - 1/2 cup raisins These optional add-ins make the casserole richer. You can mix in nuts for crunch or raisins for sweetness. Feel free to customize it to your taste! To make this tasty cinnamon roll casserole, gather your ingredients first. You need a few easy items. The process is simple and quick, perfect for busy mornings. 1. Preheat the Oven: Start by preheating your oven to 350°F (175°C). This helps the casserole cook evenly. 2. Prepare the Cinnamon Rolls: Open the can of cinnamon rolls. Take each roll and cut it into quarters. This makes them easier to mix. 3. Mix the Egg Mixture: In a big bowl, add the eggs, milk, brown sugar, vanilla, ground cinnamon, and salt. Whisk until it’s smooth. This mix gives flavor and richness. 4. Combine with Cinnamon Rolls: Gently fold the cut cinnamon rolls into the egg mixture. Stir carefully so you don’t break them. If you like nuts or raisins, add them now. 5. Transfer to Casserole Dish: Pour the mixture into a greased 9x13-inch casserole dish. Spread it out evenly with a spatula. 6. Bake to Perfection: Place the casserole in the oven. Bake for 25-30 minutes. It’s ready when the center is set and the top is golden brown. 7. Cool Slightly: Take the casserole out of the oven. Let it cool for about 5 minutes. This helps it firm up for easy serving. 8. Add Icing: Drizzle the icing from the can over the warm casserole. This sweet touch makes it even better. You can find the full recipe for this delightful dish above. Now, let’s get cooking! To make your casserole fluffy, use fresh cinnamon rolls. The fresher the rolls, the better the rise. When mixing, fold the rolls gently into the egg mixture. Avoid pressing down too hard, as you want to keep air pockets. Bake at 350°F for the right texture. If your oven runs hot, check early to prevent overbaking. Serve the casserole warm, just out of the oven. This helps the icing melt and adds to the flavor. If you let it cool too much, it may become dense. A warm casserole is best for a cozy breakfast. You can also reheat leftovers in the microwave for 20-30 seconds if needed. One common mistake is cutting the rolls too small. If you chop them too tiny, they won’t hold their shape during baking. Also, don’t skip the resting time after baking. Letting it cool for five minutes helps it set. Lastly, remember not to overload with extra ingredients. Stick to the recipe for the best results. {{image_4}} You can change the flavor of your cinnamon roll casserole easily. Try adding fresh fruit like apples or berries for a sweet twist. You can also use different flavored cinnamon rolls, like caramel or orange, to surprise your taste buds. If you love chocolate, mix in some mini chocolate chips. They melt and create gooey pockets of goodness. If you need to make the dish healthier, swap regular eggs for egg whites or a flaxseed mixture. Use almond milk instead of regular milk for a dairy-free option. You can also replace the brown sugar with maple syrup or a sugar substitute. This keeps the dish tasty while fitting your needs. Make your casserole special for the season. In the fall, add pumpkin puree and pumpkin spice to the mix. For winter, mix in crushed peppermint candies for a festive flavor. In the spring, consider using lemon zest for a bright and fresh taste. You can even make it a summer dish by adding strawberries or peaches. For the complete recipe, check the [Full Recipe]. To keep your cinnamon roll casserole fresh, store leftovers in an airtight container. Make sure it cools completely before you seal it. You can keep it in the fridge for up to three days. If you want to enjoy it later, freezing is a good option. Always label your container with the date for easy tracking. When you're ready to enjoy leftovers, preheat your oven to 350°F (175°C). Place the casserole in an oven-safe dish and cover it with foil. Heat it for about 15-20 minutes or until warm. You can also use the microwave. Just heat a portion on medium for about 1-2 minutes. Make sure it’s warm throughout. To freeze, cut the casserole into portions and wrap each piece tightly in plastic wrap. Then, place them in a freezer-safe bag or container. You can freeze the casserole for up to two months. When you're ready to eat, thaw it overnight in the fridge, then reheat as mentioned above. Enjoy the sweet flavors even after freezing! Yes, you can make this casserole ahead of time. Prepare it the night before. Just follow the steps until you pour it into the dish. Cover it tightly with plastic wrap and store it in the fridge. In the morning, take it out and let it sit for 10-15 minutes. Then, bake it as directed. This saves time and gives you an easy breakfast! To check if the casserole is done, look for a golden brown top. You can also insert a toothpick in the center. If it comes out clean, it is ready. The center should be set, not jiggly. Baking should take about 25-30 minutes in a preheated oven. You can serve this casserole with a variety of sides. Fresh fruit adds a nice touch. Sliced strawberries or blueberries work well. You might also enjoy it with yogurt for creaminess. If you like a heartier meal, pair it with scrambled eggs or bacon. These choices make a complete and tasty breakfast! For the full recipe and more details, check out the [Full Recipe]. In this post, we explored how to make a delicious Cinnamon Roll Casserole. We covered the key ingredients, cooking steps, and tips for a fluffy dish. You learned how to customize flavors and find the best storage practices. Remember, you can alter the recipe for different diets. Avoid common mistakes to make the best casserole. With these steps, you will create a treat everyone will love. Enjoy the cooking process and share your tasty results!](https://joymealplan.com/wp-content/uploads/2025/06/38cd94bd-2978-4cba-9687-581b6c0fa5a5-768x768.webp)