
Mango Coconut Chia Pudding Quick and Tasty Delight

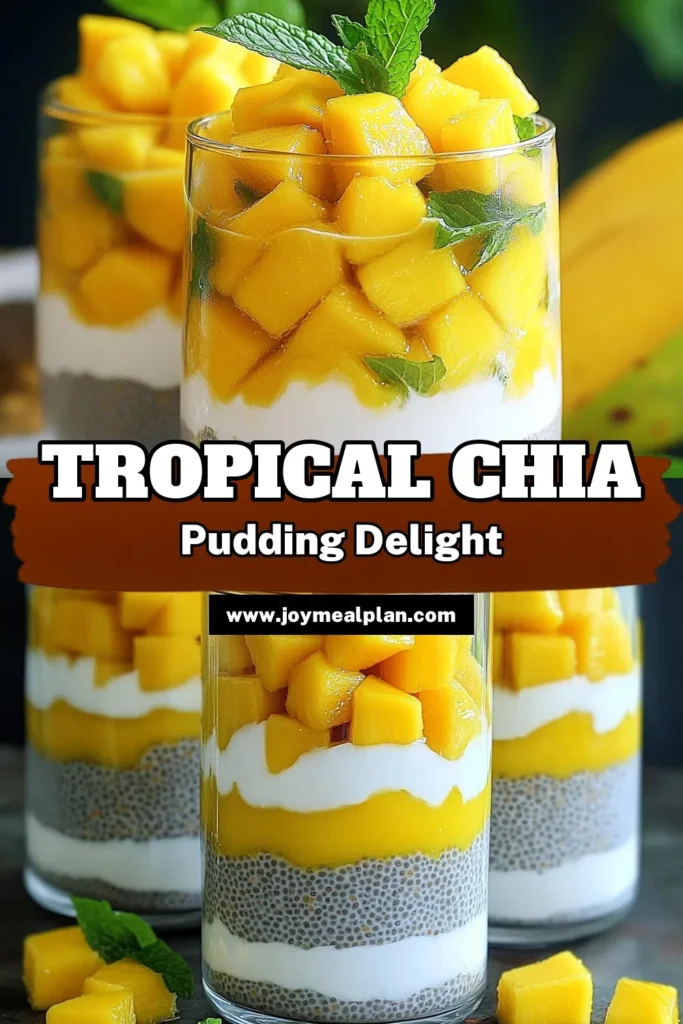
Looking for a quick and tasty treat? Mango Coconut Chia Pudding is just what you need! This delightful dessert combines creamy coconut milk and sweet mango with nutritious chia seeds. Whether you’re new to cooking or just short on time, I will guide you through each step. Let’s dive in and whip up this easy recipe that’s both delicious and good for you! Your taste buds will thank you!
Ingredients
Key Ingredients for Mango Coconut Chia Pudding
For mango coconut chia pudding, you need the following key ingredients:
– 1 cup coconut milk (canned or carton)
– 1/4 cup chia seeds
– 2 tablespoons maple syrup (or honey)
– 1 ripe mango, peeled and diced
– 1/2 teaspoon pure vanilla extract
– 1/4 teaspoon fine sea salt
These ingredients work together to create a creamy and sweet pudding. The coconut milk adds a rich flavor, while chia seeds give it a fun texture. The mango brings a burst of freshness.
Optional Garnishes
You can add some fun garnishes if you like! Here are a few ideas:
– Fresh mint leaves for color and flavor
– Extra mango cubes for a pretty look
– Shredded coconut for added texture
These garnishes make the dish look special and taste even better.
Substitutes for Coconut Milk and Sweeteners
If you cannot find coconut milk or prefer a different flavor, try these substitutes:
– Almond milk or soy milk for a lighter option
– Greek yogurt for a creamier texture
For sweeteners, you can use:
– Agave syrup instead of maple syrup
– Stevia for a low-calorie choice
These swaps let you enjoy the pudding while fitting your taste or diet.
Step-by-Step Instructions
Preparing the Chia Mixture
Start by grabbing a large mixing bowl. Add 1 cup of coconut milk. You can use canned or carton coconut milk. Next, pour in 1/4 cup of chia seeds. These tiny seeds are packed with nutrients. Then, add 2 tablespoons of maple syrup for sweetness. If you prefer, you can swap maple syrup with honey. Don’t forget to add 1/2 teaspoon of pure vanilla extract and 1/4 teaspoon of fine sea salt. Now comes the fun part—mix it all! Use a whisk or spoon to stir well. Make sure the chia seeds spread evenly in the coconut milk.
Chilling and Setting the Pudding
Once mixed, cover the bowl tightly with plastic wrap or a lid. Place it in the refrigerator. Let it chill for about 4 hours. If you have time, letting it sit overnight gives the best results. This allows the chia seeds to soak up the liquid. They will grow and create a creamy pudding-like texture. After chilling, take the bowl out of the fridge. Stir the mixture again to break any clumps. Your pudding should look thick and smooth now.
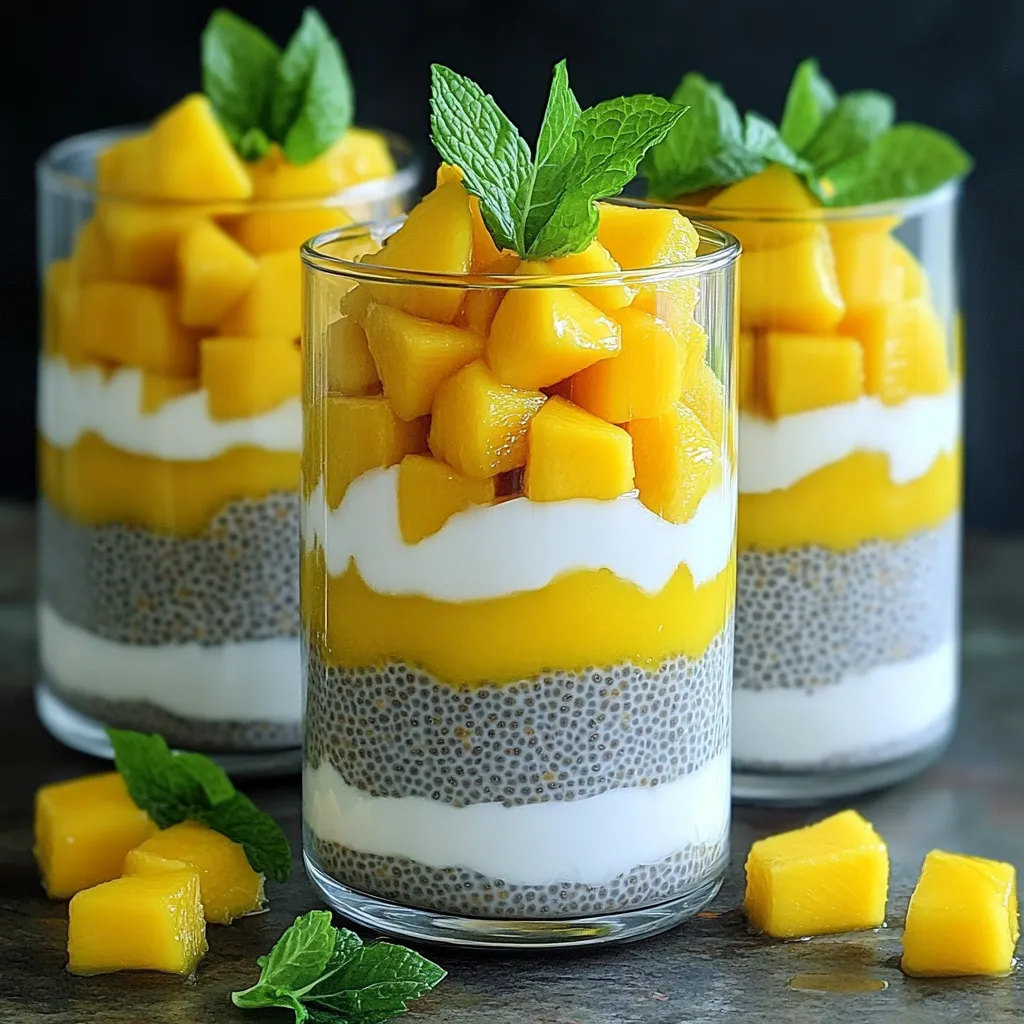
Layering for Presentation
Now, it’s time to make it pretty! Grab some serving glasses or bowls. Start with a spoonful of your chia pudding at the bottom. Next, add a layer of diced mango cubes. Make it colorful by alternating layers. Continue adding chia pudding and then more mango. Fill the glasses nearly to the top. Finish with a final layer of mango on top. For a nice touch, add some more mango cubes and fresh mint leaves. This adds a pop of color and a fresh flavor. Serve these chilled and enjoy every bite!
Tips & Tricks
Ensuring Perfect Texture
To get the best texture, start with the right ratio of chia seeds to liquid. I use 1/4 cup of chia seeds for every cup of coconut milk. This mix gives you a thick and creamy pudding. Stir the mixture well after mixing. This prevents clumps from forming. After chilling, stir again to ensure the chia seeds are evenly spread. If you want a smoother texture, you can blend the mixture before chilling.
Sweetness Adjustments
Sweetness is a personal choice. I use 2 tablespoons of maple syrup, but you can adjust this. If you like it sweeter, add more syrup or honey. If you prefer less sweetness, reduce the amount. Always taste before serving. You can also mix in mashed banana for a natural sweetness boost.
Best Practices for Storing Leftovers
Store leftovers in an airtight container. This keeps the pudding fresh and tasty. It lasts in the fridge for up to three days. If you notice the pudding thickening too much, stir in a bit of coconut milk. This will restore its creamy texture. Always add fresh fruit just before serving for the best taste!
Variations
Tropical Fruit Combinations
You can mix in other fruits for a fun twist. Try adding pineapple or kiwi. These fruits pair well with mango and coconut. You can also use berries for a vibrant look. Just remember to adjust the sweetness if you add tart fruits like raspberries.
Dairy-Free and Vegan Options
This recipe is already dairy-free. Use coconut milk from a carton or can. For vegan sweetness, stick with maple syrup. Honey is not vegan, so skip it if you want. You can also use agave syrup as a sweetener.
Flavor Enhancements
To boost flavor, consider adding spices like cinnamon or nutmeg. A pinch can add warmth and depth. You can also mix in a bit of lime or lemon juice for a zesty kick. Fresh herbs like basil or mint can give a fresh touch, too.
Nutritional Information
Health Benefits of Chia Seeds
Chia seeds are small but mighty. They are packed with fiber, which helps keep you full. Fiber also aids in digestion. Chia seeds offer a good source of protein, making them great for muscle health. They are rich in omega-3 fatty acids, which are good for your heart. With their high antioxidant content, they can help fight free radicals in your body. Eating chia seeds can support healthy skin and may even boost your mood.
Caloric Breakdown of the Recipe
This recipe serves four, making it easy to share. Each serving has about 200 calories. The coconut milk adds creaminess and flavor, contributing around 100 calories per serving. Chia seeds provide 60 calories. The maple syrup adds sweetness, with about 30 calories per serving. Mango, the star of this dish, has around 10 calories per serving. With fresh mint, you get minimal calories, but it adds a burst of flavor.
Key Nutrients and Their Benefits
The key nutrients in this pudding include:
– Fiber: Supports digestion and fullness.
– Protein: Helps build and repair muscles.
– Omega-3 Fatty Acids: Promotes heart health.
– Antioxidants: Protects the body from damage.
– Vitamins A and C: Boosts immune health and skin health.
Enjoying this pudding not only satisfies your sweet tooth but also nourishes your body with essential nutrients.
FAQs
Can I make Mango Coconut Chia Pudding ahead of time?
Yes, you can make this pudding ahead of time. It is great for meal prep. I like to prepare it the night before. This allows the chia seeds to soak well. You can enjoy it the next day or even later in the week.
What are the best ways to serve this pudding?
I love to serve this pudding in clear glasses. It looks beautiful with layers of mango and chia. You can also top it with fresh mint leaves. This adds a nice touch and makes it look fancy. It’s perfect for brunch or as a light dessert.
How long does this dessert last in the refrigerator?
This dessert lasts about 3 to 5 days in the fridge. Just make sure to cover it tightly. If you notice any liquid separation, just stir it well. This keeps the pudding tasty and fresh for a longer time.
Can I use frozen mango instead of fresh?
Yes, frozen mango works well in this recipe. Just make sure to thaw it first. Drain any excess liquid before adding it to the pudding. This keeps the texture right and adds that fruity flavor we love.
Is this recipe gluten-free?
Absolutely! This recipe is naturally gluten-free. All the ingredients, like chia seeds and coconut milk, do not contain gluten. It is a safe dessert for those with gluten allergies or sensitivities. Enjoy with peace of mind!
Mango Coconut Chia Pudding is easy and fun to make. We covered key ingredients, steps, and tips to get the best results. You can mix in tropical fruits and adjust sweetness to your taste. This pudding is not only tasty but also packed with nutrients from chia seeds. Enjoy presenting it beautifully and share with friends. Remember, it’s a great make-ahead dessert. I hope you try this simple recipe and enjoy all the delicious variations it can offer.

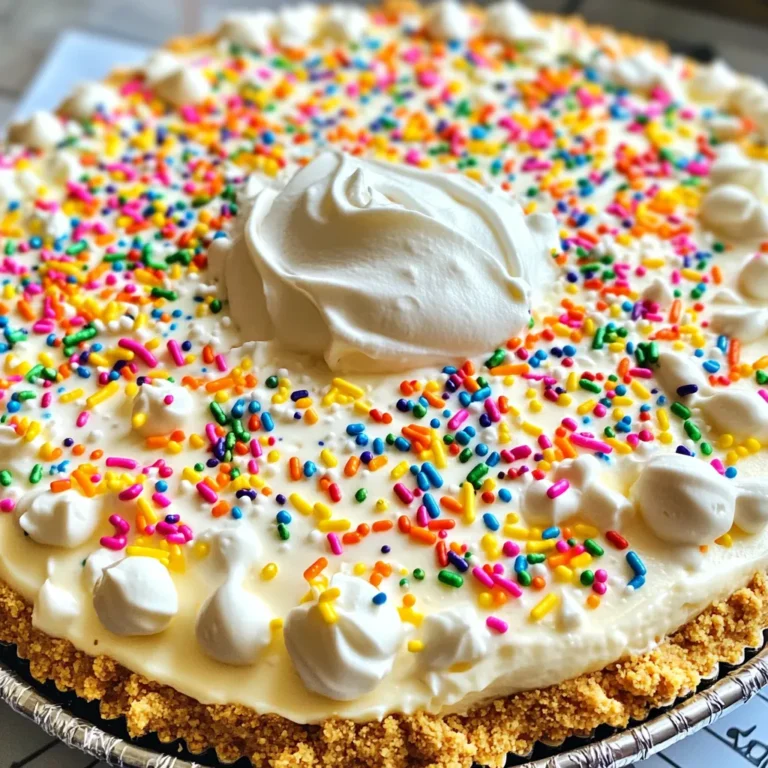

![This cinnamon roll casserole is simple and fun. It combines cinnamon rolls, eggs, and milk. You can whip it up in just 10 minutes. This dish is great for breakfast or brunch. You can serve it warm and drizzled with icing. - 1 can (16 oz) refrigerated cinnamon rolls - 6 large eggs - 1 cup milk - 1/2 cup packed brown sugar - 1 teaspoon vanilla extract - 1 teaspoon ground cinnamon - 1/4 teaspoon salt - 1/2 cup chopped pecans or walnuts - 1/2 cup raisins These optional add-ins make the casserole richer. You can mix in nuts for crunch or raisins for sweetness. Feel free to customize it to your taste! To make this tasty cinnamon roll casserole, gather your ingredients first. You need a few easy items. The process is simple and quick, perfect for busy mornings. 1. Preheat the Oven: Start by preheating your oven to 350°F (175°C). This helps the casserole cook evenly. 2. Prepare the Cinnamon Rolls: Open the can of cinnamon rolls. Take each roll and cut it into quarters. This makes them easier to mix. 3. Mix the Egg Mixture: In a big bowl, add the eggs, milk, brown sugar, vanilla, ground cinnamon, and salt. Whisk until it’s smooth. This mix gives flavor and richness. 4. Combine with Cinnamon Rolls: Gently fold the cut cinnamon rolls into the egg mixture. Stir carefully so you don’t break them. If you like nuts or raisins, add them now. 5. Transfer to Casserole Dish: Pour the mixture into a greased 9x13-inch casserole dish. Spread it out evenly with a spatula. 6. Bake to Perfection: Place the casserole in the oven. Bake for 25-30 minutes. It’s ready when the center is set and the top is golden brown. 7. Cool Slightly: Take the casserole out of the oven. Let it cool for about 5 minutes. This helps it firm up for easy serving. 8. Add Icing: Drizzle the icing from the can over the warm casserole. This sweet touch makes it even better. You can find the full recipe for this delightful dish above. Now, let’s get cooking! To make your casserole fluffy, use fresh cinnamon rolls. The fresher the rolls, the better the rise. When mixing, fold the rolls gently into the egg mixture. Avoid pressing down too hard, as you want to keep air pockets. Bake at 350°F for the right texture. If your oven runs hot, check early to prevent overbaking. Serve the casserole warm, just out of the oven. This helps the icing melt and adds to the flavor. If you let it cool too much, it may become dense. A warm casserole is best for a cozy breakfast. You can also reheat leftovers in the microwave for 20-30 seconds if needed. One common mistake is cutting the rolls too small. If you chop them too tiny, they won’t hold their shape during baking. Also, don’t skip the resting time after baking. Letting it cool for five minutes helps it set. Lastly, remember not to overload with extra ingredients. Stick to the recipe for the best results. {{image_4}} You can change the flavor of your cinnamon roll casserole easily. Try adding fresh fruit like apples or berries for a sweet twist. You can also use different flavored cinnamon rolls, like caramel or orange, to surprise your taste buds. If you love chocolate, mix in some mini chocolate chips. They melt and create gooey pockets of goodness. If you need to make the dish healthier, swap regular eggs for egg whites or a flaxseed mixture. Use almond milk instead of regular milk for a dairy-free option. You can also replace the brown sugar with maple syrup or a sugar substitute. This keeps the dish tasty while fitting your needs. Make your casserole special for the season. In the fall, add pumpkin puree and pumpkin spice to the mix. For winter, mix in crushed peppermint candies for a festive flavor. In the spring, consider using lemon zest for a bright and fresh taste. You can even make it a summer dish by adding strawberries or peaches. For the complete recipe, check the [Full Recipe]. To keep your cinnamon roll casserole fresh, store leftovers in an airtight container. Make sure it cools completely before you seal it. You can keep it in the fridge for up to three days. If you want to enjoy it later, freezing is a good option. Always label your container with the date for easy tracking. When you're ready to enjoy leftovers, preheat your oven to 350°F (175°C). Place the casserole in an oven-safe dish and cover it with foil. Heat it for about 15-20 minutes or until warm. You can also use the microwave. Just heat a portion on medium for about 1-2 minutes. Make sure it’s warm throughout. To freeze, cut the casserole into portions and wrap each piece tightly in plastic wrap. Then, place them in a freezer-safe bag or container. You can freeze the casserole for up to two months. When you're ready to eat, thaw it overnight in the fridge, then reheat as mentioned above. Enjoy the sweet flavors even after freezing! Yes, you can make this casserole ahead of time. Prepare it the night before. Just follow the steps until you pour it into the dish. Cover it tightly with plastic wrap and store it in the fridge. In the morning, take it out and let it sit for 10-15 minutes. Then, bake it as directed. This saves time and gives you an easy breakfast! To check if the casserole is done, look for a golden brown top. You can also insert a toothpick in the center. If it comes out clean, it is ready. The center should be set, not jiggly. Baking should take about 25-30 minutes in a preheated oven. You can serve this casserole with a variety of sides. Fresh fruit adds a nice touch. Sliced strawberries or blueberries work well. You might also enjoy it with yogurt for creaminess. If you like a heartier meal, pair it with scrambled eggs or bacon. These choices make a complete and tasty breakfast! For the full recipe and more details, check out the [Full Recipe]. In this post, we explored how to make a delicious Cinnamon Roll Casserole. We covered the key ingredients, cooking steps, and tips for a fluffy dish. You learned how to customize flavors and find the best storage practices. Remember, you can alter the recipe for different diets. Avoid common mistakes to make the best casserole. With these steps, you will create a treat everyone will love. Enjoy the cooking process and share your tasty results!](https://joymealplan.com/wp-content/uploads/2025/06/38cd94bd-2978-4cba-9687-581b6c0fa5a5-768x768.webp)