Air Fryer Garlic Parmesan Brussels Sprouts Delight
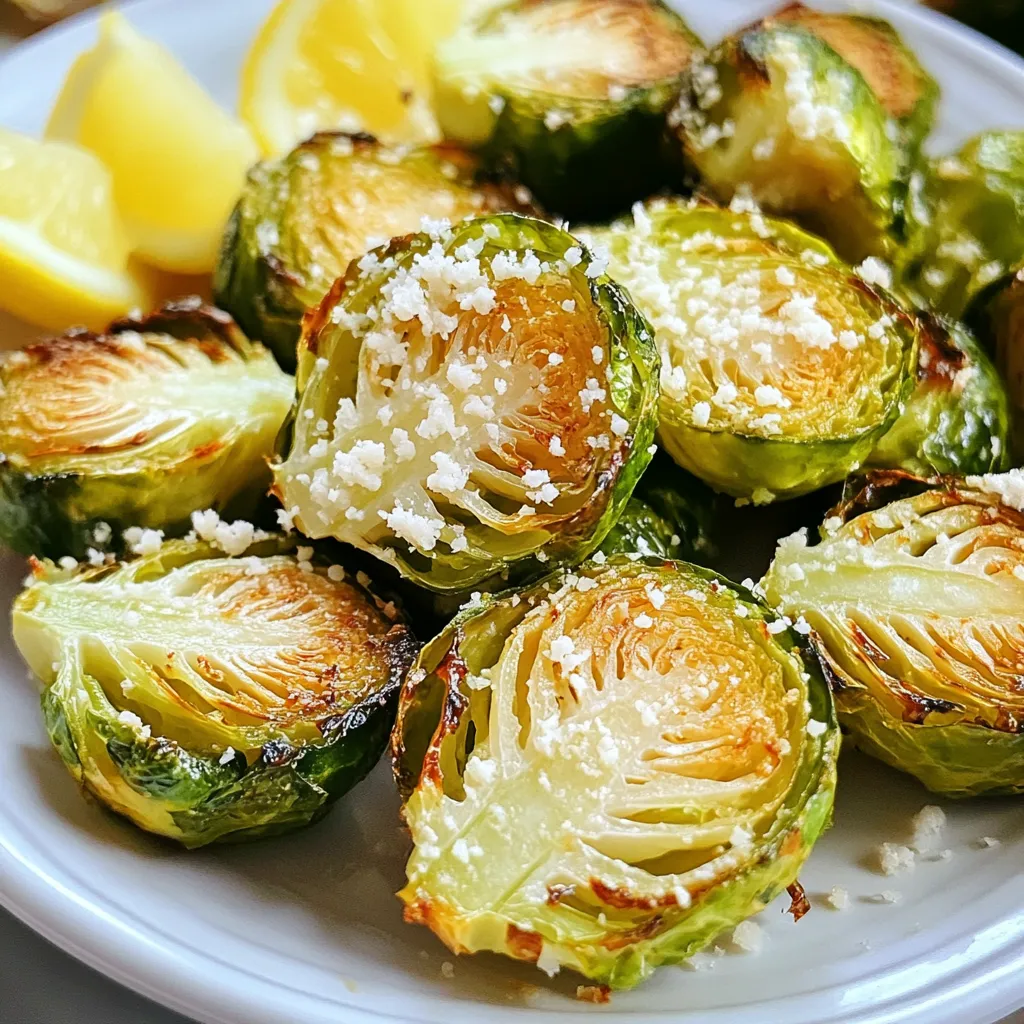
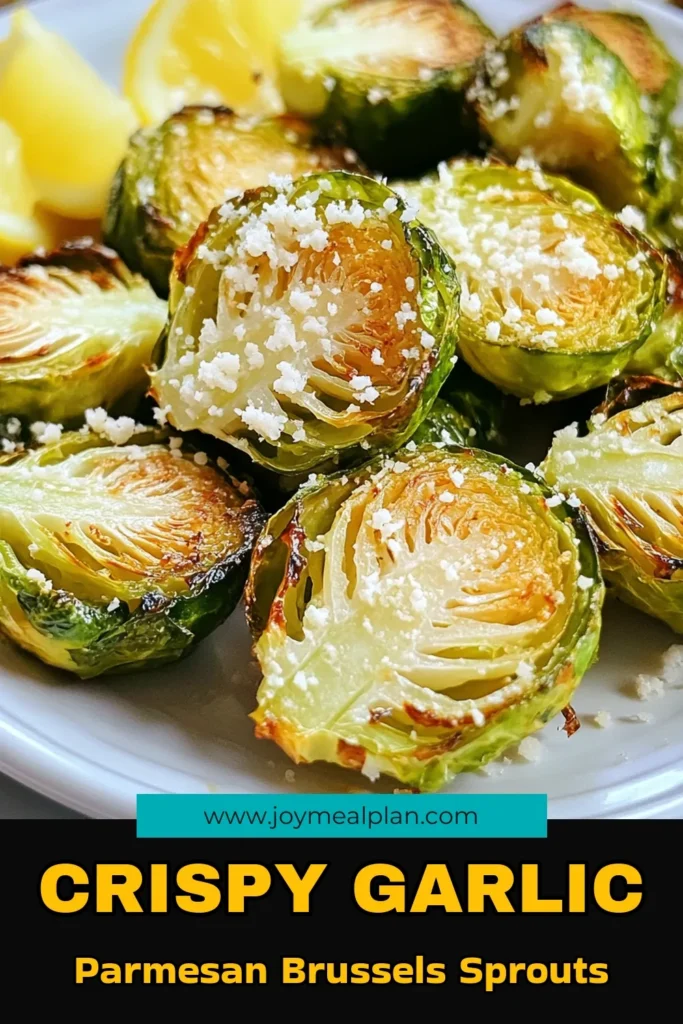
Craving a veggie dish that’s both tasty and easy? Let me introduce you to Air Fryer Garlic Parmesan Brussels Sprouts Delight! In this article, I’ll guide you through each step, from picking fresh Brussels sprouts to achieving that perfect crispy finish. Plus, I’ll share tips, tricks, and variations to elevate your dish. Get ready to impress your friends and family with this flavorful side that everyone will love!
Ingredients
Main Ingredients
– 1 pound Brussels sprouts
– 3 tablespoons extra virgin olive oil
– 4 cloves fresh garlic, minced
Seasoning and Toppings
– 1/2 cup freshly grated Parmesan cheese
– Garlic powder and onion powder
– Crushed red pepper flakes
Optional Finish
– Kosher salt and freshly ground black pepper
– Lemon wedges
Gathering these ingredients is the first step to making your Air Fryer Garlic Parmesan Brussels sprouts. The main ingredients start with fresh Brussels sprouts. Choose firm, bright green ones for the best taste.
Next, we need extra virgin olive oil. This oil not only adds flavor but helps the sprouts crisp up nicely. Fresh garlic, minced finely, will give your dish a strong, aromatic punch.
For seasoning, freshly grated Parmesan cheese is key. It melts and forms a delicious crust on the sprouts. Garlic powder and onion powder enhance the savory notes. If you like a bit of heat, include crushed red pepper flakes.
You can also add kosher salt and black pepper to taste. These help balance the flavors. If you want a tangy finish, have lemon wedges on hand. A squeeze of lemon brightens the dish and makes it pop.
These ingredients work together to create a dish that is both tasty and satisfying. Enjoy the process and look forward to a delicious meal!
Step-by-Step Instructions
Preparation of Brussels Sprouts
– Preheat your air fryer to 375°F (190°C). This takes about 5 minutes.
– Trim the ends off the Brussels sprouts and cut them in half. This makes them cook evenly.
Mixing Ingredients
– In a large mixing bowl, combine the halved Brussels sprouts with 3 tablespoons of olive oil.
– Add 4 cloves of minced garlic, 1 teaspoon of garlic powder, 1 teaspoon of onion powder, and 1/2 teaspoon of crushed red pepper flakes.
– Season with kosher salt and black pepper. Toss until all sprouts are coated well.
– Gently sprinkle 1/2 cup of grated Parmesan cheese over the sprouts. Toss lightly again to help the cheese stick.
Cooking Process
– Arrange the Brussels sprouts in a single layer in the air fryer basket. Avoid overcrowding.
– Cook for 15 to 20 minutes, shaking the basket halfway through. This helps them crisp up evenly.
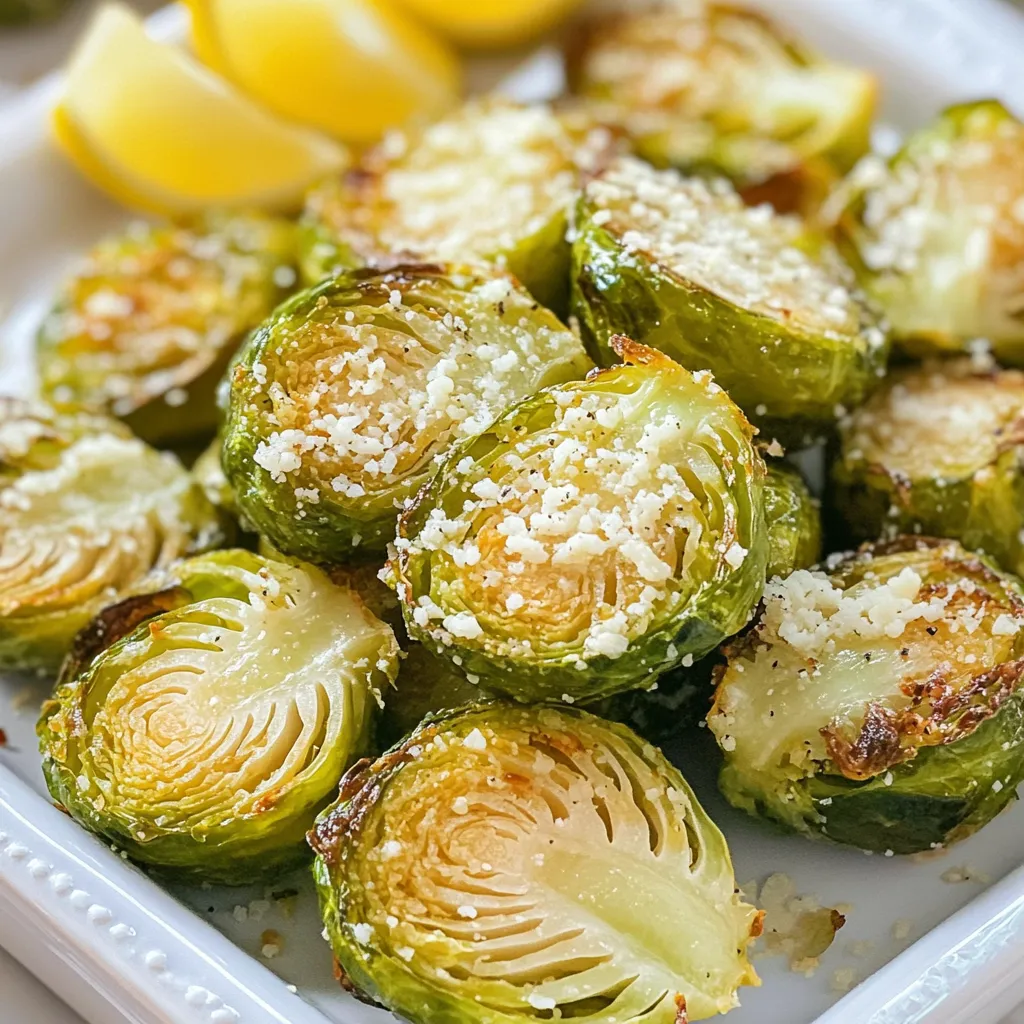
– They are done when golden brown and crispy on the outside. Use tongs to transfer them to a serving dish.
– Serve immediately with lemon wedges for a fresh squeeze of flavor.
Tips & Tricks
Achieving Crispiness
To make your Brussels sprouts crispy, preheat your air fryer to 375°F (190°C). This step is key. Preheating helps cook the sprouts evenly. It also creates a nice crunch.
Avoid overcrowding in the basket. If too many sprouts are packed in, they steam instead of fry. For best results, cook in batches if needed. Space allows hot air to circulate.
Flavor Enhancements
You can adjust spice levels by adding red pepper flakes. If you like heat, add more flakes. For a milder taste, use less. This allows you to personalize the dish.
Don’t hesitate to experiment with different cheeses. Parmesan is great, but you can try Pecorino or even feta. Each cheese brings a unique flavor twist.
Serving Suggestions
Brussels sprouts pair well with many sides. Try serving them with roasted chicken or a fresh salad. Their crispy texture complements softer dishes nicely.
When it comes to drinks, a light white wine works wonders. A crisp Sauvignon Blanc or a refreshing sparkling water can balance the flavors. Enjoy!
Variations
Adding Protein
You can make your Air Fryer Garlic Parmesan Brussels Sprouts even better by adding protein. Pair them with grilled chicken or shrimp for a complete meal. Both options add flavor and texture. Chicken brings a mild taste, while shrimp adds a nice seafood flavor. Just season the chicken or shrimp with a bit of garlic powder and salt. Cook them alongside the sprouts for a tasty combo.
Vegetarian Additions
If you’re looking to add more veggies, mix in carrots or sweet potatoes. Both add color and sweetness. Just chop them into similar sizes as the Brussels sprouts. Toss them in the same olive oil and seasoning mix. These additions will roast up nicely in the air fryer. The sweet flavors balance well with the salty Parmesan.
Flavor Swaps
Don’t be afraid to experiment with different herbs and spices. Try adding rosemary or thyme for an earthy note. You can also use smoked paprika for a unique twist. Each option brings its own special flavor. Adjust the amount based on your taste. This is a fun way to change the dish each time you make it!
Storage Info
Refrigeration
To store leftover Brussels sprouts, let them cool first. Place them in an airtight container. Make sure to squeeze out any air before sealing. This helps keep them fresh. In the fridge, they last up to three days. If you want to enjoy them later, avoid adding lemon juice until ready to eat. This keeps the sprouts crisp and tasty.
Reheating Instructions
To reheat your Brussels sprouts, use the air fryer again. Preheat it to 350°F (175°C). Place the sprouts in the basket for about 5-7 minutes. This method maintains their crispness. You can also use a skillet on medium heat. Toss them occasionally to heat evenly. Avoid the microwave, as it can make them soggy.
Freezing Tips
Yes, you can freeze these Brussels sprouts! First, let them cool completely. Spread them on a baking sheet in a single layer. Freeze for about an hour to firm them up. Then, transfer them to a freezer bag. Remove as much air as possible. They can stay good for up to three months. When ready to eat, no need to thaw. Just air fry them straight from the freezer at 375°F (190°C) for about 15-20 minutes.
FAQs
How do I keep my Brussels sprouts from getting soggy in the air fryer?
To keep your Brussels sprouts crispy, start with a preheated air fryer at 375°F (190°C). Preheating helps cook them evenly. Use just enough olive oil to coat them lightly. Too much oil can lead to sogginess. Spread the sprouts in a single layer in the basket. Avoid overcrowding, as this will trap steam and make them soft. Shake the basket halfway through cooking. This ensures they crisp up on all sides.
Can I make this recipe without garlic?
Yes, you can make this recipe without garlic. If you skip the garlic, you can try other seasonings. For a flavorful twist, use lemon zest or smoked paprika. You can also add herbs like thyme or rosemary for a fresh taste. These options keep the dish tasty while allowing you to cater to personal preferences.
What can I substitute for Parmesan cheese?
If you want a dairy-free or vegan option, use nutritional yeast instead of Parmesan cheese. Nutritional yeast has a cheesy flavor and is rich in nutrients. You can also try vegan Parmesan, which is made from nuts or seeds. If you prefer a different taste, consider using pecorino cheese or feta for a unique twist.
This blog post covered how to make crispy Brussels sprouts in an air fryer. We discussed the main ingredients like olive oil and Parmesan. I also shared tips to keep them crispy and ideas for variations.
In conclusion, these Brussels sprouts are easy to make and packed with flavor. Try adding your favorite herbs or serve them as a side dish. Enjoy experimenting with different toppings and enjoy your tasty and healthy dish!

![To make classic deviled eggs, gather these simple ingredients: - 6 large eggs - 3 tablespoons creamy mayonnaise - 1 teaspoon Dijon mustard - 1 teaspoon apple cider vinegar - 1/4 teaspoon fine salt - 1/4 teaspoon smoked paprika (plus extra for garnish) - Fresh chives, finely chopped (for garnish) You can add some extra flavor to your deviled eggs with these fun options: - A few dashes of your favorite hot sauce - Pickle relish for a tangy twist - Chopped olives for a salty kick - Crumbled bacon for a smoky crunch Having the right tools makes cooking easier. Here’s what you’ll need: - Medium-sized saucepan - Large bowl for ice water - Sharp knife for slicing - Mixing bowl for the yolk filling - Fork for mashing yolks - Piping bag with a star tip (optional) - Serving platter for presentation These ingredients and tools will set you up for a delicious batch of deviled eggs. For the full recipe and instructions, check out the [Full Recipe]. To start, you need six large eggs. Place them in a medium saucepan. Cover the eggs with cold water by at least one inch. Set the heat to medium-high and watch for a boil. When the water bubbles, cover the pot with a lid. Turn off the heat and let the eggs sit for ten to twelve minutes. This resting time will cook the yolks just right. After that, move the eggs to a bowl of ice water. Let them cool for at least five minutes. This step makes peeling easier and keeps the eggs fresh. Once the eggs are cool, gently tap each one on a flat surface. Roll the eggs to crack the shells, then peel them under running water. This helps remove the shells cleanly. Slice each egg in half lengthwise. Carefully take out the yolks and put them in a mixing bowl. Set the empty egg whites aside on a serving platter. Now, mash the yolks with a fork until they are crumbly. Add three tablespoons of creamy mayonnaise, one teaspoon of Dijon mustard, one teaspoon of apple cider vinegar, a quarter teaspoon of fine salt, and a quarter teaspoon of smoked paprika. Mix until the filling is smooth. If you like spice, add a few dashes of your favorite hot sauce. Next, it’s time to fill the egg whites. You can use a spoon or a piping bag. If you use a piping bag with a star tip, it will look fancy. Fill each hollowed egg white with the yolk mixture. Make sure to fill them well. To finish, sprinkle extra smoked paprika on top for color. Chop some fresh chives and add them as a garnish. This adds a nice touch and fresh flavor. Now you have a perfect batch of classic deviled eggs! For more details, refer to the Full Recipe. To get the best hard-boiled eggs, start with fresh eggs. Place the eggs in a saucepan and cover them with cold water. Bring the water to a rolling boil over medium-high heat. Once boiling, cover the pot and turn off the heat. Let the eggs sit for 10 to 12 minutes. This method gives you a creamy yolk with no green ring. After cooking, cool the eggs quickly in ice water. This step makes peeling easier. For a creamy filling, mash the yolks well with a fork. The more you mash, the smoother the mix. Add the mayonnaise, mustard, vinegar, and spices slowly. Mix until everything blends perfectly. If you want a spicy twist, add hot sauce to taste. For a more gourmet touch, consider using a piping bag. It will make the filling look fancy and neat. Presentation is key for deviled eggs. Arrange them on a colorful platter for a festive look. You can sprinkle extra smoked paprika on top for color. Adding finely chopped chives gives a fresh touch. For an extra pop, consider garnishing with microgreens or edible flowers. These small touches will impress your guests and make your dish stand out. For more details on making these delightful eggs, check the Full Recipe. {{image_4}} To add heat, mix some hot sauce into the yolk filling. You can use any hot sauce you like. Sriracha gives a sweet and spicy kick. For a smoky flavor, try chipotle sauce. Adjust the amount to suit your taste. You can also add diced jalapeños for texture and extra spice. If you want to skip the classic flavors, try avocado instead of mayo. Mash ripe avocado with the yolks. This adds creaminess and a fresh flavor. You can also mix in Greek yogurt for a tangy twist. For a herbal note, add finely chopped herbs like dill or parsley. Get creative with your deviled eggs! You can mix in ingredients like bacon bits for crunch. A hint of curry powder adds warmth and a new taste. For a sweet touch, mix in a little honey or relish. Try adding lemon zest for a bright flavor boost. Each twist gives your deviled eggs a new personality. For the full recipe, check out Devilishly Delectable Deviled Eggs. Store leftover deviled eggs in an airtight container. This keeps them fresh and safe to eat. Place a piece of plastic wrap over the filling to avoid drying out. You can also place a damp paper towel on top to help maintain moisture. Consume deviled eggs within three days for the best taste. For fresh deviled eggs, follow these tips: - Keep eggs in their shells until you're ready to cook. - Use the freshest eggs possible; check the expiration date. - After making the filling, store it separately from the egg whites if you don't serve right away. This keeps both parts fresh longer. - Refrigerate eggs promptly after cooking; don’t leave them out for more than two hours. Freezing deviled eggs is not the best option. The texture changes, making them watery upon thawing. If you want to freeze the filling, do so in a sealed bag. When you're ready to use it, thaw in the fridge overnight. Then, refill fresh egg whites and serve. Enjoy your eggs fresh for the best flavor! For detailed steps, check the Full Recipe. The prep time for Classic Deviled Eggs is about 15 minutes. You can easily manage this time. While the eggs cook, you can gather your other ingredients. This helps to keep things quick and easy. Yes, you can make deviled eggs ahead of time. Prepare them a day before your event. Just store them in the fridge until you are ready to serve. This keeps them fresh and tasty. If you want to skip mayonnaise, try using Greek yogurt. It adds creaminess and a tangy flavor. Another option is avocado, which gives a smooth texture. You could also use sour cream for a rich taste. Each option brings its unique twist to the classic recipe. For the full recipe, check out my detailed instructions. Deviled eggs are easy and fun to make. We covered the classic recipe, tips, and fun variations. Remember to use fresh eggs for the best taste. You can try adding flavors like spices or herbs for a twist. Store them properly to keep them fresh. Enjoy your deviled eggs at your next gathering. They are sure to impress everyone!](https://joymealplan.com/wp-content/uploads/2025/06/26f62450-2f64-4ac8-86b4-50d05502cb9e-768x768.webp)
![To make tasty honey garlic meatballs, you need: - 1 pound ground beef (or a blend of beef and pork for extra flavor) - 1/2 cup fresh breadcrumbs (homemade or store-bought) - 1/4 cup grated Parmesan cheese (for richness) - 1 large egg (to bind the mixture) - 2 cloves garlic, finely minced (for depth) - 1 tablespoon fresh ginger, finely minced (adds warmth) - 1/4 cup chopped green onions (for freshness) - Salt and black pepper to taste These main ingredients create a rich and flavorful base for the meatballs. The garlic and ginger add a nice zing, while the egg helps hold everything together. The honey garlic sauce is where the magic happens. You’ll need: - 1/2 cup honey (natural sweetness) - 1/4 cup soy sauce (for savory flavor) - 1 tablespoon rice vinegar (adds tang) - 1 teaspoon sesame oil (for nuttiness) - 1 teaspoon cornstarch mixed with 1 tablespoon water (to thicken the sauce) This sauce blends sweet and savory flavors. The honey pairs well with soy sauce, creating a perfect glaze for the meatballs. Feel free to customize your meatballs! Here are some ideas: - Use ground turkey instead of beef for a lighter option. - Add chopped herbs like parsley or cilantro for extra freshness. - Swap in breadcrumbs for crushed crackers if you want a different texture. - For a spicy kick, mix in some red pepper flakes. These tweaks can help you make the recipe your own. Enjoy experimenting with flavors! For the complete recipe, check out the Full Recipe link. To make tasty meatballs, start by gathering your ingredients. In a big bowl, combine: - 1 pound ground beef (or beef and pork mix) - 1/2 cup fresh breadcrumbs - 1/4 cup grated Parmesan cheese - 1 large egg - 2 cloves garlic, finely minced - 1 tablespoon fresh ginger, finely minced - 1/4 cup chopped green onions - Salt and black pepper to taste Use your hands or a spatula to mix these well. Be gentle! Overmixing will make the meatballs tough. You want them soft and tender. Now, it’s time to bake. Preheat your oven to 400°F (200°C). This step helps the meatballs cook evenly. Line a baking sheet with parchment paper. This keeps them from sticking and makes cleaning easy. Next, use clean hands to scoop out the meat mixture. Roll it into small balls, about 1 inch wide. Place them on the baking sheet, leaving space between each one. Bake for 15 to 20 minutes. You’ll know they’re done when they turn golden brown and reach an internal temperature of 165°F. While the meatballs bake, prepare the delicious sauce. In a small saucepan, mix: - 1/2 cup honey - 1/4 cup soy sauce - 1 tablespoon rice vinegar - 1 teaspoon sesame oil Heat this mix over medium heat. Stir it gently until it simmers. In a small bowl, mix 1 teaspoon cornstarch with 1 tablespoon water. Stir this into the sauce to thicken it. Cook for 2-3 more minutes until the sauce is shiny and thick. Once the meatballs are ready, take them out of the oven. Place them in a serving dish. Drizzle the warm honey garlic sauce over them. Garnish with extra chopped green onions for a fresh look. Enjoy every bite! For the full recipe, check out the details above. To make tender meatballs, start by mixing the meat gently. Overmixing makes them tough. Add breadcrumbs and egg for moisture. Let the mixture rest for a few minutes before shaping. This helps flavors blend well. Use clean hands to form the meatballs. Aim for about one inch in size for even cooking. For a rich honey garlic sauce, combine honey and soy sauce in a small pan. Heat it slowly to keep the honey from burning. Adding rice vinegar brings a nice tang. Finally, mix cornstarch with a bit of water to thicken it. Stir this mixture into the sauce until it coats the back of a spoon. This step is key for a glossy finish. These honey garlic meatballs shine on their own. Serve them on a platter with toothpicks. Pair them with rice or noodles for a full meal. Fresh veggies, like steamed broccoli or a crisp salad, add color and crunch. For added flair, drizzle extra sauce over the meatballs and sprinkle sesame seeds. This makes for a lovely presentation. Check the [Full Recipe] for more details! {{image_4}} You can use many meats for honey garlic meatballs. Ground beef is classic, but ground pork adds great flavor. You can even mix beef and pork for a tasty twist. Ground turkey is a leaner choice. It still pairs well with honey garlic sauce. Chicken also works great if you prefer a lighter meat. The key is to choose a meat you love. If you want a meat-free option, try using plant-based ground meat. There are many brands available today. You can also make meatballs with lentils or chickpeas. Just mash them up and mix in the same ingredients. For a fun twist, use quinoa or rice as a base. They both add texture and make the dish hearty. You can add fun flavors to your meatballs. Try mixing in some grated carrots or chopped bell peppers for a veggie boost. Fresh herbs, like cilantro or basil, can give a fresh kick. If you like heat, add red pepper flakes or sriracha to the mix. For an Asian twist, toss in some chopped water chestnuts or sesame seeds. These add crunch and make your meatballs stand out. You can find the full recipe to try these variations. After enjoying your honey garlic meatballs, let them cool down. Place them in an airtight container. They will stay fresh in the fridge for about 3 to 4 days. Make sure to separate layers with parchment paper to avoid sticking. To reheat, use the oven for best results. Preheat it to 350°F (175°C). Place the meatballs on a baking sheet. Heat them for about 10 to 15 minutes. This keeps them juicy and warm. You can also use the microwave, but they might get soggy. If you do use the microwave, cover them with a damp paper towel to keep moisture in. For long-term storage, you can freeze the meatballs. First, let them cool completely. Then, place them on a baking sheet in a single layer. Freeze them for a couple of hours until firm. Once frozen, transfer them to a freezer bag. They can last up to 3 months. When ready to eat, thaw them in the fridge overnight before reheating. These steps will help you enjoy your honey garlic meatballs anytime! Check out the Full Recipe for more cooking tips. Yes, you can use ground turkey instead of beef. Ground turkey makes a lighter meatball. It has less fat, so you may want to add a bit more cheese or breadcrumbs. This keeps the meatballs moist and tasty. The flavor will change slightly, but they will still taste great. To check if your meatballs are done, use a meat thermometer. They need to reach 165°F inside. You can also cut one in half. The inside should be no longer pink. Look for a nice golden brown color on the outside. These signs show that your meatballs are safe to eat. Honey garlic meatballs pair well with many sides. Here are some ideas: - Steamed rice - Roasted vegetables - Noodles - Salad - Mashed potatoes These sides balance the sweet and savory flavors. You can mix and match for a fun meal. For more ideas, check out the Full Recipe for serving suggestions. Honey garlic meatballs are simple and tasty. We covered the main ingredients and how to mix them. You learned step-by-step instructions for baking and making the sauce. I shared tips for tender meatballs and perfect sauce. You can also explore meat options and vegetarian choices. Don’t forget about storing leftovers and reheating them. Try the variations for a new twist. Enjoy cooking, and have fun sharing these delightful bites with friends and family!](https://joymealplan.com/wp-content/uploads/2025/05/91b0df71-a0c5-411f-83a7-9789c0a24c3c-768x768.webp)
. To store unused tomato mixture, place it in an airtight container. This keeps the mix fresh for up to two days. If you have leftover bruschetta, avoid adding toppings until you're ready to serve. This prevents the bread from getting soggy. For the bread, store it in a paper bag. This helps maintain its crispness. Avoid plastic bags, as they trap moisture and make the bread soft. If you want to keep the bread fresh longer, freeze it. Just slice the bread before freezing for easy use later. You can freeze the tomato mixture and the bread separately. This helps keep each part fresh. To freeze the tomato mix, pour it into a freezer-safe bag. Remove excess air before sealing. When you're ready to eat, thaw the mixture overnight in the fridge. For the bread, place it in the oven at 350°F (175°C) for about 10 minutes to restore its crunch. Enjoy your bruschetta within three days for the best taste. Over time, the tomatoes may lose their fresh flavor. Look for signs of spoilage like discoloration or an off smell. If the bread feels soft or stale, it’s time to toss it. By following these simple storage tips, you can extend the life of your delicious bruschetta. Enjoy it fresh and vibrant every time! The best breads for bruschetta are Italian baguette or ciabatta. Both have a nice crust that crisps up well. You can also use sourdough for a tangy flavor. Choose a bread that is sturdy enough to hold the toppings. Yes! You can prepare the tomato mix a few hours ahead. Just store it in the fridge. This lets the flavors blend. Toast the bread right before serving for the best crunch. Keep the bread and topping separate until you serve. To serve more people, double the recipe. Use multiple loaves of bread. You can also make several batches of the tomato mix. It’s easy to scale up. Just remember to toast the bread in batches to keep it crisp. Bruschetta is best served fresh. The toasted bread should be warm. The tomato mix can be at room temperature. This combo gives a nice contrast. Serve it right after you assemble it for the best taste. Bruschetta pairs well with simple sides. Think of a light salad or soup. A fresh arugula salad works great. You can also serve it with olives or cheese. These add nice flavors and textures to your meal. In this post, we explored making bruschetta from fresh ingredients like ripe tomatoes, basil, and garlic. You learned how to prepare these components and create the perfect toast. We also covered tips for storage and common mistakes to avoid. Finally, I shared variations for different seasons and diets. Bruschetta is simple, fun, and a delightful treat. Enjoy experimenting and finding your favorite flavors!](https://joymealplan.com/wp-content/uploads/2025/07/10355497-7bd2-4922-b413-5484ea4e8a3f-768x768.webp)