Thai Peanut Chicken Wraps Easy and Flavorful Recipe


Are you ready for a quick and tasty meal? These Thai Peanut Chicken Wraps are simple, delicious, and packed with flavor! I’ll share an easy recipe that you can whip up in no time. Whether you’re feeding your family or hosting friends, these wraps will be a hit. Let’s dive into the ingredients, steps, and tips to make this meal a favorite in your home.
Why I Love This Recipe
- Fresh and Flavorful: The combination of fresh vegetables and tender chicken creates a vibrant flavor profile that’s both satisfying and refreshing.
- Quick and Easy: This recipe takes just 15 minutes to prepare, making it perfect for busy weeknights or quick lunches.
- Customizable: You can easily adjust the ingredients to suit your taste preferences or dietary needs, whether it’s adding more veggies or swapping the protein.
- Healthy and Nutritious: Packed with lean protein, fiber-rich veggies, and healthy fats from the peanut sauce, these wraps are a wholesome choice for any meal.
Ingredients
Main Ingredients for Thai Peanut Chicken Wraps
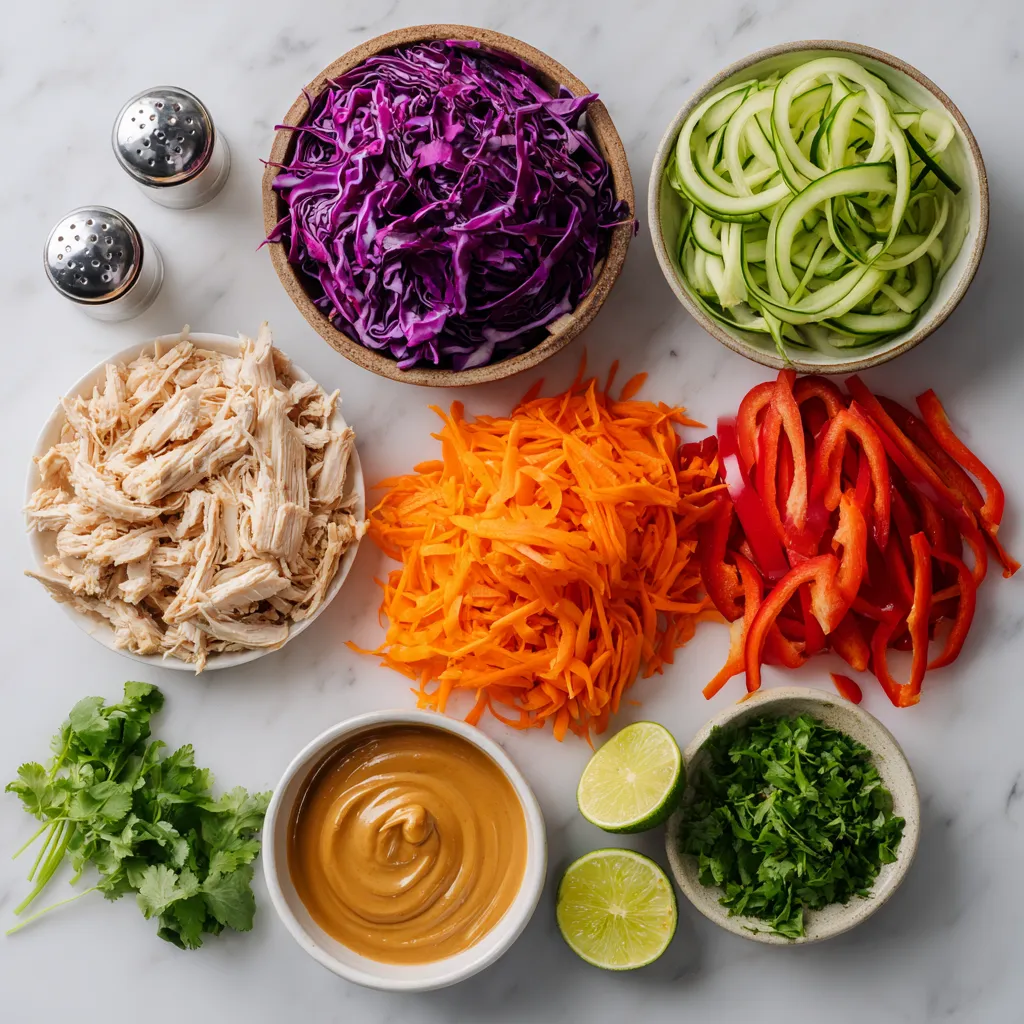
For these tasty Thai peanut chicken wraps, you need simple, fresh ingredients. Here’s what you’ll need:
– 2 cups cooked chicken breast, shredded
– 1 cup red cabbage, thinly sliced
– 1 carrot, julienned
– 1 cucumber, julienned
– 1 bell pepper (any color), thinly sliced
– ½ cup fresh cilantro, chopped
– ½ cup peanut sauce (store-bought or homemade)
– 4 large whole wheat tortillas or large lettuce leaves
– 1 tablespoon fresh lime juice
– Salt and pepper to taste
These ingredients come together to create a bright and colorful wrap. The chicken provides protein, while the veggies add crunch. The peanut sauce brings rich flavor.
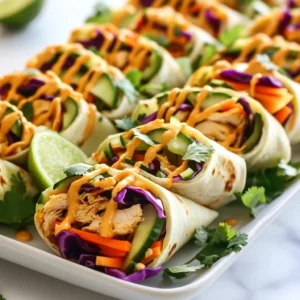
Optional Garnishes and Serving Suggestions
You can make your wraps even better with a few garnishes. Consider these ideas:
– Fresh cilantro leaves for added color and taste.
– Lime wedges to squeeze over the wraps for brightness.
– Extra peanut sauce drizzled on top for a richer flavor.
Serve the wraps on a nice platter. They look great and taste amazing!
Alternative Ingredients for Dietary Needs
If you have specific dietary needs, there are easy swaps. Try these options:
– Use tofu or tempeh instead of chicken for a vegetarian choice.
– Choose gluten-free tortillas or lettuce leaves for a gluten-free option.
– Swap peanut sauce for almond or sunflower seed sauce for nut allergies.
These alternatives keep the dish tasty while fitting various diets. Enjoy experimenting!
Step-by-Step Instructions
Preparation of Chicken and Vegetables
To start, gather your ingredients. You will need shredded chicken, red cabbage, carrot, cucumber, bell pepper, cilantro, and lime juice.
1. In a mixing bowl, add 2 cups of cooked chicken breast that you have shredded.
2. Next, toss in 1 cup of thinly sliced red cabbage. This adds crunch and color.
3. Then, add 1 julienned carrot for sweetness.
4. Include 1 julienned cucumber for freshness.
5. Add 1 thinly sliced bell pepper. You can choose any color you like.
6. Lastly, add ½ cup of chopped cilantro. This gives a bright flavor.
Drizzle 1 tablespoon of fresh lime juice over the mixture. Season with salt and pepper to taste. Now, gently toss everything together. You want all the flavors to mix well.
Assembling the Wraps
For the wraps, you can use either 4 large whole wheat tortillas or large lettuce leaves.
1. Take one tortilla or lettuce leaf. Spread about 1 tablespoon of peanut sauce evenly across it.
2. Spoon a generous amount of your chicken and vegetable mix into the center. Avoid overfilling to make rolling easier.
3. Fold the sides of the wrap inward.
4. Now, roll it up from the bottom. Tuck in the filling as you go. This helps keep everything inside.
5. Repeat this for the remaining tortillas or leaves, using all the filling.
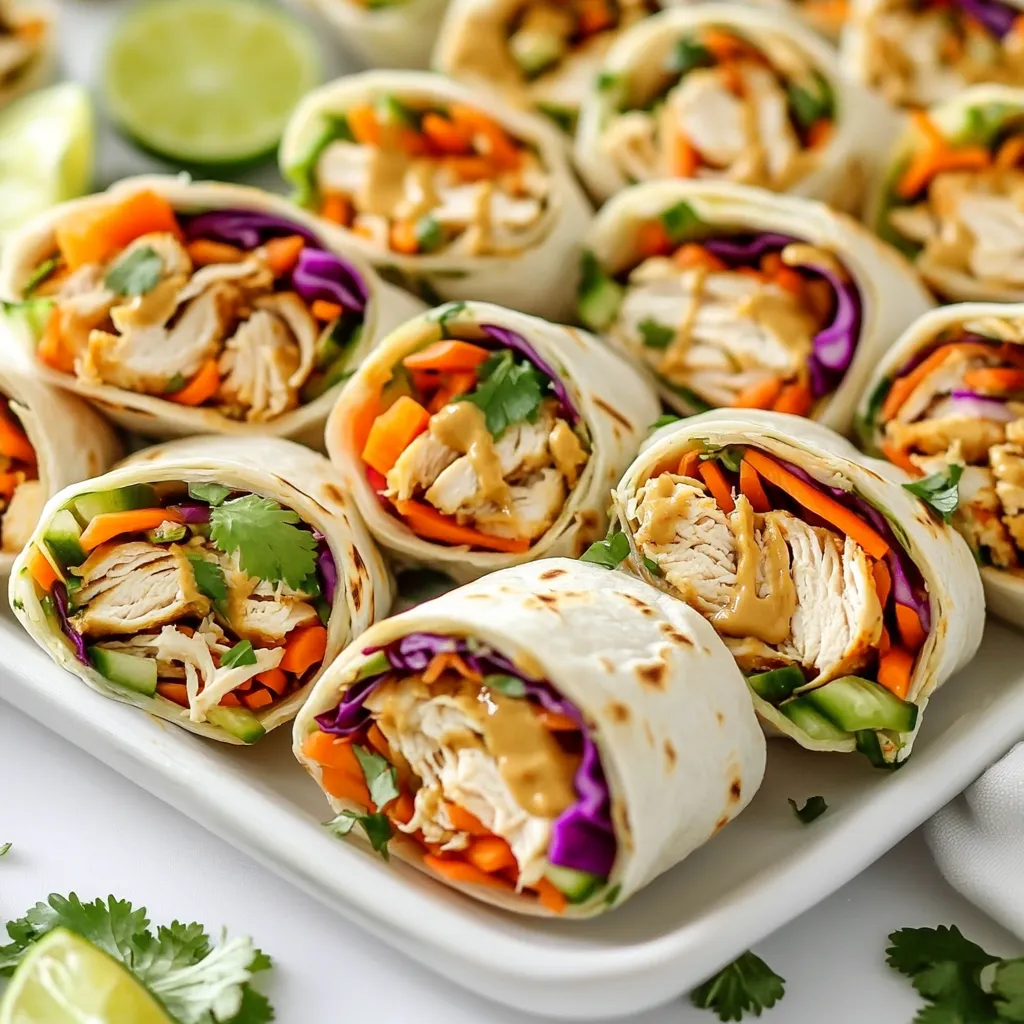
Slicing and Serving Techniques
Once you finish rolling the wraps, it’s time to slice them for serving.
1. Use a sharp knife to cut each wrap in half diagonally. This makes it easier to eat.
2. Arrange the wraps on a large platter.
3. For extra flair, drizzle some peanut sauce over the top.
4. Garnish with fresh cilantro and lime wedges. This adds color and a citrus scent.
These wraps are fun, easy, and packed with flavor!
Tips & Tricks
How to Make Perfect Peanut Sauce
To make great peanut sauce, start with smooth peanut butter. Mix it with soy sauce and lime juice. Add a touch of honey for sweetness. If you like spice, add some chili flakes. Blend it all until creamy. For a smoother sauce, whisk in warm water. Adjust the thickness to your taste.
Variations for Different Flavors
Want to change it up? Try adding ginger for a fresh kick. You could also use different nut butters like almond or cashew. For a tangy twist, mix in some coconut milk. Each change adds new flavors to your wraps. Feel free to experiment!
Common Mistakes to Avoid
One mistake is overfilling your wraps. This makes rolling hard and messy. Another is using too much sauce. A tablespoon is enough for each wrap. If your sauce is too thick, it will clump. Always taste your filling and sauce first. This helps you adjust flavors and make the best wraps.
Pro Tips
- Use Fresh Ingredients: Fresh veggies and herbs will enhance the flavor and crunch of your wraps, making them more vibrant and delicious.
- Customize Your Sauce: Feel free to adjust the spice level of your peanut sauce by adding chili flakes or sriracha for a kick, tailoring it to your taste preference.
- Wrap It Right: To ensure a sturdy wrap, make sure to tuck in the filling tightly while rolling, which helps to prevent spillage and keeps everything intact.
- Meal Prep Friendly: These wraps can be prepared in advance; just keep the filling and tortillas separate until you’re ready to eat to maintain freshness.
Variations
Vegetarian or Vegan Options
You can easily make this dish vegetarian or vegan. Swap the chicken for tofu or tempeh. Use 2 cups of firm tofu, cubed. Cook it until golden brown for great texture. For a vegan sauce, use a peanut sauce that has no animal products. This will keep the flavor rich and enjoyable. Add extra veggies, like bell peppers or mushrooms, for more taste.
Spicy Thai Peanut Chicken Wraps
Want a kick? Add some heat to your wraps! Mix in sliced jalapeños or a dash of hot sauce. You can also use spicy peanut sauce. This will give your wraps a nice, fiery taste. Remember to balance the heat with cool ingredients like cucumber or lime. These will help soothe your palate.
Alternative Wraps: Lettuce vs. Tortillas
You can choose between lettuce leaves or tortillas for your wraps. Lettuce gives a fresh crunch. It is a great low-carb option. Romaine or butter lettuce works best for wrapping. Tortillas add a soft, chewy texture. Whole wheat tortillas are a healthy choice. Experiment with both to find your favorite style. Each option brings a unique flavor and texture to your wraps.
Storage Info
Best Practices for Storing Leftovers
To keep your Thai peanut chicken wraps fresh, store them in an airtight container. This helps prevent sogginess. Place a piece of parchment paper between layers if stacking. Ensure they cool down before sealing. Leftovers are best eaten within three days for optimal taste.
Reheating Tips for Chicken Wraps
When reheating, microwave your wraps on a microwave-safe plate. Heat them for about 30 seconds. Check if they are warm all the way through. If you want a crispy wrap, use an oven. Preheat it to 350°F (175°C) and bake for about 10 minutes.
Freezing Instructions for Meal Prep
To freeze wraps, assemble them without the sauce. Wrap each one tightly in plastic wrap. Place them in a freezer bag, removing as much air as possible. They can last up to three months in the freezer. When ready to eat, thaw in the fridge overnight before reheating.
FAQs
What Can I Substitute for Chicken in Thai Peanut Wraps?
You can use tofu or tempeh for a plant-based option. Both offer protein and absorb flavors well. Grilled shrimp also works if you prefer seafood. Just ensure any substitute is cooked and seasoned well.
Can I Make Thai Peanut Sauce at Home?
Yes, making Thai peanut sauce at home is easy. Combine peanut butter, soy sauce, lime juice, and honey in a bowl. Add a bit of water to thin it out, if needed. For extra flavor, mix in garlic or ginger. Adjust the taste to your liking.
How Long Do the Wraps Last in the Fridge?
Thai peanut chicken wraps last about three days in the fridge. Store them in an airtight container to keep them fresh. The wraps may become soggy over time, so eat them sooner for the best taste.
Thai Peanut Chicken Wraps are simple and fun to make. We covered key ingredients, from chicken to tasty garnishes. You learned step-by-step instructions to prepare, assemble, and serve the wraps. I shared tips to create perfect peanut sauce and avoid common mistakes. We explored variations to suit different tastes and dietary needs.
In the end, these wraps are delicious and adjustable. Enjoy trying new flavors and ingredients. But most importantly, have fun making this dis
Thai Peanut Chicken Wraps
Ingredients
- 2 cups cooked chicken breast, shredded
- 1 cup red cabbage, thinly sliced
- 1 unit carrot, julienned
- 1 unit cucumber, julienned
- 1 unit bell pepper, thinly sliced
- 0.5 cup fresh cilantro, chopped
- 0.5 cup peanut sauce
- 4 large whole wheat tortillas or large lettuce leaves
- 1 tablespoon fresh lime juice
- to taste salt and pepper
Instructions
- In a mixing bowl, combine the shredded chicken, red cabbage, julienned carrot, cucumber, sliced bell pepper, and chopped cilantro.
- Drizzle the fresh lime juice over the chicken and vegetable mixture. Season with salt and pepper to taste, then toss gently to ensure everything is well incorporated.
- To assemble the wraps, take a tortilla or a large lettuce leaf and spread about a tablespoon of peanut sauce evenly on it.
- Spoon a generous amount of the chicken and vegetable mixture onto the center of the wrap, making sure not to overfill for easier rolling.
- Fold the sides of the tortilla or lettuce leaf inwards, then roll it up from the bottom, tucking in the filling as you go to form a neat wrap.
- Repeat the assembly for the remaining tortillas or leaves, utilizing all the filling.
- For easier handling, slice each wrap in half diagonally before serving.

![- 1 block (14 oz) firm tofu, pressed and drained - 1/2 cup cornstarch - 3 tablespoons vegetable oil - 1/4 cup honey - 2 tablespoons soy sauce - 4 cloves garlic, minced - 1 teaspoon fresh ginger, grated - 1 tablespoon sesame seeds, toasted - 2 green onions, sliced - Salt and pepper to taste To make crispy honey garlic tofu, you need simple ingredients that pack big flavor. Start with firm tofu. It holds its shape well and crisps up nicely. Press and drain it to get rid of excess water. This step is key for crispy tofu. Next, grab some cornstarch. It’s your secret weapon for that crunchy coating. It sticks to the tofu and gets crispy in the hot oil. Vegetable oil helps fry the tofu evenly. Use a good amount, but don’t drown the tofu. For the sauce, honey adds sweetness. Soy sauce brings saltiness, and garlic and ginger give it a warm kick. These flavors blend perfectly. You can adjust the honey and soy sauce to fit your taste. Finally, sesame seeds and sliced green onions are for garnishing. They add a nice crunch and color to your dish. This crispy honey garlic tofu is not just tasty; it's visually appealing too. For the full recipe, check out the detailed steps. - Cut the tofu into 1-inch cubes. - Toss tofu cubes in cornstarch with salt and pepper. Start by cutting your block of firm tofu into 1-inch cubes. Make sure the pieces are even for cooking. Next, take a shallow dish and add cornstarch. Sprinkle in some salt and pepper. Toss those tofu cubes in the cornstarch mixture, coating each piece well. Shake off any extra cornstarch to keep them light and crispy. - Heat vegetable oil in a skillet over medium-high. - Sauté tofu until golden brown and crispy. Now, heat 3 tablespoons of vegetable oil in a skillet over medium-high heat. Wait until the oil is hot. Carefully place the tofu cubes in the skillet in a single layer. Sauté them for about 5 to 7 minutes. Turn the pieces so they cook evenly. You want them to turn golden brown and get nice and crispy. Once done, transfer the tofu to a paper towel-lined plate to absorb excess oil. - Sauté garlic and ginger in the skillet. - Combine honey and soy sauce, allowing to thicken. In the same skillet, lower the heat to medium. Add 4 minced garlic cloves and 1 teaspoon of grated ginger. Sauté these for about 1 minute. You'll know they're ready when they smell great and turn golden. Now, pour in 1/4 cup of honey and 2 tablespoons of soy sauce. Stir well and let it cook for 2 to 3 minutes until it thickens a bit. - Coat crispy tofu in the honey garlic sauce. - Serve with garnishes. Gently place the crispy tofu back into the skillet. Toss it in the honey garlic sauce until every piece is coated. Remove from heat and sprinkle 1 tablespoon of toasted sesame seeds and 2 sliced green onions over the dish. This adds flavor and makes it look nice. For the full recipe, check the details above! - Use firm tofu for best results: Firm tofu holds its shape and crisps up nicely. - Ensure the tofu is properly pressed and drained: Pressing removes excess water. This helps the tofu absorb flavors and get crispy. - Adjust honey and soy sauce ratios to taste: You can make it sweeter or saltier by changing these amounts. - Experiment with adding red pepper flakes for heat: A little spice can really elevate the dish. Add to your liking. - Consider using an air fryer for an even crispier finish: Air frying gives a great crunch without extra oil. - Double-fry method for ultimate crunch: Fry the tofu once, let it rest, and fry again. This makes it super crispy. For more details, check the Full Recipe. {{image_4}} You can switch tofu for other proteins. Tempeh is a great choice. It has a nutty flavor and a firmer texture. Just cut it into cubes like tofu. Cook it the same way for a tasty dish. Seitan is another option. It mimics meat well and offers a chewy texture. It absorbs flavors easily. Use seitan if you're looking for a heartier bite. Want a kick? Add sriracha to the sauce. This gives a spicy twist to the sweet honey. You can also try orange juice or maple syrup. These swaps change the flavor profile. Orange adds a fresh zest, while maple syrup gives a rich taste. Both can make your dish stand out. Crispy honey garlic tofu shines when paired with sides. Steamed vegetables bring color and nutrition. A fresh salad can add crunch. You can also use this tofu in wraps or tacos. Just fill them with your favorite veggies and tofu. It makes for a fun and easy meal. For the full recipe, follow the steps and enjoy your cooking journey! You can keep crispy honey garlic tofu in the fridge. Place it in an airtight container. It will stay fresh for up to 3 days. This way, you can enjoy it later without losing flavor. To reheat your tofu, use the oven or a skillet. This keeps it crispy and tasty. Avoid using the microwave. It makes the tofu soggy, which we want to prevent. You can also freeze cooked tofu. It will last for up to 2 months in the freezer. When you want to eat it, simply thaw it out. After thawing, re-crisp it in a skillet or oven before serving. This method helps regain its crunchy texture. Typically, crispy honey garlic tofu lasts up to 3 days when stored properly. To keep it fresh, place it in an airtight container. Ensure the tofu is cool before sealing. This helps maintain its flavor and texture. Yes, you can make this recipe vegan. Simply replace honey with agave or maple syrup. Both options add sweetness without using animal products. This change keeps the dish plant-based and equally delicious! Crispy honey garlic tofu pairs well with rice, noodles, or a fresh vegetable stir-fry. You can serve it over steamed jasmine rice for a classic combo. Noodles coated in a light sauce also work great. Adding a side of colorful stir-fried veggies brings extra nutrition and flavor. Firm or extra-firm tofu works best for a crispy texture. These types hold their shape and don’t crumble. For the best results, make sure you press and drain the tofu well before cooking. This removes excess moisture, allowing for a delightful crunch. For the full recipe, check out the [Full Recipe]. In this post, we covered how to make crispy honey garlic tofu. You learned about the key ingredients, from firm tofu to the sweet and savory sauce. I shared step-by-step cooking tips and tricks for the perfect texture and flavor. Remember, you can customize the recipe with different proteins or sauces. Store leftovers correctly to enjoy this dish later. Overall, this recipe is fun, flexible, and delicious. Give it a try, and you’ll impress your friends or family!](https://joymealplan.com/wp-content/uploads/2025/07/a62a8118-0118-41a9-8dcd-10793e5e2e73-768x768.webp)