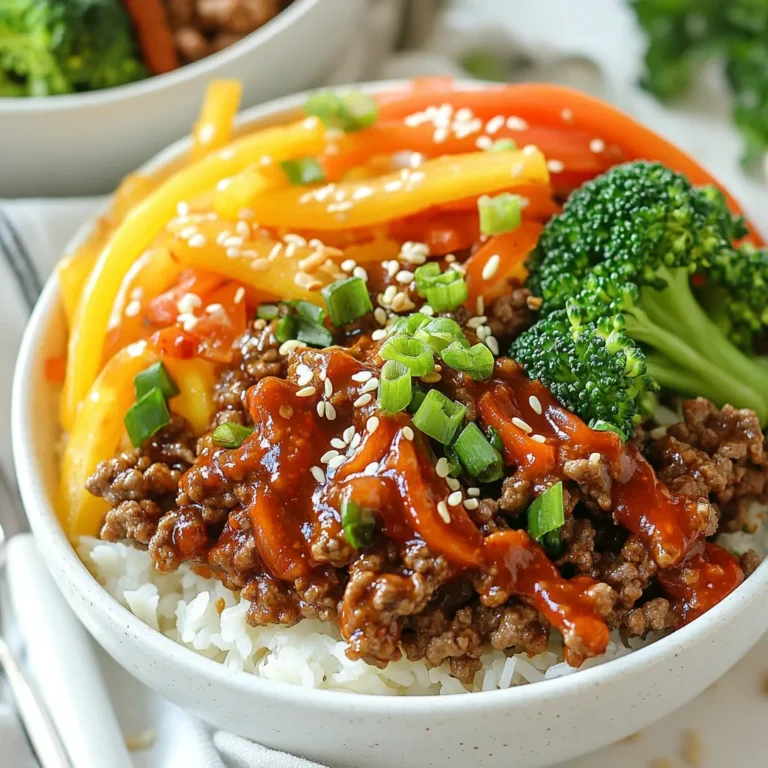
Paleo Lemon Dill Chicken Flavorful Grill Delight
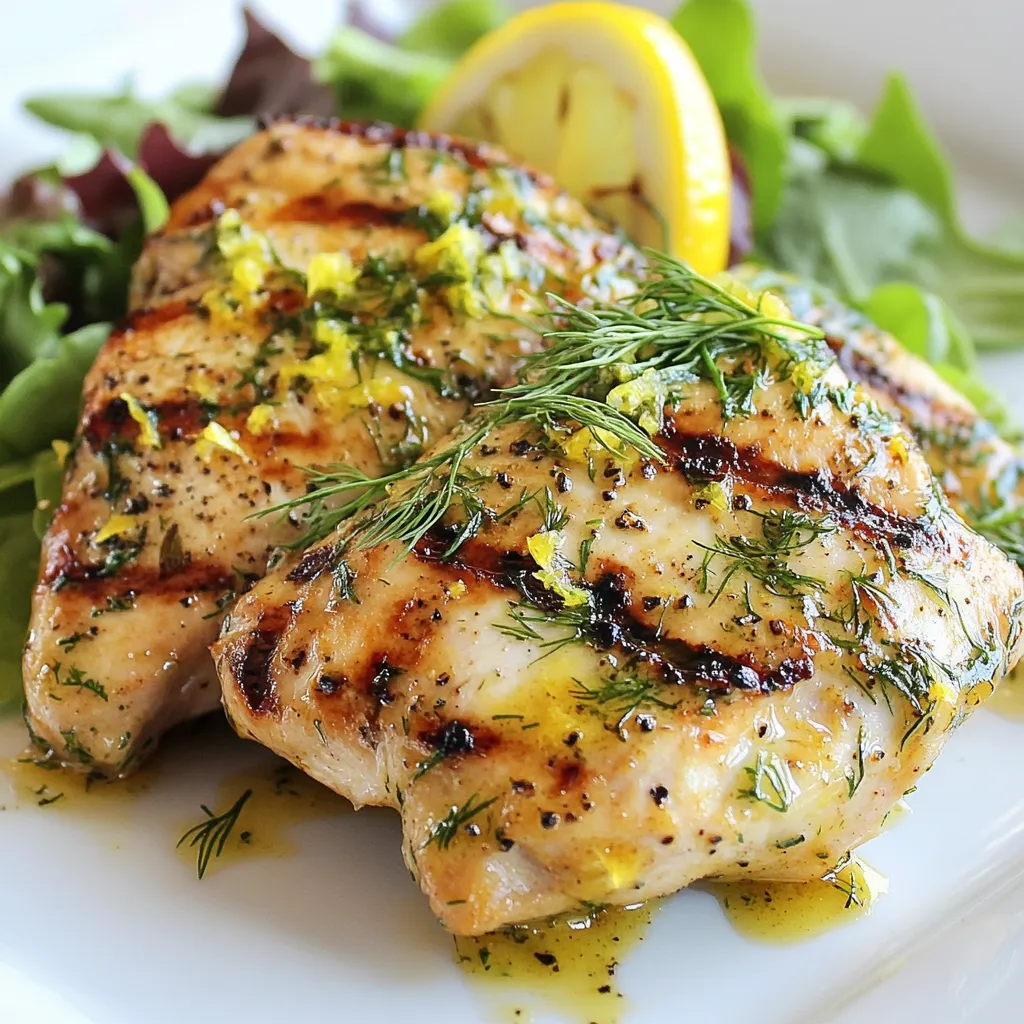
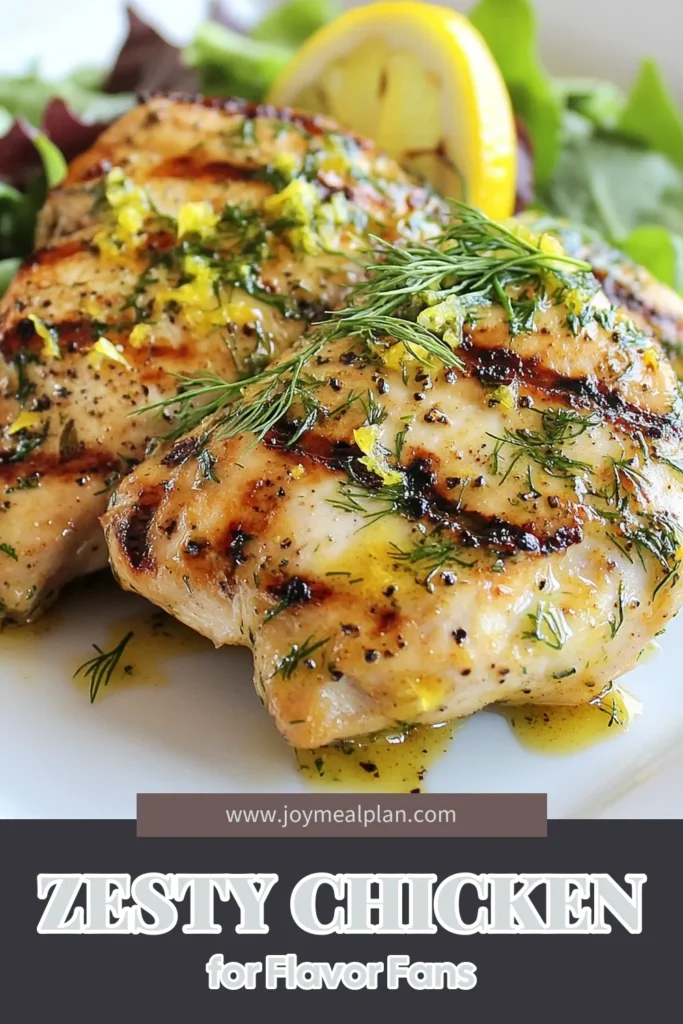
Are you ready to elevate your grill game? This Paleo Lemon Dill Chicken is a zesty and flavorful delight that you’ll crave all summer. With a few simple, fresh ingredients, you can create an amazing meal that’s both healthy and satisfying. Follow my expert tips for marinating, grilling, and serving to impress your friends and family. Let’s fire up that grill and dive into this delicious recipe!
Why I Love This Recipe
- Bright and Fresh Flavors: This recipe showcases the zesty combination of lemon and dill, creating a refreshing and vibrant taste that lifts the chicken to new heights.
- Paleo-Friendly: With no grains, dairy, or processed ingredients, this dish aligns perfectly with the Paleo diet, making it a healthy choice for anyone looking to eat clean.
- Quick and Easy Preparation: Marinating the chicken takes minimal time, and the cooking process is straightforward, making it suitable for busy weeknight dinners.
- Versatile Serving Options: This dish pairs beautifully with a variety of sides, from salads to steamed vegetables, allowing for endless meal combinations.
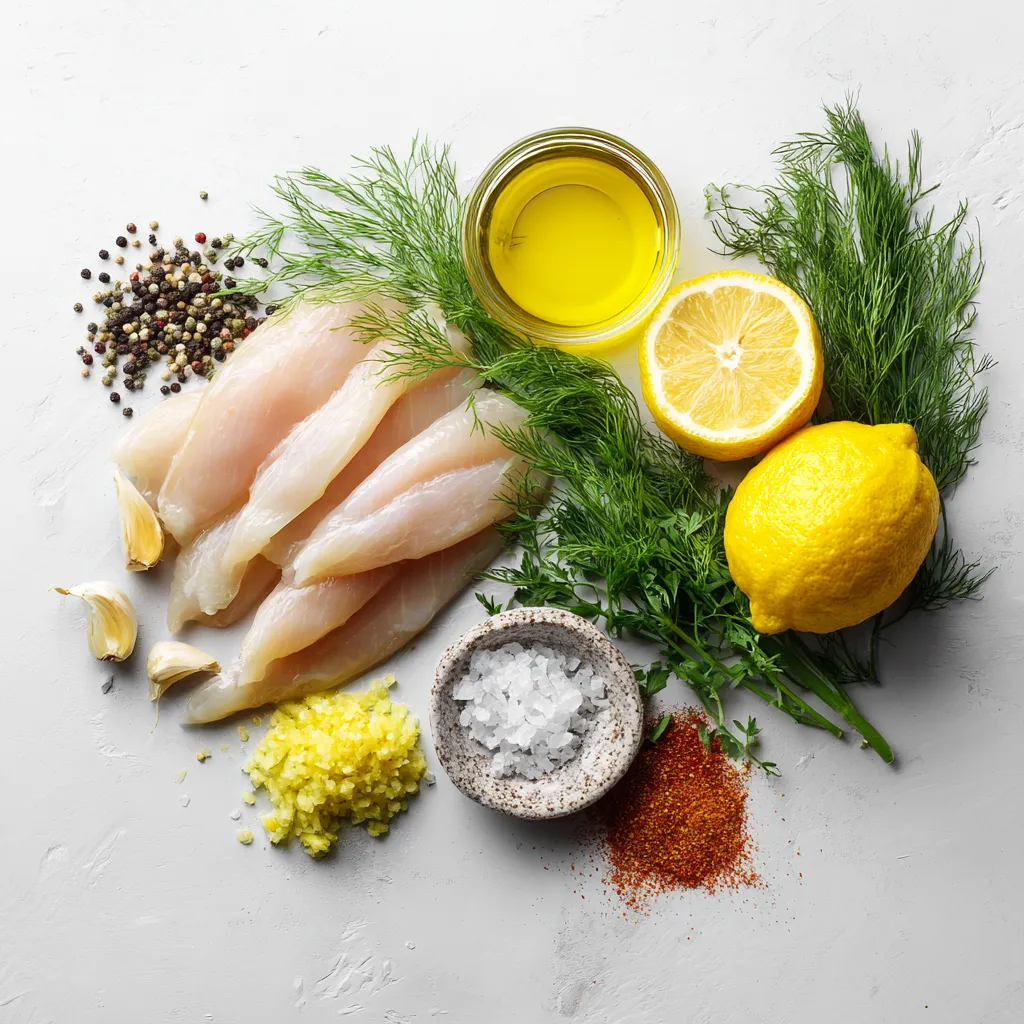
Ingredients
List of Essential Ingredients
– 4 boneless, skinless chicken breasts
– 2 tablespoons extra virgin olive oil
– Juice of 2 fresh lemons
– Zest of 1 lemon
– 3 cloves of garlic, finely minced
– 2 tablespoons fresh dill, finely chopped (or 1 tablespoon dried dill for convenience)
– 1 teaspoon sea salt
– 1/2 teaspoon freshly ground black pepper
– 1 teaspoon smoked paprika (optional, for an extra layer of flavor)
Recommended Tools
– Mixing bowl
– Whisk
– Grilling surface or non-stick skillet
– Plastic wrap or resealable plastic bag
Gathering the right ingredients is key to a great meal. For this Paleo Lemon Dill Chicken, start with fresh and high-quality items. The chicken should be boneless and skinless for easy cooking. Use extra virgin olive oil for healthy fat.
Fresh lemons add a zesty kick. The juice and zest work together to brighten up the dish. Garlic gives a fragrant base, while dill brings a unique flavor. You can use fresh or dried dill based on what you have.
Season your chicken with sea salt and black pepper. This simple seasoning enhances the taste. Smoked paprika is optional but adds a nice depth if you want it.
For tools, a mixing bowl and whisk make preparing the marinade easy. A grilling surface or non-stick skillet is best for cooking the chicken. Finally, use plastic wrap or a resealable bag to marinate the chicken. This helps the flavors soak in well.
With these ingredients and tools, you’re set for a delicious meal!
Step-by-Step Instructions
Marinating the Chicken
To start, you need to prepare the marinade. In a large bowl, whisk together:
– 2 tablespoons extra virgin olive oil
– Juice of 2 fresh lemons
– Zest of 1 lemon
– 3 cloves garlic, finely minced
– 2 tablespoons fresh dill, finely chopped
– 1 teaspoon sea salt
– 1/2 teaspoon black pepper
– 1 teaspoon smoked paprika (optional)
Mix until smooth and fragrant.
Next, submerge the chicken breasts in the marinade. Make sure each piece is coated well. Cover the bowl with plastic wrap or place the chicken in a resealable bag. Pop it in the fridge. Marinate for at least 30 minutes. For best results, aim for 2-4 hours. This lets the flavors soak in.
Cooking the Chicken
When it’s time to cook, preheat your grill or skillet over medium-high heat. If you use a grill, lightly oil the grates to keep the chicken from sticking.
Take the chicken out of the marinade. Let any extra marinade drip off. Keep the reserved marinade for basting later.
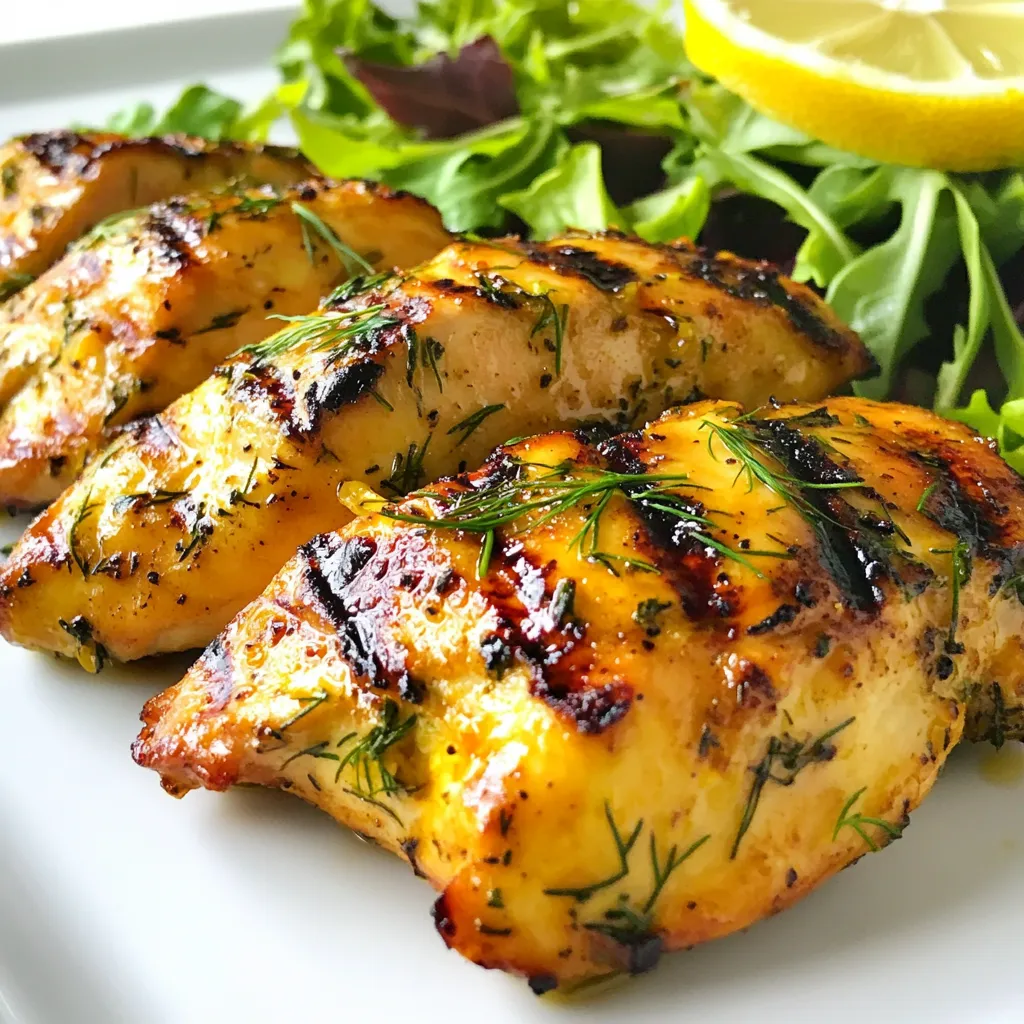
Place the chicken on the hot grill or skillet. Cook each side for about 6-7 minutes. Check for grill marks and an internal temperature of 165°F (75°C). This means your chicken is safe to eat.
Basting and Resting
In the last two minutes of cooking, brush a bit of the reserved marinade over the chicken. This enhances the flavor and keeps it juicy.
Once the chicken is cooked, remove it from the heat. Let it rest on a cutting board for about 5 minutes. Resting helps the juices go back into the meat. This step keeps your chicken moist and full of flavor.
Tips & Tricks
Perfecting the Flavors
For the best flavor, marinate the chicken for 2 to 4 hours. This time lets the marinade sink in. If you’re in a hurry, 30 minutes is still okay, but longer is better.
When it comes to dill, fresh dill gives a bright taste. It has a stronger flavor than dried dill. Use 2 tablespoons of fresh dill if you can. If you only have dried dill, use 1 tablespoon. It works too, but the taste will be different.
Cooking Method Variations
You can cook this chicken in a few ways. Grilling gives it a smoky flavor and nice grill marks. Preheat your grill and oil the grates to avoid sticking.
If you don’t have a grill, use a non-stick skillet. Preheat it on medium-high heat. Cook the chicken for about 6 to 7 minutes on each side. Both methods will make your chicken juicy and tasty.
If you want to bake the chicken, preheat your oven to 375°F (190°C). Place the marinated chicken on a baking sheet. Bake for about 25 to 30 minutes or until it reaches an internal temperature of 165°F (75°C).
Presentation Suggestions
To make your dish stand out, plate the chicken neatly. Slice it and arrange it on a large platter. Garnish with lemon wedges and fresh dill sprigs. This adds color and makes it look fresh.
Pair the chicken with colorful vegetables like steamed broccoli or a crisp salad. These sides enhance the dish’s look and taste. They also keep your meal healthy and vibrant.
Pro Tips
- Marinating Time: For the best flavor, aim to marinate the chicken for 2-4 hours. This allows the marinade to penetrate deeply, enhancing the taste.
- Grilling Technique: When grilling, ensure your grill is preheated and the grates are lightly oiled to prevent sticking and achieve beautiful grill marks.
- Resting Period: Don’t skip the resting period after cooking. Let the chicken rest for about 5 minutes to allow juices to redistribute, keeping it moist.
- Flavor Boost: Basting the chicken with reserved marinade in the final moments of cooking adds an extra layer of flavor and keeps it juicy.
Variations
Herb Substitutions
You can change the herbs in this recipe for new tastes. Fresh parsley works well with lemon and chicken. Rosemary adds a fragrant touch. For a spicy kick, try fresh basil or even cilantro. You can adjust the flavor with spices too. For example, add a pinch of chili flakes for heat. Alternatively, a dash of cumin adds earthiness. Experiment and find what you love!
Dietary Additions
This recipe is easy to adapt for different diets. To make it dairy-free, just skip any cheese or creamy sauces. You can also use coconut milk as a base for a creamy sauce. If you want to make it nut-free, avoid nut oils and stick to olive oil. Adding vegetables is a great way to boost nutrition. Try grilling zucchini, bell peppers, or asparagus alongside the chicken. These veggies pair nicely with lemon and dill. You’ll create a colorful, tasty meal everyone can enjoy!
Storage Info
Storing Leftovers
After enjoying your Paleo Lemon Dill Chicken, you may have some leftovers. Here’s how to store them:
– Refrigeration: Place the cooked chicken in an airtight container. It will stay fresh for up to 3 days in the fridge. Make sure the chicken cools down before sealing.
– Freezing: For longer storage, freeze the chicken. Wrap each piece tightly in plastic wrap, then place them in a freezer-safe bag. It can last up to 3 months. Label the bag with the date for easy reference.
Reheating Best Practices
Reheating chicken can be tricky. You want to keep it moist and tasty. Here are some tips:
– Oven Method: Preheat the oven to 350°F (175°C). Place the chicken in a baking dish. Add a splash of broth or water to keep it moist. Cover with foil to trap steam. Heat for about 20 minutes or until warmed through.
– Microwave Method: If you’re short on time, use the microwave. Place the chicken on a microwave-safe plate. Add a few drops of water and cover with a damp paper towel. Heat in short bursts, checking often. This method is quick but can dry out the chicken if not careful.
These tips will help keep your chicken delicious and juicy!
FAQs
What is the best way to marinate chicken?
The best way to marinate chicken is to use a mix of liquid and spices. A good marinade has oil, acid, and flavor. For this recipe, I use olive oil and lemon juice. They help the chicken soak up the taste.
To get the most flavor, marinate the chicken for at least 2 hours. You can even marinate it as long as 4 hours. Make sure to coat the chicken well. Use a bowl or a plastic bag to keep it all in.
Can I use different cuts of chicken?
Yes, you can use different cuts of chicken. While boneless, skinless breasts work great, thighs are also tasty. They are juicier and add more flavor. If you use thighs, adjust the cooking time. They may need a few extra minutes on the grill.
You can also try chicken wings or drumsticks. Just keep in mind that they might need longer to cook through.
What sides pair well with Paleo Lemon Dill Chicken?
Paleo Lemon Dill Chicken pairs well with many sides. Fresh salads are a great choice. Use leafy greens, cucumbers, and tomatoes for a colorful dish.
You can also serve it with steamed vegetables like broccoli or asparagus. These add a nice crunch and color to your plate.
For a heartier option, try cauliflower rice or sweet potato mash. They make a filling meal that still fits the Paleo diet.
In this post, we explored how to make flavorful Paleo Lemon Dill Chicken. We covered key ingredients and tools, along with step-by-step instructions for marinating and cooking. I shared tips for perfecting flavors and variations, and also discussed storage and reheating methods.
To sum up, this dish is easy, delicious, and versatile. With these tips, you can enjoy a tasty meal any night of the week. Try it out and find your favorite variation
Zesty Paleo Lemon Dill Chicken
Ingredients
- 4 pieces boneless, skinless chicken breasts
- 2 tablespoons extra virgin olive oil
- 2 pieces fresh lemons (juice)
- 1 piece lemon (zest)
- 3 cloves garlic, finely minced
- 2 tablespoons fresh dill, finely chopped
- 1 tablespoon dried dill (optional)
- 1 teaspoon sea salt
- 0.5 teaspoon freshly ground black pepper
- 1 teaspoon smoked paprika (optional)
Instructions
- In a large mixing bowl, whisk together the olive oil, lemon juice, lemon zest, minced garlic, chopped dill, sea salt, black pepper, and smoked paprika (if using) until the marinade is well blended.
- Submerge the chicken breasts in the marinade, ensuring each piece is thoroughly coated. Cover the bowl tightly with plastic wrap or transfer the chicken and marinade to a resealable plastic bag. Place in the refrigerator to marinate for at least 30 minutes, but aim for 2-4 hours.
- Preheat your grill or a non-stick skillet over medium-high heat. If using a grill, lightly oil the grates to prevent sticking.
- Take the chicken out of the marinade and let any excess marinade drip off. Save the remaining marinade for later use in basting.
- Place the chicken on the heated grill or skillet. Cook each side for approximately 6-7 minutes or until the internal temperature of the chicken reaches 165°F (75°C) and you see beautiful grill marks forming.
- In the final two minutes of cooking, brush a bit of the reserved marinade over the chicken to enhance its flavor profile.
- Once fully cooked, remove the chicken from the heat and allow it to rest on a cutting board for about 5 minutes.
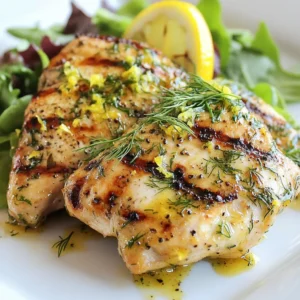
- Slice the chicken and serve it alongside a fresh, crisp salad or perfectly steamed vegetables.
![To create a delicious Lemon Herb Grilled Salmon, you need fresh and simple ingredients. Here’s what you will gather: - 4 salmon fillets (approximately 6 ounces each) - 1/4 cup extra virgin olive oil - Zest from 1 large lemon - Juice of 2 fresh lemons - 3 cloves garlic, finely minced - 2 tablespoons fresh parsley, finely chopped - 2 tablespoons fresh dill, finely chopped - 1 tablespoon fresh thyme, finely chopped - Salt and freshly ground black pepper to taste - Lemon wedges, for garnishing These ingredients work together to bring out the bright and zesty flavor of the salmon. The fresh herbs add depth, while the lemon provides a refreshing kick. When you combine these elements, you create a dish that looks and tastes amazing. If you want to explore the complete process, check out the Full Recipe. To start, grab a medium bowl. Mix together: - 1/4 cup extra virgin olive oil - Zest from 1 large lemon - Juice from 2 fresh lemons - 3 cloves garlic, finely minced - 2 tablespoons fresh parsley, chopped - 2 tablespoons fresh dill, chopped - 1 tablespoon fresh thyme, chopped - Salt and pepper to taste Whisk all these ingredients together until they blend well. This mix will be your flavorful marinade. Now, take your salmon fillets. Place them in a resealable bag or shallow dish. Pour the marinade over the salmon. Make sure each piece is well coated. Seal the bag or cover the dish. Let it chill in the fridge for 30 minutes up to 2 hours. The longer it sits, the stronger the flavor will be. Preheat your grill to medium-high heat. If using a grill pan, set it to medium heat. Lightly coat the surface with olive oil to stop the fish from sticking. After marinating, remove the salmon from the bag. Let any extra marinade drip off. Discard the leftover marinade. Place the salmon skin-side down on the hot grill. Cook for about 5-6 minutes without touching it. Then, flip the salmon gently with a spatula. Grill for another 4-5 minutes. The fish should be opaque and flake easily with a fork. Once it’s done, let the salmon rest for a few minutes. This helps improve the flavor and texture. Serve the grilled salmon with fresh lemon wedges. Add a pop of citrus to enhance your dish. Enjoy your meal! For the complete recipe, check the [Full Recipe]. To grill salmon just right, aim for medium-high heat. This usually means around 375°F to 400°F. The salmon needs about 5-6 minutes on the first side. Flip it gently and grill for another 4-5 minutes. To check for doneness, use a fork. The fish should easily flake apart and look opaque. If it’s still shiny, it needs more time. For more flavors, try adding a pinch of smoked paprika or a dash of cayenne pepper. These spices can add a nice kick. Pair the salmon with sides like roasted veggies, quinoa, or a fresh salad. These dishes complement the salmon well and balance its rich taste. When plating the salmon, add a bright touch with fresh herbs. A sprinkle of parsley or dill makes it pop. Serve with lemon wedges for an extra zing. For drinks, a crisp white wine, like Sauvignon Blanc, pairs well. It enhances the meal and makes it feel special. For a non-alcoholic option, try sparkling water with lemon. It refreshes the palate and adds a lovely touch to your dinner. For the full recipe, check out the detailed steps above. {{image_4}} You can switch up the marinade to keep things fresh. Try using lime or orange juice instead of lemon. These fruits add a different twist to your salmon. You can also add spices like cayenne pepper for some heat. A touch of heat makes the dish more exciting. Grilling is great, but you have other choices too. Baking or broiling the salmon works well and keeps it moist. If it’s raining or too cold outside, use a stovetop grill pan. Just make sure it’s hot before adding the salmon for even cooking. You can make this dish fit your diet needs. For a gluten-free version, check that your spices are gluten-free. You can also skip dairy by using olive oil instead of butter. If you want to lower calories, use less oil in the marinade. These small changes keep the meal healthy while still tasting great. Try these variations to make lemon herb grilled salmon fit your taste and lifestyle. For the full recipe, check out the earlier sections! To keep your grilled salmon fresh, store it in the fridge. Place the salmon in an airtight container. This helps keep it from drying out. It should last for up to three days in the fridge. If you want to save it longer, freezing is a good option. Wrap the salmon tightly in plastic wrap, then put it in a freezer bag. You can freeze it for up to three months. Label the bag with the date so you know when to use it. When you reheat grilled salmon, you want to keep it moist. The best way is to use the oven. Preheat the oven to 275°F (135°C). Place the salmon on a baking sheet, cover it with foil, and heat for about 15 minutes. This method helps avoid drying out the fish. You can also use a microwave, but be careful. Heat it in short bursts of 30 seconds on low power. Check often to keep the flavor and texture. A splash of lemon juice can help refresh the taste. Grilling time depends on the thickness of the salmon. For fillets about 1 inch thick, grill for 5-6 minutes on one side. Flip and grill for another 4-5 minutes. Thicker fillets may need more time, so check for doneness. When the salmon is opaque and flakes easily, it's ready to eat. Yes, you can use frozen salmon. To cook it, thaw the salmon first. Place it in the fridge overnight or submerge it in cold water for about an hour. Once thawed, pat it dry and marinate as in the Full Recipe. This will help keep it moist while grilling. Lemon herb grilled salmon pairs well with fresh salads and veggies. Try serving it with: - Mixed green salad with a light vinaigrette - Steamed asparagus or green beans - Roasted potatoes seasoned with herbs - Quinoa or rice pilaf for a hearty side These dishes complement the fresh flavors of the salmon and make a complete meal. Grilling lemon herb salmon is simple and rewarding. You start with fresh salmon and a tasty marinade of olive oil, lemon, garlic, and herbs. Marinate for a short time to boost flavor. Grill it right and serve with sides for a complete meal. Experiment with different flavors and cooking methods to find your favorite. Always store leftovers properly to enjoy them later. With these tips, you’ll impress everyone at the table. Now, get ready to grill and enjoy this delicious dish!](https://joymealplan.com/wp-content/uploads/2025/06/94675a3f-7fd4-4f6d-bbd0-da6b916d26a4-768x768.webp)