Cheesy Garlic Butter Shrimp Delightful Dinner Recipe

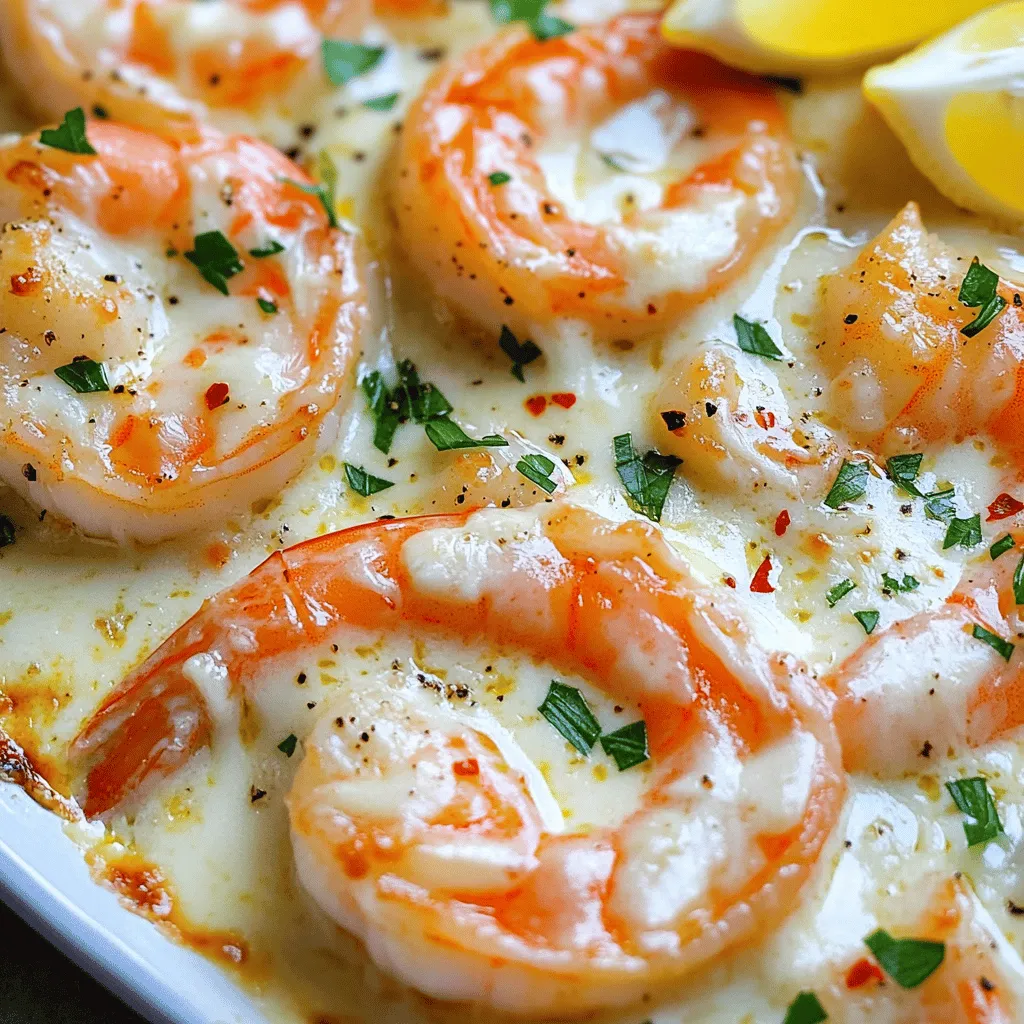
Looking for a quick and tasty dinner that will impress everyone? You’ve found it! My Cheesy Garlic Butter Shrimp recipe combines creamy goodness with a garlic kick that is simply irresistible. With just a few ingredients, you can create a delightful dish packed with flavor. Whether it’s a weeknight meal or a special occasion, this recipe is sure to please. Let’s dive into the details and get cooking!
Ingredients
Main Ingredients for Cheesy Garlic Butter Shrimp
– 1 lb large shrimp, peeled and deveined
– 4 tablespoons unsalted butter
– 4 cloves garlic, finely minced
Additional Ingredients
– 1 teaspoon red pepper flakes
– 1 cup heavy cream
– 1 cup shredded mozzarella cheese
– 1/2 cup grated Parmesan cheese
– Salt and freshly ground black pepper
– 2 tablespoons fresh parsley, finely chopped
– Lemon wedges for serving
Step-by-Step Instructions
Preparation Steps
– Step 1: Melt the butter in a large skillet.
– Step 2: Sauté garlic and red pepper flakes.
Cooking Instructions
– Step 3: Cook the shrimp until pink and opaque.
– Step 4: Pour in the heavy cream and stir.
Finishing Touches
– Step 5: Add cheese and mix until melted.
– Step 6: Garnish and serve with lemon wedges.
This dish comes together quickly, making it perfect for a weeknight meal. The shrimp cook fast, so stay close to the stove. As the shrimp cook, they turn a lovely pink and curl slightly, which means they’re ready! This is where the magic happens. Adding the cream creates a rich sauce that blends beautifully with the melted cheese.
For a bit of heat, adjust the red pepper flakes to your taste. The fresh parsley adds a nice pop of color and flavor. Don’t skip the lemon wedges! A squeeze of lemon brightens the dish and balances the richness. This recipe is a great way to enjoy a gourmet meal at home.Enjoy cooking!
Tips & Tricks
Enhancing Flavor
Adjusting spice levels with red pepper flakes is easy. Start with a small amount. Taste as you go. If you want more heat, just add more. Fresh garlic is a must. It gives the dish a strong, bold taste. Use whole cloves and finely mince them for best results.
Cooking Techniques
Shrimp cooks fast. Aim for 2-3 minutes. You want them pink and slightly curled. Overcooking makes them rubbery. When adding cheese, sprinkle it in slowly. This helps it melt evenly. Stir well to keep the sauce smooth and creamy.
Variations
Ingredient Substitutions
If you prefer, try scallops or chicken instead of shrimp. Both taste great with this sauce. For a lighter dish, use low-fat cream and cheese. It still tastes good but with fewer calories.
Flavor Variations
Fresh herbs can change the dish. Add thyme or basil for extra flavor. Each herb brings a unique taste. You can also swap different cheeses. Try gouda or cheddar for a fun twist.
Storage Info
How to Store Leftovers
Store your Cheesy Garlic Butter Shrimp in an airtight container. It is best to refrigerate it right after cooling. Ensure it cools down to room temperature before sealing. This keeps the shrimp fresh for you. Use a glass or plastic container with a tight lid.
Reheating Tips
To reheat your shrimp, use a skillet over low heat. This method helps keep the shrimp tender. You can also use a microwave. If using a microwave, cover the dish to trap moisture. Heat in short bursts to avoid overcooking. Stir the shrimp occasionally to ensure even warmth.
FAQs
What can I serve with Cheesy Garlic Butter Shrimp?
You can pair your shrimp with many tasty sides. Here are a few ideas:
– Steamed rice or cauliflower rice
– Crusty garlic bread
– Fresh salad with lemon vinaigrette
– Pasta tossed with olive oil and herbs
Can I make this recipe ahead of time?
Yes, you can prep this dish in advance. Cook the shrimp and sauce ahead of time. Store it in the fridge for up to two days. When ready to serve, reheat gently. Add fresh parsley before serving for extra flavor.
How long does Cheesy Garlic Butter Shrimp last in the fridge?
This dish lasts about 2 to 3 days in the fridge. Make sure to store it properly in an airtight container. If you see any signs of spoilage, it’s best to discard it. Always prioritize freshness for the best taste.
Is this recipe suitable for special diets?
This recipe can be gluten-free if you check your ingredients. Use gluten-free options for the heavy cream and cheese. It is also low in carbs, making it great for low-carb diets. Always check labels to ensure they fit your dietary needs.


. To start, you need to whisk the eggs. Take a medium bowl and crack in 4 large eggs. Add 1/2 cup of milk. Whisk them together until they are smooth. Then, season this mixture with a little salt and freshly cracked pepper. This adds flavor to your eggs. Next, we need to cook the vegetables. Heat 2 tablespoons of olive oil in a large non-stick skillet over medium heat. Once the oil is hot, add 1 small yellow onion and 1 small red bell pepper, both finely diced. Sauté them for about 4-5 minutes. You want them tender and fragrant. Now comes the fun part. Add in 1/2 cup of black beans that you’ve rinsed and drained. Sprinkle in 1 teaspoon of ground cumin for a warm flavor. Stir everything together and cook for another 2-3 minutes. This warms the beans and brings the flavors together. Then, it’s time to cook the eggs. Pour the whisked egg mixture into the skillet. Gently stir them as they begin to set. Cook for about 3-4 minutes or until the eggs are fully cooked, fluffy, and light. Once done, remove the skillet from heat. To assemble your burritos, lay a whole wheat tortilla flat on your workspace. Spoon a generous portion of the egg and bean mixture into the center. Next, top it with a few slices of avocado and a sprinkle of shredded cheese. You can choose either cheddar or pepper jack. Now, let’s fold and roll the burrito. Carefully fold the sides of the tortilla over the filling. Then, roll it up from the bottom, tucking it tightly. Repeat this with the remaining tortillas and filling. For a crispy finish, return the burritos to the skillet, seam-side down. Toast them for 1-2 minutes on each side over medium heat. This will make them golden brown and slightly crisp. Serve the burritos warm, garnished with fresh cilantro leaves and a side of salsa or hot sauce. Enjoy! Achieving Fluffy Eggs To get fluffy eggs, whisk them well with milk. Air makes the eggs rise. Cook them gently over medium heat. Stir slowly as they cook. This keeps them light and fluffy. Avoiding Overcooking Watch your eggs closely while they cook. Eggs can go from soft to dry in seconds. Remove them from heat when they are just set. They will continue to cook after being taken off the stove. Adding More Vegetables or Proteins Feel free to add more veggies like spinach or mushrooms. You can also add proteins like cooked sausage or diced ham. This makes the burrito more filling and fun. Spice Variations If you like heat, add jalapeños or a dash of hot sauce. For a different flavor, try smoked paprika or chili powder. These spices can make your breakfast so exciting. Ideal Accompaniments Serve your burritos with salsa or fresh avocado. A side of fruit adds a nice touch, too. You could even add a dollop of sour cream for creaminess. Presentation Ideas Place the burritos on a colorful plate. Add a sprinkle of cilantro on top for color. Cut them in half to show off the filling. This makes your meal look tasty and fresh. For the full recipe, check out the detailed instructions. {{image_4}} For a tasty twist, you can make vegetarian sunrise burritos. Just swap the meat for tofu or extra veggies. Tofu adds protein and absorbs flavors well. You can use bell peppers, zucchini, or spinach. This way, you still enjoy a filling meal without meat. If you want more protein, try adding sausage or bacon. Cook the sausage until it's browned and crumbled. For bacon, fry until crispy, then crumble over the eggs. This gives the burritos a hearty flavor. You can even mix both for a double protein boost. For gluten-free options, consider using corn tortillas or other gluten-free wraps. They hold the filling well and add a different taste. You can also check for store-bought gluten-free tortillas. This way, everyone can enjoy your sunrise breakfast burritos. Feel free to explore these variations to make your breakfast exciting! For the full recipe, be sure to check out the provided details. To keep your burritos fresh, follow these steps: - Refrigeration Tips: Place leftover burritos in an airtight container. Store them in the fridge. They stay good for up to three days. - Freezing Instructions: If you want to keep them longer, wrap each burrito in foil. Then, put them in a freezer bag. They can last for up to three months in the freezer. To enjoy your burritos again, use these methods: - Best Methods for Preserving Texture: The oven works best. Preheat it to 350°F. Place the burrito on a baking sheet. Heat for about 15-20 minutes. This keeps the tortilla crispy. You can also use a microwave. Wrap the burrito in a damp paper towel. Heat it for 1-2 minutes. This method is quick but may make the tortilla soft. To make Sunrise Breakfast Burritos vegetarian, just leave out the eggs. Instead, use tofu or extra veggies. You can add mushrooms, spinach, or zucchini for a tasty option. Season them well with spices like cumin and paprika to keep the flavor strong. Yes, you can make these burritos ahead of time. Prepare the filling and store it in the fridge for up to three days. You can also wrap the burritos tightly in foil and freeze them. Just reheat them in the oven or microwave when you’re ready to eat! Many sauces go well with Sunrise Breakfast Burritos. Salsa is a classic choice. It adds freshness and a bit of spice. You can also try hot sauce for heat or avocado crema for creaminess. A drizzle of ranch dressing adds a tasty twist too. To change the spice level, adjust the amount of cumin and add chili powder. For more heat, include diced jalapeños or a dash of cayenne pepper. If you prefer mild flavors, skip the spicy ingredients and focus on herbs like cilantro for freshness. Yes, there are a few good ways to warm tortillas. You can heat them in a dry skillet for about 30 seconds on each side. Alternatively, wrap them in a damp paper towel and microwave for 15-20 seconds. This keeps them soft and pliable for wrapping. In this article, we explored how to create delicious Sunrise Breakfast Burritos. You learned about essential ingredients like eggs, black beans, and fresh veggies. We broke down the steps for mixing, cooking, and assembling, plus tips for perfect eggs and custom flavors. You can also modify these burritos to fit dietary needs or preferences. Remember, these burritos are easy to store and reheat well. Enjoy your cooking journey and share your tasty results!](https://joymealplan.com/wp-content/uploads/2025/07/3ee2e162-623e-4153-8713-e8e5adb7d2c4-768x768.webp)


![- 2 cups cooked chicken, shredded - 1 cup canned black beans, rinsed and drained - 1 cup fresh or frozen corn kernels The main ingredients create the heart of the chicken enchiladas. First, shredded chicken offers a tender and juicy base. I love using rotisserie chicken for ease. Black beans add protein and fiber, making the meal hearty. Corn brings sweetness and a pop of color. Each ingredient plays a role in making this dish satisfying. - 1 small red onion, finely chopped - 2 cloves garlic, minced - 1 teaspoon ground cumin - 1 teaspoon chili powder Aromatics and seasonings elevate the flavor. The red onion adds a sweet, savory taste. Garlic brings depth and aroma that fills your kitchen. Cumin provides a warm, earthy note. Chili powder adds a gentle kick. These elements create a rich base for the enchiladas. - 8 small corn tortillas - 2 cups shredded cheese (cheddar or Mexican blend) - ¼ cup fresh cilantro, chopped (for garnish) Tortillas hold everything together. I prefer corn tortillas for their authentic flavor. They warm up nicely, making them easy to roll. Cheese melts beautifully, creating a creamy topping. I recommend using a blend for extra flavor. Fresh cilantro adds brightness and a fresh touch. Together, these elements create a delightful finish to your enchiladas. For the full recipe, check out the Spicy Chicken Enchiladas. - Preheat your oven to 350°F (175°C). - Sauté red onion and garlic until fragrant. Start by heating a drizzle of oil in a large skillet over medium heat. Add the finely chopped red onion. Sauté for about 3-4 minutes until the onion turns soft and clear. Then, add the minced garlic and cook for another minute. This step makes your kitchen smell amazing and sets the stage for great flavor. - Combine chicken, black beans, corn, onion-garlic mixture, salsa, cumin, and chili powder. In a big mixing bowl, add the shredded chicken, rinsed black beans, and corn. Pour in the sautéed onion and garlic mixture, along with your choice of salsa. To spice it up, add cumin and chili powder. Mix everything well. This filling is packed with protein and flavor, making your enchiladas both tasty and hearty. - Warm tortillas and fill with chicken mixture. - Roll and arrange in baking dish. Now, warm the corn tortillas in a dry skillet or microwave. This makes them soft and easy to roll. Take about ¼ cup of the chicken mixture and place it in the center of each tortilla. Sprinkle a little cheese on top, then roll them up tightly. Place the rolled tortillas seam-side down in a greased 9x13 inch baking dish. This step is where the magic begins! - Cover with salsa and cheese, bake with foil, then uncovered. Pour any remaining salsa over the top of the enchiladas. Sprinkle the rest of the cheese evenly on top. Cover your baking dish with aluminum foil to keep the moisture in. Bake in the preheated oven for 20 minutes. After that, remove the foil and bake for another 10 minutes. You want the cheese to melt and bubble. Once done, let the enchiladas cool for a few minutes. Garnish with fresh cilantro before serving. This adds a fresh flavor and a lovely touch. Enjoy your homemade chicken enchiladas! For more detailed steps, check out the Full Recipe. - Ensure tortillas are pliable to prevent cracking. Warm them in a skillet or microwave. - Use a mix of cheeses for more flavor. Try combining cheddar and pepper jack. - Serve with sour cream and additional cilantro for extra zest. - Integrate sides like rice or refried beans to complete the meal. - Overfilling tortillas can make them hard to roll. Stick to ¼ cup of filling. - Not letting them cool before serving can lead to a messy plate. Give them a few minutes. {{image_4}} You can make your chicken enchiladas even better for you. - Swap out cheese for a low-fat version. This change cuts calories. - Use whole wheat tortillas for extra fiber. This option boosts nutrition. Want to spice things up? Add some fun flavors! - Add jalapeños for extra heat. This will make your dish lively! - Experiment with different salsas. Try mild, medium, or spicy. Each adds a unique taste. Need to adjust for dietary needs? No problem! - Make it vegetarian by using black beans only. This keeps it hearty and filling. - Use corn tortillas for gluten-free options. They work perfectly in this dish. Feel free to explore these variations and make the recipe your own! To keep your chicken enchiladas fresh, store them in an airtight container. This helps prevent moisture loss and keeps flavors intact. Place them in the fridge where they can stay good for about 3-4 days. Label the container with the date, so you remember when you made them. If you want to save some for later, freezing is a great option. Wrap each enchilada tightly in foil before placing them in a freezer bag. This protects them from freezer burn. They can last for up to 3 months in the freezer. When you're ready to eat, simply thaw them overnight in the fridge. For the best taste and texture, reheat your enchiladas in the oven. Preheat your oven to 350°F (175°C). Place the enchiladas in a baking dish, cover with foil, and heat for about 20-25 minutes. Remove the foil for the last 5 minutes to crisp up the cheese. Enjoy them warm! Chicken enchiladas last about 3-4 days when stored properly. Keep them in an airtight container to maintain freshness. Always check for any signs of spoilage before eating leftovers. Yes, you can assemble chicken enchiladas ahead of time. Just prepare them and place them in the fridge before baking. This is a great way to save time, especially on busy days. You can add many tasty toppings to your enchiladas. Some options include: - Avocado - Guacamole - Green onions - Olives Feel free to get creative with your toppings. They can add color and flavor. You can easily customize this recipe. Adjust the spices to fit your taste. Add your favorite vegetables to the filling, like bell peppers or spinach. This makes the dish more personal and fun. Yes, you can use a slow cooker for this dish. Cook the filling in the slow cooker first. Then, assemble the enchiladas and bake them as usual. This method adds rich flavors and makes cooking easier. For the full recipe, check [Full Recipe]. Chicken enchiladas are simple and fun to make. You need cooked chicken, black beans, corn, and cheese. Follow the steps to prepare, mix, and bake them to perfection. Use tips to avoid common mistakes and enjoy variations for your taste. Remember, leftovers are easy to store and reheat. You can customize this dish with your favorite toppings too. Enjoy this tasty meal with friends and family!](https://joymealplan.com/wp-content/uploads/2025/07/08f715d1-a8ab-4086-9fca-7ff252efa8d5-768x768.webp)