Cherry White Chocolate Blondies Irresistible and Tasty

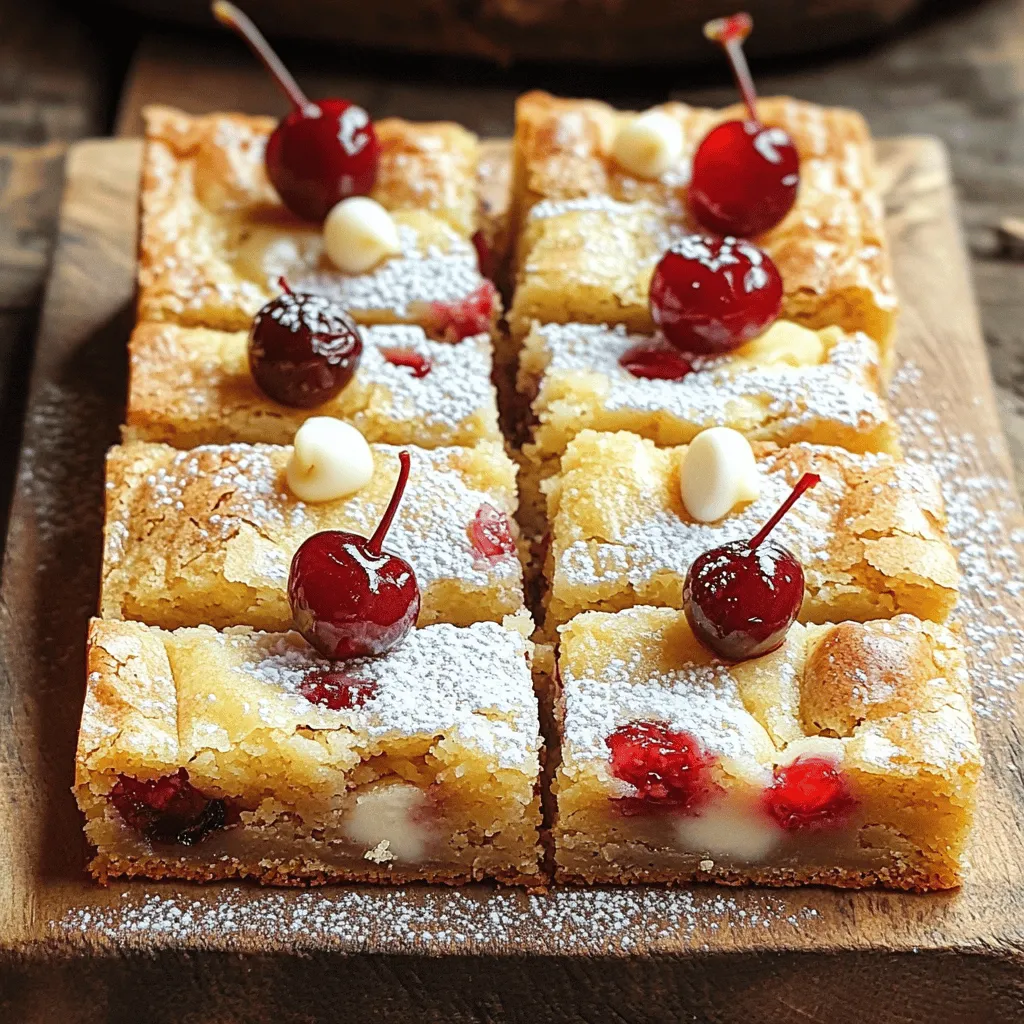
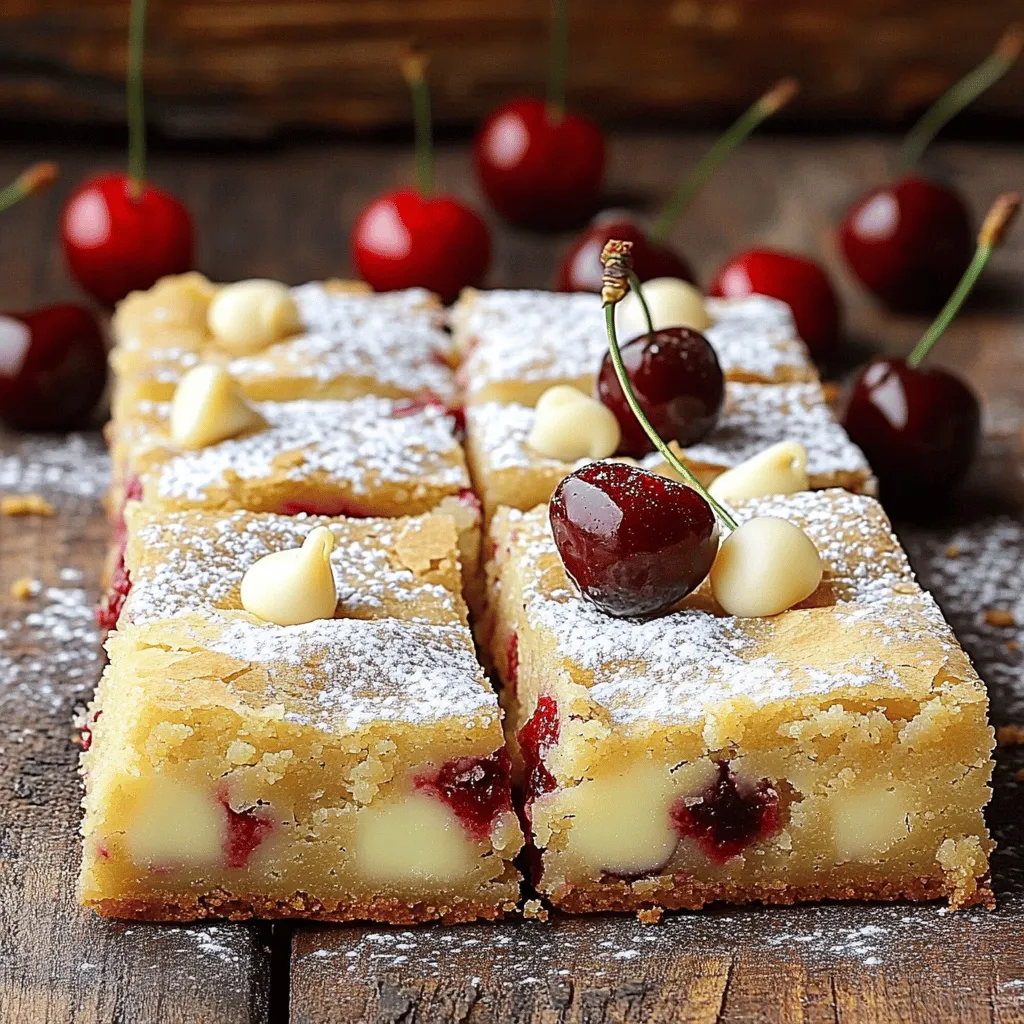
Craving a sweet treat that’s both chewy and fruity? You’ve got to try my Cherry White Chocolate Blondies! These delicious blondies are packed with rich white chocolate and juicy cherries, making them hard to resist. In this post, I’ll share everything you need to whip up these tasty treats, including tips, variations, and storage ideas to keep them fresh. Let’s dive into the sweet world of baking!
Ingredients
List of Ingredients
– 1 cup unsalted butter, melted
– 1 cup tightly packed brown sugar
– 2 large eggs, at room temperature
– 1 teaspoon pure vanilla extract
– 2 cups all-purpose flour
– 1/2 teaspoon baking powder
– 1/4 teaspoon fine sea salt
– 1 cup white chocolate chips
– 1 cup fresh cherries, pitted and finely chopped
When you gather your ingredients, focus on freshness. Use the best cherries you can find. Fresh cherries give the blondies a juicy burst of flavor.
Ingredient Substitutions
– You can swap brown sugar for coconut sugar for a different taste.
– If you need an egg substitute, use applesauce or flaxseed meal mixed with water.
– For a gluten-free option, try almond flour or a gluten-free flour blend.
These swaps can change the taste and texture, so feel free to experiment. Each choice can make your blondies unique, so have fun!
Step-by-Step Instructions
Preparation Steps
– Preheat your oven to 350°F (175°C).
– Prepare a 9×9-inch baking pan by greasing it or lining it with parchment paper.
– In a large bowl, pour in 1 cup of melted butter.
– Add 1 cup of tightly packed brown sugar.
– Whisk together until smooth and well mixed.
Combining Wet Ingredients
– Add 2 large eggs, one at a time, to the butter-sugar mix.
– Blend well after each egg.
– Stir in 1 teaspoon of pure vanilla extract for flavor.
Mixing Dry Ingredients and Baking
– In a separate bowl, whisk together 2 cups of all-purpose flour, 1/2 teaspoon of baking powder, and 1/4 teaspoon of fine sea salt.
– Gradually fold this dry mix into the wet ingredients.
– Be gentle to avoid overmixing.
– Carefully fold in 1 cup of white chocolate chips and 1 cup of chopped fresh cherries.
– Pour the batter into your prepared pan.
– Bake for 25 to 30 minutes.
– Check for doneness by inserting a toothpick; it should come out with a few moist crumbs.
– Allow the blondies to cool in the pan for 15 minutes.
– Move them to a wire rack to cool completely before cutting into squares.
Tips & Tricks
Tips for Perfect Blondies
To make the best Cherry White Chocolate Blondies, avoid overmixing the batter. Overmixing can lead to tough blondies. Mix just until the dry and wet ingredients blend together. This keeps the texture soft and chewy. Also, ensure your oven has an even baking temperature. Place the pan in the center of the oven for consistent heat.
Storage Tips
Let your blondies cool completely before storing them. This step helps them stay fresh longer. Use airtight containers for the best storage. They keep the blondies moist and tasty. You can also wrap them in plastic wrap for extra protection.
Serving Suggestions
Cherry White Chocolate Blondies taste great with a scoop of ice cream or a dollop of whipped cream. This adds creaminess and extra flavor. These blondies are perfect for parties or casual gatherings. Serve them at birthdays, picnics, or family dinners. The bright colors and sweet taste make them a hit!

Variations
Flavor Enhancements
You can make your cherry white chocolate blondies even better! Adding nuts like pecans or walnuts gives them a nice crunch. The nutty flavor pairs well with the sweet cherries. If you want a twist, try almond extract instead of vanilla. It adds a delightful, nutty taste that makes each bite special.
Seasonal Variations
Changing the fruit is a fun way to mix it up. You can swap out cherries for raspberries or blueberries. These fruits bring their own unique flavor and color. For the holidays, think about adding warm spices like cinnamon or nutmeg. This gives your blondies a festive touch that everyone will love.
Dietary Alternatives
You can also make vegan cherry white chocolate blondies. Replace the eggs with applesauce or flaxseed. Use plant-based butter to keep them dairy-free. If you’re watching carbs, try keto-friendly options. Use almond flour instead of all-purpose flour and substitute sweeteners like erythritol. These swaps help you enjoy blondies while sticking to your diet.
Storage Info
Short-Term Storage
You can store your cherry white chocolate blondies at room temperature. Keep them in an airtight container. This way, they stay soft and fresh for two to three days. If you want them to last a bit longer, put them in the fridge. They can stay good for about a week when chilled. Just make sure to let them come back to room temp before eating.
Long-Term Storage
If you want to save your blondies for later, freezing is a great option. Cut them into squares first. Then, wrap each piece in plastic wrap. Place the wrapped blondies in a freezer-safe bag or container. They will stay fresh for up to three months in the freezer.
When you’re ready to enjoy them, take them out and let them defrost in the fridge overnight. If you’re in a hurry, you can also let them sit at room temp for a couple of hours. This helps them regain their chewy texture.
Shelf Life
When stored properly, cherry white chocolate blondies can last three days at room temp or up to a week in the fridge. In the freezer, they can remain tasty for about three months. Always check for any signs of spoilage. If they look dry or hard, it’s best to toss them. Enjoy the deliciousness of your blondies while they are fresh!
FAQs
Q: Can I use frozen cherries for this recipe?
Yes, you can use frozen cherries. Make sure to thaw and drain them first. This avoids adding extra moisture to your batter. Chopped frozen cherries work well too. They still bring that nice tart flavor to your blondies.
Q: How can I tell when the blondies are done baking?
Check the edges; they should be golden. Insert a toothpick into the center. If it comes out with a few moist crumbs, your blondies are ready. Bake too long, and they might dry out. Keep an eye on them towards the end of the baking time.
Q: What is the difference between blondies and brownies?
Blondies are sweeter and lighter than brownies. They use brown sugar and no cocoa powder. This gives blondies a rich, buttery flavor. Brownies are denser and chocolatey, thanks to cocoa. Both are delicious in their own way!
Q: Can I make these blondies ahead of time?
Absolutely! You can bake them a day in advance. Just store them in an airtight container. This helps the flavors blend even better. You can also freeze them for a longer time. Thaw them before serving for the best taste.
Q: How do I achieve a chewy texture for my blondies?
To get that chewy texture, avoid overmixing the batter. Mix just until you see no dry flour. Use good quality butter and brown sugar for moisture. Baking them at the right time also helps. Chewy blondies are all about balance!Enjoy your baking!
This blog post explored how to make delicious cherry white chocolate blondies. You learned about key ingredients, easy steps, and tips for success. I shared ways to swap ingredients based on your needs and options for storing and enjoying your blondies. Remember, blondies are flexible and fun to customize with flavors you love. Keep experimenting with variations, and enjoy this treat any time! Happy baking!


![For a tasty batch of pumpkin spice granola, you need these simple ingredients: - 3 cups rolled oats - 1 cup pumpkin seeds - 1 cup almond slivers - 1/2 cup pure maple syrup - 1/4 cup coconut oil, melted - 1 cup dried cranberries - 1 tablespoon pumpkin pie spice - 1/2 teaspoon pure vanilla extract - 1/4 teaspoon sea salt - Rolled oats: They provide fiber. This helps keep you full longer. - Pumpkin seeds: These are rich in zinc and magnesium. They support heart health. - Almond slivers: They add protein and healthy fats. They also boost your energy. - Pure maple syrup: This natural sweetener has antioxidants. It gives a touch of sweetness. - Coconut oil: It offers healthy fats. This adds flavor and helps with cooking. - Dried cranberries: They are a good source of vitamins. They add a sweet-tart flavor. - Pumpkin pie spice: This mix includes cinnamon and nutmeg. It brings warmth and flavor. - Pure vanilla extract: It enhances the taste. It adds a lovely aroma. - Sea salt: Just a pinch enhances all the flavors. It balances the sweetness. If you want to change things up, try these swaps: - Use honey instead of maple syrup for a different sweetness. - Swap sunflower seeds for pumpkin seeds if you have allergies. - Replace almond slivers with walnut pieces for a different nutty flavor. - Use agave syrup instead of maple syrup for a vegan option. - Try raisins or dried cherries instead of cranberries for a new taste. These choices allow you to customize your granola to fit your taste and dietary needs. Check out the Full Recipe for more details! To make pumpkin spice granola, start by gathering all your ingredients. You need oats, pumpkin seeds, almond slivers, and more. Preheat your oven to 325°F (165°C). This heat helps the granola crisp up nicely. Line a large baking sheet with parchment paper. This makes cleanup easy. In a big bowl, mix the rolled oats, pumpkin seeds, almond slivers, and sea salt. Stir them well so they blend. In another small bowl, whisk together melted coconut oil, pure maple syrup, pumpkin pie spice, and vanilla extract. This mixture adds flavor to your granola. Pour the wet mix over the dry ingredients. Stir well to coat everything. Transfer this mixture to the baking sheet. Spread it out evenly. Bake for 25 to 30 minutes. Stir every 10 minutes to avoid burning. The granola is done when it is golden brown. After baking, let it cool completely on the sheet. This step is key for making it crunchy. Once cool, add in the dried cranberries and mix them in. Store your granola in an airtight container for up to two weeks. To get the best texture, make sure not to skip the stirring. Stirring helps the granola bake evenly. If you want clusters, don’t stir too much. Let it sit in the oven without stirring for the last 10 minutes. Use high-quality maple syrup for better flavor. You can also switch the coconut oil for another oil if you prefer. Just keep the same amount. Adding nuts or seeds can give a nice crunch. Try using sunflower seeds or walnuts too. When making granola, pay attention to the color. A golden brown color means it is ready. If it looks too light, it might need more time. Consistency is also important. You want every piece to be evenly coated. Feel free to take a peek through the oven door, but avoid opening it too much. This helps keep the heat inside. For a fun touch, sprinkle some extra pumpkin pie spice on top before baking. It gives a nice aroma and flavor. Granola can be tricky. Here are some common mistakes to avoid: - Not stirring enough: Stir your mix every 10 minutes while baking. This helps prevent burning. - Using too much wet ingredients: Too much oil or syrup makes granola chewy instead of crunchy. - Not cooling properly: Allow the granola to cool on the baking sheet. This creates those tasty clusters. Want more flavor in your granola? Try these ideas: - Add cinnamon: Sprinkle in extra cinnamon for warmth. - Try nutmeg: A dash of nutmeg adds a cozy kick. - Use ginger: Ground ginger gives a nice zing to your mix. - Experiment with cardamom: This spice brings a unique taste that pairs well with pumpkin. Clusters make granola fun. Here’s how to make them: - Press down the mixture: After spreading the granola on the sheet, press it down firmly. - Bake without stirring: Bake for the first 20 minutes without stirring for bigger clusters. - Cool completely: Let it cool before breaking it apart. This helps form solid chunks. For a full recipe, check out the [Full Recipe]. {{image_4}} You can change your pumpkin spice granola by adding fun mix-ins. Try adding nuts like walnuts or pecans for crunch. You can also mix in seeds like sunflower or chia for extra nutrition. Dried fruits, such as raisins or apricots, add sweetness and chewiness. Want some chocolate? Toss in dark chocolate chips or cocoa nibs. You can create a granola that fits your taste. As fall turns to winter, you can spice up your granola even more. Add cinnamon or nutmeg for a cozy taste. Try incorporating peppermint extract for a fresh twist during the holidays. You can even mix in crushed ginger snaps for a festive crunch. Each season brings new flavors to explore, so feel free to experiment. If you need a gluten-free version, simply swap rolled oats for certified gluten-free oats. Most nuts and seeds are gluten-free, so you’re all set. For a vegan option, ensure your maple syrup is pure. You can also use agave syrup if you prefer. By making these simple swaps, anyone can enjoy your delicious granola. For the full recipe, check out the details above. To keep your pumpkin spice granola fresh, use an airtight container. Glass jars or plastic bins work well. Store it in a cool, dry place. Avoid direct sunlight, as it can make the granola stale. To extend the life of your granola, consider these tips: - Keep it sealed. Always close the lid tightly after each use. - Use small portions. Store in smaller containers for easy access. - Refrigerate if needed. If your kitchen is warm, the fridge can help. Check your granola for these signs to know if it has spoiled: - Odor. If it smells off or rancid, it's best to toss it. - Texture. It should be crunchy, not soggy or chewy. - Taste. If it tastes stale or strange, do not eat it. For the best flavor and crunch, enjoy your pumpkin spice granola within two weeks. You can find the full recipe above to get started on this tasty treat! Homemade pumpkin spice granola lasts for about two weeks. Store it in an airtight container. Keep it at room temperature to maintain its crunch. If you notice it becoming soft, it may not be fresh. Enjoy it while it's at its best! Yes, you can freeze pumpkin spice granola. Place it in a freezer-safe bag or container. It can last for up to three months in the freezer. Just remember to let it thaw before eating. This way, you can enjoy it even longer! You can find pumpkin spice granola at most grocery stores. Look in the snack aisle or the health food section. Many brands offer it, so you have options. You can also check online retailers for more choices. Making pumpkin spice granola at home is easy and rewarding. We covered the ingredients, their benefits, and tips for perfect preparation. I shared common mistakes to avoid and ways to enhance flavor. You also learned about fun variations and storage tips to keep your granola fresh. With these insights, you can create a delicious snack that fits your taste and needs. Enjoy the process and create your own unique recipes!](https://joymealplan.com/wp-content/uploads/2025/07/a68e2ffd-e611-4647-9bbb-589f309bc2c0-768x768.webp)


![- 1 cup dark chocolate chips - 1 cup white chocolate chips - 1 cup freeze-dried strawberries, crushed - 1/2 cup roasted almonds, roughly chopped (optional) - Sea salt, for a finishing sprinkle To make chocolate covered strawberry bark, you need simple ingredients. Dark chocolate chips form the base, giving a rich taste. White chocolate chips add sweetness and a lovely contrast. Freeze-dried strawberries provide a fruity crunch. If you like, you can add roasted almonds for a nutty flavor. A sprinkle of sea salt at the end really enhances everything. - For chocolate alternatives, you can use milk chocolate or vegan chocolate. - Other nuts and toppings can include walnuts, pecans, or coconut flakes. If you want to switch things up, feel free to use different chocolates. Milk chocolate offers a sweeter note, while vegan chocolate works for plant-based diets. You can also play with toppings. Try different nuts or even dried fruits like apricots or raisins. These changes keep the bark fun and exciting. 1. Lining the baking sheet Start by lining a baking sheet with parchment paper. This paper helps the bark come off easily later. Without it, the chocolate might stick. 2. Melting the dark chocolate Next, take a microwave-safe bowl and add one cup of dark chocolate chips. Microwave the chips in 30-second bursts. Stir well after each round. Keep going until the chocolate is fully melted and smooth. Be careful; you don’t want to overheat the chocolate. 3. Spreading the dark chocolate Once your dark chocolate is melted, pour it onto the lined baking sheet. Use a spatula to spread it into an even layer. Make it as thick or thin as you like. A consistent layer looks great. 4. Melting and drizzling white chocolate In another bowl, melt one cup of white chocolate chips the same way. Use the microwave in 30-second increments until it’s silky smooth. Drizzle the melted white chocolate over the dark chocolate. To create a pretty marbled effect, take a toothpick or spatula and swirl the two chocolates together. 5. Adding toppings and sea salt Now, sprinkle the crushed freeze-dried strawberries on top. If you want, add chopped roasted almonds for crunch. Finally, lightly sprinkle sea salt over everything. This adds a nice balance to the sweetness. 6. Chilling the bark Carefully place the baking sheet in the refrigerator. Chill for about 30 minutes, or until the chocolate is firm. Once set, break the bark into pieces with your hands or a knife. This gives it a rustic look. For the [Full Recipe], check the earlier section. Enjoy your chocolate-covered strawberry bark! To melt chocolate correctly, avoid overheating it. Heat can turn chocolate into a grainy mess. Use short bursts in the microwave, about 30 seconds at a time. Stir well after each interval. If you notice the chocolate starting to seize, stop heating immediately. You can also use a double boiler as an alternative. Fill a pot with a bit of water and place a heat-safe bowl on top. This method helps keep the chocolate at a steady temperature. Stir gently as it melts for a silky smooth finish. For the best texture, aim for a thickness of about 1/4 inch when spreading the chocolate. This thickness will give your bark a nice bite. If you prefer thicker pieces, adjust accordingly. If you have leftover melted chocolate, store it in a sealed container. Keep it in the fridge for up to a week. When you want to use it again, gently reheat it in the microwave. To make your Chocolate Covered Strawberry Bark look stunning, use a decorative platter for serving. Arrange some whole strawberries next to the bark for a pop of color. You can also sprinkle some colorful garnish on top. Consider using edible flowers or nuts for added texture. These small touches make a big difference in presentation. For more creative ideas, check out the Full Recipe for inspiration. {{image_4}} You can easily change the taste of your chocolate bark. Adding flavors like peppermint or orange can make it special. Just mix in a few drops of peppermint extract or some orange zest with your melted chocolate. This twist can really freshen up the bark. You can also add dried fruits. Dried cherries, blueberries, or even mango give great flavor. These fruits add a sweet and chewy bite. Just sprinkle them on top along with the strawberries. If you need gluten-free options, worry not! Both dark and white chocolate can be gluten-free. Just check the labels to be sure. You can also skip the nuts if you have allergies. This bark stays delicious and fun to eat without them. For vegan adaptations, swap the chocolate for vegan chocolate. There are many brands that make dairy-free chocolate. This way, everyone can enjoy this treat! You can create themed bark for holidays, too. For Christmas, add crushed candy canes on top for a festive touch. For Valentine's Day, use pink or red sprinkles along with the strawberries. This can make your bark look lovely and cheerful for any celebration. Check out the Full Recipe for more details on making this delightful treat! To keep your chocolate covered strawberry bark fresh, use airtight containers. This keeps moisture out and prevents the bark from getting soft. The ideal temperature for storage is cool, around 60-70°F. Avoid placing the bark in warm areas, as heat can melt the chocolate. For best taste, enjoy your chocolate covered strawberry bark within two weeks. After that, the quality may decrease. Look for signs of spoilage like a white film or off smell. If you spot these, it’s best to throw it away. Always check for freshness before enjoying this treat. Enjoy your chocolate covered strawberry bark while it’s at its best! How do I make Chocolate Covered Strawberry Bark? Making Chocolate Covered Strawberry Bark is simple! First, gather your ingredients: - 1 cup dark chocolate chips - 1 cup white chocolate chips - 1 cup freeze-dried strawberries, crushed - 1/2 cup roasted almonds, roughly chopped (optional) - Sea salt, for a finishing sprinkle Follow the steps in the Full Recipe for smooth melting and perfect layering. This treat is fun to make and even better to eat! Can I use different types of chocolate? Yes, you can use different types of chocolate! Milk chocolate, dark chocolate, or even vegan chocolate work well. Each type brings its own flavor and sweetness. Feel free to mix and match based on your taste. Where to buy pre-made Chocolate Covered Strawberry Bark If you want to skip the prep, you can find pre-made Chocolate Covered Strawberry Bark at many specialty stores. Check local gourmet shops or online marketplaces for ready-made options. Recommended brands Some popular brands to try include: - Compartés Chocolatier - See's Candies - Godiva These brands offer quality products that can satisfy your chocolate cravings. Ideal pairings with beverages Chocolate Covered Strawberry Bark pairs well with many drinks! Consider serving it with a glass of milk, hot cocoa, or even a fruity tea. The flavors blend nicely and make for a tasty treat. Best occasions for serving this treat This bark is perfect for any occasion! Serve it at birthday parties, holiday gatherings, or as a sweet snack during movie nights. It always brings smiles and joy. In this blog post, we explored how to make Chocolate Covered Strawberry Bark. We discussed the main ingredients, including dark and white chocolate, strawberries, and optional almonds. You learned step-by-step instructions for preparation and assembly. I shared tips for melting chocolate safely and achieving the right texture. We also looked at variations and storage tips for this delightful treat. Enjoy making your own chocolate bark and get creative with flavors! It's simple, fun, and perfect for sharing.](https://joymealplan.com/wp-content/uploads/2025/07/8e3d9728-8bcd-40c4-9564-7af6a171388c-768x768.webp)