Homemade Chicken Noodle Soup Comforting and Easy Recipe

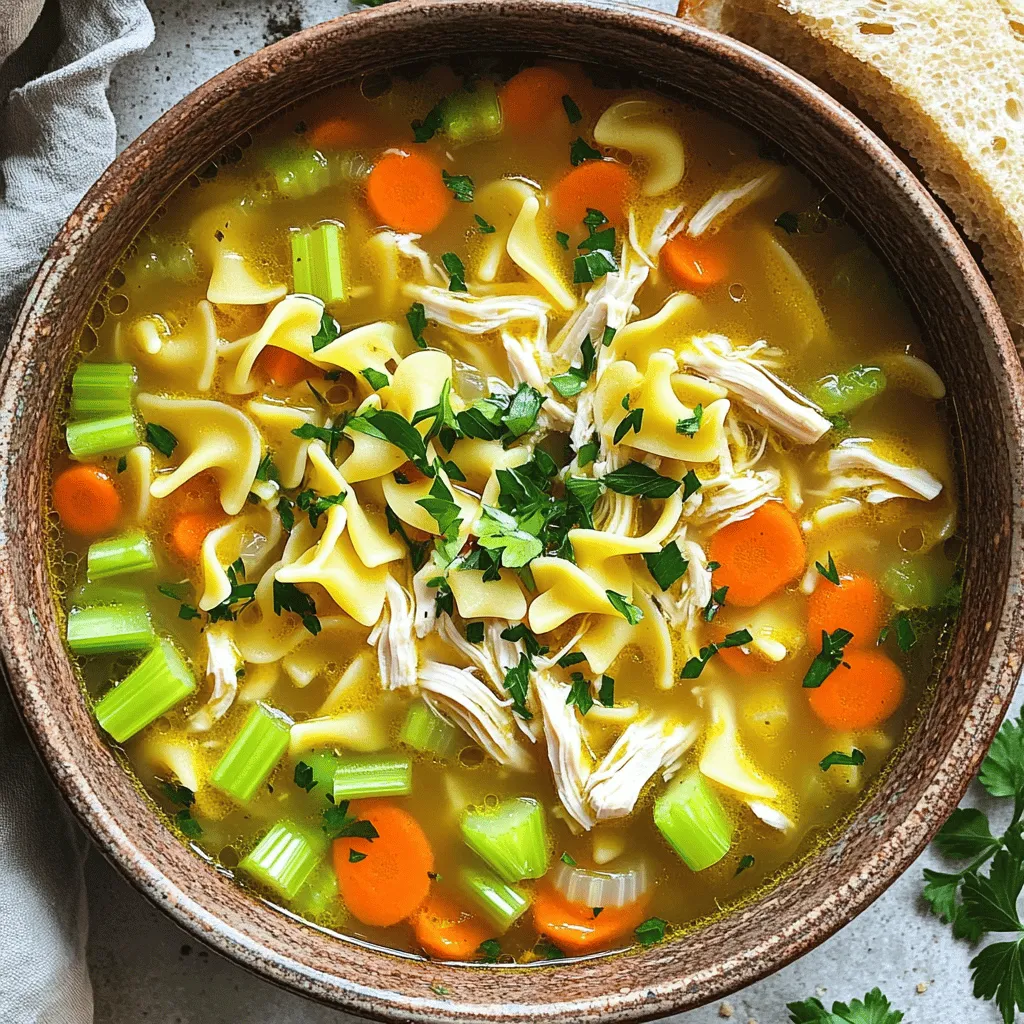
Looking to warm your soul with a bowl of homemade chicken noodle soup? You’re in the right place! This comforting and easy recipe packs tons of flavor and is perfect for any occasion. I’ll guide you through simple steps, tasty ingredients, and helpful tips. Whether you’re battling a cold or just need a hearty meal, my recipe is sure to please. Let’s dive into this delicious journey together!
Ingredients
Essential Ingredients for Homemade Chicken Noodle Soup
For a hearty chicken noodle soup, gather these key items:
– 2 tablespoons of olive oil
– 1 medium onion, finely diced
– 2 medium carrots, thinly sliced
– 2 celery stalks, thinly sliced
– 3 cloves of garlic, minced
– 1 teaspoon dried thyme
– 1 teaspoon dried rosemary
– 6 cups chicken broth (preferably low-sodium)
– 2 cups cooked chicken, shredded (store-bought rotisserie chicken is ideal)
– 1 cup egg noodles
– 1 cup frozen peas
– Salt and freshly ground black pepper, to taste
– Fresh parsley, chopped (for garnish)
These ingredients make the base of your soup rich and flavorful. The chicken broth adds depth, while the veggies bring in freshness and crunch.
Optional Ingredients for Added Flavor
If you want to take your soup up a notch, consider adding:
– A squeeze of lemon juice for brightness
– Bay leaves for extra aroma
– A pinch of red pepper flakes for heat
– Corn for a sweet twist
These options let you customize your soup to your own taste. I love adding a squeeze of lemon. It brightens the flavors and makes the soup feel fresh.
Substitutions for Special Diets
You can easily adjust this recipe for different diets:
– Use vegetable broth instead of chicken broth for a vegetarian option.
– Swap egg noodles for gluten-free noodles to make it gluten-free.
– Replace chicken with tofu or chickpeas for a plant-based option.
These substitutions help everyone enjoy a bowl of comfort. You still get that warm feeling, no matter your diet.
Step-by-Step Instructions
Preparation and Sautéing the Vegetables
Start by adding olive oil to a large pot. Heat it over medium heat. Once hot, add diced onion, sliced carrots, and sliced celery. Sauté these veggies for about 5 minutes. Stir them often. You want the onions to be clear and the carrots to soften. Next, add minced garlic, dried thyme, and dried rosemary. Cook for one more minute. This step makes your kitchen smell great!
Cooking the Chicken Noodle Soup Base
Now, it’s time to add the chicken broth. Carefully pour it into the pot. Stir well and bring it to a boil. Once it bubbles, lower the heat to a gentle simmer. Add shredded chicken and egg noodles to the pot. Let everything cook for about 7 to 8 minutes. The noodles should be tender and ready to eat.
Final Cooking Steps and Plating
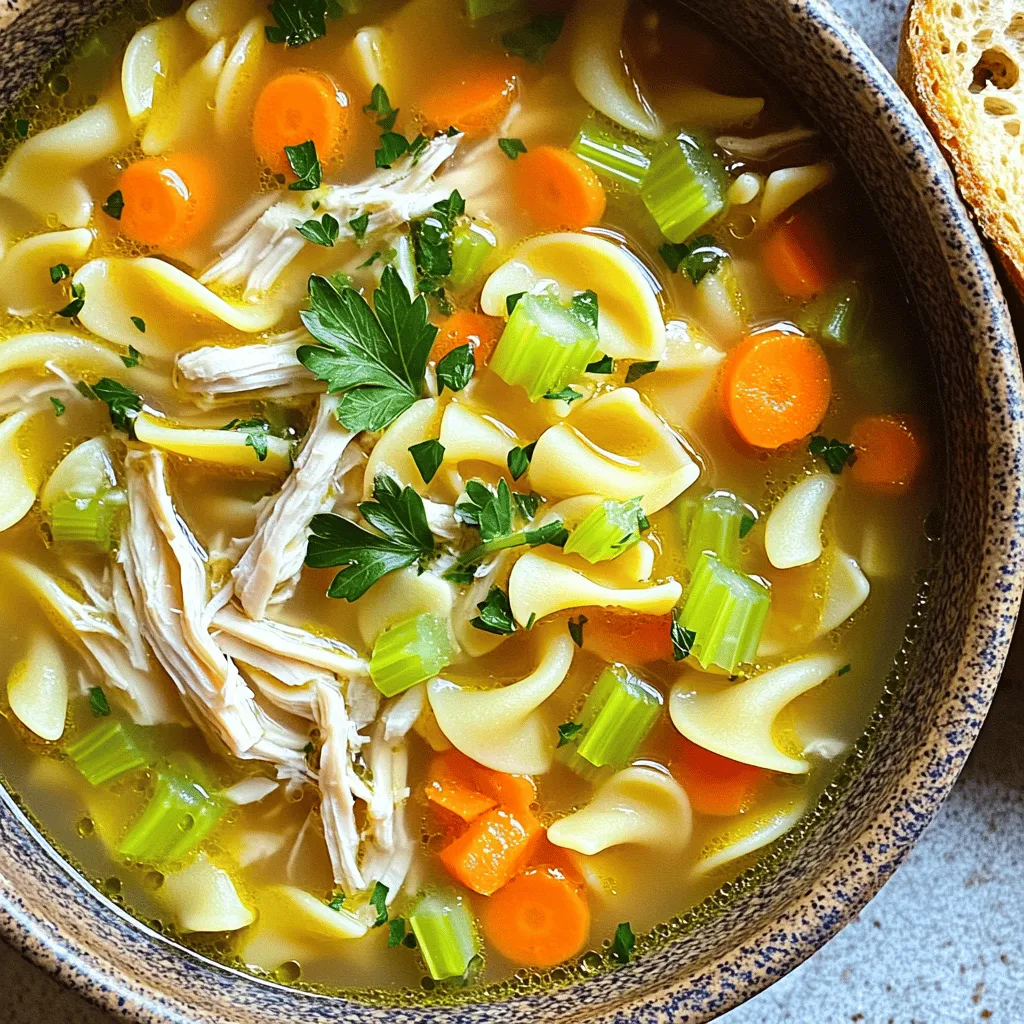
After the noodles are cooked, fold in the frozen peas. Let the soup simmer for another 2 minutes. This heats the peas nicely. Now, taste your soup! Add salt and black pepper as needed. It should be full of flavor. When serving, ladle the soup into warm bowls. Sprinkle fresh parsley on top for a lovely finish. Enjoy your cozy chicken noodle soup!
Tips & Tricks
How to Perfect Your Chicken Noodle Soup
To make your chicken noodle soup just right, start with good broth. Use low-sodium chicken broth for a cleaner taste. If you prefer homemade, simmer chicken bones with veggies for hours. Next, cook your vegetables until soft but not mushy. Keep an eye on the noodles; they cook fast. You want them tender but not overcooked. Finally, taste your soup often. Adjust the seasoning as you go, and don’t forget the fresh parsley at the end!
Common Mistakes to Avoid
Many people rush the cooking process. Cooking too fast can ruin the flavors. Let your veggies soften before adding broth. Another mistake is using too much salt early. You can always add more later. Also, avoid using raw chicken in this recipe. It can make the soup tough and chewy. Always start with cooked chicken for a tender bite. Lastly, don’t forget to remove the soup from heat before adding peas. They just need a quick warm-up.
Enhancing Flavor with Herbs and Spices
Herbs and spices are your best friends in the kitchen. Thyme and rosemary are great in chicken soup. They add warmth and depth. You can also try adding bay leaves while it simmers. Just remember to remove them before serving. A splash of lemon juice at the end brightens the flavors. If you like heat, a pinch of red pepper flakes can work wonders. Experiment with flavors you enjoy, and make this soup your own.

Variations
Healthier Alternatives to Classic Chicken Noodle Soup
You can make chicken noodle soup lighter and healthier. Use skinless chicken breast instead of dark meat. This change cuts fat and calories. You can also swap out regular noodles for whole grain or zucchini noodles. These options add fiber and nutrients. Use low-sodium broth to lower salt content. You can also add more herbs like basil or cilantro for flavor without extra calories.
Different Noodle Options to Use
Noodles are the heart of your soup. While egg noodles are classic, you have options. Try whole wheat or rice noodles for a different taste. Gluten-free noodles work well too. You can even use spiralized vegetables like zucchini or sweet potatoes. They add a fun twist and extra nutrition. Just adjust cooking times based on the type of noodle you choose.
Adding Veggies for Extra Nutrition
Adding veggies boosts the nutrition of your soup. Carrots and celery are great, but don’t stop there. Consider adding spinach, kale, or green beans for more vitamins. Bell peppers and corn can add color and sweetness. For a heartier soup, try adding potatoes or mushrooms. Cut them into small pieces for quicker cooking. This way, you enhance flavor and health benefits in one delicious bowl.
Storage Info
Best Practices for Storing Leftover Soup
To keep your chicken noodle soup fresh, let it cool first. Pour it into an airtight container. You can store it in the fridge for up to three days. If you want to keep it longer, freezing is your best option.
How to Reheat Chicken Noodle Soup
When you’re ready to enjoy your soup, pour it into a pot. Heat it over medium heat. Stir often to prevent sticking. You can also use the microwave. Just use a microwave-safe bowl and heat it in short bursts. Stir in between until hot.
Freezing Your Homemade Soup for Later
Freezing your soup is simple. Use a freezer-safe container or bag. Leave some space at the top, as soup expands when frozen. Label it with the date. You can freeze it for up to three months. When you’re ready to eat, thaw it in the fridge overnight. Then reheat it as mentioned above. Enjoy your cozy chicken noodle soup anytime!
FAQs
Can I use raw chicken instead of cooked?
Yes, you can use raw chicken. Start by cooking the raw chicken in the pot. Sauté it in olive oil until it’s fully cooked. This may take about 10 minutes. Once it’s cooked, remove it and shred it. Then, follow the recipe as usual. This method adds great flavor to your soup.
What’s the best broth to use for soup?
The best broth is low-sodium chicken broth. It allows you to control the salt level. Homemade broth is also a great choice if you have time. It gives a deeper flavor. Store-bought options are quick and easy, too.
How long can I store homemade chicken noodle soup?
You can store homemade chicken noodle soup for up to three days in the fridge. Keep it in an airtight container. If you want to keep it longer, freeze it. It can last for about three months in the freezer. Just remember to thaw it in the fridge before reheating.
Is chicken noodle soup good for you?
Chicken noodle soup is very good for you. It has protein, vitamins, and minerals. The broth helps keep you hydrated. The veggies add fiber and nutrients. This soup is often a go-to when you’re feeling under the weather.
How can I make this soup gluten-free?
To make this soup gluten-free, swap out the egg noodles. Use gluten-free noodles instead. Many brands offer great options. Always check the label to be sure they are gluten-free. This way, everyone can enjoy a warm bowl of soup!
Homemade chicken noodle soup is simple and versatile. We discussed key ingredients, from essential to optional. You learned step-by-step how to prepare, cook, and plate your soup. Tips and tricks will help you avoid common mistakes and perfect your dish. Different variations let you customize for health and taste. Lastly, proper storage ensures your soup stays fresh. With these insights, you can create a warm bowl of comfort and nourish yourself and others. Enjoy the cooking journey!


![- 2 cups cooked white or brown rice - 2 cups fresh broccoli florets, steamed until tender - 1 cup sharp cheddar cheese, shredded - 1 cup cream of mushroom soup - 1 cup milk - 1 teaspoon garlic powder - 1 teaspoon onion powder - Salt and freshly ground black pepper to taste - 1/2 cup breadcrumbs (for a crispy topping) - 2 tablespoons olive oil - Preheat oven to 350°F (175°C) - Combine rice and broccoli in a mixing bowl - Add soup, milk, spices, and cheese; mix thoroughly - Transfer to a greased baking dish and top with breadcrumbs and cheese - Cover with foil; bake for 25 minutes - Remove foil; bake for an additional 15-20 minutes Making Cheesy Broccoli Rice Casserole is simple and fun. You start with the main ingredients, mixing cooked rice with steamed broccoli. This gives you a great base. The cheddar cheese adds a rich, creamy taste. The cream of mushroom soup and milk make the mix smooth. Next, we add some seasoning. Garlic powder and onion powder give the dish a nice flavor. Salt and pepper allow you to adjust the taste just how you like it. For a crunchy topping, breadcrumbs mixed with olive oil work great. Once you have everything mixed, pour it into a greased baking dish. This keeps it from sticking. Spread it out evenly. Then comes the fun part—topping it with more cheese and breadcrumbs! Now, cover the dish with foil. This keeps the moisture in while it cooks. Bake it for 25 minutes, then remove the foil. Bake for another 15-20 minutes until the cheese is melted and the top is golden. You can find the complete recipe [Full Recipe] for more detailed steps if needed. Enjoy this tasty, warm casserole. It’s perfect for dinner or as a side dish! To boost the taste of your Cheesy Broccoli Rice Casserole, I recommend using homemade cream of mushroom soup. It adds freshness and depth that store-bought versions can't match. You can easily make it by sautéing mushrooms with butter and mixing in some cream. Another fun tip is to experiment with different cheeses. Try gouda or pepper jack for a unique twist. Each cheese brings its own flavor, making each bite exciting. To make your casserole look beautiful, garnish it with fresh parsley or chives. The green color brightens the dish and gives it a fresh taste. For an extra touch of flavor, drizzle some balsamic glaze over the top just before serving. This adds a sweet and tangy contrast that pairs well with cheesy goodness. Make sure your broccoli is steamed evenly. This ensures every piece is tender and not overcooked. If some pieces are hard, they won't blend well with the rice. After baking, let the casserole rest for about five minutes. This simple step helps it set and makes slicing easier. You will have perfect portions for serving! You can easily switch the main veggies in this dish. Swap broccoli for cauliflower or spinach. Both options taste great and add different flavors. You can also try brown rice or quinoa instead of white rice. This makes the meal healthier and adds more fiber. If you need a gluten-free option, use gluten-free breadcrumbs. This keeps the crispy topping but makes it safe for gluten-sensitive folks. For a vegan version, substitute cheese and milk with plant-based choices. Almond milk and vegan cheese work well here. Want to add more taste? Cooked chicken or turkey is a great protein boost. This makes the meal heartier. You can also sprinkle in spices like paprika or cayenne for some heat. These little changes make a big difference in flavor. {{image_4}} After enjoying your cheesy broccoli rice casserole, store any leftovers in an airtight container. This keeps the flavors fresh for up to 4 days. I recommend letting it cool down before sealing. This way, it won’t steam and get soggy. You can freeze the casserole before baking it. This method lets you enjoy it later without losing taste. Just wrap it well in plastic wrap or foil and store it in the freezer for up to 3 months. When you are ready to bake, thaw it in the fridge overnight. Adjust the baking time since it will be cold. To reheat, the oven is your best bet. It helps keep the texture nice and creamy. Just cover it with foil and heat at 350°F (175°C) until warmed through. You can also use the microwave for a quicker option. It’s great for busy days when you want a tasty meal fast. Yes, you can prepare the casserole and refrigerate or freeze it before baking. This makes it easy to have a warm meal ready when you need it. Just remember to let it thaw before baking if frozen. You can use homemade cream soup or a different canned soup option, like cream of chicken or celery. This gives you flexibility based on what you have at home. To lighten it up, use reduced-fat cheese. You can also substitute whole milk with low-fat or unsweetened almond milk. These changes still keep the dish creamy and tasty. Absolutely! It stores well and can be portioned for easy meal prepping. Just make sure to use airtight containers for freshness. Enjoy it throughout the week! - 2 cups cooked white or brown rice - 2 cups fresh broccoli florets, steamed until tender - 1 cup sharp cheddar cheese, shredded - 1 cup cream of mushroom soup (store-bought or homemade) - 1 cup milk - 1 teaspoon garlic powder - 1 teaspoon onion powder - Salt and freshly ground black pepper to taste - 1/2 cup breadcrumbs (for a crispy topping) - 2 tablespoons olive oil 1. Preheat your oven to 350°F (175°C). 2. Mix the cooked rice and steamed broccoli in a large bowl. 3. Add cream of mushroom soup, milk, garlic powder, onion powder, and half the cheese. Season with salt and pepper. Stir well. 4. Grease a 9x13 inch baking dish with olive oil. Transfer the mixture into the dish and spread evenly. 5. In a small bowl, mix breadcrumbs with olive oil. Sprinkle over the casserole. 6. Add the remaining cheese on top of the breadcrumbs. 7. Cover the dish with aluminum foil, shiny side down. Bake for 25 minutes. 8. Remove the foil and bake for another 15-20 minutes. Watch for bubbling cheese and golden breadcrumbs. 9. Let the casserole rest for 5 minutes before serving. - Serving Size: 1/6 of the casserole - Calories: Approximately 320 - Total Fat: 12g - Saturated Fat: 5g - Carbohydrates: 42g - Protein: 12g - Fiber: 3g - Sugars: 2g This blog showed you how to make a tasty Cheesy Broccoli Rice Casserole. We covered all the main ingredients, from rice and cheese to spices. You learned step-by-step how to mix and bake it perfectly. I also shared tips to enhance flavor and fun variations. Finally, you got key storage info and answers to common questions. Enjoy making this dish! It’s simple, delicious, and adaptable for everyone.](https://joymealplan.com/wp-content/uploads/2025/06/63660ef9-884f-40e9-9c69-6c7b156d354b-768x768.webp)
![- 1 pound boneless, skinless chicken breasts - Marinade: 1 cup buttermilk - Breading elements: 1 cup panko breadcrumbs, 1/2 cup all-purpose flour - Seasonings: 1 teaspoon garlic powder, 1 teaspoon onion powder, 1 teaspoon smoked paprika, 1/2 teaspoon salt, 1/2 teaspoon black pepper, 1/4 teaspoon cayenne pepper (optional) - Cooking oil: 2 tablespoons extra virgin olive oil - Garnish: Fresh parsley, finely chopped I love using fresh, simple ingredients for my crispy baked chicken tenders. The chicken breasts are the star here. I always choose boneless and skinless for easy handling. This keeps them juicy and tender. For the marinade, I use buttermilk. It helps to make the chicken soft and adds great flavor. Soak the chicken for at least 30 minutes. You can go up to two hours for the best taste. Next comes the breading. I prefer panko breadcrumbs because they give the best crunch. The all-purpose flour helps the breadcrumbs stick. Mixing garlic powder, onion powder, smoked paprika, salt, and pepper adds a nice depth of flavor. I add cayenne pepper for those who like a bit of heat. It’s optional, but it gives a great kick. Finally, a drizzle of extra virgin olive oil helps the tenders bake to a golden brown. You can finish with fresh parsley for a pop of color. Want the full recipe? Check out the [Full Recipe]. It’s a delicious way to enjoy chicken! First, set your oven to 425°F (220°C). While it heats up, grab a baking sheet. Line it with parchment paper. This will help the chicken not stick. It also makes cleanup easy. Take a big bowl and pour in the buttermilk. Add the chicken strips. Make sure they are all covered. Cover the bowl with plastic wrap. Let it sit for at least 30 minutes. For even more flavor, you can marinate it for up to 2 hours in the fridge. In another shallow dish, mix the flour, garlic powder, onion powder, smoked paprika, salt, black pepper, and cayenne pepper. Whisk it well. In a separate bowl, place the panko breadcrumbs. This is what will give your chicken that crunchy outside. After marinating, take the chicken out of the buttermilk. Let the excess drip off. Next, coat each piece in the flour mixture. Make sure each strip is covered. Gently shake off the extra flour. For extra crunch, dip the chicken back into the buttermilk. Then, roll it in the panko breadcrumbs. Press down a bit to help the crumbs stick. Arrange the coated chicken on the lined baking sheet. Drizzle a little olive oil on top. This helps it get golden brown. Bake the chicken for 20-25 minutes. Check with a meat thermometer. It should reach 165°F (75°C). Once the chicken is baked, take it out of the oven. Let it rest for about 5 minutes. This helps keep the juices in. Finally, garnish with fresh parsley. It adds a nice touch. Serve hot with your favorite sauces. Don't forget to check the Full Recipe for all the details! For the crispiest chicken tenders, use panko breadcrumbs. Panko adds a light and airy crunch that regular breadcrumbs can't match. Their larger flakes create a wonderful texture. To take it up a notch, use the double-dipping technique. First, coat the chicken in flour, then dip it back into the buttermilk before rolling it in panko. This extra layer of breading will give you an amazing crunch. To make your chicken tenders more flavorful, add spices to the breading mix. Garlic powder, onion powder, and smoked paprika all work great. Feel free to adjust the amounts to fit your taste. You can also try different marinades. A simple mix of lemon juice and herbs can change the flavor profile entirely. Experiment with your favorites to find the perfect taste. If you want a healthier option, consider using an air fryer. It cooks the chicken tenders with less oil while still keeping them crispy. Adjust the cooking time to about 12-15 minutes at 400°F (200°C). Another great tip is to place the chicken tenders on a wire rack. This allows hot air to circulate around the tenders, leading to even cooking and a crispier finish. {{image_4}} You can easily change the flavor of your chicken tenders. Here are two fun ideas: - Lemon pepper chicken tenders: Add lemon zest and black pepper to the flour mix. This gives a bright and zesty taste that wakes up your meal. - BBQ chicken tenders: Brush the tenders with your favorite BBQ sauce before baking. This adds a sweet and tangy flavor that kids love. If you have dietary needs, you can still enjoy these tenders: - Gluten-free options: Use gluten-free breadcrumbs instead of regular. This way, everyone can enjoy the meal without any worry. - Low-carb alternatives: Swap regular flour with almond flour or coconut flour. Both options give you a nice crunch while keeping carbs low. Pair your chicken tenders with tasty sides and dips: - Suggested dipping sauces: Try ranch dressing, honey mustard, or spicy sriracha. Each adds a unique kick to your tenders. - Side dish pairings: Serve them with a fresh salad, crispy fries, or steamed veggies. These sides complete your meal and add more nutrition. For more ideas, check out the Full Recipe to explore different flavors and tips! To keep your chicken tenders fresh, store them right. First, let the cooked tenders cool. Then, place them in an airtight container. You can store them in the fridge for up to three days. If you want to keep them longer, freezing is a great option. Use containers that seal tightly. Glass or plastic containers work well. If you use plastic wrap, make sure it hugs the tenders closely. This way, they won’t dry out. When you want to enjoy your leftovers, reheating is key. The best way to keep them crispy is to use the oven. Preheat your oven to 375°F (190°C) and bake for about 10 to 15 minutes. This method makes the chicken hot and crispy again. You can also use an air fryer. Set it to 375°F (190°C) and heat for about 5 to 7 minutes. This method is quick and gives great results. You can freeze both uncooked and cooked chicken tenders. For uncooked tenders, place them on a baking sheet to freeze individually first. Once they are frozen, transfer them to a freezer bag. This keeps them from sticking together. For cooked tenders, let them cool, then store them in an airtight container. They can last up to three months in the freezer. When you are ready to eat, just reheat them as mentioned earlier. For more detailed cooking methods, check the Full Recipe. Bake chicken tenders for 20 to 25 minutes at 425°F. This time gives them a golden color and keeps them juicy. Always check their internal temperature; it should reach 165°F for safety. Yes, you can make these chicken tenders ahead of time. Prepare them fully and store them in the fridge for up to 24 hours. When you're ready to eat, just pop them in the oven to reheat. This way, you save time while still enjoying a tasty meal. If you don't have buttermilk, use regular milk with a splash of vinegar or lemon juice. Let it sit for about five minutes. This method mimics buttermilk's acidity and helps tenderize the chicken just as well. Check chicken tenders with a meat thermometer. They are done when they hit 165°F inside. If you don’t have a thermometer, cut one open. The meat should be white, not pink, and the juices should run clear. Yes, chicken thighs work well in this recipe. They are more flavorful and juicy than breasts. Just cut them into strips like you would with the chicken breasts. The cooking time may be similar, so keep an eye on them. Crispy baked chicken tenders are easy and tasty. You start with simple ingredients, like chicken, buttermilk, and spices. The steps are clear, from marinating to baking. I shared tips for extra crunch and tasty flavors. Finally, you can personalize these tenders with countless variations and sides. Whether it's for a family dinner or meal prep, these tenders will impress. Enjoy making them and exploring your options!](https://joymealplan.com/wp-content/uploads/2025/06/4bfc5954-182f-42e7-9a90-e67bfbd9568b-768x768.webp)

![To make Easy Chicken Tikka Masala, gather these essential ingredients: - 500g chicken breast, diced into bite-sized pieces - 1 cup plain yogurt - 2 tablespoons garam masala - 1 tablespoon ground cumin - 1 tablespoon ground coriander - 1 teaspoon turmeric - 1 teaspoon chili powder (adjust for spice level) - 4 cloves of garlic, finely minced - 1 inch fresh ginger, grated - 2 tablespoons olive oil - 1 medium onion, finely chopped - 1 can (400g) diced tomatoes, with juices - 1 cup coconut milk - Salt, to taste - Fresh cilantro (coriander), chopped, for garnish To boost the taste, you can add these optional items: - 1 tablespoon lemon juice for a tangy twist - 1-2 green chili peppers, chopped, for extra heat - 1 teaspoon sugar to balance flavors - Additional spices like cinnamon or cardamom for depth You will need these items to make cooking easier: - A large mixing bowl for marinating chicken - A sharp knife and cutting board for prep - A skillet or frying pan for cooking - A spoon or spatula for stirring - Measuring spoons for accurate ingredient amounts - A serving dish for presentation Gathering these ingredients and utensils sets you up for a flavorful cooking experience. Enjoy the process of making this delightful dish! To start, take a mixing bowl. In it, add 1 cup of plain yogurt. Then, mix in 2 tablespoons of garam masala, 1 tablespoon of ground cumin, and 1 tablespoon of ground coriander. Next, add 1 teaspoon of turmeric and 1 teaspoon of chili powder. You can adjust the chili powder to suit your taste. Finally, add half of the minced garlic and the grated ginger. Stir everything together until it forms a smooth marinade. This mix is key to a flavorful dish. Now, take 500g of diced chicken breast. Add it to the marinade you just made. Make sure every piece is well-coated. This is where the magic happens! Cover the bowl with plastic wrap or a lid. Place it in the refrigerator for at least 1 hour. For the best flavor, let it sit overnight. This allows the spices to soak into the chicken. Heat 2 tablespoons of olive oil in a large skillet over medium heat. Once the oil is hot, add 1 finely chopped onion. Sauté it for about 5 minutes until it turns soft and clear. Next, add the remaining minced garlic and grated ginger. Cook for 1-2 more minutes. This step fills your kitchen with a lovely aroma. Now, add the marinated chicken to the skillet. Reserve any leftover marinade. Cook the chicken for about 7-10 minutes until it browns. Then, pour in the can of diced tomatoes with their juices and the reserved marinade. Stir everything together and bring it to a simmer. Let it cook for 10 more minutes. Lower the heat, and stir in 1 cup of coconut milk. Mix it well. Let it simmer gently for another 10 minutes. You can add water if you want a thinner sauce. Season with salt to taste. When it’s ready, turn off the heat and let it sit for a few minutes. This resting time helps the flavors blend well. For the full recipe, refer to the earlier section. To get the best flavor, marinate your chicken well. Use plain yogurt as your base. Yogurt helps to tenderize the meat and adds a tangy taste. Mix yogurt with spices like garam masala, cumin, and turmeric. This mixture will coat every piece of chicken. Make sure to let it marinate for at least one hour. For the best results, marinate overnight. This gives the spices more time to soak in. Cooking techniques matter a lot. Start by sautéing onions in olive oil. This adds sweetness and depth to your dish. After the onions are soft, add garlic and ginger for more flavor. These ingredients should cook just until fragrant. This step enhances the taste of the whole dish. When adding the marinated chicken, let it brown well. Browning adds a nice texture. Finally, add diced tomatoes and coconut milk, stirring thoroughly to combine. To make your meal complete, serve Chicken Tikka Masala with basmati rice or naan. The rice soaks up the sauce, making every bite delicious. Naan is perfect for scooping up the sauce. For a fresh touch, garnish with chopped cilantro. You can also add lime wedges for extra zing. This adds a bright flavor that balances the spices. For more fun, consider serving a side salad or yogurt raita to cool things down. {{image_4}} You can easily swap chicken for vegetables or tofu. For a vegetarian version, use firm tofu. Cut it into cubes and marinate just like the chicken. You can also use mixed vegetables like bell peppers, zucchini, and cauliflower. These options soak up the spices nicely. Cook them until they're tender. The flavors will still shine through. Not everyone enjoys the same level of heat. If you want less spice, reduce the chili powder. Start with a half teaspoon and taste as you go. For more heat, add extra chili powder or even fresh chopped chilies. Remember, you can always add more, but it’s hard to take it away. If you have dietary needs, you can make changes easily. For a dairy-free version, use almond yogurt instead of plain yogurt. If you're gluten-free, check that all spices and canned goods are gluten-free. Coconut milk is a great dairy substitute, but you can also use vegetable broth for a lighter sauce. You can find the full recipe [here]. To store leftover chicken tikka masala, let it cool down first. Then, place it in an airtight container. This helps keep it fresh. Store it in the fridge for up to four days. If you want to keep it longer, consider freezing it. When reheating chicken tikka masala, use the stove for the best taste. Place it in a pan over low heat. Stir occasionally to warm it evenly. You can add a splash of water or coconut milk if it seems too thick. You can also use a microwave, but be careful not to overheat. To freeze chicken tikka masala, ensure it is fully cooled. Place it in freezer-safe bags or containers. Remove as much air as possible to prevent freezer burn. It can last up to three months in the freezer. When ready to eat, thaw it in the fridge overnight before reheating. Yes, you can make Easy Chicken Tikka Masala ahead of time. Prepare the dish, then cool it down. Store it in a sealed container in the fridge for up to three days. When ready to eat, just reheat on the stove until hot. This helps the flavors meld even more! If you want to swap out coconut milk, try using heavy cream or Greek yogurt. These options add creaminess without losing flavor. You can also use almond milk, but it may change the taste a bit. Just remember to adjust the seasoning to keep it tasty. Easy Chicken Tikka Masala can be made spicy or mild. The chili powder is the main spice. Start with a small amount if you prefer less heat. You can always add more later, but you can’t take it out once it’s in! Adjust it to your taste for the best experience. We explored how to make easy Chicken Tikka Masala, focusing on ingredients, instructions, and tips. You learned about required and optional ingredients that elevate flavor. Understanding marinating and cooking steps ensures juicy chicken. Plus, I shared ways to adapt recipes for different diets and spice levels. In closing, enjoy your meal and feel free to experiment. Happy cooking!](https://joymealplan.com/wp-content/uploads/2025/07/7203decf-58c7-4016-ac99-38120703d330-768x768.webp)

