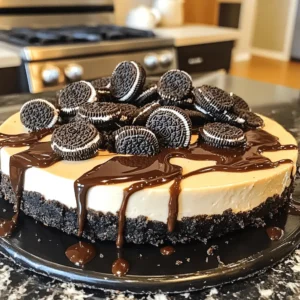
No-Bake Oreo Cheesecake
Indulge in the ultimate dessert with this Decadent No-Bake Oreo Cheesecake recipe! Made with crushed Oreos, cream cheese, and whipped cream, this creamy delight is easy to prepare and requires no baking. Perfect for gatherings or a special treat, it's sure to impress your guests. Discover the step-by-step instructions and create this delicious dessert today.