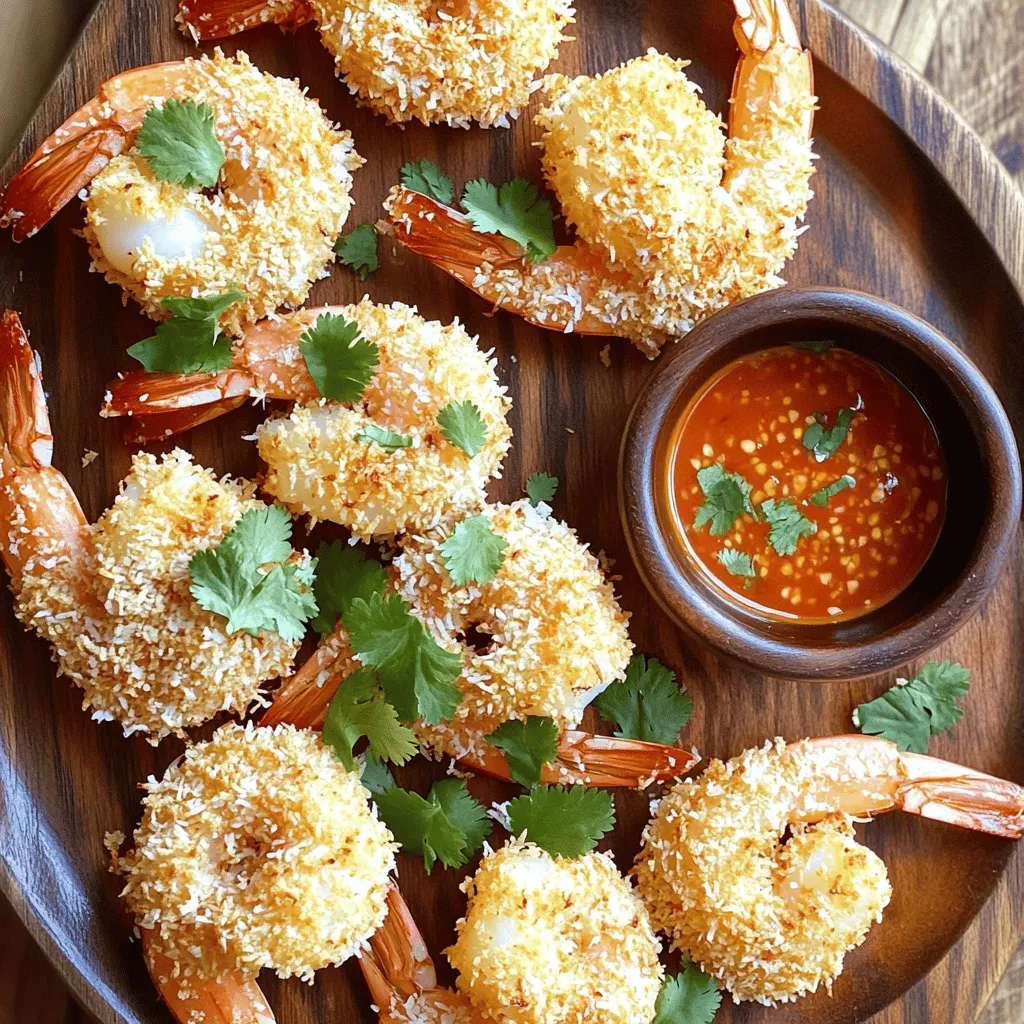
Craving a delicious snack? Let me introduce you to Air Fryer Coconut Shrimp With Dip. This tasty and easy recipe gives you the perfect blend of crispy and sweet. Plus, it’s a healthier option thanks to the air fryer! I’ll guide you through each step, from ingredients to expert tips. Get ready to impress your friends and family with this simple treat that everyone will love! Let’s dive in!
Ingredients
Main Ingredients for Coconut Shrimp
To make delicious coconut shrimp, gather these main ingredients:
– 1 pound large shrimp, peeled and deveined
– 1 cup shredded unsweetened coconut
– 1/2 cup panko breadcrumbs
– 1/2 cup all-purpose flour
– 2 large eggs
– 1 tablespoon freshly squeezed lime juice
– 1 teaspoon garlic powder
– 1 teaspoon smoked paprika
– Salt and freshly ground black pepper, to taste
– Cooking spray
These ingredients blend to create a crunchy, flavorful coating that makes the shrimp shine.
Ingredients Needed for Dipping Sauce
For the dipping sauce, you will need:
– 1/2 cup sweet chili sauce
– 1 tablespoon freshly squeezed lime juice
– 1 tablespoon finely chopped fresh cilantro
This sauce adds a sweet and zesty touch, balancing the rich coconut flavor.
Optional Garnishes and Add-ins
To elevate your dish, consider these garnishes:
– Lime wedges
– Fresh cilantro sprigs
These simple add-ins brighten your presentation and add a fresh twist to each bite.
Step-by-Step Instructions
Preparing the Shrimp
First, start by rinsing the shrimp under cold water. Make sure to peel and devein them if you haven’t already. This step is crucial as it helps the shrimp cook evenly. After rinsing, gently pat them dry with a paper towel. Season the shrimp with salt and freshly ground black pepper. This enhances their natural flavor and makes them taste great.
Setting Up the Breading Station
Next, set up your breading station with three separate bowls. In the first bowl, place 1/2 cup of all-purpose flour. This will help the coating stick. In the second bowl, whisk together two large eggs, 1 tablespoon of lime juice, 1 teaspoon of garlic powder, and 1 teaspoon of smoked paprika. Mix this well. In the third bowl, combine 1 cup of shredded unsweetened coconut and 1/2 cup of panko breadcrumbs. This mix gives the shrimp a crunchy texture.
Cooking Instructions in the Air Fryer
Now, it’s time to bread the shrimp. For each shrimp, roll it in the flour first. Shake off any extra flour so it’s not too thick. Next, dip it into the egg mixture, making sure it’s fully coated. Finally, place it in the coconut-panko mix. Gently press down so the coating sticks well. After breading all the shrimp, preheat your air fryer to 400°F (200°C) for about 5 minutes. This helps create a crispy outside. Lightly spray the air fryer basket with cooking spray to avoid sticking. Arrange the shrimp in a single layer, making sure they do not touch each other. Lightly spray the tops of the shrimp for extra crunch. Cook the shrimp for 6-8 minutes, flipping halfway through. They should turn golden brown and crisp. Enjoy your crispy coconut shrimp fresh from the air fryer!
Tips & Tricks
Achieving Perfectly Crispy Shrimp
To get your coconut shrimp crispy, follow these key steps. First, dry the shrimp well after rinsing. Moisture can make them soggy. Next, preheat your air fryer to 400°F (200°C). This helps cook the shrimp evenly. When breading, use three bowls: one for flour, one for eggs, and one for the coconut-panko mix. Make sure to coat each shrimp fully. Lastly, spray the shrimp lightly with cooking spray before cooking. This adds crunch and color.
Tips for Dipping Sauce Variations
While sweet chili sauce is a classic, you can try different dips. Mix mayonnaise with sriracha for a creamy kick. You can also blend Greek yogurt with lime juice and garlic for a tangy twist. If you prefer a fruity dip, combine mango puree with lime juice. Feel free to add herbs like cilantro or mint to any sauce for extra flavor.
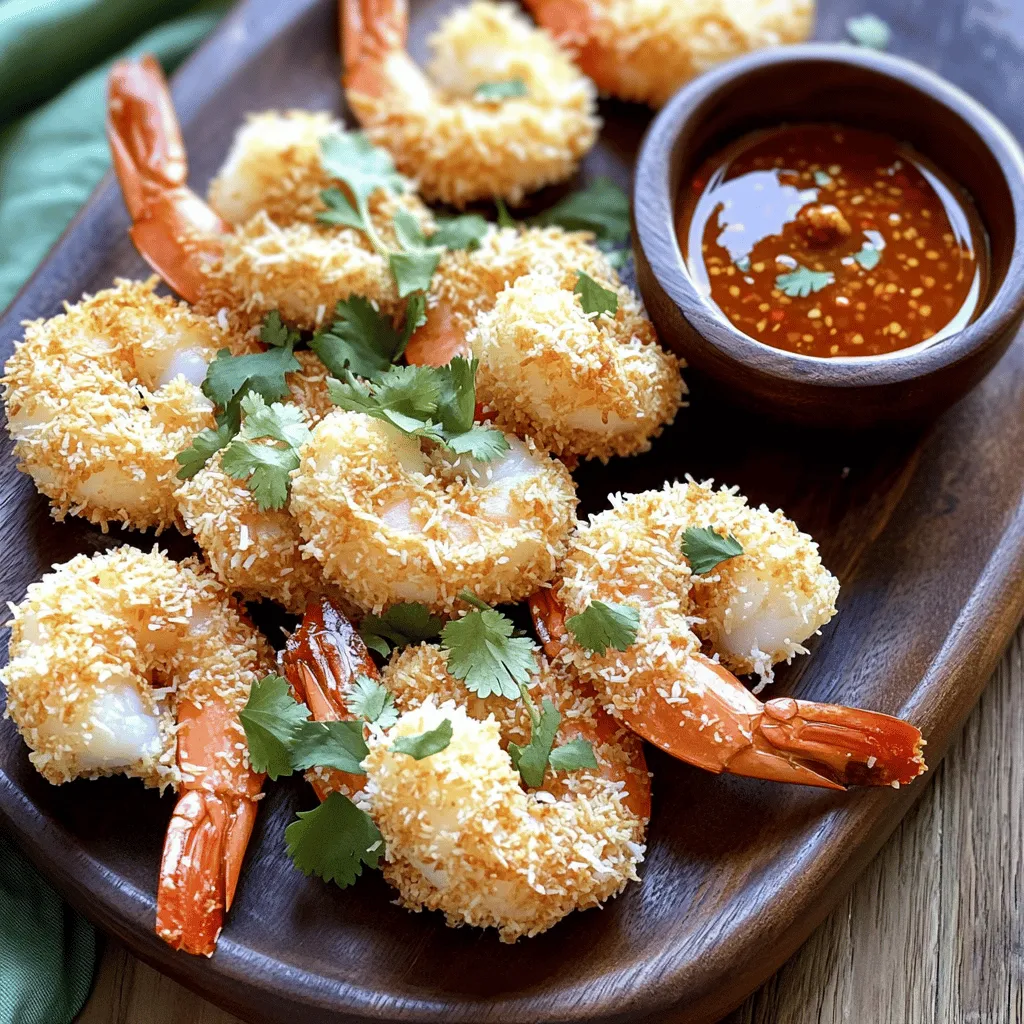
Best Practices for Serving and Presentation
Present your coconut shrimp on a bright platter for a fun touch. Use lime wedges and cilantro sprigs as garnish to add color. You can arrange the shrimp in a circle around the dipping sauce. This makes it easy for guests to reach. For a party, serve them with toothpicks for easy eating. Always remember to keep the shrimp warm until served. Warm food tastes better and feels inviting!
Variations
Additional Flavors for Coconut Shrimp
You can add more flavors to your coconut shrimp. Try mixing spices into the flour. For a kick, add cayenne pepper or chili powder. You can also use different herbs like basil or thyme. If you enjoy a sweeter taste, add some brown sugar to the coconut mix. These small changes can make a big difference in flavor.
Alternative Dipping Sauce Ideas
The sweet chili sauce is great, but you can switch it up. How about a mango salsa? Just mix diced mango with lime, cilantro, and a pinch of salt. This gives a fresh burst. Another option is a creamy avocado dip. Mash ripe avocado with lime juice and a little garlic. This dip is smooth and complements the crunchy shrimp.
Air Fryer vs. Oven Baking
You can make coconut shrimp in both the air fryer and the oven. The air fryer cooks faster and gives a crispier texture. It uses less oil too, making it a healthier choice. If you use the oven, preheat it to 400°F (200°C). Bake the shrimp for about 12-15 minutes, flipping halfway. Both methods yield tasty shrimp, but the air fryer is my favorite for its crunch!
Storage Info
How to Store Leftover Coconut Shrimp
After enjoying your coconut shrimp, let any leftovers cool to room temperature. Place them in an airtight container. This keeps them fresh and tasty. Store the container in the fridge for up to three days. Make sure to label it with the date. This way, you won’t forget about your delicious snacks!
Reheating Instructions for Best Results
To reheat your coconut shrimp, use the air fryer. Preheat it to 350°F (175°C). Arrange the shrimp in a single layer in the basket. Heat them for about 5 minutes. This will help them stay crispy. You can also use an oven. Set it to 350°F (175°C) and place the shrimp on a baking sheet. Bake for about 10 minutes. Avoid using a microwave, as it can make them soggy.
Freezing Coconut Shrimp for Later Use
If you want to save your coconut shrimp for later, freezing is a great option. First, let them cool completely. Arrange them in a single layer on a baking sheet. Freeze them for about an hour. Once frozen, transfer the shrimp to a freezer bag. Squeeze out as much air as possible. This helps prevent freezer burn. You can keep them frozen for up to three months. When ready to eat, reheat them directly from the freezer using the air fryer or oven.
FAQs
Can I use frozen shrimp for this recipe?
Yes, you can use frozen shrimp. Just make sure to thaw them before cooking. Thaw the shrimp by placing them in cold water for about 15-20 minutes. Pat them dry with a paper towel. This step helps the breading stick well.
What can I substitute for panko breadcrumbs?
If you do not have panko, you can use regular breadcrumbs. Crush them lightly to make them coarser. You can also use crushed cornflakes for a crunchy texture. Both options will work well in this recipe.
How do I know when the shrimp are done cooking?
The shrimp are done when they turn golden brown. You can also check if they curl into a C shape. This means they are cooked through. The internal temperature should reach 120°F (49°C). Enjoy your crispy shrimp!
Coconut shrimp are fun to make and taste great. We covered the main ingredients, cooking steps, and helpful tips. I shared ways to customize the flavors and how to store leftovers. With these simple steps, you can enjoy crispy shrimp and tasty dips anytime. Remember, practice makes perfect, so don’t be afraid to try different variations. Enjoy your cooking adventure!


