
Craving a tasty, healthy snack? Look no further! In this post, I’ll show you how to make Air Fryer Crispy Honey Garlic Cauliflower. This dish is a delightful mix of crispy texture and sweet, garlicky goodness. It’s easy, fun, and perfect for any occasion. Whether you’re a novice cook or a seasoned chef, follow my simple steps and watch this cauliflower transform into a mouthwatering treat. Let’s get cooking!
Ingredients
Main Ingredients
– 1 medium head of cauliflower, cut into florets
– 1/2 cup all-purpose flour
– 1/2 cup cold water
Seasoning and Sauce Ingredients
– 1 teaspoon garlic powder
– 1 teaspoon onion powder
– 1/2 teaspoon smoked paprika
– Salt and pepper to taste
– 1/4 cup honey
– 2 tablespoons soy sauce (or tamari for gluten-free)
– 1 tablespoon apple cider vinegar
– 1 tablespoon sesame oil
– 1 tablespoon cornstarch
– 1 tablespoon sesame seeds
– 2 tablespoons chopped green onions
Gather these ingredients before you start. This step makes the cooking process smooth and fun. The cauliflower gives a fresh crunch. The flour and water create a lovely batter. The seasoning adds flavor that makes your taste buds dance. Honey and soy sauce form a sweet and savory glaze. It all comes together to make a wonderful dish.
Step-by-Step Instructions
Prepare the Batter
In a medium bowl, I whisk together three key ingredients: all-purpose flour, cold water, and seasonings. I add garlic powder, onion powder, smoked paprika, salt, and pepper. The goal is a smooth, slightly thick batter. It should be free of lumps. This batter coats the cauliflower and gives it a nice crunch.
Coat the Cauliflower
Next, I take each cauliflower floret and dip it into the batter. It’s important to coat each piece well. I let any extra batter drip off. This step helps avoid soggy bites later. The batter should cling to each floret but not be overly heavy.
Air Fry the Cauliflower
Now, I preheat my air fryer to 400°F (200°C). I arrange the battered florets in a single layer. If needed, I work in batches. I air fry them for about 15-20 minutes. Halfway through, I shake the basket to ensure even browning. When done, they should look golden and crispy.
Make the Honey Garlic Sauce
While the cauliflower cooks, I prepare the honey garlic sauce. In a small saucepan over medium heat, I combine honey, soy sauce, apple cider vinegar, sesame oil, and cornstarch. I stir continuously for 3-4 minutes. The sauce thickens into a glossy, sticky mix. I remove it from the heat.
Combine and Serve
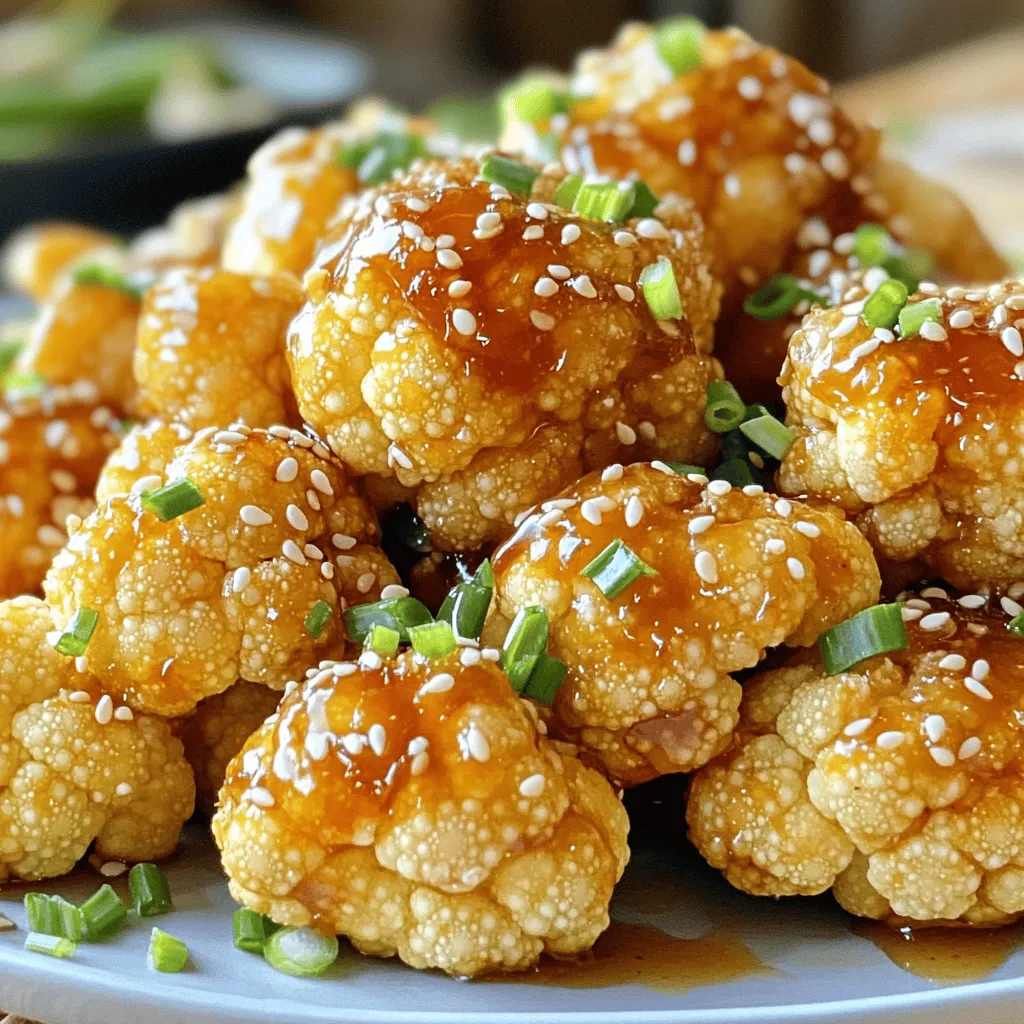
Once the cauliflower is ready, I transfer it to a large bowl. I pour the warm honey garlic sauce over the cauliflower. I toss gently to coat each piece evenly. For a lovely touch, I sprinkle sesame seeds and chopped green onions on top. This dish is best served warm, fresh from the air fryer!
Tips & Tricks
Achieving Maximum Crispiness
To get the best crunch, make sure your batter is thick enough. A thicker batter sticks better to the cauliflower. If it’s too runny, it won’t coat well. Start with half a cup of flour and half a cup of cold water. Mix until smooth but thick.
Avoid overcrowding the air fryer. If you pack too many florets, they will steam instead of fry. Cook in batches if needed. Each piece deserves space to crisp up nicely.
Serving Suggestions
For a great meal, pair the crispy cauliflower with a side of rice or quinoa. These grains soak up the sauce well. You can also serve it with a fresh salad for a tasty contrast.
Ideal dipping sauces include soy sauce, sweet chili sauce, or even ranch dressing. These options enhance the flavors and add a fun twist.
Making it More Flavorful
Try adding spices like cayenne pepper or chili powder for a kick. These spices give your dish a nice warmth. You can also mix in some herbs like thyme or basil for freshness.
Experiment with different sauces too. Swap the honey with maple syrup for a vegan twist. Or try a teriyaki sauce for a sweet and savory blend that pairs perfectly.
Variations
Gluten-Free Option
You can make this dish gluten-free easily. Replace the all-purpose flour with gluten-free flour. This swap keeps the texture nice and crispy. Check the package for the right amount to use. Most gluten-free flours work well in this recipe.
Vegan Adaptation
To make this recipe vegan, swap honey with maple syrup. This change keeps the sweet flavor while making it plant-based. You should also omit the sesame oil. The dish will still taste amazing without it.
Flavor Variations
Want to spice things up? Add cayenne pepper or chili powder to the batter. This gives the cauliflower a nice kick. You can also try different sauces. Teriyaki sauce adds a rich and bold flavor. Feel free to get creative and mix flavors!
Storage Info
Storing Leftovers
To keep your crispy honey garlic cauliflower fresh, store it in an airtight container. Place it in the fridge right after it cools down. This way, it stays tasty and safe to eat. The dish lasts for about 3-4 days in the fridge. If you want to save it longer, consider freezing it.
Reheating Tips
When reheating, you want to keep the cauliflower crispy. The air fryer works best for this. Preheat it to 350°F (175°C) and air fry for about 5-7 minutes. This helps restore its crunch. If using a microwave, expect a softer texture. Heat for 1-2 minutes, but it may lose some crispiness. Enjoy your leftovers just as much as the first time!
FAQs
How do I make the batter stick better?
To help the batter stick to the cauliflower, start with dry florets. Make sure they are not wet after washing. You can also dust them lightly with flour before dipping them into the batter. This extra layer helps the batter cling. Finally, ensure your batter is thick. A thicker batter will coat better and hold on during cooking.
Can I use frozen cauliflower for this recipe?
Yes, you can use frozen cauliflower. First, thaw the florets and drain any excess water. This step is key. If they are too wet, the batter won’t stick. You might need to increase the cooking time by a few minutes since frozen cauliflower takes longer to cook.
What can I serve with crispy honey garlic cauliflower?
This tasty dish pairs well with many sides. You can serve it with rice or quinoa. A fresh salad adds crunch and color. For protein, try grilled chicken or tofu. You can also enjoy it as a snack with dipping sauces like ranch or sriracha.
Can I make this recipe ahead of time?
Yes, you can prep some parts ahead. You can make the batter and store it in the fridge for up to 24 hours. You can also prep the cauliflower florets a day in advance. Just keep them in an airtight container. After cooking, the cauliflower is best served fresh but can be stored in the fridge for a few days. Reheat in the air fryer to regain crispiness.
In this blog post, we explored how to make crispy honey garlic cauliflower. We covered key ingredients, preparation steps, and tips for achieving maximum crispiness. You learned how to make a tasty coating and a flavorful sauce. Additionally, we discussed variations for gluten-free and vegan diets.
In conclusion, this dish is not just easy to prepare; it’s also versatile. You can change flavors and enjoy it as a side or snack. Now, it’s time to try this recipe and impress everyone with your cooking!


